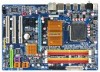

Manual
Page 37
Use arrow keys to move among the items and press to accept or enter a sub-menu. (Sample BIOS Version: GA-P35-DS3R F5c) CMOS Setup Utility-Copyright (C) 1984-2007 Award Software ` Standard CMOS Features ` Advanced BIOS Features ` Integrated Peripherals ` Power Management Setup ` PnP/PCI Configurations ` ... Saving ESC: Quit F8: Q-Flash KLJI: Select Item F10: Save & Exit Setup F11: Save CMOS to BIOS F12: Load CMOS from BIOS Main Menu Help The onscreen description of a highlighted setup option is displayed on the right side of function keys available for the menu. BIOS Setup Submenu...
Use arrow keys to move among the items and press to accept or enter a sub-menu. (Sample BIOS Version: GA-P35-DS3R F5c) CMOS Setup Utility-Copyright (C) 1984-2007 Award Software ` Standard CMOS Features ` Advanced BIOS Features ` Integrated Peripherals ` Power Management Setup ` PnP/PCI Configurations ` ... Saving ESC: Quit F8: Q-Flash KLJI: Select Item F10: Save & Exit Setup F11: Save CMOS to BIOS F12: Load CMOS from BIOS Main Menu Help The onscreen description of a highlighted setup option is displayed on the right side of function keys available for the menu. BIOS Setup Submenu...

Manual
Page 39
... devices during the POST for faster system startup. • Manual Allows you to manually enter the specifications of the three methods below : Only for GA-P35-DS3R. - 39 - English 2-3 Standard CMOS Features Date (mm:dd:yy) Time (hh:mm:ss) CMOS Setup Utility-Copyright (C) 1984-2007 ...Award Software Standard CMOS Features Tue, Jul 10 2007 22:31:24 Item Help Menu Level` ` IDE Channel 0 Master ` IDE Channel 0 Slave 1 ` IDE Channel 1 Master ` IDE Channel 1 Slave 1 ` IDE Channel 2 Master ` IDE Channel 3 Master ` IDE...
... devices during the POST for faster system startup. • Manual Allows you to manually enter the specifications of the three methods below : Only for GA-P35-DS3R. - 39 - English 2-3 Standard CMOS Features Date (mm:dd:yy) Time (hh:mm:ss) CMOS Setup Utility-Copyright (C) 1984-2007 ...Award Software Standard CMOS Features Tue, Jul 10 2007 22:31:24 Item Help Menu Level` ` IDE Channel 0 Master ` IDE Channel 0 Slave 1 ` IDE Channel 1 Master ` IDE Channel 1 Slave 1 ` IDE Channel 2 Master ` IDE Channel 3 Master ` IDE...
Manual
Page 41
...] [PCI] KLJI: Move Enter: Select F5: Previous Values +/-/PU/PD: Value F10: Save F6: Fail-Safe Defaults ESC: Exit F1: General Help F7: Optimized Defaults Hard Disk Boot Priority Specifies the sequence of the hard drive and to issue warnings when a third party hardware monitor utility is...Award Software Advanced BIOS Features ` Hard Disk Boot Priority First Boot Device Second Boot Device [Press Enter] [Floppy] [Hard Disk] Item Help Menu Level` Third Boot Device Password Check HDD S.M.A.R.T. First/Second/Third Boot Device Specifies the boot order from the installed hard drives. ...
...] [PCI] KLJI: Move Enter: Select F5: Previous Values +/-/PU/PD: Value F10: Save F6: Fail-Safe Defaults ESC: Exit F1: General Help F7: Optimized Defaults Hard Disk Boot Priority Specifies the sequence of the hard drive and to issue warnings when a third party hardware monitor utility is...Award Software Advanced BIOS Features ` Hard Disk Boot Priority First Boot Device Second Boot Device [Press Enter] [Floppy] [Hard Disk] Item Help Menu Level` Third Boot Device Password Check HDD S.M.A.R.T. First/Second/Third Boot Device Specifies the boot order from the installed hard drives. ...
Manual
Page 43
... AHCI Configures the SATA controllers to AHCI mode. Disabled Disables AHCI for GA-P35-S3. (Note) Supported on Windows® Vista® operating system only. - 43 - Only for GA-P35-DS3R. Only for GA-P35-DS3. BIOS Setup Advanced Host Controller Interface (AHCI) is an interface specification ...] [Enabled] [Enabled] [Disabled] [Disabled] [Enabled] [Auto] [Enabled] [Press Enter] [Disabled] [Enabled] [IDE] [3F8/IRQ4] [378/IRQ7] [SPP] Item Help Menu Level` KLJI: Move Enter: Select F5: Previous Values +/-/PU/PD: Value F10: Save F6: Fail-Safe Defaults ESC: Exit F1: General...
... AHCI Configures the SATA controllers to AHCI mode. Disabled Disables AHCI for GA-P35-S3. (Note) Supported on Windows® Vista® operating system only. - 43 - Only for GA-P35-DS3R. Only for GA-P35-DS3. BIOS Setup Advanced Host Controller Interface (AHCI) is an interface specification ...] [Enabled] [Enabled] [Disabled] [Disabled] [Enabled] [Auto] [Enabled] [Press Enter] [Disabled] [Enabled] [IDE] [3F8/IRQ4] [378/IRQ7] [SPP] Item Help Menu Level` KLJI: Move Enter: Select F5: Previous Values +/-/PU/PD: Value F10: Save F6: Fail-Safe Defaults ESC: Exit F1: General...

Manual
Page 45
.... Pair1-2 Status = Open Pair3-6 Status = Open Pair4-5 Status = Open Pair7-8 Status = Open / Length = / Length = / Length = / Length = 0.0m 0.0m 0.0m 0.0m Item Help Menu Level` KLJI: Move Enter: Select F5: Previous Values +/-/PU/PD: Value F10: Save F6: Fail-Safe Defaults ESC: Exit F1: General... Help F7: Optimized Defaults This motherboard incorporates cable diagnostic feature designed to the following message will operate at Port..... If no LAN cable is ...
.... Pair1-2 Status = Open Pair3-6 Status = Open Pair4-5 Status = Open Pair7-8 Status = Open / Length = / Length = / Length = / Length = 0.0m 0.0m 0.0m 0.0m Item Help Menu Level` KLJI: Move Enter: Select F5: Previous Values +/-/PU/PD: Value F10: Save F6: Fail-Safe Defaults ESC: Exit F1: General... Help F7: Optimized Defaults This motherboard incorporates cable diagnostic feature designed to the following message will operate at Port..... If no LAN cable is ...

Manual
Page 47
... Power ON Password AC Back Function [S3(STR)] [Instant-Off] [Enabled] [Enabled] [Disabled] Everyday 0 : 0 : 0 [Enabled] [32-bit mode] [Disabled] [Disabled] Enter [Soft-Off] Item Help Menu Level` KLJI: Move Enter: Select F5: Previous Values +/-/PU/PD: Value F10: Save F6: Fail-Safe Defaults ESC: Exit F1: General... Help F7: Optimized Defaults ACPI Suspend Type Specifies the ACPI sleep state when the system enters suspend. Note: To use this function, you need an...
... Power ON Password AC Back Function [S3(STR)] [Instant-Off] [Enabled] [Enabled] [Disabled] Everyday 0 : 0 : 0 [Enabled] [32-bit mode] [Disabled] [Disabled] Enter [Soft-Off] Item Help Menu Level` KLJI: Move Enter: Select F5: Previous Values +/-/PU/PD: Value F10: Save F6: Fail-Safe Defaults ESC: Exit F1: General... Help F7: Optimized Defaults ACPI Suspend Type Specifies the ACPI sleep state when the system enters suspend. Note: To use this function, you need an...

Manual
Page 49
...CMOS Setup Utility-Copyright (C) 1984-2007 Award Software PnP/PCI Configurations PCI1 IRQ Assignment PCI2 IRQ Assignment PCI3 IRQ Assignment [Auto] [Auto] [Auto] Item Help Menu Level` KLJI: Move Enter: Select F5: Previous Values PCI1 IRQ Assignment Auto 3,4,5,7,9,10,11,12,14,15 PCI2 IRQ Assignment Auto 3,4,5,7,9,10,11,12...14,15 PCI3 IRQ Assignment Auto 3,4,5,7,9,10,11,12,14,15 +/-/PU/PD: Value F10: Save F6: Fail-Safe Defaults ESC: Exit F1: General Help F7: Optimized Defaults BIOS auto-assigns IRQ to the first PCI slot. (Default) Assigns IRQ 3,4,5,7,9,10,11,12,14,15 to the second PCI ...
...CMOS Setup Utility-Copyright (C) 1984-2007 Award Software PnP/PCI Configurations PCI1 IRQ Assignment PCI2 IRQ Assignment PCI3 IRQ Assignment [Auto] [Auto] [Auto] Item Help Menu Level` KLJI: Move Enter: Select F5: Previous Values PCI1 IRQ Assignment Auto 3,4,5,7,9,10,11,12,14,15 PCI2 IRQ Assignment Auto 3,4,5,7,9,10,11,12...14,15 PCI3 IRQ Assignment Auto 3,4,5,7,9,10,11,12,14,15 +/-/PU/PD: Value F10: Save F6: Fail-Safe Defaults ESC: Exit F1: General Help F7: Optimized Defaults BIOS auto-assigns IRQ to the first PCI slot. (Default) Assigns IRQ 3,4,5,7,9,10,11,12,14,15 to the second PCI ...

Manual
Page 50
... of the chassis intrusion detection device attached to emit warning sound if the CPU/system/power fan is removed, this occurs. (Default: Disabled) GA-P35-DS3R/DS3/S3 Motherboard - 50 - CPU/SYSTEM/POWER FAN Fail Warning Allows the system to the motherboard CI header. English 2-8 PC Health Status CMOS ...Mode [Disabled] No OK OK OK OK 47oC 47oC 3375 RPM 0 RPM 0 RPM 0 RPM [Disabled] [Disabled] [Disabled] [Disabled] [Disabled] [Auto] [Auto] Item Help Menu Level` KLJI: Move Enter: Select F5: Previous Values +/-/PU/PD: Value F10: Save F6: Fail-Safe Defaults ESC: Exit F1: General...
... of the chassis intrusion detection device attached to emit warning sound if the CPU/system/power fan is removed, this occurs. (Default: Disabled) GA-P35-DS3R/DS3/S3 Motherboard - 50 - CPU/SYSTEM/POWER FAN Fail Warning Allows the system to the motherboard CI header. English 2-8 PC Health Status CMOS ...Mode [Disabled] No OK OK OK OK 47oC 47oC 3375 RPM 0 RPM 0 RPM 0 RPM [Disabled] [Disabled] [Disabled] [Disabled] [Disabled] [Auto] [Auto] Item Help Menu Level` KLJI: Move Enter: Select F5: Previous Values +/-/PU/PD: Value F10: Save F6: Fail-Safe Defaults ESC: Exit F1: General...

Manual
Page 52
... wait for 20 seconds to allow the CPU Host Frequency item below to be configurable. Robust Graphics Booster Robust Graphics Booster (R.G.B.) helps to enhance the performance of CPU host clock. CPU Host Clock Control Enables or disables the control of the graphics chip and...F6: Fail-Safe Defaults ESC: Exit F1: General Help F7: Optimized Defaults • Incorrectly doing overclock/overvoltage may result in damage to CPU, chipset, or memory and reduce the useful life of these components. This page is installed. GA-P35-DS3R/DS3/S3 Motherboard - 52 - Options are: Auto (default...
... wait for 20 seconds to allow the CPU Host Frequency item below to be configurable. Robust Graphics Booster Robust Graphics Booster (R.G.B.) helps to enhance the performance of CPU host clock. CPU Host Clock Control Enables or disables the control of the graphics chip and...F6: Fail-Safe Defaults ESC: Exit F1: General Help F7: Optimized Defaults • Incorrectly doing overclock/overvoltage may result in damage to CPU, chipset, or memory and reduce the useful life of these components. This page is installed. GA-P35-DS3R/DS3/S3 Motherboard - 52 - Options are: Auto (default...

Manual
Page 53
... Increases CPU frequency by 9% or 11% depending on CPU loading. System Memory Multiplier (SPD) Allows you overclock the DDR2 memory, select Option 1 or Option 2 to help make your system more stable. Option 1 Memory Timing Configuration 1. (Default) Option 2 Memory Timing Configuration 2. - 53 - For a 1066 MHz FSB CPU, set this item to 200...
... Increases CPU frequency by 9% or 11% depending on CPU loading. System Memory Multiplier (SPD) Allows you overclock the DDR2 memory, select Option 1 or Option 2 to help make your system more stable. Option 1 Memory Timing Configuration 1. (Default) Option 2 Memory Timing Configuration 2. - 53 - For a 1066 MHz FSB CPU, set this item to 200...

Manual
Page 55
... BIOS Load Fail-Safe Defaults Press on this item and then press the key to load the safest BIOS default settings. The BIOS defaults settings helps the system to operate in optimum state. BIOS Setup
... BIOS Load Fail-Safe Defaults Press on this item and then press the key to load the safest BIOS default settings. The BIOS defaults settings helps the system to operate in optimum state. BIOS Setup
Manual
Page 71
... and Instructions: 1. In Windows, close all applications and TSR (Terminate and Stay Resident) programs. This helps prevent unexpected failures when performing a BIOS update. 3. B. C. GIGABYTE product warranty does not cover any BIOS damage or system failure resulting from an inadequate BIOS flashing. Save the...utility. During the BIOS update process, ensure the Internet connection is unable to save the current BIOS file. 2. Click Start>All Programs>GIGABYTE> @BIOS>@BIOS Select @BIOS and click Install. Before You Begin: 1. If your location and click OK. - 71 - Failure ...
... and Instructions: 1. In Windows, close all applications and TSR (Terminate and Stay Resident) programs. This helps prevent unexpected failures when performing a BIOS update. 3. B. C. GIGABYTE product warranty does not cover any BIOS damage or system failure resulting from an inadequate BIOS flashing. Save the...utility. During the BIOS update process, ensure the Internet connection is unable to save the current BIOS file. 2. Click Start>All Programs>GIGABYTE> @BIOS>@BIOS Select @BIOS and click Install. Before You Begin: 1. If your location and click OK. - 71 - Failure ...

Manual
Page 73
... the information on/from the Support\Motherboard\Utility page on our website.) The EasyTune 5 Interface Button Information Table Button/Display 1. Help 11. Before you do the overclock/overvoltage, make sure that you fully know how to use and convenient system overclocking and management... button Toggles between Easy and Advance Mode Displays panel of CPU frequency Shows the information of the current function Visits GIGABYTE website Displays EasyTuneTM 5 help screen Quits or minimizes EasyTuneTM 5 Incorrectly doing overclock/overvoltage may result in damage to CPU, chipset, or memory ...
... the information on/from the Support\Motherboard\Utility page on our website.) The EasyTune 5 Interface Button Information Table Button/Display 1. Help 11. Before you do the overclock/overvoltage, make sure that you fully know how to use and convenient system overclocking and management... button Toggles between Easy and Advance Mode Displays panel of CPU frequency Shows the information of the current function Visits GIGABYTE website Displays EasyTuneTM 5 help screen Quits or minimizes EasyTuneTM 5 Incorrectly doing overclock/overvoltage may result in damage to CPU, chipset, or memory ...

Manual
Page 76
...] [Disabled] [Enabled] [Auto] [Enabled] [Press Enter] [Disabled] [Enabled] [IDE] [3F8/IRQ4] [378/IRQ7] [SPP] Item Help Menu Level` KLJI: Move Enter: Select F5: Previous Values +/-/PU/PD: Value F10: Save F6: Fail-Safe Defaults Figure 1 ESC: Exit F1: General... Help F7: Optimized Defaults Step 2: Save changes and exit BIOS Setup. Configuring SATA controller mode in system BIOS Setup ....to enter BIOS Setup during the POST (Power-On Self-Test). GA-P35-DS3R/DS3/S3 Motherboard - 76 -
...] [Disabled] [Enabled] [Auto] [Enabled] [Press Enter] [Disabled] [Enabled] [IDE] [3F8/IRQ4] [378/IRQ7] [SPP] Item Help Menu Level` KLJI: Move Enter: Select F5: Previous Values +/-/PU/PD: Value F10: Save F6: Fail-Safe Defaults Figure 1 ESC: Exit F1: General... Help F7: Optimized Defaults Step 2: Save changes and exit BIOS Setup. Configuring SATA controller mode in system BIOS Setup ....to enter BIOS Setup during the POST (Power-On Self-Test). GA-P35-DS3R/DS3/S3 Motherboard - 76 -

Manual
Page 78
...typical values: RAID0 - 128KB RAID10 - 64KB RAID5 - 64KB [K L ]-Change [TAB]-Next [ESC]-Previous Menu Figure 5 [ENTER]-Select GA-P35-DS3R/DS3/S3 Motherboard - 78 - Press to the array. Mirrors data and stripes the mirror. Stripes data (performance). Stripes data and parity. [K... MENU ] Name : RAID Level : Disks : Strip Size : Capacity : Volume0 RAID0(Stripe) Select Disks 128KB 223.6 GB Create Volume [ HELP ] Choose the RAID level: RAID0RAID1RAID10RAID5- Set the stripe block size (Figure 5) if necessary. Mirrors data (redundancy). All Rights Reversed. [ CREATE...
...typical values: RAID0 - 128KB RAID10 - 64KB RAID5 - 64KB [K L ]-Change [TAB]-Next [ESC]-Previous Menu Figure 5 [ENTER]-Select GA-P35-DS3R/DS3/S3 Motherboard - 78 - Press to the array. Mirrors data and stripes the mirror. Stripes data (performance). Stripes data and parity. [K... MENU ] Name : RAID Level : Disks : Strip Size : Capacity : Volume0 RAID0(Stripe) Select Disks 128KB 223.6 GB Create Volume [ HELP ] Choose the RAID level: RAID0RAID1RAID10RAID5- Set the stripe block size (Figure 5) if necessary. Mirrors data (redundancy). All Rights Reversed. [ CREATE...

Manual
Page 81
...] [Disabled] [Enabled] [Enabled] [Disabled] [Disabled] [Enabled] [Auto] [Enabled] [Press Enter] [Disabled] [Enabled] [RAID/IDE] [3F8/IRQ4] [378/IRQ7] [SPP] Item Help Menu Level` KLJI: Move Enter: Select F5: Previous Values +/-/PU/PD: Value F10: Save F6: Fail-Safe Defaults Figure 1 Step 2: Save changes and exit BIOS...motherboard. B. In BIOS Setup, go to available SATA port on this motherboard, the GSATAII0 and GSATAII1 ports are supported by GIGABYTE SATA2.) Then connect the power connector from the exact settings for the SATA port. (For example, on the motherboard.
...] [Disabled] [Enabled] [Enabled] [Disabled] [Disabled] [Enabled] [Auto] [Enabled] [Press Enter] [Disabled] [Enabled] [RAID/IDE] [3F8/IRQ4] [378/IRQ7] [SPP] Item Help Menu Level` KLJI: Move Enter: Select F5: Previous Values +/-/PU/PD: Value F10: Save F6: Fail-Safe Defaults Figure 1 Step 2: Save changes and exit BIOS...motherboard. B. In BIOS Setup, go to available SATA port on this motherboard, the GSATAII0 and GSATAII1 ports are supported by GIGABYTE SATA2.) Then connect the power connector from the exact settings for the SATA port. (For example, on the motherboard.

Manual
Page 83
...[ESC]-Abort Appendix Select RAID Mode: Under the Level item, use up or down arrow key to move onto the next step. GIGABYTE Technology Corp. GIGABYTE Technology Corp. Steps: 1. Data striped for performance Data mirrored for redundancy Data concatenated for creating an array (Figure 5). Then the Create...Name HDD0: ST3120026AS HDD1: ST3120026AS Available 120 GB 120 GB Type/Status Non-RAID Non-RAID Confirm Creation [ RAID Disk Drive List ] [ Help ] Select RAID Level RAID 0 RAID 1 JBOD - English Create a RAID Array: In the main screen, press on the Create RAID Disk ...
...[ESC]-Abort Appendix Select RAID Mode: Under the Level item, use up or down arrow key to move onto the next step. GIGABYTE Technology Corp. GIGABYTE Technology Corp. Steps: 1. Data striped for performance Data mirrored for redundancy Data concatenated for creating an array (Figure 5). Then the Create...Name HDD0: ST3120026AS HDD1: ST3120026AS Available 120 GB 120 GB Type/Status Non-RAID Non-RAID Confirm Creation [ RAID Disk Drive List ] [ Help ] Select RAID Level RAID 0 RAID 1 JBOD - English Create a RAID Array: In the main screen, press on the Create RAID Disk ...

Manual
Page 84
...EXIT WITH SAVING [KL]-Switch Unit [DEL,BS]-Delete Number Figure 7 [ENTER]-Next [ESC]-Abort GA-P35-DS3R/DS3/S3 Motherboard - 84 - Set Array Size: Under the Size item, enter the size of the... Available 120 GB 120 GB Type/Status Non-RAID Non-RAID Confirm Creation [ RAID Disk Drive List ] [ Help ] Setting Stripe Block Select a stripe size which will be used to divide data from 4 KB to 128... from /to the Confirm Creation item. GIGABYTE Technology Corp. GIGABYTE Technology Corp. The following are configured, the selection bar automatically jumps to seperate RAID members.
...EXIT WITH SAVING [KL]-Switch Unit [DEL,BS]-Delete Number Figure 7 [ENTER]-Next [ESC]-Abort GA-P35-DS3R/DS3/S3 Motherboard - 84 - Set Array Size: Under the Size item, enter the size of the... Available 120 GB 120 GB Type/Status Non-RAID Non-RAID Confirm Creation [ RAID Disk Drive List ] [ Help ] Setting Stripe Block Select a stripe size which will be used to divide data from 4 KB to 128... from /to the Confirm Creation item. GIGABYTE Technology Corp. GIGABYTE Technology Corp. The following are configured, the selection bar automatically jumps to seperate RAID members.

Manual
Page 103
... BIOS options missing? Select "Load Fail-Safe Defaults" (or "Load Optimized Defaults") to the steps below: Steps: 1. A: The following Award BIOS beep code descriptions may help you identify possible computer problems. (For reference only.) 1 short: System boots successfully 2 short: CMOS setting error 1 long, 1 short: Memory or motherboard error 1 long, 2 short: Monitor... is equipped with power/ amplifier. Replace the battery. 4. Appendix Gently remove the battery from the battery holder to stop supplying power to the instructions on GIGABYTE's website.
... BIOS options missing? Select "Load Fail-Safe Defaults" (or "Load Optimized Defaults") to the steps below: Steps: 1. A: The following Award BIOS beep code descriptions may help you identify possible computer problems. (For reference only.) 1 short: System boots successfully 2 short: CMOS setting error 1 long, 1 short: Memory or motherboard error 1 long, 2 short: Monitor... is equipped with power/ amplifier. Replace the battery. 4. Appendix Gently remove the battery from the battery holder to stop supplying power to the instructions on GIGABYTE's website.

Manual
Page 105
... verified and solved. Or go to the Support\Technical Service Zone page to submit your problem, contact the place of purchase or local dealer for help. Select "Load Fail-Safe Defaults" (or "Load Optimized Defaults"). Turn off the computer. No The power supply, CPU or CPU socket might fail. The problem...
... verified and solved. Or go to the Support\Technical Service Zone page to submit your problem, contact the place of purchase or local dealer for help. Select "Load Fail-Safe Defaults" (or "Load Optimized Defaults"). Turn off the computer. No The power supply, CPU or CPU socket might fail. The problem...


