
Manual
Page 5
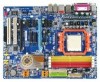
... ...7 GA-M55SLI-S4 (rev. 1.0) Motherboard Layout 8 GA-M55SLI-S4 (rev. 2.0) Motherboard Layout 9 Block Diagram ...10 Chapter 1 Hardware Installation 11 1-1 Considerations Prior to Installation 11 1-2 Feature Summary 12 1-3 Installation of the CPU and CPU Cooler 14 1-3-1 Installation of the CPU 14 1-3-2 Installation of the CPU Cooler 15 1-4 Installation of Memory 16 1-5 Installation of Expansion Cards 18 1-6 Setup of SLI (Scalable...
... ...7 GA-M55SLI-S4 (rev. 1.0) Motherboard Layout 8 GA-M55SLI-S4 (rev. 2.0) Motherboard Layout 9 Block Diagram ...10 Chapter 1 Hardware Installation 11 1-1 Considerations Prior to Installation 11 1-2 Feature Summary 12 1-3 Installation of the CPU and CPU Cooler 14 1-3-1 Installation of the CPU 14 1-3-2 Installation of the CPU Cooler 15 1-4 Installation of Memory 16 1-5 Installation of Expansion Cards 18 1-6 Setup of SLI (Scalable...

Manual
Page 12
... connector Š 3 USB 2.0/1.1 connectors for additional 6 USB 2.0/1.1 ports by cable Š 1 chassis intrusion connector Š 1 power LED connector GA-M55SLI-S4 Motherboard - 12 - English 1-2 Feature Summary CPU Š Socket AM2 for additional 2 port by cables Š 2 IEEE 1394a connectors for AMD AthlonTM 64...Supports CD In connection IEEE 1394 Š Onboard TI TSB43AB23 chip Š 3 IEEE 1394a ports Storage Š nVIDIA® nForce4 SLI chipset - 1 FDD connector, allowing connection of 1 FDD device - 2 IDE connectors with ATA-33/66/100/133 support, allowing ...
... connector Š 3 USB 2.0/1.1 connectors for additional 6 USB 2.0/1.1 ports by cable Š 1 chassis intrusion connector Š 1 power LED connector GA-M55SLI-S4 Motherboard - 12 - English 1-2 Feature Summary CPU Š Socket AM2 for additional 2 port by cables Š 2 IEEE 1394a connectors for AMD AthlonTM 64...Supports CD In connection IEEE 1394 Š Onboard TI TSB43AB23 chip Š 3 IEEE 1394a ports Storage Š nVIDIA® nForce4 SLI chipset - 1 FDD connector, allowing connection of 1 FDD device - 2 IDE connectors with ATA-33/66/100/133 support, allowing ...

Manual
Page 19
...GIGABYTE SLI Jumper: You can run at up to configure an SLI system on the GAM55SLI-S4 motherboard. Normal Mode (Pin 2-3 close, default setting): Only the first PCIe x16 slot (PCIE_16_1) is available 1 and can operate at up to provide enhanced performance. Hardware Installation You can run in two modes. SLI... either use them as two individual x8 slots or install two SLI-ready PCIe x16 cards (Example: GIGABYTE GV-NX76T256D-RH) of the same model and link them together with an SLI bridge connector to enable SLI function to x16 in Normal Mode. This section introduces steps to...
...GIGABYTE SLI Jumper: You can run at up to configure an SLI system on the GAM55SLI-S4 motherboard. Normal Mode (Pin 2-3 close, default setting): Only the first PCIe x16 slot (PCIE_16_1) is available 1 and can operate at up to provide enhanced performance. Hardware Installation You can run in two modes. SLI... either use them as two individual x8 slots or install two SLI-ready PCIe x16 cards (Example: GIGABYTE GV-NX76T256D-RH) of the same model and link them together with an SLI bridge connector to enable SLI function to x16 in Normal Mode. This section introduces steps to...

Manual
Page 20
... Cards: Step 1: Observe the steps in "1-5 Installation of Expansion Cards" and install two SLI-ready graphics cards of graphics card GA-M55SLI-S4 Motherboard - 20 - Female slots on the bridge connector Gold edge connector on the bridge connector securely fit onto the SLI gold edge connetors of both cards. Supported Operating Systems: Only Windows XP operating...
... Cards: Step 1: Observe the steps in "1-5 Installation of Expansion Cards" and install two SLI-ready graphics cards of graphics card GA-M55SLI-S4 Motherboard - 20 - Female slots on the bridge connector Gold edge connector on the bridge connector securely fit onto the SLI gold edge connetors of both cards. Supported Operating Systems: Only Windows XP operating...

Manual
Page 21
... dialog box. System will appear. Hardware Installation Then the SLI configuration is completed. (Note) If you want to enable the SLI function, you must install the retention bracket included with a screw. English Step 3: In order to the chassis back panel with the motherboard and secure the retention bracket to securely fix the bridge...
... dialog box. System will appear. Hardware Installation Then the SLI configuration is completed. (Note) If you want to enable the SLI function, you must install the retention bracket included with a screw. English Step 3: In order to the chassis back panel with the motherboard and secure the retention bracket to securely fix the bridge...

Manual
Page 28
... the system enters suspend mode(S1). English 9) SATAII0 / 1 / 2 / 3 (SATA 3Gb/s Connectors, Controlled by nForce4 SLI) SATA 3Gb/s can provide up to indicate whether the system is connected with the system power indicator to 300 MB/s transfer rate. GA-M55SLI-S4 Motherboard - 28 - Please refer to the BIOS setting for the Serial ATA controller and install...
... the system enters suspend mode(S1). English 9) SATAII0 / 1 / 2 / 3 (SATA 3Gb/s Connectors, Controlled by nForce4 SLI) SATA 3Gb/s can provide up to indicate whether the system is connected with the system power indicator to 300 MB/s transfer rate. GA-M55SLI-S4 Motherboard - 28 - Please refer to the BIOS setting for the Serial ATA controller and install...


