Gigabyte GA-F2A75-D3H Support and Manuals
Get Help and Manuals for this Gigabyte item
View All Support Options Below
Free Gigabyte GA-F2A75-D3H manuals!
Problems with Gigabyte GA-F2A75-D3H?
Ask a Question
Free Gigabyte GA-F2A75-D3H manuals!
Problems with Gigabyte GA-F2A75-D3H?
Ask a Question
Gigabyte GA-F2A75-D3H Videos

Gigabyte GA-F2A75-D3H
Duration: 2:57
Total Views: 1,150
Duration: 2:57
Total Views: 1,150
Gigabyte GA-F2A75-D3H
Duration: :22
Total Views: 918
Duration: :22
Total Views: 918
Popular Gigabyte GA-F2A75-D3H Manual Pages
User Manual - Page 1
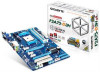
GA-F2A75-D3H
User's Manual
Rev. 1002 12ME-F275D3H-1002R
User Manual - Page 2
Motherboard GA-F2A75-D3H
Aug. 20, 2012
Motherboard GA-F2A75-D3H
Aug. 20, 2012
User Manual - Page 4
...7 GA-F2A75-D3H Motherboard Block Diagram 8
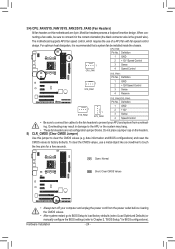
Chapter 1 Hardware Installation 9 1-1 Installation Precautions 9 1-2 Product Specifications 10 1-3 Installing the APU and APU Cooler 13
1-3-1 Installing the APU...13 1-3-2 Installing the APU Cooler 15 1-4 Installing the Memory 16 1-4-1 Dual Channel Memory Configuration 16 1-4-2 Installing a Memory 17 1-5 Installing an Expansion Card 18 1-6 Setup...
User Manual - Page 6
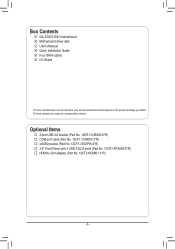
... on the product package you obtain. Box Contents
55 GA-F2A75-D3H motherboard 55 Motherboard driver disk 55 User's Manual 55 Quick Installation Guide 55 Four SATA cables 55 I/O Shield
The box contents above are subject to -DVI adapter (Part No. 12CT2-HDMI01-1*R)
- 6 - Optional Items
…… 2-port USB 2.0 bracket (Part No. 12CR1-1UB030-6*R) …… COM port cable...
User Manual - Page 8
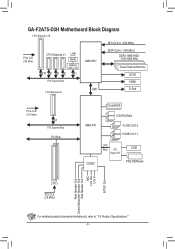
GA-F2A75-D3H Motherboard Block Diagram
1 PCI Express x16
APU CLK+/- (100 MHz)
PCIe CLK (100 MHz)
3 PCI Express x1 LAN RJ45
Realtek GbE LAN
x16 x1 x1 ... Speaker Out
Side Speaker Out MIC
Line Out Line In
S/PDIF Out
2 PCI PCI CLK (33 MHz)
For detailed product information/limitation(s), refer to "1-2 Product Specifications." - 8 -
User Manual - Page 18
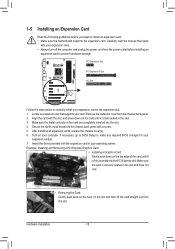
...inserted into the PCI Express slot. After installing all expansion cards, replace the chassis cover(s). 6. If necessary, go to BIOS Setup to make any required BIOS changes for ...Install the driver provided with the slot, and press down on the card until it is fully inserted into the slot. 4. Locate an expansion slot that came
with a screw. 5.
Carefully read the manual that supports...
User Manual - Page 19
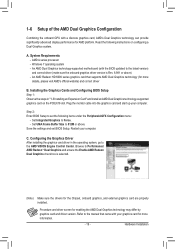
... Cards and Configuring BIOS Setup Step 1: Observe the steps in the operating system, go to the AMD VISION Engine Control Center. Set UMA Frame Buffer Size to 512M or above ) --
Procedure and driver screen for the Chipset, onboard graphics, and external graphics card are properly installed. Refer to the manual that supports AMD Dual Graphics technology...
User Manual - Page 24
....
•• These fan headers are 4-pin. Hardware Installation
- 24 -
The motherboard supports APU fan speed control, which requires the use a metal ...CMOS values.
•• After system restart, go to BIOS Setup to load factory defaults (select Load Optimized Defaults) or manually configure the BIOS settings (refer to clear the CMOS values (e.g. 3/4) CPU_FAN/SYS_FAN1/SYS_FAN2/...
User Manual - Page 31
..., if you need to) to Chapter 4, "BIOS Update Utilities."
•• Because BIOS flashing is turned on the motherboard. To access the BIOS Setup program, press the key during system startup, saving system parameters and loading operating system, etc. BIOS Setup
To upgrade the BIOS, use either the GIGABYTE Q-Flash or @BIOS utility. ••...
User Manual - Page 55
....
•• For USB 2.0 driver support under the Windows XP operating system, please install the Windows XP Service Pack 1 or later. Click Yes to install.
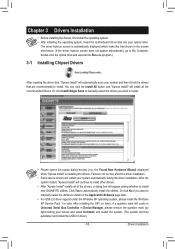
•• Please ignore the popup dialog box(es) (e.g. Chapter 3 Drivers Installation
•• Before installing the drivers, first install the operating system. •• After installing the operating system, insert the...
User Manual - Page 76
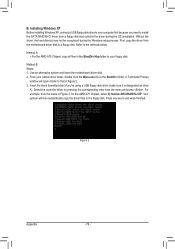
....exe file in the \BootDrv\Hxp folder to the methods below. Figure 2
Appendix
- 76 - Installing Windows XP Before installing Windows XP, connect a USB floppy disk drive to install the SATA RAID/AHCI driver from the motherboard driver disk to that contains the driver during the Windows setup process. For example, from the menu and press . B. Without the...
User Manual - Page 77
... Adapter for installing the driver during the Windows setup process.
AMD AHCI Compatible RAID Controller-x86 platform AMD AHCI Compatible RAID Controller-x64 platform
ENTER=Select F3=Exit
Figure 3
Step 3: On the next screen, press to that in Figure 3 will then appear asking you can proceed with Windows, using a device support disk provided by...
User Manual - Page 79
... the audio driver.
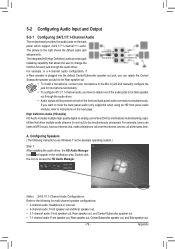
•• Audio signals will appear in jack and manually configure the jack...instructions on the next page. The picture to the following instructions use Windows 7 as the example operating system.)
Step 1: After installing the audio driver...8226; To install a microphone, connect your microphone to be present on the back panel which support 2/4/5.1/7.1-channel (...
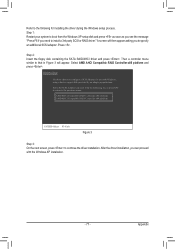
User Manual - Page 82
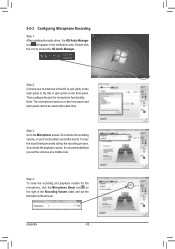
Do not mute the recording volume, or you set the Microphone Boost level. To hear the sound being recorded during the recording...area. Step 3: Go to access the HD Audio Manager. Appendix
- 82 -
5-2-3 Configuring Microphone Recording
Step 1: After installing the audio driver, the HD Audio Manager icon will appear in jack (pink) on the front panel. Note: The microphone functions on ...
User Manual - Page 85
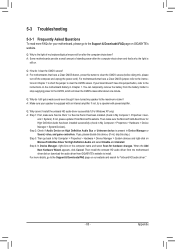
..., refer to the instructions in Chapter 1 to short the jumper to clear the CMOS values.
Then make sure Service Pack 1 or Service Pack 2 has been installed (check in My ...Driver for High Definition Audio has been installed successfully (check in My Computer > Properties > Gen- If not, please update it from GIGABYTE's website to install. Step 4: In Device Manager, right-click on GIGABYTE...
Gigabyte GA-F2A75-D3H Reviews
We have not received any reviews for Gigabyte yet.