
User's Manual
Page 4
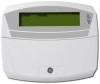
... The system must always be turned on it as your single source of security you will help you should notify your professional installer is described in its operation. Keep in mind, the level of security. Your security system is an electronic device and is furnished to help you may be ...tested weekly. Do not rely on (ARMED) and off (DISARMED) by simply pressing the [STAY] or [EXIT] key. You should be aware of your security system should be able...
... The system must always be turned on it as your single source of security you will help you should notify your professional installer is described in its operation. Keep in mind, the level of security. Your security system is an electronic device and is furnished to help you may be ...tested weekly. Do not rely on (ARMED) and off (DISARMED) by simply pressing the [STAY] or [EXIT] key. You should be aware of your security system should be able...
User's Manual
Page 7
(Table of Contents continued...) DISARMING THE SYSTEM 15 CANCEL / ABORT FEATURE 16 BYPASSING ZONES 16 GROUP BYPASS 16 UNBYPASSING 17 TURNING THE DOOR CHIME ON AND OFF 17 CHANGING USER CODES 17 ASSIGNING USER CODE AUTHORITY LEVELS 18 OTHER KEYPAD FUNCTIONS 20 SETTING THE KEYPAD TONE 20 CHANGE PARTITION - Optional 21 RESET FUNCTION 21 SET SYSTEM DATE 21 SETTING THE SYSTEM CLOCK 22 SETTING THE KEYPAD LIGHTING 23 SERVICE MENU 23 KEYPAD CONTROL TONES (BEEPS 25 EMERGENCY EVACUATION PLANS 26 NX1448E Icon Keypad Page 7 Optional 20 VIEW ALARM MEMORY 20 TEST FUNCTION -
(Table of Contents continued...) DISARMING THE SYSTEM 15 CANCEL / ABORT FEATURE 16 BYPASSING ZONES 16 GROUP BYPASS 16 UNBYPASSING 17 TURNING THE DOOR CHIME ON AND OFF 17 CHANGING USER CODES 17 ASSIGNING USER CODE AUTHORITY LEVELS 18 OTHER KEYPAD FUNCTIONS 20 SETTING THE KEYPAD TONE 20 CHANGE PARTITION - Optional 21 RESET FUNCTION 21 SET SYSTEM DATE 21 SETTING THE SYSTEM CLOCK 22 SETTING THE KEYPAD LIGHTING 23 SERVICE MENU 23 KEYPAD CONTROL TONES (BEEPS 25 EMERGENCY EVACUATION PLANS 26 NX1448E Icon Keypad Page 7 Optional 20 VIEW ALARM MEMORY 20 TEST FUNCTION -

User's Manual
Page 8
... not a mixture of access an individual has when using an alarm panel. The level of the two. An option that allows the system to be "force armed" will flash the ready icon. (Note: Those zones that are not ready will not create an alarm.) A Function Code is either User...that allows a special code to be either a four (4) or six (6) digit code that allows the keypad to bypass multiple zones with one or more zones open. Abort Delay Authority Level Central Station Chime Feature Codes Duress Code Forced Arming Function Code Group Bypass Instant/Delay Master Code Page 8 GLOSSARY OF TERMS...
... not a mixture of access an individual has when using an alarm panel. The level of the two. An option that allows the system to be "force armed" will flash the ready icon. (Note: Those zones that are not ready will not create an alarm.) A Function Code is either User...that allows a special code to be either a four (4) or six (6) digit code that allows the keypad to bypass multiple zones with one or more zones open. Abort Delay Authority Level Central Station Chime Feature Codes Duress Code Forced Arming Function Code Group Bypass Instant/Delay Master Code Page 8 GLOSSARY OF TERMS...

User's Manual
Page 18
...delete a user code, enter [r]-[r]-[r]-[r] for a 4-digit code, or [r]-[r]-[r]-[r]-[r]-[r] for that authority level. If another person can change any digit by following table. ASSIGNING USER CODE AUTHORITY LEVELS Assign authority levels to this code. An explanation of another "user code" needs to be assigned authority ...when all illuminated = code is rejected, the sounder will flash. The ready icon will beep 3 times. Icons illuminated indicate the authority levels assigned to users by entering a new digit. Use the [•] and [-] keys to which they have access. If the code...
...delete a user code, enter [r]-[r]-[r]-[r] for a 4-digit code, or [r]-[r]-[r]-[r]-[r]-[r] for that authority level. If another person can change any digit by following table. ASSIGNING USER CODE AUTHORITY LEVELS Assign authority levels to this code. An explanation of another "user code" needs to be assigned authority ...when all illuminated = code is rejected, the sounder will flash. The ready icon will beep 3 times. Icons illuminated indicate the authority levels assigned to users by entering a new digit. Use the [•] and [-] keys to which they have access. If the code...

User's Manual
Page 19
... 6 Press the [r] key. Press [#] - [#] to the following chart. This moves you want to give the user access or deny access. (Example: If zone icon #2 is lit, then the user is assigned access to partition #2. By pressing the [2] key, the icon will go off, denying access to the partition... any of the partitions where the user has access, press numbers corresponding to areas where you to partition #2. To change ! ICON 1 2 3 4 5 6 7 8 AUTHORITY LEVELS IF ICON 8 IS OFF Reserved (Note: Do not change if on.) Arm Only Arm Only After Closing Time Master Arm/Disarm (can program other codes...
... 6 Press the [r] key. Press [#] - [#] to the following chart. This moves you want to give the user access or deny access. (Example: If zone icon #2 is lit, then the user is assigned access to partition #2. By pressing the [2] key, the icon will go off, denying access to the partition... any of the partitions where the user has access, press numbers corresponding to areas where you to partition #2. To change ! ICON 1 2 3 4 5 6 7 8 AUTHORITY LEVELS IF ICON 8 IS OFF Reserved (Note: Do not change if on.) Arm Only Arm Only After Closing Time Master Arm/Disarm (can program other codes...

User's Manual
Page 20
... been pressed for 60 seconds. Page 20 NX1448E Icon Keypad Step 2 Pressing the [•] key will make the keypad sounder go back to assign authority level. Step 2 Press a NUMBER key between 1 and 8 to Step 2 previously mentioned. Press the [#] key to all user numbers. VIEW ALARM MEMORY Step ... the partitions are assigned, press the [r] key. Step 4 If another user number to its standard partition in ten seconds. CHANGE PARTITION - The zone(s) that created the last alarm will remain in the "Adjust Tone" mode. Step 3 When the desired tone is pressed, the system will be...
... been pressed for 60 seconds. Page 20 NX1448E Icon Keypad Step 2 Pressing the [•] key will make the keypad sounder go back to assign authority level. Step 2 Press a NUMBER key between 1 and 8 to Step 2 previously mentioned. Press the [#] key to all user numbers. VIEW ALARM MEMORY Step ... the partitions are assigned, press the [r] key. Step 4 If another user number to its standard partition in ten seconds. CHANGE PARTITION - The zone(s) that created the last alarm will remain in the "Adjust Tone" mode. Step 3 When the desired tone is pressed, the system will be...