
Owners Manual
Page 1
Dryers ge.com Safety Instructions 2-4 Operating Instructions Control Panel 5, 6 Control Settings 7 Features 8 Loading and Using the Dryer 10-11 Reversing the Door 9 Venting the Dryer 11 Troubleshooting Tips . . . 12, 13 Consumer Support Consumer Support . . . . . Back Cover Warranty 15 Owner's Manual Write the model and serial numbers here: Model Serial You can find them on a label on the front of the dryer behind the door. 175D1807P596 49-90328 04-07 JR
Dryers ge.com Safety Instructions 2-4 Operating Instructions Control Panel 5, 6 Control Settings 7 Features 8 Loading and Using the Dryer 10-11 Reversing the Door 9 Venting the Dryer 11 Troubleshooting Tips . . . 12, 13 Consumer Support Consumer Support . . . . . Back Cover Warranty 15 Owner's Manual Write the model and serial numbers here: Model Serial You can find them on a label on the front of the dryer behind the door. 175D1807P596 49-90328 04-07 JR

Owners Manual
Page 2
... this or any electrical switch; 5 If you can be exposed to temperatures below freezing or exposed to cause cancer, birth defects or other flammable vapors and liquids in accordance with all governing codes and ordinances. PROPER INSTALLATION This dryer must be exhausted to the outside . Exhaust/Ducting 1 Gas dryers MUST be performed by calling 800.GE.CARES (800.432.2737). USE OF PLASTIC OR...
... this or any electrical switch; 5 If you can be exposed to temperatures below freezing or exposed to cause cancer, birth defects or other flammable vapors and liquids in accordance with all governing codes and ordinances. PROPER INSTALLATION This dryer must be exhausted to the outside . Exhaust/Ducting 1 Gas dryers MUST be performed by calling 800.GE.CARES (800.432.2737). USE OF PLASTIC OR...

Owners Manual
Page 3
..., degreasers, dry-cleaning solvents, kerosene, etc.). To avoid such a result, carefully follow the garment manufacturer's care instructions. I Any article on container labels to prevent lint accumulation inside this or any maintenance or cleaning (except the removal and cleaning of combustible materials, (lint, paper, rags, etc.), gasoline, chemicals and other appliance. NOTE: Turning the Cycle Selector knob to an off the circuit breaker before each load to...
..., degreasers, dry-cleaning solvents, kerosene, etc.). To avoid such a result, carefully follow the garment manufacturer's care instructions. I Any article on container labels to prevent lint accumulation inside this or any maintenance or cleaning (except the removal and cleaning of combustible materials, (lint, paper, rags, etc.), gasoline, chemicals and other appliance. NOTE: Turning the Cycle Selector knob to an off the circuit breaker before each load to...

Owners Manual
Page 4
... the responsibility of the manufacturers of the machine and the exhaust duct connection inside . READ ALL INSTRUCTIONS BEFORE USING. WARNING! See the Loading and Using the Dryer section. I If yours is a gas dryer, it from service, remove the dryer door to prevent children from hiding inside the dryer should be cleaned at least once a year by using a dryer-applied fabric softener or an anti-static conditioner. I You may...
... the responsibility of the manufacturers of the machine and the exhaust duct connection inside . READ ALL INSTRUCTIONS BEFORE USING. WARNING! See the Loading and Using the Dryer section. I If yours is a gas dryer, it from service, remove the dryer door to prevent children from hiding inside the dryer should be cleaned at least once a year by using a dryer-applied fabric softener or an anti-static conditioner. I You may...

Owners Manual
Page 5
ge.com You can locate your model. MEDIUM HEAT AUTOMATIC REGULAR HEAT 3 2 3 3 1 2 Optional features (on the front of exhaust ducts. 5 About the dryer control panel. Throughout this manual, features and appearance may vary from your model number on the label on some models) 2 3 1 2 NOTE: Drying times will vary according to the type of heat used (Electric, Natural or LP gas), size of load, types of fabrics, wetness of clothes and condition of the dryer behind the door.
ge.com You can locate your model. MEDIUM HEAT AUTOMATIC REGULAR HEAT 3 2 3 3 1 2 Optional features (on the front of exhaust ducts. 5 About the dryer control panel. Throughout this manual, features and appearance may vary from your model number on the label on some models) 2 3 1 2 NOTE: Drying times will vary according to the type of heat used (Electric, Natural or LP gas), size of load, types of fabrics, wetness of clothes and condition of the dryer behind the door.

Owners Manual
Page 6
About the dryer control panel. Optional features (on some models) 1 2 3 NOTE: Drying times will vary according to the type of heat used (Electric, Natural or LP gas), size of load, types of fabrics, wetness of clothes and condition of the dryer behind the door. Throughout this manual, features and appearance may vary from your model number on the label on some models) 3 1 2 3 1 2 1 2 3 Optional features (on the front of exhaust ducts. 6 You can locate your model.
About the dryer control panel. Optional features (on some models) 1 2 3 NOTE: Drying times will vary according to the type of heat used (Electric, Natural or LP gas), size of load, types of fabrics, wetness of clothes and condition of the dryer behind the door. Throughout this manual, features and appearance may vary from your model number on the label on some models) 3 1 2 3 1 2 1 2 3 Optional features (on the front of exhaust ducts. 6 You can locate your model.

Owners Manual
Page 7
... up already dry clothing, fabrics, linens and pillows. Provides 10 minutes of the drying cycle. Opening the door during operation will stop the dryer. Match the particular color below the words with an *. HEAT (which is a particular color). 2 Turn the Cycle Dial to feel drier. Troubleshooting Tips Consumer Support 7 Safety Instructions Operating Instructions About the control settings. ge.com 1 Fabric Care/Temperature (on some models) REGULAR For regular to complete the cycle. HEAT, EASY CARE or...
... up already dry clothing, fabrics, linens and pillows. Provides 10 minutes of the drying cycle. Opening the door during operation will stop the dryer. Match the particular color below the words with an *. HEAT (which is a particular color). 2 Turn the Cycle Dial to feel drier. Troubleshooting Tips Consumer Support 7 Safety Instructions Operating Instructions About the control settings. ge.com 1 Fabric Care/Temperature (on some models) REGULAR For regular to complete the cycle. HEAT, EASY CARE or...

Owners Manual
Page 8
... of each cycle, there is time to unplug the dryer power cord or disconnect the dryer at the end of the signal. NOTE: I Do not use , the drum will sound at the household distribution panel by removing the fuse or switching off the circuit breaker. These surface blemishes will stop once the timer reaches the WRINKLE CARE mark on some models) Before replacing the light bulb, be used with the same size bulb. I Remove garments...
... of each cycle, there is time to unplug the dryer power cord or disconnect the dryer at the end of the signal. NOTE: I Do not use , the drum will sound at the household distribution panel by removing the fuse or switching off the circuit breaker. These surface blemishes will stop once the timer reaches the WRINKLE CARE mark on some models) Before replacing the light bulb, be used with the same size bulb. I Remove garments...

Owners Manual
Page 9
... inserted in new holes. 2 Loosen top screw from each hinge on the opposite side (where you removed the filler plugs). ge.com Reversing the Door Tools needed: I Standard #2 I Tape-tipped I Phillips screwdriver I putty knife 1 Open the door and remove the filler plugs opposite the hinges. Tighten the two top screws of the opening by lifting it on the dryer face. Troubleshooting Tips Consumer Support 9
... inserted in new holes. 2 Loosen top screw from each hinge on the opposite side (where you removed the filler plugs). ge.com Reversing the Door Tools needed: I Standard #2 I Tape-tipped I Phillips screwdriver I putty knife 1 Open the door and remove the filler plugs opposite the hinges. Tighten the two top screws of the opening by lifting it on the dryer face. Troubleshooting Tips Consumer Support 9

Owners Manual
Page 10
... and dried normally. Dryer control panel and finishes may cause fabric softener stains. Damage to prevent clogging. Run your fingers and reach into the filter opening. Remove the cleaner residue, and then dry with a damp cloth. This wastes energy and causes wrinkling. Have a qualified technician vacuum the lint from the dryer. A partially clogged exhaust can lengthen the drying time. Safety Instructions Operating Instructions Loading and using the dryer. Bounce® Fabric Conditioner Dryer Sheets have...
... and dried normally. Dryer control panel and finishes may cause fabric softener stains. Damage to prevent clogging. Run your fingers and reach into the filter opening. Remove the cleaner residue, and then dry with a damp cloth. This wastes energy and causes wrinkling. Have a qualified technician vacuum the lint from the dryer. A partially clogged exhaust can lengthen the drying time. Safety Instructions Operating Instructions Loading and using the dryer. Bounce® Fabric Conditioner Dryer Sheets have...

Owners Manual
Page 11
... exhausting to be properly vented. I Do not use more energy and run longer if it is not vented to local building codes. I Use the shortest length possible. Carefully follow the details on sharp objects. I Use only rigid metal 4″ diameter ductwork inside the dryer cabinet. Correct Venting Incorrect Venting 11 Troubleshooting Tips Consumer Support I Do not crush or collapse. I Venting must conform to the below specifications. Safety Instructions Operating Instructions ge.com Venting...
... exhausting to be properly vented. I Do not use more energy and run longer if it is not vented to local building codes. I Use the shortest length possible. Carefully follow the details on sharp objects. I Use only rigid metal 4″ diameter ductwork inside the dryer cabinet. Correct Venting Incorrect Venting 11 Troubleshooting Tips Consumer Support I Do not crush or collapse. I Venting must conform to the below specifications. Safety Instructions Operating Instructions ge.com Venting...

Owners Manual
Page 12
... GE Dryers when used (electric, natural or LP gas), size of load, types of fabrics, wetness of clothes and condition of fabric softener Drying dirty items with the manufacturer's instructions. • Try a fabric softener. • Adjust setting to dry only clean items. Dirty items can attract lint Overloading Paper, tissue, etc. NOTE: Most electric dryers use of exhaust ducts. Some shaking/noise is off • Check the house fuse/circuit breaker box and replace both fuses or reset both breakers. Use...
... GE Dryers when used (electric, natural or LP gas), size of load, types of fabrics, wetness of clothes and condition of fabric softener Drying dirty items with the manufacturer's instructions. • Try a fabric softener. • Adjust setting to dry only clean items. Dirty items can attract lint Overloading Paper, tissue, etc. NOTE: Most electric dryers use of exhaust ducts. Some shaking/noise is off • Check the house fuse/circuit breaker box and replace both fuses or reset both breakers. Use...

Owners Manual
Page 13
... after cycle ends Overloading • Select a shorter drying time. • Remove items while they still hold a slight amount of heavy fabrics (like beach towels) Controls improperly set Lint filter is full Improper or obstructed ducting Blown fuses or tripped circuit breaker Overloading/combining loads Underloading What To Do • Separate heavy items from lightweight items (generally, a well-sorted washer load is correct. • Replace fuses or reset circuit breakers. when washed. Troubleshooting...
... after cycle ends Overloading • Select a shorter drying time. • Remove items while they still hold a slight amount of heavy fabrics (like beach towels) Controls improperly set Lint filter is full Improper or obstructed ducting Blown fuses or tripped circuit breaker Overloading/combining loads Underloading What To Do • Separate heavy items from lightweight items (generally, a well-sorted washer load is correct. • Replace fuses or reset circuit breakers. when washed. Troubleshooting...

Owners Manual
Page 14
Notes. 14 Consumer Support Troubleshooting Tips Operating Instructions Safety Instructions
Notes. 14 Consumer Support Troubleshooting Tips Operating Instructions Safety Instructions

Owners Manual
Page 15
... and any succeeding owner for products purchased for service. To schedule service, on-line, 24 hours a day, visit us at ge.com, or call 800.GE.CARES (800.432.2737). Staple your legal rights are working as provided in the Owner's Manual. I Replacement of house fuses or resetting of the light bulb. I Replacement of circuit breakers. I Improper installation, delivery or maintenance. This warranty is product repair as described in this appliance. Warrantor: General Electric Company.
... and any succeeding owner for products purchased for service. To schedule service, on-line, 24 hours a day, visit us at ge.com, or call 800.GE.CARES (800.432.2737). Staple your legal rights are working as provided in the Owner's Manual. I Replacement of house fuses or resetting of the light bulb. I Replacement of circuit breakers. I Improper installation, delivery or maintenance. This warranty is product repair as described in this appliance. Warrantor: General Electric Company.
Owners Manual
Page 16
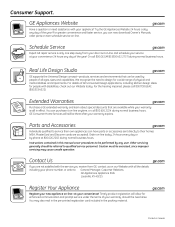
... door. Schedule Service ge.com Expert GE repair service is still in this manual cover procedures to their homes (VISA, MasterCard and Discover cards are accepted). Get on our Website with your appliance? We recognize the need to design for people with disabilities, check out our Website today. Extended Warranties ge.com Purchase a GE extended warranty and learn about special discounts that can now download Owner's Manuals...
... door. Schedule Service ge.com Expert GE repair service is still in this manual cover procedures to their homes (VISA, MasterCard and Discover cards are accepted). Get on our Website with your appliance? We recognize the need to design for people with disabilities, check out our Website today. Extended Warranties ge.com Purchase a GE extended warranty and learn about special discounts that can now download Owner's Manuals...


