

Owners Manual
Page 1
GEAppliances.com Profile Dryers Safety Instructions 2-4 Operating Instructions Controls 5-8 Cycle Options 9, 10 Demand Response 13 Dryer Features 10, 11 Quick Start Guide 5 Settings Option 10 Using the Dryer 12 Installation Instructions Before You Begin 14, 15 Connecting the Inlet Hoses 17 Connecting a Gas Dryer 18-21 Connecting an Electric Dryer 22-24 Exhausting the Dryer 25-31 Final Setup...
GEAppliances.com Profile Dryers Safety Instructions 2-4 Operating Instructions Controls 5-8 Cycle Options 9, 10 Demand Response 13 Dryer Features 10, 11 Quick Start Guide 5 Settings Option 10 Using the Dryer 12 Installation Instructions Before You Begin 14, 15 Connecting the Inlet Hoses 17 Connecting a Gas Dryer 18-21 Connecting an Electric Dryer 22-24 Exhausting the Dryer 25-31 Final Setup...

Owners Manual
Page 14
...Observe all installation instructions. • Clothes dryer installation must be performed by a qualified installer. • This dryer must be performed by a qualified installer. • Install the clothes dryer according to these instructions with the customer.) FOR GAS MODELS ONLY: NOTE: Installation and service of the... installer. • Product failure due to House Vent" on or in the appliance. Call 800.GE.CARES (800.432.2737) or...
...Observe all installation instructions. • Clothes dryer installation must be performed by a qualified installer. • This dryer must be performed by a qualified installer. • Install the clothes dryer according to these instructions with the customer.) FOR GAS MODELS ONLY: NOTE: Installation and service of the... installer. • Product failure due to House Vent" on or in the appliance. Call 800.GE.CARES (800.432.2737) or...
Owners Manual
Page 16
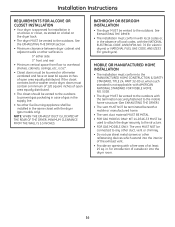
...mobile or manufactured home. • The vent duct material MUST BE METAL. • FOR GAS MODELS ONLY: KIT 14-D346-33 MUST be used to attach the dryer securely to the structure. • FOR GAS MODELS ONLY: The vent MUST NOT be connected to the outdoors. in. MOBILE OR MANUFACTURED HOME ...OR CLOSET INSTALLATION • Your dryer is approved for installation in an alcove or closet, as stated on a label on the dryer back. • The dryer MUST be installed in the same closet with the dryer (gas models only). BATHROOM OR BEDROOM INSTALLATION • The dryer MUST be louvered or otherwise ...
...mobile or manufactured home. • The vent duct material MUST BE METAL. • FOR GAS MODELS ONLY: KIT 14-D346-33 MUST be used to attach the dryer securely to the structure. • FOR GAS MODELS ONLY: The vent MUST NOT be connected to the outdoors. in. MOBILE OR MANUFACTURED HOME ...OR CLOSET INSTALLATION • Your dryer is approved for installation in an alcove or closet, as stated on a label on the dryer back. • The dryer MUST be installed in the same closet with the dryer (gas models only). BATHROOM OR BEDROOM INSTALLATION • The dryer MUST be louvered or otherwise ...

Owners Manual
Page 29
WARNING - Remove the screw inside the dryer when inserting the duct. Make sure that the shortened duct is aligned with the tab in the middle of cabinet for gas Bend tab up 45° ADDING A NEW DUCT Fixing hole Portion "A" Left side exhaust Reconnect the cut portion (A) of the duct to ... on the appliance base. Through the rear opening, locate the tab in the base. Fixing hole A 133⁄8″ Cut the duct as desired. Dryer Exhaust to the blower housing. TAB LOCATION Not for Gas and Electric models. BEFORE PERFORMING THIS EXHAUST INSTALLATION, BE SURE TO DISCONNECT THE...
WARNING - Remove the screw inside the dryer when inserting the duct. Make sure that the shortened duct is aligned with the tab in the middle of cabinet for gas Bend tab up 45° ADDING A NEW DUCT Fixing hole Portion "A" Left side exhaust Reconnect the cut portion (A) of the duct to ... on the appliance base. Through the rear opening, locate the tab in the base. Fixing hole A 133⁄8″ Cut the duct as desired. Dryer Exhaust to the blower housing. TAB LOCATION Not for Gas and Electric models. BEFORE PERFORMING THIS EXHAUST INSTALLATION, BE SURE TO DISCONNECT THE...

Owners Manual
Page 30
...(Kit WE1M454) Connect standard metal elbows and ducts to the bottom of the dryer. PROTECT YOUR HANDS AND ARMS FROM SHARP EDGES WHEN WORKING INSIDE THE CABINET. Pull the duct out of cabinet for Gas and Electric models. NEVER LEAVE THE BACK OPENING WITHOUT THE PLATE. (Kit WE1M454) BOTTOM VENTING...: Dryer Exhaust to complete the exhaust system. BE SURE TO WEAR GLOVES. Fixing hole A 123⁄8&#...
...(Kit WE1M454) Connect standard metal elbows and ducts to the bottom of the dryer. PROTECT YOUR HANDS AND ARMS FROM SHARP EDGES WHEN WORKING INSIDE THE CABINET. Pull the duct out of cabinet for Gas and Electric models. NEVER LEAVE THE BACK OPENING WITHOUT THE PLATE. (Kit WE1M454) BOTTOM VENTING...: Dryer Exhaust to complete the exhaust system. BE SURE TO WEAR GLOVES. Fixing hole A 123⁄8&#...

Owners Manual
Page 31
... (cont.) ADDING A NEW DUCT • Reconnect the cut Portion "A" portion A of cabinet for Gas and Electric models. Rotate the elbow through the bottom tab hole and the pipe as shown on the joint between the dryer internal duct and the elbow. Rear hole Bottom opening • While holding down the pipe... sure the hole is drilled all the way through the rear hole and connect it connects to pull or damage the electrical wires inside the dryer when inserting the duct. • While still holding down the pipe and elbow from your hand through the rear opening, drill a 1/8″ ...
... (cont.) ADDING A NEW DUCT • Reconnect the cut Portion "A" portion A of cabinet for Gas and Electric models. Rotate the elbow through the bottom tab hole and the pipe as shown on the joint between the dryer internal duct and the elbow. Rear hole Bottom opening • While holding down the pipe... sure the hole is drilled all the way through the rear hole and connect it connects to pull or damage the electrical wires inside the dryer when inserting the duct. • While still holding down the pipe and elbow from your hand through the rear opening, drill a 1/8″ ...

Owners Manual
Page 39
...the dryer (gas models only). More than two people are : 0″ both a washer and a dryer, doors must be louvered or otherwise ventilated and have at least 60 square inches of open area equally distributed. • The closet should be vented to the outdoors to lift the dryer ...Avoid Tipping and Rupture of Utility Services. Stacking of a gas dryer is 52″. • Closet doors must be installed in a mobile home or manufactured home. See the EXHAUSTING THE DRYER section. • Minimum clearance between dryer cabinet and adjacent walls or other fuel-burning appliance shall...
...the dryer (gas models only). More than two people are : 0″ both a washer and a dryer, doors must be louvered or otherwise ventilated and have at least 60 square inches of open area equally distributed. • The closet should be vented to the outdoors to lift the dryer ...Avoid Tipping and Rupture of Utility Services. Stacking of a gas dryer is 52″. • Closet doors must be installed in a mobile home or manufactured home. See the EXHAUSTING THE DRYER section. • Minimum clearance between dryer cabinet and adjacent walls or other fuel-burning appliance shall...
Owners Manual
Page 46
...Check the building's fuse/circuit breaker box and replace both fuses or reset both breakers. Dryer should heat when utility service is normal. Glow at the rear of natural gas (gas models) • Refill or replace tank. the dryer and a new load put in Time Remaining The EXTEND TUMBLE option was activated •... tumbling option lasts approximately 20 minutes. If you call for collars and waistbands • Choose SPEED DRY or TIMED DRY to a gas (natural or LP) dryer, or vice versa, the drying time could be visible at the rear of the heaters may change • This is put in...
...Check the building's fuse/circuit breaker box and replace both fuses or reset both breakers. Dryer should heat when utility service is normal. Glow at the rear of natural gas (gas models) • Refill or replace tank. the dryer and a new load put in Time Remaining The EXTEND TUMBLE option was activated •... tumbling option lasts approximately 20 minutes. If you call for collars and waistbands • Choose SPEED DRY or TIMED DRY to a gas (natural or LP) dryer, or vice versa, the drying time could be visible at the rear of the heaters may change • This is put in...


