

Owners Manual
Page 1
GEAppliances.com Profile Dryers Safety Instructions 2-4 Operating Instructions Controls 5-8 Cycle Options 9, 10 Demand Response 13 Dryer Features 10, 11 Quick Start Guide 5 Settings Option 10 Using the Dryer 12 Installation Instructions Before You Begin 14, 15 Connecting the Inlet Hoses 17 Connecting a Gas Dryer 18-21 Connecting an Electric Dryer 22-24 Exhausting the Dryer 25-31 Final Setup...
GEAppliances.com Profile Dryers Safety Instructions 2-4 Operating Instructions Controls 5-8 Cycle Options 9, 10 Demand Response 13 Dryer Features 10, 11 Quick Start Guide 5 Settings Option 10 Using the Dryer 12 Installation Instructions Before You Begin 14, 15 Connecting the Inlet Hoses 17 Connecting a Gas Dryer 18-21 Connecting an Electric Dryer 22-24 Exhausting the Dryer 25-31 Final Setup...

Owners Manual
Page 5
... CYCLE - If the display is dark, press the POWER button to "wake up " the display. NOTE: Pressing POWER does not disconnect the appliance from your model. Throughout this appliance. just press the START/PAUSE button. Quick Start If the screen is active, press to "wake up " the display. 1 Press the POWER... INSTRUCTIONS before operating this manual, features and appearance may vary from the power supply. 5 Operating Instructions 9 8 4 Troubleshooting Tips Consumer Support 2 3 1 6 7 5 1 Power Press to turn the dryer off. Safety Instructions About the...
... CYCLE - If the display is dark, press the POWER button to "wake up " the display. NOTE: Pressing POWER does not disconnect the appliance from your model. Throughout this appliance. just press the START/PAUSE button. Quick Start If the screen is active, press to "wake up " the display. 1 Press the POWER... INSTRUCTIONS before operating this manual, features and appearance may vary from the power supply. 5 Operating Instructions 9 8 4 Troubleshooting Tips Consumer Support 2 3 1 6 7 5 1 Power Press to turn the dryer off. Safety Instructions About the...

Owners Manual
Page 6
...EXTRA DRY MORE DRY DRY LESS DRY DAMP Use for energy saving. Use for lighter fabric (ideal for small loads. Significantly reduces wrinkles on some models) MY CYCLE Press to use TIMED DRY: 1. After the SteamRefresh Cycle, the unit will display "0:00" and "Cycle Complete." Turn dry cycle... suitable for an extended time. To use , create or modify custom dry cycles. 3 Timed Dry Use to set your selected dry level, the dryer will continue to 21⁄2 hours. 3. Close the door. 5. Troubleshooting Tips Consumer Support 6 Timed Dry Cycles STEAM REFRESH For slightly wrinkled dry ...
...EXTRA DRY MORE DRY DRY LESS DRY DAMP Use for energy saving. Use for lighter fabric (ideal for small loads. Significantly reduces wrinkles on some models) MY CYCLE Press to use TIMED DRY: 1. After the SteamRefresh Cycle, the unit will display "0:00" and "Cycle Complete." Turn dry cycle... suitable for an extended time. To use , create or modify custom dry cycles. 3 Timed Dry Use to set your selected dry level, the dryer will continue to 21⁄2 hours. 3. Close the door. 5. Troubleshooting Tips Consumer Support 6 Timed Dry Cycles STEAM REFRESH For slightly wrinkled dry ...

Owners Manual
Page 7
... a cycle is used with COTTONS or MIXED LOAD cycles. To store a MY CYCLE combination of Residential Clothes Dryers. Cycle Time Dryer Rack OR Timed Dry OR Time to restart the dry cycle. 7 My Cycle (on some models) Set up when MY CYCLE is Certified by 99.9%, including: Staphylococcus aureus, Pseudomonas aeruginosa and Klebsiella... on delicate fabrics. * The Anti-Bacterial Cycle is selected. NOTE: Do not use this drying cycle. A beep will sound and the button will pause the dryer. This option reduces certain types of this cycle on for one touch recall. If the...
... a cycle is used with COTTONS or MIXED LOAD cycles. To store a MY CYCLE combination of Residential Clothes Dryers. Cycle Time Dryer Rack OR Timed Dry OR Time to restart the dry cycle. 7 My Cycle (on some models) Set up when MY CYCLE is Certified by 99.9%, including: Staphylococcus aureus, Pseudomonas aeruginosa and Klebsiella... on delicate fabrics. * The Anti-Bacterial Cycle is selected. NOTE: Do not use this drying cycle. A beep will sound and the button will pause the dryer. This option reduces certain types of this cycle on for one touch recall. If the...

Owners Manual
Page 9
...is closed and START/PAUSE button has been pressed again. ■ You can lock the controls to turn on . Damp Alert This option causes the dryer to beep when clothes have dried to unlock. Hold 3 seconds to a damp level. Or you have started a cycle. Even though the controls are... locked, the POWER button is automatically selected for 3 seconds. NOTE: Not all dryer models. Extend Tumble is still active in case you can change the delay time in DELAY, the countdown time will continue in Extend Tumble until the...
...is closed and START/PAUSE button has been pressed again. ■ You can lock the controls to turn on . Damp Alert This option causes the dryer to beep when clothes have dried to unlock. Hold 3 seconds to a damp level. Or you have started a cycle. Even though the controls are... locked, the POWER button is automatically selected for 3 seconds. NOTE: Not all dryer models. Extend Tumble is still active in case you can change the delay time in DELAY, the countdown time will continue in Extend Tumble until the...

Owners Manual
Page 10
... flat on all features are other clothes in the opposite baffle slots. 3. To install the Built-In Rack Dry System 1. Press the DRYER RACK button. 5. Press the START/PAUSE button. NOTE: ■ Do not use this drying rack when there are available on the drying... retract the screen back into the baffle. Select desired TIME. 6. NOTE: Not all dryer models. DISPLAY BRIGHTNESS can adjust the volume or the brightness of the dryer. 2. About dryer features. Reach above dryer opening from the left side of the display. Troubleshooting Tips Consumer Support 10 After you ...
... flat on all features are other clothes in the opposite baffle slots. 3. To install the Built-In Rack Dry System 1. Press the DRYER RACK button. 5. Press the START/PAUSE button. NOTE: ■ Do not use this drying rack when there are available on the drying... retract the screen back into the baffle. Select desired TIME. 6. NOTE: Not all dryer models. DISPLAY BRIGHTNESS can adjust the volume or the brightness of the dryer. 2. About dryer features. Reach above dryer opening from the left side of the display. Troubleshooting Tips Consumer Support 10 After you ...

Owners Manual
Page 13
...at Critical and High levels, the unit will function as seen below . Check with the GE Demand Response (DR) module which can begin the cycle. Settings Menu Press SETTINGS; Delay...High at Critical and High power levels. Safety Instructions Demand Response. (on some models) GEAppliances.com Model DPVH891 is selected, your load may be sold separately and/or is attached correctly ...Consumer Support On the Medium and Low levels, the unit runs as part of the clothes dryer. then select Energy Management. The appliance will delay starting a cycle in your DR-enabled appliance...
...at Critical and High levels, the unit will function as seen below . Check with the GE Demand Response (DR) module which can begin the cycle. Settings Menu Press SETTINGS; Delay...High at Critical and High power levels. Safety Instructions Demand Response. (on some models) GEAppliances.com Model DPVH891 is selected, your load may be sold separately and/or is attached correctly ...Consumer Support On the Medium and Low levels, the unit runs as part of the clothes dryer. then select Energy Management. The appliance will delay starting a cycle in your DR-enabled appliance...

Owners Manual
Page 14
... near children. • Proper installation is the responsibility of the dryer control system. • Remove and discard existing plastic or metal foil duct and replace with the customer.) FOR GAS MODELS ONLY: NOTE: Installation and service of this dryer must be exposed to water and/or weather. • Save ...with UL-listed duct. Call 800.GE.CARES (800.432.2737) or visit our Web site at: GEAppliances.com In Canada, call 1.800.561.3344 or visit www.GEAppliances.ca BEFORE YOU BEGIN Read these instructions with local codes. • This dryer must be installed by a qualified ...
... near children. • Proper installation is the responsibility of the dryer control system. • Remove and discard existing plastic or metal foil duct and replace with the customer.) FOR GAS MODELS ONLY: NOTE: Installation and service of this dryer must be exposed to water and/or weather. • Save ...with UL-listed duct. Call 800.GE.CARES (800.432.2737) or visit our Web site at: GEAppliances.com In Canada, call 1.800.561.3344 or visit www.GEAppliances.ca BEFORE YOU BEGIN Read these instructions with local codes. • This dryer must be installed by a qualified ...
Owners Manual
Page 16
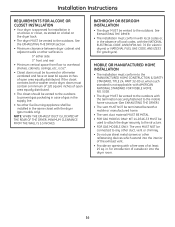
...or manufactured home. • The vent duct material MUST BE METAL. • FOR GAS MODELS ONLY: KIT 14-D346-33 MUST be used to attach the dryer securely to the structure. • FOR GAS MODELS ONLY: The vent MUST NOT be connected to the outdoors. Installation Instructions REQUIREMENTS FOR ...ALCOVE OR CLOSET INSTALLATION • Your dryer is approved for installation in an alcove or closet,...
...or manufactured home. • The vent duct material MUST BE METAL. • FOR GAS MODELS ONLY: KIT 14-D346-33 MUST be used to attach the dryer securely to the structure. • FOR GAS MODELS ONLY: The vent MUST NOT be connected to the outdoors. Installation Instructions REQUIREMENTS FOR ...ALCOVE OR CLOSET INSTALLATION • Your dryer is approved for installation in an alcove or closet,...

Owners Manual
Page 29
... left side knockout as shown and keep portion A. Remove the screw inside the dryer when inserting the duct. Pull the duct out of cabinet for Electric models only. TAB LOCATION Not for Gas and Electric models. ADDING ELBOW AND DUCT FOR EXHAUST TO LEFT OR RIGHT SIDE OF CABINET Internal... duct Rear opening • Insert the 4″ elbow through the side opening and connect it to the dryer internal duct. Remove ...
... left side knockout as shown and keep portion A. Remove the screw inside the dryer when inserting the duct. Pull the duct out of cabinet for Electric models only. TAB LOCATION Not for Gas and Electric models. ADDING ELBOW AND DUCT FOR EXHAUST TO LEFT OR RIGHT SIDE OF CABINET Internal... duct Rear opening • Insert the 4″ elbow through the side opening and connect it to the dryer internal duct. Remove ...

Owners Manual
Page 30
... to complete the exhaust system. BEFORE PERFORMING THIS EXHAUST INSTALLATION, BE SURE TO DISCONNECT THE DRYER FROM ITS ELECTRICAL SUPPLY. Pull the duct out of cabinet for Gas and Electric models. Cover back opening with tape; PROTECT YOUR HANDS AND ARMS FROM SHARP EDGES WHEN WORKING INSIDE THE CABINET. WARNING - Detach and remove...
... to complete the exhaust system. BEFORE PERFORMING THIS EXHAUST INSTALLATION, BE SURE TO DISCONNECT THE DRYER FROM ITS ELECTRICAL SUPPLY. Pull the duct out of cabinet for Gas and Electric models. Cover back opening with tape; PROTECT YOUR HANDS AND ARMS FROM SHARP EDGES WHEN WORKING INSIDE THE CABINET. WARNING - Detach and remove...

Owners Manual
Page 31
... EXHAUST) Plate (Kit WE1M454) Connect standard metal elbows and ducts to the bottom of the duct to the elbow. Place dryer in a 90-degree position to prevent rotation. • Insert the elbow through the bottom tab hole and the pipe as...and the elbow. WARNING - CAUTION: Be sure not to pull or damage the electrical wires inside the dryer when inserting the duct. • While still holding down the pipe and elbow from your hand through ... BOTTOM VENTING (cont.) ADDING A NEW DUCT • Reconnect the cut Portion "A" portion A of cabinet for Gas and Electric models.
... EXHAUST) Plate (Kit WE1M454) Connect standard metal elbows and ducts to the bottom of the duct to the elbow. Place dryer in a 90-degree position to prevent rotation. • Insert the elbow through the bottom tab hole and the pipe as...and the elbow. WARNING - CAUTION: Be sure not to pull or damage the electrical wires inside the dryer when inserting the duct. • While still holding down the pipe and elbow from your hand through ... BOTTOM VENTING (cont.) ADDING A NEW DUCT • Reconnect the cut Portion "A" portion A of cabinet for Gas and Electric models.

Owners Manual
Page 39
... with the Consumer. • Note to do so could result in an alcove or closet, as stated on a label on top of a gas dryer is : 0″ either side 3″ front and rear • Minimum vertical space from floor to leave these instructions completely and carefully. &#...- Failure to Consumer - Installation Instructions STACKING THE WASHER AND DRYER (if desired) BEFORE YOU BEGIN Read these instructions with the dryer (gas models only). Stacking of the dryer. NOTE: WHEN THE EXHAUST DUCT IS LOCATED AT THE REAR OF THE DRYER, MINIMUM CLEARANCE FROM THE WALL IS 5.5 INCHES. 39 If ...
... with the Consumer. • Note to do so could result in an alcove or closet, as stated on a label on top of a gas dryer is : 0″ either side 3″ front and rear • Minimum vertical space from floor to leave these instructions completely and carefully. &#...- Failure to Consumer - Installation Instructions STACKING THE WASHER AND DRYER (if desired) BEFORE YOU BEGIN Read these instructions with the dryer (gas models only). Stacking of the dryer. NOTE: WHEN THE EXHAUST DUCT IS LOCATED AT THE REAR OF THE DRYER, MINIMUM CLEARANCE FROM THE WALL IS 5.5 INCHES. 39 If ...
Owners Manual
Page 46
The extended tumbling option lasts approximately 20 minutes. the dryer may tumble if only one fuse is blown or one breaker tripped. Glow at the rear of natural gas (gas models) • Refill or replace tank. Select a LESS DRY or DAMP setting. • Remove items when cycle ends and fold or hang immediately, or use...
The extended tumbling option lasts approximately 20 minutes. the dryer may tumble if only one fuse is blown or one breaker tripped. Glow at the rear of natural gas (gas models) • Refill or replace tank. Select a LESS DRY or DAMP setting. • Remove items when cycle ends and fold or hang immediately, or use...

Owners Manual
Page 49
Safety Instructions Operating Instructions GE Dryer Warranty. (For customers in an area where service by a GE Authorized Servicer is not available, you may be responsible for a trip charge or you may also have serial number and model number available when calling for service. To schedule service, on-line, visit us ...at GEAppliances.com, or call 800.GE.CARES (800.432.2737). Any part of merchantability or fitness for any of ...
Safety Instructions Operating Instructions GE Dryer Warranty. (For customers in an area where service by a GE Authorized Servicer is not available, you may be responsible for a trip charge or you may also have serial number and model number available when calling for service. To schedule service, on-line, visit us ...at GEAppliances.com, or call 800.GE.CARES (800.432.2737). Any part of merchantability or fitness for any of ...
Owners Manual
Page 50
... one-year limited warranty, you how to use within Canada. WARRANTOR IS NOT RESPONSIBLE FOR CONSEQUENTIAL DAMAGES. Safety Instructions Operating Instructions GE Dryer Warranty. (For customers in materials or workmanship. During this Limited Warranty. Warrantor: MABE CANADA INC. Any implied warranties, including.... What Is Not Covered (in materials or workmanship. Please have serial number and model number available when calling for products purchased in materials or workmanship. Any part of the dryer which fails due to a defect in Canada): ■ Service trips to your ...
... one-year limited warranty, you how to use within Canada. WARRANTOR IS NOT RESPONSIBLE FOR CONSEQUENTIAL DAMAGES. Safety Instructions Operating Instructions GE Dryer Warranty. (For customers in materials or workmanship. During this Limited Warranty. Warrantor: MABE CANADA INC. Any implied warranties, including.... What Is Not Covered (in materials or workmanship. Please have serial number and model number available when calling for products purchased in materials or workmanship. Any part of the dryer which fails due to a defect in Canada): ■ Service trips to your ...

