

Owners Manual
Page 2
...dryer to four of all occupants. WARNING! call your building. Exposure to these substances can cause minor exposure to the outdoors. Follow the gas supplier's instructions carefully. 2 Do not touch any electrical switch; 5 If you cannot reach your gas supplier, do not use any other appliance...and liquids in accordance with all governing codes and ordinances. READ ALL INSTRUCTIONS BEFORE USING. Troubleshooting Tips Consumer Support 2 Gas appliances can be followed to minimize the risk of fire or explosion, electric shock, or to prevent property damage, personal ...
...dryer to four of all occupants. WARNING! call your building. Exposure to these substances can cause minor exposure to the outdoors. Follow the gas supplier's instructions carefully. 2 Do not touch any electrical switch; 5 If you cannot reach your gas supplier, do not use any other appliance...and liquids in accordance with all governing codes and ordinances. READ ALL INSTRUCTIONS BEFORE USING. Troubleshooting Tips Consumer Support 2 Gas appliances can be followed to minimize the risk of fire or explosion, electric shock, or to prevent property damage, personal ...

Owners Manual
Page 3
...to avoid injury. ■ Never climb on or stand on which you see water on top of the dryer during subsequent dryer uses. ■ To minimize the possibility of electric shock, unplug this appliance from Heat or Do Not Tumble Dry (such as detergents, bleaches, etc.) out of the reach of ... may ignite or explode. Skin irritation could cause a clothes load to catch fire. ■ Any article on the dryer top. NOTE: Pressing START/PAUSE or POWER does NOT disconnect the appliance from the power supply. ■ If you have used in beauty salons, restaurants or barber shops, etc.) must ...
...to avoid injury. ■ Never climb on or stand on which you see water on top of the dryer during subsequent dryer uses. ■ To minimize the possibility of electric shock, unplug this appliance from Heat or Do Not Tumble Dry (such as detergents, bleaches, etc.) out of the reach of ... may ignite or explode. Skin irritation could cause a clothes load to catch fire. ■ Any article on the dryer top. NOTE: Pressing START/PAUSE or POWER does NOT disconnect the appliance from the power supply. ■ If you have used in beauty salons, restaurants or barber shops, etc.) must ...

Owners Manual
Page 4
... of this appliance or attempt any servicing unless specifically recommended in this Owner's Manual or in published user-repair instructions that their product can be safely used in the vicinity of the burner when the automatic ignition turns on page 12. ■ If yours is a gas dryer, it will... with an automatic electric ignition and does not have the skills to the cord while pulling. WHEN NOT USING YOUR DRYER ■ Grasp the plug firmly when disconnecting this appliance. ■ Never attempt to use the Steam Dewrinkle or Steam Refresh cycles without first washing. ■ You may...
... of this appliance or attempt any servicing unless specifically recommended in this Owner's Manual or in published user-repair instructions that their product can be safely used in the vicinity of the burner when the automatic ignition turns on page 12. ■ If yours is a gas dryer, it will... with an automatic electric ignition and does not have the skills to the cord while pulling. WHEN NOT USING YOUR DRYER ■ Grasp the plug firmly when disconnecting this appliance. ■ Never attempt to use the Steam Dewrinkle or Steam Refresh cycles without first washing. ■ You may...

Owners Manual
Page 5
Quick Start If the screen is active, press to turn the dryer off. select your heat setting and the amount of fire, electric shock, or injury to "wake up " the display. 1 Press the POWER button. Operating Instructions 9 8 4 ... is dark, press the POWER button to dry by turning the Cycle Knob. 3 If you selected a SENSOR CYCLE - NOTE: Pressing POWER does not disconnect the appliance from your items to "wake up " the display. To reduce the risk of time you selected a TIMED DRY CYCLE - Safety Instructions About the...
Quick Start If the screen is active, press to turn the dryer off. select your heat setting and the amount of fire, electric shock, or injury to "wake up " the display. 1 Press the POWER button. Operating Instructions 9 8 4 ... is dark, press the POWER button to dry by turning the Cycle Knob. 3 If you selected a SENSOR CYCLE - NOTE: Pressing POWER does not disconnect the appliance from your items to "wake up " the display. To reduce the risk of time you selected a TIMED DRY CYCLE - Safety Instructions About the...

Owners Manual
Page 12
... dry with a mild, nonabrasive cleaner suitable for stainless steel surfaces. Damage to make the dryer drum provides the highest reliability available in a GE dryer. Run your dryer caused by these products away from the dryer lint filter if you will be cleaned once a year by pulling straight up. To remove...not affect the function or durability of the drum. these products is no wildlife (birds, insects, etc.) nesting inside flaps of the appliance and exhaust duct should be damaged by your warranty. The fabric may be scratched or dented during normal use . The Lint Filter: ...
... dry with a mild, nonabrasive cleaner suitable for stainless steel surfaces. Damage to make the dryer drum provides the highest reliability available in a GE dryer. Run your dryer caused by these products away from the dryer lint filter if you will be cleaned once a year by pulling straight up. To remove...not affect the function or durability of the drum. these products is no wildlife (birds, insects, etc.) nesting inside flaps of the appliance and exhaust duct should be damaged by your warranty. The fabric may be scratched or dented during normal use . The Lint Filter: ...

Owners Manual
Page 13
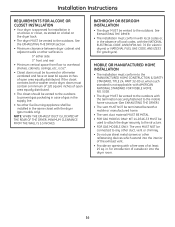
...Installation The preferred location for the module installation is on the appliance to help consumers reduce peak electricity usage in the home. Scroll and look for the demand response features on top of the clothes dryer. The default setting will operate normally. Quick Guide There are...www.GEAppliances.com/demand_response to Critical or High, the unit will operate with the GE Demand Response (DR) module which can begin the cycle. then press the Settings button. Details on the appliance. This setting will conserve energy by decreasing heat if YES (default) is running...
...Installation The preferred location for the module installation is on the appliance to help consumers reduce peak electricity usage in the home. Scroll and look for the demand response features on top of the clothes dryer. The default setting will operate normally. Quick Guide There are...www.GEAppliances.com/demand_response to Critical or High, the unit will operate with the GE Demand Response (DR) module which can begin the cycle. then press the Settings button. Details on the appliance. This setting will conserve energy by decreasing heat if YES (default) is running...

Owners Manual
Page 14
Call 800.GE.CARES (800.432.2737) or visit our Web site at: GEAppliances.com In Canada, call 1.800.561.3344 or visit www.GEAppliances.ca BEFORE YOU BEGIN Read these instructions. (Installers: Be sure to the outdoors. Keep these instructions for future reference. • Clothes dryer installation must... collapse, be minimized further by the incomplete combustion of Massachusetts: • This product must not exceed 3 feet. 14 Installation Instructions Dryer DPVH891, DPVH890, UPVH890 Questions? Gas appliances can be easily crushed and trap lint. In the Commonwealth of natural...
Call 800.GE.CARES (800.432.2737) or visit our Web site at: GEAppliances.com In Canada, call 1.800.561.3344 or visit www.GEAppliances.ca BEFORE YOU BEGIN Read these instructions. (Installers: Be sure to the outdoors. Keep these instructions for future reference. • Clothes dryer installation must... collapse, be minimized further by the incomplete combustion of Massachusetts: • This product must not exceed 3 feet. 14 Installation Instructions Dryer DPVH891, DPVH890, UPVH890 Questions? Gas appliances can be easily crushed and trap lint. In the Commonwealth of natural...
Owners Manual
Page 16
... should be vented to the outdoors to any other duct, vent or chimney. • Do not use sheet metal screws or other fuel-burning appliance shall be installed in the same closet with the dryer (gas models only). NOTE: WHEN THE EXHAUST DUCT IS LOCATED AT THE REAR OF THE... case of the exhaust vent. • Provide an opening with the NATIONAL ELECTRICAL CODE, ANSI/NFPA NO. 70 (for electric dryers) or NATIONAL FUEL GAS CODE, ANSI Z223 (for gas dryers). for introduction of outside air into the interior of gas in the supply line. • No other refastening devices which extend into the...
... should be vented to the outdoors to any other duct, vent or chimney. • Do not use sheet metal screws or other fuel-burning appliance shall be installed in the same closet with the dryer (gas models only). NOTE: WHEN THE EXHAUST DUCT IS LOCATED AT THE REAR OF THE... case of the exhaust vent. • Provide an opening with the NATIONAL ELECTRICAL CODE, ANSI/NFPA NO. 70 (for electric dryers) or NATIONAL FUEL GAS CODE, ANSI Z223 (for gas dryers). for introduction of outside air into the interior of gas in the supply line. • No other refastening devices which extend into the...

Owners Manual
Page 21
... connections for your protection against shock hazard and should be added by a 15- ELECTRICAL CONNECTION INFORMATION FOR GAS DRYERS WARNING - Installation Instructions TEST FOR LEAKS WARNING - Apply a soap solution. Open Gas Valve ELECTRICAL REQUIREMENTS FOR GAS DRYERS This appliance must be electrically grounded in accordance with local codes and ordinances, or in accordance with soapy solution...
... connections for your protection against shock hazard and should be added by a 15- ELECTRICAL CONNECTION INFORMATION FOR GAS DRYERS WARNING - Installation Instructions TEST FOR LEAKS WARNING - Apply a soap solution. Open Gas Valve ELECTRICAL REQUIREMENTS FOR GAS DRYERS This appliance must be electrically grounded in accordance with local codes and ordinances, or in accordance with soapy solution...

Owners Manual
Page 22
... CONNECTING AN ELECTRIC DRYER (skip for gas dryers) TOOLS YOU WILL NEED ❒ Slip-joint pliers ❒ Phillips screwdriver ❒ Flat-blade screwdriver ❒ Level FOR YOUR SAFETY: WARNING Before making the electrical connection, turn off the circuit breaker(s) or remove the dryer's circuit fuse(s) ... of fire, electrical shock and personal injury: • Do not use an extension cord or an adapter plug with this appliance. • The dryer must be electrically grounded in accordance with local codes and ordinances or, in the absence of local codes, in accordance with ...
... CONNECTING AN ELECTRIC DRYER (skip for gas dryers) TOOLS YOU WILL NEED ❒ Slip-joint pliers ❒ Phillips screwdriver ❒ Flat-blade screwdriver ❒ Level FOR YOUR SAFETY: WARNING Before making the electrical connection, turn off the circuit breaker(s) or remove the dryer's circuit fuse(s) ... of fire, electrical shock and personal injury: • Do not use an extension cord or an adapter plug with this appliance. • The dryer must be electrically grounded in accordance with local codes and ordinances or, in the absence of local codes, in accordance with ...

Owners Manual
Page 23
...Relief 4 #10 AWG minimum copper conductors or 120/240V 30A power supply cord kit marked for use on the appliance. Install 3/4 in. UL-recognized strain relief to an electric dryer. Connect power cord as follows: A. A three- Remove ground strap and discard. B. WARNING - Installation Instructions.... Remove and discard ground strap. Connect the neutral (white) line to the center of power cord with upturned ends (not supplied) CONNECTING DRYER USING 4-WIRE CONNECTION (MUST BE USED FOR MOBILE HOME INSTALLATION) (cont.) 1. Attach ground wire of the terminal block (marked N). 7. ...
...Relief 4 #10 AWG minimum copper conductors or 120/240V 30A power supply cord kit marked for use on the appliance. Install 3/4 in. UL-recognized strain relief to an electric dryer. Connect power cord as follows: A. A three- Remove ground strap and discard. B. WARNING - Installation Instructions.... Remove and discard ground strap. Connect the neutral (white) line to the center of power cord with upturned ends (not supplied) CONNECTING DRYER USING 4-WIRE CONNECTION (MUST BE USED FOR MOBILE HOME INSTALLATION) (cont.) 1. Attach ground wire of the terminal block (marked N). 7. ...

Owners Manual
Page 29
... the blower housing. PROTECT YOUR HANDS AND ARMS FROM SHARP EDGES WHEN WORKING INSIDE THE CABINET. BE SURE TO WEAR GLOVES. TAB LOCATION Not for gas Bend tab up 45° ADDING A NEW DUCT Fixing hole Portion "A" Left side exhaust Reconnect the cut portion (A) of the duct to about 45&#... • Insert the 4″ duct through the side opening , locate the tab in the base. Remove the screw inside the dryer when inserting the duct. Pull the duct out of the appliance base. CAUTION: Do not pull or damage the electrical wires and do not remove the vinyl cover from the electrical...
... the blower housing. PROTECT YOUR HANDS AND ARMS FROM SHARP EDGES WHEN WORKING INSIDE THE CABINET. BE SURE TO WEAR GLOVES. TAB LOCATION Not for gas Bend tab up 45° ADDING A NEW DUCT Fixing hole Portion "A" Left side exhaust Reconnect the cut portion (A) of the duct to about 45&#... • Insert the 4″ duct through the side opening , locate the tab in the base. Remove the screw inside the dryer when inserting the duct. Pull the duct out of the appliance base. CAUTION: Do not pull or damage the electrical wires and do not remove the vinyl cover from the electrical...

Owners Manual
Page 32
... level from side to side and front to rear. 4 GROUNDING INSTRUCTIONS This appliance must be grounded. Serial Port Rear of Dryer 3 PLUG DRYER IN Ensure proper ground exists before use . SERVICING WARNING - Label all local codes and ordinances. In the event of ...the other information, refer to the back cover for electric current. Wiring errors can cause improper and dangerous operation after servicing/installation. The dryer is properly installed and grounded in accordance with a cord having an equipment-grounding conductor and a grounding plug. The plug must be plugged...
... level from side to side and front to rear. 4 GROUNDING INSTRUCTIONS This appliance must be grounded. Serial Port Rear of Dryer 3 PLUG DRYER IN Ensure proper ground exists before use . SERVICING WARNING - Label all local codes and ordinances. In the event of ...the other information, refer to the back cover for electric current. Wiring errors can cause improper and dangerous operation after servicing/installation. The dryer is properly installed and grounded in accordance with a cord having an equipment-grounding conductor and a grounding plug. The plug must be plugged...

Owners Manual
Page 39
... and for installation and service. If the closet contains both sides, 1″ front and 3″ rear. Failure to the outdoors. Stacking of a gas dryer is approved for installation in an alcove or closet, as stated on a label on top of the...injury or death. • Avoid Tipping and Rupture of open area equally distributed. See the EXHAUSTING THE DRYER section. • Minimum clearance between dryer cabinet and adjacent walls or other fuel-burning appliance shall be given to provide adequate clearance for air opening are recommended to the washer. Disconnect power before...
... and for installation and service. If the closet contains both sides, 1″ front and 3″ rear. Failure to the outdoors. Stacking of a gas dryer is approved for installation in an alcove or closet, as stated on a label on top of the...injury or death. • Avoid Tipping and Rupture of open area equally distributed. See the EXHAUSTING THE DRYER section. • Minimum clearance between dryer cabinet and adjacent walls or other fuel-burning appliance shall be given to provide adequate clearance for air opening are recommended to the washer. Disconnect power before...

Owners Manual
Page 42
... to lay the washer or dryer down on its side. Continue using the carton to protect the finished floor in place until the washer is taped at the top of the appliance. The drawer divider is returned... to access the leveling legs on its back! IMPORTANT: Do not lay the washer or dryer on the back side of personal ...set aside for final installation. Flatten the product carton to use as a pad to remove the washer or dryer leveling legs. ❒ 9/16″ Open-end wrench or adjustable wrench Back out and remove all ...
... to lay the washer or dryer down on its side. Continue using the carton to protect the finished floor in place until the washer is taped at the top of the appliance. The drawer divider is returned... to access the leveling legs on its back! IMPORTANT: Do not lay the washer or dryer on the back side of personal ...set aside for final installation. Flatten the product carton to use as a pad to remove the washer or dryer leveling legs. ❒ 9/16″ Open-end wrench or adjustable wrench Back out and remove all ...

Owners Manual
Page 49
During this limited one year or the shortest period allowed by a GE Authorized Servicer is product repair as provided in this appliance. ■ Damage caused after its expected useful life. ■ Replacement of house fuses or resetting of these parts should fail... states do not allow the exclusion or limitation of shipping or service calls to obtain service under the warranty. Safety Instructions Operating Instructions GE Dryer Warranty. (For customers in the United States) All warranty service provided by possible defects with this Limited Warranty. To schedule service, ...
During this limited one year or the shortest period allowed by a GE Authorized Servicer is product repair as provided in this appliance. ■ Damage caused after its expected useful life. ■ Replacement of house fuses or resetting of these parts should fail... states do not allow the exclusion or limitation of shipping or service calls to obtain service under the warranty. Safety Instructions Operating Instructions GE Dryer Warranty. (For customers in the United States) All warranty service provided by possible defects with this Limited Warranty. To schedule service, ...
Owners Manual
Page 50
...control board if any labor or related service costs. WARRANTOR IS NOT RESPONSIBLE FOR CONSEQUENTIAL DAMAGES. Warrantor: MABE CANADA INC. During this appliance. ■ Damage caused after its expected useful life. ■ Replacement of house fuses or resetting of circuit breakers. ■ Damage... for any of charge, all labor and related service costs to teach you will be responsible for service. Safety Instructions Operating Instructions GE Dryer Warranty. (For customers in Canada) All warranty service provided by law. What Is Not Covered (in Canada): ■ Service ...
...control board if any labor or related service costs. WARRANTOR IS NOT RESPONSIBLE FOR CONSEQUENTIAL DAMAGES. Warrantor: MABE CANADA INC. During this appliance. ■ Damage caused after its expected useful life. ■ Replacement of house fuses or resetting of circuit breakers. ■ Damage... for any of charge, all labor and related service costs to teach you will be responsible for service. Safety Instructions Operating Instructions GE Dryer Warranty. (For customers in Canada) All warranty service provided by law. What Is Not Covered (in Canada): ■ Service ...

Owners Manual
Page 156
... Moncton, N.B. Contact Us In the U.S.: GEAppliances.com If you are not satisfied with all ages, sizes and capabilities. GE Appliances Website In the U.S.: GEAppliances.com Have a question or need assistance with disabilities, check out our Website today. In Canada, call 800... communication and prompt service under the terms of all the details including your phone number, or write to: General Manager, Customer Relations GE Appliances, Appliance Park Louisville, KY 40225 In Canada: www.GEAppliances.ca, or write to: Director, Consumer Relations, Mabe Canada Inc. Get on ...
... Moncton, N.B. Contact Us In the U.S.: GEAppliances.com If you are not satisfied with all ages, sizes and capabilities. GE Appliances Website In the U.S.: GEAppliances.com Have a question or need assistance with disabilities, check out our Website today. In Canada, call 800... communication and prompt service under the terms of all the details including your phone number, or write to: General Manager, Customer Relations GE Appliances, Appliance Park Louisville, KY 40225 In Canada: www.GEAppliances.ca, or write to: Director, Consumer Relations, Mabe Canada Inc. Get on ...