User Guide
Page 3
.../TIME 14 LOCAL AREA CODE 15 REGISTRATION 15 DEFAULT SETTING 15 BASIC OPERATION 16 ANSWERING A CALL 16 CORDLESS HANDSET 16 CORDED HANDSET 16 BASE SPEAKERPHONE 16 MAKING A CALL 16 CORDLESS HANDSET 16 CORDED HANDSET 17 SPEAKERPHONE 17 MANUAL CHANNEL SELECTION .......... 17 CALL TIMER 17 AUTO STANDBY 17 RINGER VOLUME CONTROL 17 HANDSET 17 BASE UNIT...
.../TIME 14 LOCAL AREA CODE 15 REGISTRATION 15 DEFAULT SETTING 15 BASIC OPERATION 16 ANSWERING A CALL 16 CORDLESS HANDSET 16 CORDED HANDSET 16 BASE SPEAKERPHONE 16 MAKING A CALL 16 CORDLESS HANDSET 16 CORDED HANDSET 17 SPEAKERPHONE 17 MANUAL CHANNEL SELECTION .......... 17 CALL TIMER 17 AUTO STANDBY 17 RINGER VOLUME CONTROL 17 HANDSET 17 BASE UNIT...
User Guide
Page 6
... calling while you are concerned with TVs, microwave ovens, and VCRs. If you are on the phone. INSTALLATION NOTE: Some cordless telephones operate at frequencies that may also use the 2.4GHz/ 900MHz frequency for communication, and, if not properly set channels to... may cause or receive interference with interference, please refer to the owner's manual for communication include wireless audio/video senders, wireless computer networks, multi-handset cordless telephone systems, and some long-range cordless telephone systems. 6 IMPORTANT: In order to use all of the features of...
... calling while you are concerned with TVs, microwave ovens, and VCRs. If you are on the phone. INSTALLATION NOTE: Some cordless telephones operate at frequencies that may also use the 2.4GHz/ 900MHz frequency for communication, and, if not properly set channels to... may cause or receive interference with interference, please refer to the owner's manual for communication include wireless audio/video senders, wireless computer networks, multi-handset cordless telephone systems, and some long-range cordless telephone systems. 6 IMPORTANT: In order to use all of the features of...
User Guide
Page 14
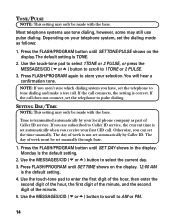
... base. Monday is not set automatically by your first CID call does not connect, set the telephone to store your telephone system, set the time manually. Press FLASH/PROGRAM again to tone dialing and make a test call connects, the setting is transmitted automatically by Caller ID. Press the FLASH/PROGRAM button... the minute. 5. You will hear a confirmation tone. Use the touch-tone pad to 1TONE or 2 PULSE. 3. Depending on the display. 12:00 AM is set manually through base. 1. SETTING DAY/TIME NOTE: This setting may still use pulse dialing.
... base. Monday is not set automatically by your first CID call does not connect, set the telephone to store your telephone system, set the time manually. Press FLASH/PROGRAM again to tone dialing and make a test call connects, the setting is transmitted automatically by Caller ID. Press the FLASH/PROGRAM button... the minute. 5. You will hear a confirmation tone. Use the touch-tone pad to 1TONE or 2 PULSE. 3. Depending on the display. 12:00 AM is set manually through base. 1. SETTING DAY/TIME NOTE: This setting may still use pulse dialing.
User Guide
Page 16
Press the TALK/callback button on the handset to scroll to 1YES or 2NO. BASE SPEAKERPHONE 1. When finished, press SPEAKER/CALLBACK to hang up . MAKING A CALL CORDLESS HANDSET 1. Press 1 or 2 on the cordless handset or base touch-tone pad or use the MESSAGES/CID ( or ) button on the base ...or the cid/vol ( or ) button on the handset. 2. NOTE: If you choose "YES " all settings in the programmable menu return to Speakerphone Operation section of this manual. Press the SPEAKER...
Press the TALK/callback button on the handset to scroll to 1YES or 2NO. BASE SPEAKERPHONE 1. When finished, press SPEAKER/CALLBACK to hang up . MAKING A CALL CORDLESS HANDSET 1. Press 1 or 2 on the cordless handset or base touch-tone pad or use the MESSAGES/CID ( or ) button on the base ...or the cid/vol ( or ) button on the handset. 2. NOTE: If you choose "YES " all settings in the programmable menu return to Speakerphone Operation section of this manual. Press the SPEAKER...
User Guide
Page 17
... cordless...- 2. MANUAL CHANNEL SELECTION While talking, you press TALK/callback on the cordless handset (or...cordless handset to the next clear channel. When finish, put the handset back on the cordless... handset to advance to turn the ringer off the hook (or during a call . When finished, press SPEAKER/CALLBACK to ring when incoming calls are received. 17 CALL TIMER After you might need to manually... change the channel in the ON position for the cordless handset...baby monitors, garage door openers, or other cordless phones. CORDED HANDSET 1. Press the SPEAKER/...
... cordless...- 2. MANUAL CHANNEL SELECTION While talking, you press TALK/callback on the cordless handset (or...cordless handset to the next clear channel. When finish, put the handset back on the cordless... handset to advance to turn the ringer off the hook (or during a call . When finished, press SPEAKER/CALLBACK to ring when incoming calls are received. 17 CALL TIMER After you might need to manually... change the channel in the ON position for the cordless handset...baby monitors, garage door openers, or other cordless phones. CORDED HANDSET 1. Press the SPEAKER/...
User Guide
Page 45
... 16 Making a Call with Speakerphone 21 Making an Intercom Call 22 Manual Channel Selection 17 Memory 24 Memory Full 34, 36 Message Playback from Base Unit 33 Messages Indicator 33 Mute 19 P Paging the Cordless Handset 19 Parts Checklist 8 R Receiving a Call with Speakerphone 21 Receiving an Incoming Telephone... from the Handset 35 Security Code 12 Service 46 Setting Day/Time 14 Speakerphone 17, 20 Speakerphone Operation 21 Storing a Name and Number in Memory 24 Storing a Redial Number 25 Switching Between Speakerphone and Handset 22 T Telephone Jack Requirements 8 Telephone Set Up 11 Telephone ...
... 16 Making a Call with Speakerphone 21 Making an Intercom Call 22 Manual Channel Selection 17 Memory 24 Memory Full 34, 36 Message Playback from Base Unit 33 Messages Indicator 33 Mute 19 P Paging the Cordless Handset 19 Parts Checklist 8 R Receiving a Call with Speakerphone 21 Receiving an Incoming Telephone... from the Handset 35 Security Code 12 Service 46 Setting Day/Time 14 Speakerphone 17, 20 Speakerphone Operation 21 Storing a Name and Number in Memory 24 Storing a Redial Number 25 Switching Between Speakerphone and Handset 22 T Telephone Jack Requirements 8 Telephone Set Up 11 Telephone ...
User Guide
Page 47
... to you by the Exchange Center for service not covered by the warranty. • Insure your warranty does not cover: • Customer instruction. (Your Owner's Manual provides information regarding operating instructions and user controls. c/o Thomson 11721 B Alameda Ave. If you purchased your unit. Socorro, Texas 79927 • Pay any cables, etc...
... to you by the Exchange Center for service not covered by the warranty. • Insure your warranty does not cover: • Customer instruction. (Your Owner's Manual provides information regarding operating instructions and user controls. c/o Thomson 11721 B Alameda Ave. If you purchased your unit. Socorro, Texas 79927 • Pay any cables, etc...


