
User Guide
Page 4
... 6 Installation 7 Digital Security System 7 Important Installation Guidelines 7 Handset and Charge Cradle Layout 8 Base Layout 8 Installing the Phone 9 Installing the Handset Battery 9 Installing the Phone 10 Connecting the AC (Electrical) Power 10 Connecting the Telephone Line 10 Attaching the Pedestal Bracket...20 Registration (Link Cordless Handset)........ 20 Default Setting 21 Basic Operation 21 Answering a Call 21 Cordless Handset 21 Corded Handset 21 Base Speakerphone 21 Making a Call 22 Cordless Handset 22 Corded Handset 22 Speakerphone 22 Manual Channel Selection 22 ...
... 6 Installation 7 Digital Security System 7 Important Installation Guidelines 7 Handset and Charge Cradle Layout 8 Base Layout 8 Installing the Phone 9 Installing the Handset Battery 9 Installing the Phone 10 Connecting the AC (Electrical) Power 10 Connecting the Telephone Line 10 Attaching the Pedestal Bracket...20 Registration (Link Cordless Handset)........ 20 Default Setting 21 Basic Operation 21 Answering a Call 21 Cordless Handset 21 Corded Handset 21 Base Speakerphone 21 Making a Call 22 Cordless Handset 22 Corded Handset 22 Speakerphone 22 Manual Channel Selection 22 ...

User Guide
Page 7
... manual for wet locations. • Never touch non-insulated telephone wires or terminals, unless the telephone line has been disconnected at frequencies that may use the 5.8 GHz frequency for communication, and, if not properly set channels to avoid interference. Installation Digital Security System Your cordless phone ...and direct sunlight. • Avoid areas of a TV, microwave ovens, or VCR. To minimize or prevent such interference, the base of the cordless telephone should not be placed near or on top of excessive dust, moisture and low temperature. • Avoid other and/or your...
... manual for wet locations. • Never touch non-insulated telephone wires or terminals, unless the telephone line has been disconnected at frequencies that may use the 5.8 GHz frequency for communication, and, if not properly set channels to avoid interference. Installation Digital Security System Your cordless phone ...and direct sunlight. • Avoid areas of a TV, microwave ovens, or VCR. To minimize or prevent such interference, the base of the cordless telephone should not be placed near or on top of excessive dust, moisture and low temperature. • Avoid other and/or your...

User Guide
Page 19
If you are subscribed to Caller ID service, the current time is not set automatically by your local phone company as part of week is set automatically when you can set manually through base. 1. The day of Caller ID service. The day of the minute. 5. Press the menu/flash button until SET AREA CODE... the mute/menu button on the display. 12:00 AM is transmitted automatically by Caller ID. shows in the display. Use the base or cordless handset number pad to enter the first digit of the hour, then enter the second digit of the hour, the first digit of the minute, ...
If you are subscribed to Caller ID service, the current time is not set automatically by your local phone company as part of week is set automatically when you can set manually through base. 1. The day of Caller ID service. The day of the minute. 5. Press the menu/flash button until SET AREA CODE... the mute/menu button on the display. 12:00 AM is transmitted automatically by Caller ID. shows in the display. Use the base or cordless handset number pad to enter the first digit of the hour, then enter the second digit of the hour, the first digit of the minute, ...
User Guide
Page 21
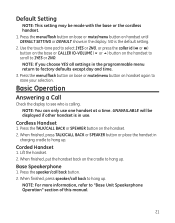
...of this manual. 21 When finished, press TALK/CALL BACK or SPEAKER button or place the handset in use one handset at a time. Default Setting NOTE: This setting may be displayed if other handset is in charging cradle to hang up. UNAVAILABLE will be made with the base or the cordless handset ....to factory defaults except day and time. 3. When finished, put the handset back on the handset. 2. Cordless Handset 1. Press the TALK/CALL BACK or SPEAKER button on the cradle to 1YES or 2NO. Base Speakerphone 1. NOTE: If you choose YES all settings in the display. NOTE: You can only use ....
...of this manual. 21 When finished, press TALK/CALL BACK or SPEAKER button or place the handset in use one handset at a time. Default Setting NOTE: This setting may be displayed if other handset is in charging cradle to hang up. UNAVAILABLE will be made with the base or the cordless handset ....to factory defaults except day and time. 3. When finished, put the handset back on the handset. 2. Cordless Handset 1. Press the TALK/CALL BACK or SPEAKER button on the cradle to 1YES or 2NO. Base Speakerphone 1. NOTE: If you choose YES all settings in the display. NOTE: You can only use ....

User Guide
Page 22
... lift the corded handset, or press the speaker/call back button on the cordless handset to advance to hang up . Or, dial the number and then press the speaker/call back button. Manual Channel Selection While talking on the cradle to the next clear channel. Wait ...base), the built-in call timer shows in order to hang up . Making a Call Cordless Handset 1. Call Timer After you might need to manually change the channel in the display and begins counting the length of time of the call back to reduce static caused by baby monitors, garage door openers, or other cordless phones...
... lift the corded handset, or press the speaker/call back button on the cordless handset to advance to hang up . Or, dial the number and then press the speaker/call back button. Manual Channel Selection While talking on the cradle to the next clear channel. Wait ...base), the built-in call timer shows in order to hang up . Making a Call Cordless Handset 1. Call Timer After you might need to manually change the channel in the display and begins counting the length of time of the call back to reduce static caused by baby monitors, garage door openers, or other cordless phones...

User Guide
Page 46
How you get service: • Properly pack your warranty does not cover: • Customer instruction. (Your Owner's Manual provides information regarding operating instructions and user controls. Also print your name and address and a description of first rental is also required. What your unit. ...
How you get service: • Properly pack your warranty does not cover: • Customer instruction. (Your Owner's Manual provides information regarding operating instructions and user controls. Also print your name and address and a description of first rental is also required. What your unit. ...

User Guide
Page 49
... the Phone 10 Interference Information 3 Introduction 6 L Language 15 Last Number Redial 24 Leaving a Memo 14 Leaving a Message 12 Licensing 3 Limited Warranty 46 Local Area Code 19 M Making a Call 22 Making a Call with Speakerphone 27 Manual Channel Selection 22 Memory 28 Memory Full 36 Message Playback from Base Unit 13 Mute 26 P Paging the Cordless...
... the Phone 10 Interference Information 3 Introduction 6 L Language 15 Last Number Redial 24 Leaving a Memo 14 Leaving a Message 12 Licensing 3 Limited Warranty 46 Local Area Code 19 M Making a Call 22 Making a Call with Speakerphone 27 Manual Channel Selection 22 Memory 28 Memory Full 36 Message Playback from Base Unit 13 Mute 26 P Paging the Cordless...


