
Hardware Installation Guide
Page 5
Installing a hard drive is a process consisting of seven procedures that must be done in sequence: 1 Prepare for Installation This guide provides the information you need to install a replacement or new hard drive. 1 Preparing for installation. 2 Remove an existing drive (if applicable). 3 Set the jumpers on the new drive (if applicable). 4 Install the new drive. 5 Set up the new drive. 6 Partition the new drive (manual setup). 7 Format the new drive (manual setup). 1 This guide covers SCSI and IDE hard drives.
Installing a hard drive is a process consisting of seven procedures that must be done in sequence: 1 Prepare for Installation This guide provides the information you need to install a replacement or new hard drive. 1 Preparing for installation. 2 Remove an existing drive (if applicable). 3 Set the jumpers on the new drive (if applicable). 4 Install the new drive. 5 Set up the new drive. 6 Partition the new drive (manual setup). 7 Format the new drive (manual setup). 1 This guide covers SCSI and IDE hard drives.
Hardware Installation Guide
Page 7
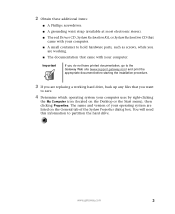
... 3 You will need this information to the Gateway Web site (www.support.gateway.com) and print the appropriate document before starting the installation procedure. 3 If you are replacing a working . ■ The documentation that you want to save. 4 Determine which operating system your computer uses by right-clicking the My...Restoration CD that came with your computer. ■ A small container to hold hardware parts, such as screws, while you are working hard drive, back up any files that came with your computer. Important If you do not have printed documentation, go to partition the...
... 3 You will need this information to the Gateway Web site (www.support.gateway.com) and print the appropriate document before starting the installation procedure. 3 If you are replacing a working . ■ The documentation that you want to save. 4 Determine which operating system your computer uses by right-clicking the My...Restoration CD that came with your computer. ■ A small container to hold hardware parts, such as screws, while you are working hard drive, back up any files that came with your computer. Important If you do not have printed documentation, go to partition the...

Hardware Installation Guide
Page 9
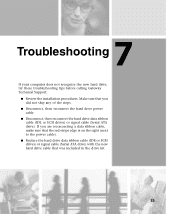
If you are replacing a drive, make note of the jumper settings on page 9. Tips & Tricks See the documentation that came with your computer for more information about your computer ... cable before opening the case. Warning Avoid exposure to "Configuring the New Drive" on the old drive so you are replacing an existing hard drive. Tips & Tricks If you are adding a new hard drive, go to dangerous electrical voltages and moving parts by turning off your specific computer case. 2 Removing an Existing Drive...
If you are replacing a drive, make note of the jumper settings on page 9. Tips & Tricks See the documentation that came with your computer for more information about your computer ... cable before opening the case. Warning Avoid exposure to "Configuring the New Drive" on the old drive so you are replacing an existing hard drive. Tips & Tricks If you are adding a new hard drive, go to dangerous electrical voltages and moving parts by turning off your specific computer case. 2 Removing an Existing Drive...

Hardware Installation Guide
Page 30
To install the additional fan into a tower case. Chapter 4: Installing the New Drive Installing the additional fan If you are adding a drive that came with your new half-height SCSI hard drive into the tower case using the screws that is not a half-height SCSI hard drive, or if you are installing a new half-height SCSI hard drive into a tower case: 1 Install the fan that came with the fan. 26 www.gateway.com You only need to perform this procedure if you are replacing a hard drive, go to "To connect the drive cables:" on page 28.
To install the additional fan into a tower case. Chapter 4: Installing the New Drive Installing the additional fan If you are adding a drive that came with your new half-height SCSI hard drive into the tower case using the screws that is not a half-height SCSI hard drive, or if you are installing a new half-height SCSI hard drive into a tower case: 1 Install the fan that came with the fan. 26 www.gateway.com You only need to perform this procedure if you are replacing a hard drive, go to "To connect the drive cables:" on page 28.

Hardware Installation Guide
Page 37
...either Serial ATA host adapter. 4 Go to the next step. - To complete drive installation: 1 Replace your computer, the hard drive installation procedure is complete. See the documentation that came with your computer for instructions on replacing your computer case cover. 2 Reconnect the external cables, then plug in the power cord. 3 Turn...Serial ATA drive, connect the signal cable to one of the host adapter connectors on page 33. OR - Connecting the drive cables If you replaced the master (boot) drive and the Windows® desktop appears after restarting your computer case cover. www...
...either Serial ATA host adapter. 4 Go to the next step. - To complete drive installation: 1 Replace your computer, the hard drive installation procedure is complete. See the documentation that came with your computer for instructions on replacing your computer case cover. 2 Reconnect the external cables, then plug in the power cord. 3 Turn...Serial ATA drive, connect the signal cable to one of the host adapter connectors on page 33. OR - Connecting the drive cables If you replaced the master (boot) drive and the Windows® desktop appears after restarting your computer case cover. www...

Hardware Installation Guide
Page 38
... with your computer to reinstall the drivers. Tips & Tricks If you do not see the Windows desktop, or you replaced or added an additional slave drive, go to www.support.gateway.com to download any of your computer's devices. If you find any yellow circles, use the red Drivers CD, ... or if the new hard drive does not seem to be working correctly, go to "Partitioning the new drive" on page 53. 34 www.gateway.com If you want to create a customized partition, go to "Troubleshooting" on page 41. - OR - Chapter 4: Installing the New Drive If you replaced a master (boot) drive and...
... with your computer to reinstall the drivers. Tips & Tricks If you do not see the Windows desktop, or you replaced or added an additional slave drive, go to www.support.gateway.com to download any of your computer's devices. If you find any yellow circles, use the red Drivers CD, ... or if the new hard drive does not seem to be working correctly, go to "Partitioning the new drive" on page 53. 34 www.gateway.com If you want to create a customized partition, go to "Troubleshooting" on page 41. - OR - Chapter 4: Installing the New Drive If you replaced a master (boot) drive and...

Hardware Installation Guide
Page 39
If you start your computer, go to "Setting up the New Drive Manually" on page 36. 5 Setting Up the New Drive Automatically If you replaced a master (boot) drive and you do not see the Windows desktop when you replaced or added an additional slave drive, go to "Setting up the hard drive" on page 41. 35
If you start your computer, go to "Setting up the New Drive Manually" on page 36. 5 Setting Up the New Drive Automatically If you replaced a master (boot) drive and you do not see the Windows desktop when you replaced or added an additional slave drive, go to "Setting up the hard drive" on page 41. 35

Hardware Installation Guide
Page 51
...created appears, the total size of the new hard drive using Windows NT NTFS: 1 Click Start, Programs, Administrative Tools, then click Disk Administrator. 2 Select the drive you that all available drive space has been partitioned. 6 Press ESC. www.gateway.com 47 FDISK closes. 8 Go to ...to FAT16 without losing the file information on your computer verifies the drive integrity. Creating an NTFS partition in Windows NT 4.0 If you replaced a failed drive and have Windows NT 4.0 on the drive. To create an extended partition using FAT16. The Create Extended DOS Partition ...
...created appears, the total size of the new hard drive using Windows NT NTFS: 1 Click Start, Programs, Administrative Tools, then click Disk Administrator. 2 Select the drive you that all available drive space has been partitioned. 6 Press ESC. www.gateway.com 47 FDISK closes. 8 Go to ...to FAT16 without losing the file information on your computer verifies the drive integrity. Creating an NTFS partition in Windows NT 4.0 If you replaced a failed drive and have Windows NT 4.0 on the drive. To create an extended partition using FAT16. The Create Extended DOS Partition ...

Hardware Installation Guide
Page 52
... Partition when prompted for a partition type. 8 Go to create an extended partition so logical drives can be assigned. However, you replaced a hard drive and have Windows XP on page 50. 48 www.gateway.com The Computer Management window opens. 4 Double-click Disk Management. 5 Right-click the shaded, unallocated space box. 6 Click New Partition...
... Partition when prompted for a partition type. 8 Go to create an extended partition so logical drives can be assigned. However, you replaced a hard drive and have Windows XP on page 50. 48 www.gateway.com The Computer Management window opens. 4 Double-click Disk Management. 5 Right-click the shaded, unallocated space box. 6 Click New Partition...

Hardware Installation Guide
Page 54
...computer. The Main menu opens. 3 Close the Main menu. 4 Type format x: /s where x is the letter of the hard drive you have just installed, then press ENTER. 50 www.gateway.com Formatting a primary partition using Windows" on a boot drive: 1 Insert the System Restoration Kit CD or the System Restoration ...or DVD drive. Chapter 6: Setting up the New Drive Manually Formatting the New Drive If you replaced your master (boot) drive, follow the instructions in this section to format your replacement hard drive or to make your CD or DVD drive the primary boot device in the BIOS Setup...
...computer. The Main menu opens. 3 Close the Main menu. 4 Type format x: /s where x is the letter of the hard drive you have just installed, then press ENTER. 50 www.gateway.com Formatting a primary partition using Windows" on a boot drive: 1 Insert the System Restoration Kit CD or the System Restoration ...or DVD drive. Chapter 6: Setting up the New Drive Manually Formatting the New Drive If you replaced your master (boot) drive, follow the instructions in this section to format your replacement hard drive or to make your CD or DVD drive the primary boot device in the BIOS Setup...
Hardware Installation Guide
Page 57
... red-stripe edge is on the right (next to the power cable). ■ Replace the hard drive data ribbon cable (IDE or SCSI drives) or signal cable (Serial ATA drive) with the new hard drive cable that you did not skip any of the steps. ■ Disconnect, ...then reconnect the hard drive power cable. ■ Disconnect, then reconnect the hard drive data ribbon cable (IDE or SCSI drives) or signal cable (Serial ATA drive). 7 Troubleshooting If your computer does not recognize the new hard drive, try these troubleshooting tips before calling Gateway Technical Support: ■ Review...
... red-stripe edge is on the right (next to the power cable). ■ Replace the hard drive data ribbon cable (IDE or SCSI drives) or signal cable (Serial ATA drive) with the new hard drive cable that you did not skip any of the steps. ■ Disconnect, ...then reconnect the hard drive power cable. ■ Disconnect, then reconnect the hard drive data ribbon cable (IDE or SCSI drives) or signal cable (Serial ATA drive). 7 Troubleshooting If your computer does not recognize the new hard drive, try these troubleshooting tips before calling Gateway Technical Support: ■ Review...
User Guide
Page 7
... for your computer 162 Protecting your computer from viruses 164 Managing hard drive space 167 Checking hard drive space 167 Using Disk Cleanup 168 Checking the hard drive for errors 169 Defragmenting the hard drive 171 Backing up files 173 Using the Scheduled Task Wizard ... the case 196 Replacing the side panel 196 Replacing the front bezel 197 Adding or replacing a CD, DVD, or diskette drive 198 Replacing the hard drive 203 Adding or replacing add-in cards 206 Installing memory 208 Replacing the system battery 212 Replacing the power supply 214 Replacing the system board ...
... for your computer 162 Protecting your computer from viruses 164 Managing hard drive space 167 Checking hard drive space 167 Using Disk Cleanup 168 Checking the hard drive for errors 169 Defragmenting the hard drive 171 Backing up files 173 Using the Scheduled Task Wizard ... the case 196 Replacing the side panel 196 Replacing the front bezel 197 Adding or replacing a CD, DVD, or diskette drive 198 Replacing the hard drive 203 Adding or replacing add-in cards 206 Installing memory 208 Replacing the system battery 212 Replacing the power supply 214 Replacing the system board ...

User Guide
Page 17
... are running temporarily during a total power failure. Accessories Laser printers and cartridges are more expensive, but usually they should, try replacing your existing hard drive with a larger drive. Laser printers are printing large documents. A UPS uses a battery to back up an uninterruptible power... supply" on page 203. www.gateway.com 9 If you are better than inkjet printers. For more slowly than you think they ...
... are running temporarily during a total power failure. Accessories Laser printers and cartridges are more expensive, but usually they should, try replacing your existing hard drive with a larger drive. Laser printers are printing large documents. A UPS uses a battery to back up an uninterruptible power... supply" on page 203. www.gateway.com 9 If you are better than inkjet printers. For more slowly than you think they ...

User Guide
Page 211
Replacing the hard drive Replacing the hard drive Use these instructions to replace the hard drive. To replace the hard drive: 1 Remove the side panel by following the instructions in "Removing the side panel" on page 192. 2 Disconnect the drive cables, noting their locations and orientation. (You will reconnect the cables after you install the new drive.) See the drive documentation for further instructions. Data ribbon cable Power cable www.gateway.com 203
Replacing the hard drive Replacing the hard drive Use these instructions to replace the hard drive. To replace the hard drive: 1 Remove the side panel by following the instructions in "Removing the side panel" on page 192. 2 Disconnect the drive cables, noting their locations and orientation. (You will reconnect the cables after you install the new drive.) See the drive documentation for further instructions. Data ribbon cable Power cable www.gateway.com 203
User Guide
Page 213
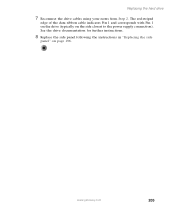
www.gateway.com 205 See the drive documentation for further instructions. 8 Replace the side panel following the instructions in "Replacing the side panel" on the side closest to the power supply connection). Replacing the hard drive 7 Reconnect the drive cables using your notes from Step 2. The red-striped edge of the data ribbon cable indicates Pin 1 and corresponds with Pin 1 on the drive (typically on page 196.
www.gateway.com 205 See the drive documentation for further instructions. 8 Replace the side panel following the instructions in "Replacing the side panel" on the side closest to the power supply connection). Replacing the hard drive 7 Reconnect the drive cables using your notes from Step 2. The red-striped edge of the data ribbon cable indicates Pin 1 and corresponds with Pin 1 on the drive (typically on page 196.
User Guide
Page 222
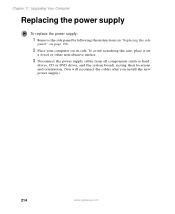
To avoid scratching the case, place it on its side. Chapter 11: Upgrading Your Computer Replacing the power supply To replace the power supply: 1 Remove the side panel by following the instructions in "Replacing the side panel" on page 196. 2 Place your computer on a towel or other non-abrasive surface. 3 Disconnect the power supply cables from all components (such as hard drives, CD or DVD drives, and the system board), noting their locations and orientation. (You will reconnect the cables after you install the new power supply.) 214 www.gateway.com
To avoid scratching the case, place it on its side. Chapter 11: Upgrading Your Computer Replacing the power supply To replace the power supply: 1 Remove the side panel by following the instructions in "Replacing the side panel" on page 196. 2 Place your computer on a towel or other non-abrasive surface. 3 Disconnect the power supply cables from all components (such as hard drives, CD or DVD drives, and the system board), noting their locations and orientation. (You will reconnect the cables after you install the new power supply.) 214 www.gateway.com
User Guide
Page 234
For more information about connecting the hard cables, see "Replacing the hard drive" on page 203. For more information about connecting the hard cables, see "Replacing the hard drive" on page 203. ■ If your computer has been subjected to static electricity or physical shock, you may be accessed... poster to make sure that your account with your ISP technical support for errors" on the hard drive. For more information, see "Checking the hard drive for help. 226 www.gateway.com To enter the BIOS Setup utility, restart your computer, then press and hold F1 while...
For more information about connecting the hard cables, see "Replacing the hard drive" on page 203. For more information about connecting the hard cables, see "Replacing the hard drive" on page 203. ■ If your computer has been subjected to static electricity or physical shock, you may be accessed... poster to make sure that your account with your ISP technical support for errors" on the hard drive. For more information, see "Checking the hard drive for help. 226 www.gateway.com To enter the BIOS Setup utility, restart your computer, then press and hold F1 while...
User Guide
Page 265
... Service Accounting 241 Sales 241 Warranty 241 customizing 119 cutting files and folders 41, 53 text and graphics 53 D default printer 236 defragmenting hard drive 171 deleting files and folders 33, 43, 44, 53, 168 desktop 32 adding icons 35 adding shortcuts 35 adjusting settings 120 changing... keys 19 Disk Cleanup 168 Disk Defragmenter 171 diskette inserting 116 diskette drive adding 198 eject button 116 locating 3 locating drive 3 replacing 198 using 116 display changing resolution 122 using screen saver 126 documentation Gateway Web site 28 help 26 Help and Support 26 online help 27 257
... Service Accounting 241 Sales 241 Warranty 241 customizing 119 cutting files and folders 41, 53 text and graphics 53 D default printer 236 defragmenting hard drive 171 deleting files and folders 33, 43, 44, 53, 168 desktop 32 adding icons 35 adding shortcuts 35 adjusting settings 120 changing... keys 19 Disk Cleanup 168 Disk Defragmenter 171 diskette inserting 116 diskette drive adding 198 eject button 116 locating 3 locating drive 3 replacing 198 using 116 display changing resolution 122 using screen saver 126 documentation Gateway Web site 28 help 26 Help and Support 26 online help 27 257

User Guide
Page 266
...171 diskette 3, 116, 198 DVD 3, 84, 198 DVD/CD-RW 3, 84, 198 DVD-R/-RW/+R/+RW/CD-RW 3, 84, 198 hard drive 203 identifying drive types 84 media card reader 3 replacing 198, 203 sharing 140 troubleshooting 222, 225 types 84 viewing contents 38 viewing files and folders 38 DSL modem 56, 144...112 creating video 114 inserting 85 playing 95 troubleshooting 222 DVD drive activity indicator 85 adding 198 eject button 85 identifying 84 locating drive 3 replacing 198 testing 112 testing speed 112 troubleshooting 222 using 84 DVD-R/-RW/+R/+RW/CD-RW drive activity indicator 85 adding 198 eject button 85 ...
...171 diskette 3, 116, 198 DVD 3, 84, 198 DVD/CD-RW 3, 84, 198 DVD-R/-RW/+R/+RW/CD-RW 3, 84, 198 hard drive 203 identifying drive types 84 media card reader 3 replacing 198, 203 sharing 140 troubleshooting 222, 225 types 84 viewing contents 38 viewing files and folders 38 DSL modem 56, 144...112 creating video 114 inserting 85 playing 95 troubleshooting 222 DVD drive activity indicator 85 adding 198 eject button 85 identifying 84 locating drive 3 replacing 198 testing 112 testing speed 112 troubleshooting 222 using 84 DVD-R/-RW/+R/+RW/CD-RW drive activity indicator 85 adding 198 eject button 85 ...
User Guide
Page 267
... 44, 46 viewing list 38 fragmentation 171 front bezel removing 197 replacing 197 function keys 19 G game multi-player 141 Gateway model number 6 serial number 6 Technical Support 240 Web address 28 Web site 28 gateway dial-up server 231 gigabit Ethernet 143 H hard drive backing up files 173 checking for errors 169 checking for...
... 44, 46 viewing list 38 fragmentation 171 front bezel removing 197 replacing 197 function keys 19 G game multi-player 141 Gateway model number 6 serial number 6 Technical Support 240 Web address 28 Web site 28 gateway dial-up server 231 gigabit Ethernet 143 H hard drive backing up files 173 checking for errors 169 checking for...


