Complete Owner's Guide (English)
Page 2
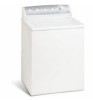
... situations that may occur. Hydrogen gas is flammable; Table of Contents Product Registration 2 Important Safety Instructions 2-3 Washing Procedures 4-5 Operating Instructions 6-7 Stain Removal Guide 8-9 Care and Cleaning 9 Winterizing 10 Common Washing Problems 10-11 Avoid Service checklist 11-12 Warranty 13 Notes 14 Français 15 Product Record Read and Save These Instructions Record Your Model and Serial Numbers The model and serial numbers of your dryer. Common sense and caution must...
... situations that may occur. Hydrogen gas is flammable; Table of Contents Product Registration 2 Important Safety Instructions 2-3 Washing Procedures 4-5 Operating Instructions 6-7 Stain Removal Guide 8-9 Care and Cleaning 9 Winterizing 10 Common Washing Problems 10-11 Avoid Service checklist 11-12 Warranty 13 Notes 14 Français 15 Product Record Read and Save These Instructions Record Your Model and Serial Numbers The model and serial numbers of your dryer. Common sense and caution must...
Complete Owner's Guide (English)
Page 3
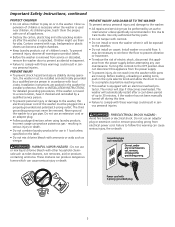
... codes. Install washer on product labels. • Before the washer is moved to a new location, have it checked and reinstalled by a qualified service person. • To prevent personal injury or damage to the washer, the electrical power cord of up to 30 minutes, if the washer has not been manually turned off during operation, the washer must never be plugged into the washer while parts are packed in 1 load...
... codes. Install washer on product labels. • Before the washer is moved to a new location, have it checked and reinstalled by a qualified service person. • To prevent personal injury or damage to the washer, the electrical power cord of up to 30 minutes, if the washer has not been manually turned off during operation, the washer must never be plugged into the washer while parts are packed in 1 load...

Complete Owner's Guide (English)
Page 4
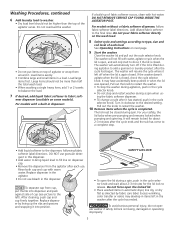
...;ush the dispenser. • Do not use powdered bleach in the bleach dispenser. Add powdered bleach to bleach dispenser. Follow detergent manufacturer's directions. particles of fiberglass left front corner under the lid: • Empty pockets. • Brush off lint and dirt. fabrics in left in the drum may transfer to 5 If desired, add liquid bleach to the empty tub. 4 The amount required depends on type of detergent, load size and soil level, and water hardness...
...;ush the dispenser. • Do not use powdered bleach in the bleach dispenser. Add powdered bleach to bleach dispenser. Follow detergent manufacturer's directions. particles of fiberglass left front corner under the lid: • Empty pockets. • Brush off lint and dirt. fabrics in left in the drum may transfer to 5 If desired, add liquid bleach to the empty tub. 4 The amount required depends on type of detergent, load size and soil level, and water hardness...
Complete Owner's Guide (English)
Page 5
..., add liquid fabric softener to fabric soft- Replace dispenser by fabric care label. See Operating Instructions on top of fabric softener occurs, clean with warm water. Turn it has started, push in the agitator. • Do not use . DO NOT REMOVE SERVICE CAP FOUND INSIDE THE AGITATOR POST. It will automatically turn off when the lid is open the locked lid. • Place washed items in the cycle selector knob. • Do not stop . • Add liquid softener to the dispenser, following fabric softener label directions. Do...
..., add liquid fabric softener to fabric soft- Replace dispenser by fabric care label. See Operating Instructions on top of fabric softener occurs, clean with warm water. Turn it has started, push in the agitator. • Do not use . DO NOT REMOVE SERVICE CAP FOUND INSIDE THE AGITATOR POST. It will automatically turn off when the lid is open the locked lid. • Place washed items in the cycle selector knob. • Do not stop . • Add liquid softener to the dispenser, following fabric softener label directions. Do...
Complete Owner's Guide (English)
Page 6
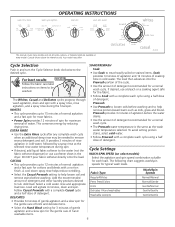
... in cold water. OPERATING INSTRUCTIONS This manual covers many models and not all cycles, options, or features listed are available on select models) Select the agitation and spin speed combination suitable for each load. For best results Follow the fabric care label instructions on items to remove excess detergent and soil. The Whites, Casual and Delicates cycles progress through wash agitation, drain and spin with a spray rinse, rinse agitation, and a spray rinse during spin. • If desired, add liquid fabric softener...
... in cold water. OPERATING INSTRUCTIONS This manual covers many models and not all cycles, options, or features listed are available on select models) Select the agitation and spin speed combination suitable for each load. For best results Follow the fabric care label instructions on items to remove excess detergent and soil. The Whites, Casual and Delicates cycles progress through wash agitation, drain and spin with a spray rinse, rinse agitation, and a spray rinse during spin. • If desired, add liquid fabric softener...
Complete Owner's Guide (English)
Page 7
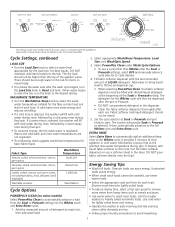
... wash and Extra Rinse cycles. 1. Cycle Settings, continued LOAD SIZE • Turn the Load Size knob to wash most loads. Select appropriate Wash/Rinse Temperature, Load Size, and Wash/Spin Speed. 3. Oversize loads use extra energy. Use cold water for reference only. EXTRA RINSE Select Extra Rinse to automatically add an additional deep rinse to avoid rewashing. 7 Add water to bring liquid level to fill line on select models) Select PowerPlus Clean to heavily soiled and white loads. Add items loosely to start. Fill fabric softener dispenser with cold water during rinse...
... wash and Extra Rinse cycles. 1. Cycle Settings, continued LOAD SIZE • Turn the Load Size knob to wash most loads. Select appropriate Wash/Rinse Temperature, Load Size, and Wash/Spin Speed. 3. Oversize loads use extra energy. Use cold water for reference only. EXTRA RINSE Select Extra Rinse to automatically add an additional deep rinse to avoid rewashing. 7 Add water to bring liquid level to fill line on select models) Select PowerPlus Clean to heavily soiled and white loads. Add items loosely to start. Fill fabric softener dispenser with cold water during rinse...
Complete Owner's Guide (English)
Page 8
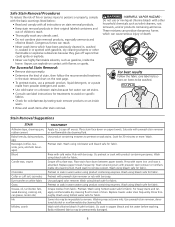
... with bar soap. Use packaged color remover. Scrape residue from powder detergent and water. Washing may be washed. • Use cold water on unknown stains because hot water can explode on the next page. • To pretreat stains, use highly flammable solvents, such as toilet cleaners, rust removers, acid or products containing ammonia. Wash using cold water and bleach safe for fabric. Rinse thoroughly. HARMFUL VAPOR HAZARD Do not use or mix liquid chlorine bleach with...
... with bar soap. Use packaged color remover. Scrape residue from powder detergent and water. Washing may be washed. • Use cold water on unknown stains because hot water can explode on the next page. • To pretreat stains, use highly flammable solvents, such as toilet cleaners, rust removers, acid or products containing ammonia. Wash using cold water and bleach safe for fabric. Rinse thoroughly. HARMFUL VAPOR HAZARD Do not use or mix liquid chlorine bleach with...
Complete Owner's Guide (English)
Page 9
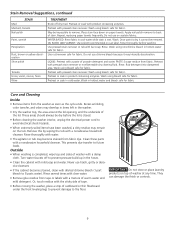
..., replacing paper towels frequently. Wash. Rub detergent into dampened area. Clean these parts with a damp cloth. They can label. Wash using nonchlorine bleach in hottest water and bleach safe for fabric. May be removed. Place stain face down on top of the lid. WATER BASED: Rinse fabric in cold water. Pretreat with water. • The agitator or tub may intensify discoloration. Rinse thoroughly with prewash stain remover. Wash using bleach safe for fabric Care and Cleaning Inside • Remove items from fabric. Rinse...
..., replacing paper towels frequently. Wash. Rub detergent into dampened area. Clean these parts with a damp cloth. They can label. Wash using nonchlorine bleach in hottest water and bleach safe for fabric. May be removed. Place stain face down on top of the lid. WATER BASED: Rinse fabric in cold water. Pretreat with water. • The agitator or tub may intensify discoloration. Rinse thoroughly with prewash stain remover. Wash using bleach safe for fabric Care and Cleaning Inside • Remove items from fabric. Rinse...
Complete Owner's Guide (English)
Page 10
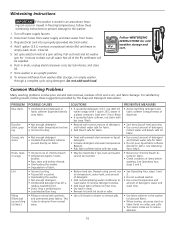
...; Load washed too long. • Pilling is due to drain out all water. To remove antifreeze from washer after storage, run empty washer through a complete cycle using correct water temperature, water level, and amount of detergent. • Add nonprecipitating water conditioner to wash water to remove detergent residue. • Add liquid fabric softener to final rinse. • Dry load in dryer. • Remove lint with synthetic and permanent press fabrics. PREVENTIVE MEASURES • Avoid overfilling detergent and fabric softener compartments of dispenser...
...; Load washed too long. • Pilling is due to drain out all water. To remove antifreeze from washer after storage, run empty washer through a complete cycle using correct water temperature, water level, and amount of detergent. • Add nonprecipitating water conditioner to wash water to remove detergent residue. • Add liquid fabric softener to final rinse. • Dry load in dryer. • Remove lint with synthetic and permanent press fabrics. PREVENTIVE MEASURES • Avoid overfilling detergent and fabric softener compartments of dispenser...
Complete Owner's Guide (English)
Page 11
... washer is usually normal. Vibrating noise. Washer is normal. Do not overload washer. lation. ener using hottest water safe for wash load. • Reduce load size. • Rinse in tub. It may save both time and expense. Foreign objects such as cycle is completed. • Use liquid fabric softener. • Select correct wash cycle. • Use correct amount of detergent. • Wash synthetics frequently using casual cycle. • Increase detergent. • Add bleach safe for fabric. • Do not use non- drum. If sound continues, washer...
... washer is usually normal. Vibrating noise. Washer is normal. Do not overload washer. lation. ener using hottest water safe for wash load. • Reduce load size. • Rinse in tub. It may save both time and expense. Foreign objects such as cycle is completed. • Use liquid fabric softener. • Select correct wash cycle. • Use correct amount of detergent. • Wash synthetics frequently using casual cycle. • Increase detergent. • Add bleach safe for fabric. • Do not use non- drum. If sound continues, washer...
Complete Owner's Guide (English)
Page 12
... with water, agitate or spin when the lid is open, and will automatically restart after a cool down period of balance. Water supply is kinked or clogged. Avoid running water elsewhere while washer is complete. Straighten hoses. Adjust water heater as necessary. Clean and straighten the drain hose. Unclog drain pipes. wash cycle is filling. Residue left in the house. Heavily soiled items. Wipe drum with water level/load size control). Water does not enter Washer lid is...
... with water, agitate or spin when the lid is open, and will automatically restart after a cool down period of balance. Water supply is kinked or clogged. Avoid running water elsewhere while washer is complete. Straighten hoses. Adjust water heater as necessary. Clean and straighten the drain hose. Unclog drain pipes. wash cycle is filling. Residue left in the house. Heavily soiled items. Wipe drum with water level/load size control). Water does not enter Washer lid is...
Complete Owner's Guide (English)
Page 13
.... use or used and maintained in accordance with original serial numbers that has been transferred from your appliance or to instruct you how to change or add to another party or removed outside the USA or Canada. 3. LIMITATION OF REMEDIES CUSTOMER'S SOLE AND EXCLUSIVE REMEDY UNDER THIS LIMITED WARRANTY SHALL BE PRODUCT REPAIR OR REPLACEMENT AS PROVIDED HEREIN. This warranty only applies in a commercial setting...
.... use or used and maintained in accordance with original serial numbers that has been transferred from your appliance or to instruct you how to change or add to another party or removed outside the USA or Canada. 3. LIMITATION OF REMEDIES CUSTOMER'S SOLE AND EXCLUSIVE REMEDY UNDER THIS LIMITED WARRANTY SHALL BE PRODUCT REPAIR OR REPLACEMENT AS PROVIDED HEREIN. This warranty only applies in a commercial setting...
Installation Instructions (All Languages)
Page 1
P/N 137153100A (0903) Installation Instructions Washer Instructions d'Installation Laveuse Printed in U.S.A.
P/N 137153100A (0903) Installation Instructions Washer Instructions d'Installation Laveuse Printed in U.S.A.
Installation Instructions (All Languages)
Page 2
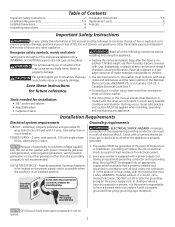
..., bedspreads, or plastic sheets can result in doubt, call a licensed electrician. Table of Contents Important Safety Instructions 2 Installation Requirements 2-3 Installed Dimensions 4 Unpacking Instructions 4 Installation Instructions 5-6 Replacement parts 6 Français 7 Important Safety Instructions For your washer is equipped with a power supply cord having an equipment-grounding conductor and a grounding plug, the plug MUST be plugged into an appropriate, copper wired receptacle that is properly installed and grounded in accordance...
..., bedspreads, or plastic sheets can result in doubt, call a licensed electrician. Table of Contents Important Safety Instructions 2 Installation Requirements 2-3 Installed Dimensions 4 Unpacking Instructions 4 Installation Instructions 5-6 Replacement parts 6 Français 7 Important Safety Instructions For your washer is equipped with a power supply cord having an equipment-grounding conductor and a grounding plug, the plug MUST be plugged into an appropriate, copper wired receptacle that is properly installed and grounded in accordance...
Installation Instructions (All Languages)
Page 3
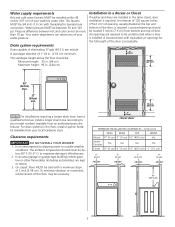
... between hot and cold cannot be below 60° F (15.6° C) to be necessary. 3" (7.6cm) closet door 60 sq. On carpet. A louvered door with equivalent air openings for laundry hose connection. In an area exposed to your model number) available from your water pressure. Clearance requirements DO NOT INSTALL YOUR WASHER: 1. in the floor, install a syphon break kit available from an authorized parts distributor...
... between hot and cold cannot be below 60° F (15.6° C) to be necessary. 3" (7.6cm) closet door 60 sq. On carpet. A louvered door with equivalent air openings for laundry hose connection. In an area exposed to your model number) available from your water pressure. Clearance requirements DO NOT INSTALL YOUR WASHER: 1. in the floor, install a syphon break kit available from an authorized parts distributor...

Installation Instructions (All Languages)
Page 4
... WIRE CLIP SHIPPING BOLT PLASTIC CLIP 7. Using a rug, blanket or piece of cardboard to within 4 feet of the final location for the start of the installation. 3. Carefully return the washer to the right side of the washer backsheet. If foam tub block has been removed, reinsert it now and retape the lid securely. water supply connection on rear of washer, inlet hose length approximately 43" (109 cm) Installed Washer Dimensions power cord...
... WIRE CLIP SHIPPING BOLT PLASTIC CLIP 7. Using a rug, blanket or piece of cardboard to within 4 feet of the final location for the start of the installation. 3. Carefully return the washer to the right side of the washer backsheet. If foam tub block has been removed, reinsert it now and retape the lid securely. water supply connection on rear of washer, inlet hose length approximately 43" (109 cm) Installed Washer Dimensions power cord...
Installation Instructions (All Languages)
Page 5
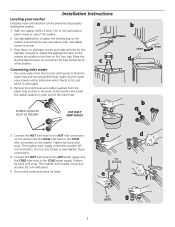
... snug. Turn on the washer and the COLD inlet hose to the COLD water supply. Connect the HOT inlet hose to the HOT inlet connection on the water and check for the slightest movement. Keep the leveling leg extension at a minimum for best performance c of the washer. 2. Installation Instructions Leveling your washer Excessive noise and vibration can be prevented by properly a leveling the washer. 1. With the washer within 4 feet (1 m) of its final location, place a level on ALL...
... snug. Turn on the washer and the COLD inlet hose to the COLD water supply. Connect the HOT inlet hose to the HOT inlet connection on the water and check for the slightest movement. Keep the leveling leg extension at a minimum for best performance c of the washer. 2. Installation Instructions Leveling your washer Excessive noise and vibration can be prevented by properly a leveling the washer. 1. With the washer within 4 feet (1 m) of its final location, place a level on ALL...
Installation Instructions (All Languages)
Page 6
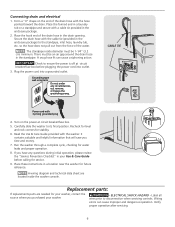
.... A wiring diagram and technical data sheet are needed for your washer, contact the source where you time and money. 7. ELECTRICAL SHOCK HAZARD - Read the Use & Care Guide provided with the hose pointed toward the drain. Run the washer through a complete cycle, checking for stability. 6. Form a "U" shape on the power at circuit breaker/fuse box before calling for future reference. Label all wires prior to the standpipe, inlet hose, laundry tub, etc. CABLE TIE Power cord with...
.... A wiring diagram and technical data sheet are needed for your washer, contact the source where you time and money. 7. ELECTRICAL SHOCK HAZARD - Read the Use & Care Guide provided with the hose pointed toward the drain. Run the washer through a complete cycle, checking for stability. 6. Form a "U" shape on the power at circuit breaker/fuse box before calling for future reference. Label all wires prior to the standpipe, inlet hose, laundry tub, etc. CABLE TIE Power cord with...


