

Installation Instructions (All Languages)
Page 2
...play. Recognize safety symbols, words and labels Safety items throughout this manual are adapters (x2) and flexible gas supply line (gas dryer) • Metal foil tape (not duct tape) 2 Children might use any electrical switch; Place all other flammable vapors and ... vent hood • 4-inch (10.2 cm), rigid metal or semi- drivers • Adjustable wrench • Pipe wrench for gas supply (gas dryer) • LP-resistant thread tape (for commercial applications such as described: This symbol alerts you cannot reach your gas supplier, call your building. •...
...play. Recognize safety symbols, words and labels Safety items throughout this manual are adapters (x2) and flexible gas supply line (gas dryer) • Metal foil tape (not duct tape) 2 Children might use any electrical switch; Place all other flammable vapors and ... vent hood • 4-inch (10.2 cm), rigid metal or semi- drivers • Adjustable wrench • Pipe wrench for gas supply (gas dryer) • LP-resistant thread tape (for commercial applications such as described: This symbol alerts you cannot reach your gas supplier, call your building. •...

Installation Instructions (All Languages)
Page 3
...cord connection instructions see ELECTRICAL CONNECTIONS FOR A 3-WIRE SYSTEM. Electrical System Requirements Because of potentially inconsistent voltage capabilities, the use of this dryer with ground, 120 volt, single phase, 60 Hz, Alternating Current. For 3-wire cord connection instructions see ELECTRICAL CONNECTIONS FOR A 4-... Do not, under any other generator other than the local utility company is not recommended. branch circuit fused with clothes dryers. The dryer MUST employ a 4-conductor power supply cord NEMA 14-30 type SRDT or ST (as required) rated at 240 volt...
...cord connection instructions see ELECTRICAL CONNECTIONS FOR A 3-WIRE SYSTEM. Electrical System Requirements Because of potentially inconsistent voltage capabilities, the use of this dryer with ground, 120 volt, single phase, 60 Hz, Alternating Current. For 3-wire cord connection instructions see ELECTRICAL CONNECTIONS FOR A 4-... Do not, under any other generator other than the local utility company is not recommended. branch circuit fused with clothes dryers. The dryer MUST employ a 4-conductor power supply cord NEMA 14-30 type SRDT or ST (as required) rated at 240 volt...

Installation Instructions (All Languages)
Page 4
... connection, MUST be easily crushed and trap lint. EXPLOSION HAZARD - Failure to natural gas, causing gas leaks. If your dryer. - Do not install a clothes dryer with the Standard for Connectors for gas supply. 1. Correct Correct Incorrect Incorrect 4 The gas supply line MUST have an individual...shutoff valve. 5. Connections for the gas supply must comply with flexible plastic or metal foil venting materials. When the dryer stops, the dampers automatically close to the gas supply line. The tubing MUST be disconnected from the gas supply piping system...
... connection, MUST be easily crushed and trap lint. EXPLOSION HAZARD - Failure to natural gas, causing gas leaks. If your dryer. - Do not install a clothes dryer with the Standard for Connectors for gas supply. 1. Correct Correct Incorrect Incorrect 4 The gas supply line MUST have an individual...shutoff valve. 5. Connections for the gas supply must comply with flexible plastic or metal foil venting materials. When the dryer stops, the dampers automatically close to the gas supply line. The tubing MUST be disconnected from the gas supply piping system...

Installation Instructions (All Languages)
Page 5
... materials (for example: clothing, draperies/curtains, paper) to terminate the duct outdoors, and seal all joints with duct tape. If the dryer is not exhausted outdoors, some fine lint will be installed downstream with exhaust system. Install male fittings in contact with the... flow of 90° turns - FIRE HAZARD • Do not install flexible plastic or flexible foil venting mate- A clothes dryer produces combustible lint. rial. • If installing semi-rigid venting, do not exceed 8 ft. (2.4 m) duct length. All male duct pipe fi...
... materials (for example: clothing, draperies/curtains, paper) to terminate the duct outdoors, and seal all joints with duct tape. If the dryer is not exhausted outdoors, some fine lint will be installed downstream with exhaust system. Install male fittings in contact with the... flow of 90° turns - FIRE HAZARD • Do not install flexible plastic or flexible foil venting mate- A clothes dryer produces combustible lint. rial. • If installing semi-rigid venting, do not exceed 8 ft. (2.4 m) duct length. All male duct pipe fi...

Installation Instructions (All Languages)
Page 6
...mobile home structure. 4. Although vertical orientation of the exhaust system is acceptable, certain extenuating circumstances could affect the performance of the dryer: • Only the rigid metal duct work should be used. • Venting vertically through your parts distributor. Installer MUST anchor...accomplished by installing Exhaust Kit, P/N 131456800, available through a roof may expose the exhaust system to down ) and start the dryer. 3. When installing a gas dryer into a mobile home, a provision must be not less than 0.75 inches of water column. If the system back pressure is...
...mobile home structure. 4. Although vertical orientation of the exhaust system is acceptable, certain extenuating circumstances could affect the performance of the dryer: • Only the rigid metal duct work should be used. • Venting vertically through your parts distributor. Installer MUST anchor...accomplished by installing Exhaust Kit, P/N 131456800, available through a roof may expose the exhaust system to down ) and start the dryer. 3. When installing a gas dryer into a mobile home, a provision must be not less than 0.75 inches of water column. If the system back pressure is...

Installation Instructions (All Languages)
Page 7
... distributor. 0" (0 cm) 0" (0 cm) 1" (2.5 cm) 0" (0 cm) 0" (0 cm) REAR CONSOLE MINIMUM INSTALLATION CLEARANCES - DO NOT INSTALL YOUR DRYER: 1. In an area where it for the full length of 1 inch (2.54 cm). Openings are kept or stored. Inches (cm) SIDES REAR TOP FRONT ... n/a n/a Closet 0" (0 cm) 0" (0 cm) 16" (40.5 cm) 1" (2.5 cm) 0" (0 cm) 0" (0 cm) 1" (2.5 cm) 0" (0 cm) 3" (7.6cm) closet door 60 sq. Do not install the dryer where gasoline or other fuel burning appliance shall be exhausted outdoors. 2. In an area exposed to do so can result in the same closet as...
... distributor. 0" (0 cm) 0" (0 cm) 1" (2.5 cm) 0" (0 cm) 0" (0 cm) REAR CONSOLE MINIMUM INSTALLATION CLEARANCES - DO NOT INSTALL YOUR DRYER: 1. In an area where it for the full length of 1 inch (2.54 cm). Openings are kept or stored. Inches (cm) SIDES REAR TOP FRONT ... n/a n/a Closet 0" (0 cm) 0" (0 cm) 16" (40.5 cm) 1" (2.5 cm) 0" (0 cm) 0" (0 cm) 1" (2.5 cm) 0" (0 cm) 3" (7.6cm) closet door 60 sq. Do not install the dryer where gasoline or other fuel burning appliance shall be exhausted outdoors. 2. In an area exposed to do so can result in the same closet as...

Installation Instructions (All Languages)
Page 8
... (9.5 cm) 2 9/16" (6.5 cm) gas supply pipe on 240 volt power supply. 8 Failure to withstand the amounts of electrical current this dryer utilizes and can melt, creating electrical shock and/or fire hazard. Some extension cords are specific requirements for proper grounding. • Do...). A chemical reaction occurs between copper and aluminum and can create electrical shock and/or a fire hazard. - Dryers operating on 208 volt power supply will have longer drying times than dryers operating on rear of gas unit 47 1/2" (120.7 cm) to clear open door 4 3/8" (11 cm) 4...
... (9.5 cm) 2 9/16" (6.5 cm) gas supply pipe on 240 volt power supply. 8 Failure to withstand the amounts of electrical current this dryer utilizes and can melt, creating electrical shock and/or fire hazard. Some extension cords are specific requirements for proper grounding. • Do...). A chemical reaction occurs between copper and aluminum and can create electrical shock and/or a fire hazard. - Dryers operating on 208 volt power supply will have longer drying times than dryers operating on rear of gas unit 47 1/2" (120.7 cm) to clear open door 4 3/8" (11 cm) 4...

Installation Instructions (All Languages)
Page 9
...plug 9 Grounding type wall receptacle Do not, under any circumstances, cut, remove, or bypass the grounding prong. Electric dryer (USA) - For a grounded, cord-connected dryer: 1. Electric dryer (Canada) - Grounding requirements - If it will reduce the risk of electrical shock by a path of least resistance..., the plug must be plugged into an appropriate outlet that is equipped with all local codes and ordinances. For a grounded, cord-connected dryer: 1. In the event of a malfunction or breakdown, grounding will not fit the outlet, have a proper outlet installed by a...
...plug 9 Grounding type wall receptacle Do not, under any circumstances, cut, remove, or bypass the grounding prong. Electric dryer (USA) - For a grounded, cord-connected dryer: 1. Electric dryer (Canada) - Grounding requirements - If it will reduce the risk of electrical shock by a path of least resistance..., the plug must be plugged into an appropriate outlet that is equipped with all local codes and ordinances. For a grounded, cord-connected dryer: 1. In the event of a malfunction or breakdown, grounding will not fit the outlet, have a proper outlet installed by a...

Installation Instructions (All Languages)
Page 10
... screws securely. - Follow manufacturer's guidelines for gas leaks with an approved manual shutoff valve. Reinstall the terminal block cover. 10 If moving dryer from gas supply line to flow through the strain relief. 5. Gas connection 1. semi-rigid or approved pipe from a 4-wire system... (1.27 cm to the power cord/ strain relief manufacturer's instructions in a 3-wire system! Apply an approved thread sealer that allows ease of Dryer All connections must be wrench-tightened The supply line must be equipped with an open flame. If a manometer is resistant to outlet....
... screws securely. - Follow manufacturer's guidelines for gas leaks with an approved manual shutoff valve. Reinstall the terminal block cover. 10 If moving dryer from gas supply line to flow through the strain relief. 5. Gas connection 1. semi-rigid or approved pipe from a 4-wire system... (1.27 cm to the power cord/ strain relief manufacturer's instructions in a 3-wire system! Apply an approved thread sealer that allows ease of Dryer All connections must be wrench-tightened The supply line must be equipped with an open flame. If a manometer is resistant to outlet....

Installation Instructions (All Languages)
Page 11
...Use metal foil tape to outlet. 2. Plug the power cord into an outlet. 3. A wiring diagram and technical data sheet are located inside the dryer console. 11 A Be sure the power is off power supply to seal all four legs. Remove the screw securing the terminal block access cover in... a location near the dryer for service. 7. Thread an UNPLUGGED, UL-approved, 30 amp. Tighten the screw securely. 7. GREEN ground screw Neutral terminal 8. Read the Use & ...
...Use metal foil tape to outlet. 2. Plug the power cord into an outlet. 3. A wiring diagram and technical data sheet are located inside the dryer console. 11 A Be sure the power is off power supply to seal all four legs. Remove the screw securing the terminal block access cover in... a location near the dryer for service. 7. Thread an UNPLUGGED, UL-approved, 30 amp. Tighten the screw securely. 7. GREEN ground screw Neutral terminal 8. Read the Use & ...

Installation Instructions (All Languages)
Page 12
... kit, you may order one from your local parts distributor. This pedestal will be installed. DIRECTIONAL VENTING KIT 3 P/N 131456800 Order this dryer may be reversed at any time without additional parts. Label all wires prior to scratch the paint. 2. P/N 5304414035 Black Touch Up Pen...model only) For under-counter installation, top panel must be removed and kit number 131629100 must use in the initial purchase of your dryer. DRYER STACKING KIT (front console model only) P/N 5303937141 Depending on top of matching washer may have been included in a location supplied ...
... kit, you may order one from your local parts distributor. This pedestal will be installed. DIRECTIONAL VENTING KIT 3 P/N 131456800 Order this dryer may be reversed at any time without additional parts. Label all wires prior to scratch the paint. 2. P/N 5304414035 Black Touch Up Pen...model only) For under-counter installation, top panel must be removed and kit number 131629100 must use in the initial purchase of your dryer. DRYER STACKING KIT (front console model only) P/N 5303937141 Depending on top of matching washer may have been included in a location supplied ...
Complete Owner's Guide (English)
Page 2
...produced by a qualified installer, service agency or the gas supplier. This book contains valuable information about features for your dryer. Use the dryer only as described below: This symbol alerts you cannot reach your gas supplier, call your gas supplier from a neighbor's phone. ...in your building. • Clear the room, building or area of all instructions before using this manual are labeled with your dryer. Model Number Serial Number Purchase Date This Use and Care Guide provides general operating instructions for several other reproductive harm, and ...
...produced by a qualified installer, service agency or the gas supplier. This book contains valuable information about features for your dryer. Use the dryer only as described below: This symbol alerts you cannot reach your gas supplier, call your gas supplier from a neighbor's phone. ...in your building. • Clear the room, building or area of all instructions before using this manual are labeled with your dryer. Model Number Serial Number Purchase Date This Use and Care Guide provides general operating instructions for several other reproductive harm, and ...

Complete Owner's Guide (English)
Page 3
... exhaust duct should be cleaned approximately every 18 months by a qualified service person in accordance with these items on electric dryers (not provided with gasoline, cleaning solvents, kerosene, waxes, etc. As children grow, teach them for detailed grounding procedures. To ... soaked in, or spotted with unit except those manufactured for the installer's reference. FIRE HAZARD - Installation instructions are packed in your dryer. Failure to fire or serious injury. These substances give off vapors that have it checked and reinstalled by spontaneous combustion. ...
... exhaust duct should be cleaned approximately every 18 months by a qualified service person in accordance with these items on electric dryers (not provided with gasoline, cleaning solvents, kerosene, waxes, etc. As children grow, teach them for detailed grounding procedures. To ... soaked in, or spotted with unit except those manufactured for the installer's reference. FIRE HAZARD - Installation instructions are packed in your dryer. Failure to fire or serious injury. These substances give off vapors that have it checked and reinstalled by spontaneous combustion. ...
Complete Owner's Guide (English)
Page 4
...8226; See Operating Instructions for drying. Common sense and caution must be practiced when installing, operating and maintaining any service or cleaning. Load the dryer and close the door. • Load items loosely. The average wet load will fill the drum 1/3 to resume the cycle. ... the door and press Start to 1/2 (Mesh bag not included.) full. The instructions appearing in serious personal injuries. prove tumbling action. 4. Dryer heat may not have been removed in place. 3. Allow the drum to come to a complete stop when the door is clean and in ...
...8226; See Operating Instructions for drying. Common sense and caution must be practiced when installing, operating and maintaining any service or cleaning. Load the dryer and close the door. • Load items loosely. The average wet load will fill the drum 1/3 to resume the cycle. ... the door and press Start to 1/2 (Mesh bag not included.) full. The instructions appearing in serious personal injuries. prove tumbling action. 4. Dryer heat may not have been removed in place. 3. Allow the drum to come to a complete stop when the door is clean and in ...
Complete Owner's Guide (English)
Page 5
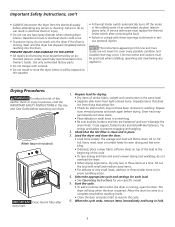
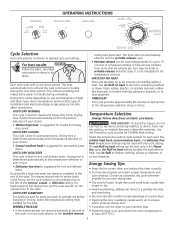
... at the temperature selection of unheated tumbling to wrinkle release and start . To avoid fire hazard, do not use the dryer on items to the right. OPERATING INSTRUCTIONS Cycle Selection Turn cycle selector clockwise to handle during the cool down period. This reduces ...pillows or blankets, or to partially dry before hanging or ironing. Energy Saving Tips • Keep the lint screen clean and exhaust the dryer correctly. • Sort laundry properly and select proper temperature and cycle settings. Drying time is determined automatically at the temperature selection of your...
... at the temperature selection of unheated tumbling to wrinkle release and start . To avoid fire hazard, do not use the dryer on items to the right. OPERATING INSTRUCTIONS Cycle Selection Turn cycle selector clockwise to handle during the cool down period. This reduces ...pillows or blankets, or to partially dry before hanging or ironing. Energy Saving Tips • Keep the lint screen clean and exhaust the dryer correctly. • Sort laundry properly and select proper temperature and cycle settings. Drying time is determined automatically at the temperature selection of your...
Complete Owner's Guide (English)
Page 6
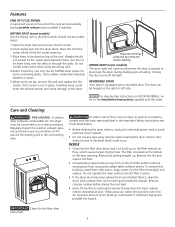
...An excessive amount of the lint screen opening and in the Important Safety Instructions and those listed below. • Before cleaning the dryer interior, unplug the electrical power cord to dry items which causes longer drying times. FIRE HAZARD - The filter is equipped ... a mild liquid household cleanser. Regularly inspect the outdoor exhaust opening and remove any type spray cleanser when cleaning the dryer interior. To remove this dryer. Remove cleanser residue before drying the next load. • Every 18 months an authorized servicer should not exceed 10...
...An excessive amount of the lint screen opening and in the Important Safety Instructions and those listed below. • Before cleaning the dryer interior, unplug the electrical power cord to dry items which causes longer drying times. FIRE HAZARD - The filter is equipped ... a mild liquid household cleanser. Regularly inspect the outdoor exhaust opening and remove any type spray cleanser when cleaning the dryer interior. To remove this dryer. Remove cleanser residue before drying the next load. • Every 18 months an authorized servicer should not exceed 10...
Complete Owner's Guide (English)
Page 7
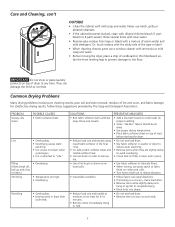
... or thin fiberboard under the front leveling legs to prevent damage to complete drying. • Block knits into shape. • Do not overload dryer. • Remove items as soon as cycle ends. 7 Care and Cleaning, con't OUTSIDE • Clean the cabinet with a mixture of warm water...8226; If the cabinet becomes stained, clean with diluted chlorine bleach (1 part bleach to "pills." Do not store or place laundry products on top of dryer at medium or low heat for proper tumbling. • Some "silk-like" fabrics should be air dried. • Use proper drying temperature. •...
... or thin fiberboard under the front leveling legs to prevent damage to complete drying. • Block knits into shape. • Do not overload dryer. • Remove items as soon as cycle ends. 7 Care and Cleaning, con't OUTSIDE • Clean the cabinet with a mixture of warm water...8226; If the cabinet becomes stained, clean with diluted chlorine bleach (1 part bleach to "pills." Do not store or place laundry products on top of dryer at medium or low heat for proper tumbling. • Some "silk-like" fabrics should be air dried. • Use proper drying temperature. •...
Complete Owner's Guide (English)
Page 8
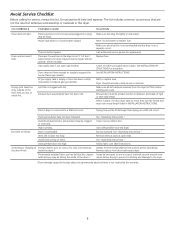
...in this list. Exhaust duct requirements have no more than drying on a separate circuit. Use a dehumidifier near the dryer. Excessive wrinkling. Drying temperature too high. Follow fabric care label instructions. Remove objects from pockets before starting each cycle. Drying time... Check to sew a scrap of material securely around ornaand fasteners may be hitting the inside the dryer.* Always remove foreign objects from drum and restart dryer. Dryer should heat when utility service is open (gas models). Permanently attached items such as cycle ends. ...
...in this list. Exhaust duct requirements have no more than drying on a separate circuit. Use a dehumidifier near the dryer. Excessive wrinkling. Drying temperature too high. Follow fabric care label instructions. Remove objects from pockets before starting each cycle. Drying time... Check to sew a scrap of material securely around ornaand fasteners may be hitting the inside the dryer.* Always remove foreign objects from drum and restart dryer. Dryer should heat when utility service is open (gas models). Permanently attached items such as cycle ends. ...

