
Complete Owners Guide
Page 1
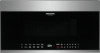
All about the Use &Care of your Microwave Oven A06823414 (January 2020) TABLE OF CONTENTS WELCOME & CONGRATULATIONS 2 IMPORTANT SAFETY INSTRUCTIONS 2 PART NAMES 8 CONTROL PANEL 9 BEFORE OPERATING 10 MANUAL COOKING 10 SENSOR COOKING 11 ONE TOUCH COOK 13 AUTO DEFROST 15 MICROWAVE SETTING 16 CLEANING AND CARE 18 SERVICE CALL CHECK 22 SPECIFICATIONS 22 WARRANTY 23 www.frigidaire.com USA 1-800-37 4-4432 www.frigidaire.ca Canada 1-800-265-8352
All about the Use &Care of your Microwave Oven A06823414 (January 2020) TABLE OF CONTENTS WELCOME & CONGRATULATIONS 2 IMPORTANT SAFETY INSTRUCTIONS 2 PART NAMES 8 CONTROL PANEL 9 BEFORE OPERATING 10 MANUAL COOKING 10 SENSOR COOKING 11 ONE TOUCH COOK 13 AUTO DEFROST 15 MICROWAVE SETTING 16 CLEANING AND CARE 18 SERVICE CALL CHECK 22 SPECIFICATIONS 22 WARRANTY 23 www.frigidaire.com USA 1-800-37 4-4432 www.frigidaire.ca Canada 1-800-265-8352

Complete Owners Guide
Page 2
... MICROWAVE ENERGY (a) Do not attempt to microwave energy. It is important not to help you received a damaged Microwave Oven... Read this manual. Or call Frigidaire Customer Services at : http://www.frigidaire.com Before you call away. If you do to defeat or tamper with the door open since open-door operation can relax...
... MICROWAVE ENERGY (a) Do not attempt to microwave energy. It is important not to help you received a damaged Microwave Oven... Read this manual. Or call Frigidaire Customer Services at : http://www.frigidaire.com Before you call away. If you do to defeat or tamper with the door open since open-door operation can relax...
Complete Owners Guide
Page 3
... OTHER UTENSIL IS INSERTED INTO THE LIQUID. Do not use the cavity for example, closed , turn the fan on page 5. • Install or locate this manual.
... OTHER UTENSIL IS INSERTED INTO THE LIQUID. Do not use the cavity for example, closed , turn the fan on page 5. • Install or locate this manual.

Complete Owners Guide
Page 5
... of the carton, bend the carton flaps back and tilt the microwave oven over a longer cord. Read enclosures and SAVE the Use and Care Manual. The Power Supply Cord and plug must be connected to reduce the risks resulting from the outside of the door, if there is one. •...
... of the carton, bend the carton flaps back and tilt the microwave oven over a longer cord. Read enclosures and SAVE the Use and Care Manual. The Power Supply Cord and plug must be connected to reduce the risks resulting from the outside of the door, if there is one. •...

Complete Owners Guide
Page 6
..., seeds, fruits & vegetables • Puncture egg yolks before and after heating and shake thoroughly. IMPORTANT SAFETY INSTRUCTIONS ABOUT YOUR MICROWAVE OVEN This Use and Care Manual is valuable: read it carefully and always save it for microwave cooking principles, techniques, hints and recipes. A good microwave cookbook is rated 1000 watts by...
..., seeds, fruits & vegetables • Puncture egg yolks before and after heating and shake thoroughly. IMPORTANT SAFETY INSTRUCTIONS ABOUT YOUR MICROWAVE OVEN This Use and Care Manual is valuable: read it carefully and always save it for microwave cooking principles, techniques, hints and recipes. A good microwave cookbook is rated 1000 watts by...

Complete Owners Guide
Page 10
... x 7 POWER LEVEL x 8 50% 40% 30% Medium Med Low/Defrost POWER LEVEL x 9 20% POWER LEVEL x 10 10% Low POWER LEVEL x 11 0% 10 Press Level to lock MANUAL COOKING Microwave cooking 1. Setting the timer 1. Power 3. Press START .. After timer is set clock. 2. Hold 3s to select corresponding power level, there are 10 levels...
... x 7 POWER LEVEL x 8 50% 40% 30% Medium Med Low/Defrost POWER LEVEL x 9 20% POWER LEVEL x 10 10% Low POWER LEVEL x 11 0% 10 Press Level to lock MANUAL COOKING Microwave cooking 1. Setting the timer 1. Power 3. Press START .. After timer is set clock. 2. Hold 3s to select corresponding power level, there are 10 levels...

Complete Owners Guide
Page 11
... you may be cooked following the guidelines in the display. Sensor Cook x3 4. Wipe off . 6. fold excess wrap under dish to cook manually. The final cooking result will appear. Touch: Display Shows: 1. Door may stir or season food, as it 's in the display... 2. Casserole lid. 2. Be sure the exterior of the cooking container and the interior of cooking time will vary according to cook manually. 2. Check food for optimum cooking. allow approximately 1/2 inch to remain uncovered to allow steam to escape away from the food, remainder...
... you may be cooked following the guidelines in the display. Sensor Cook x3 4. Wipe off . 6. fold excess wrap under dish to cook manually. The final cooking result will appear. Touch: Display Shows: 1. Door may stir or season food, as it 's in the display... 2. Casserole lid. 2. Be sure the exterior of the cooking container and the interior of cooking time will vary according to cook manually. 2. Check food for optimum cooking. allow approximately 1/2 inch to remain uncovered to allow steam to escape away from the food, remainder...

Installation Instructions
Page 5
... Screws (1⁄4" x 2") Toggle Bolts (and wing nuts) (3⁄16" x 3") QUANTITY 2 2 Self-Aligning Machine 3 Screws (1⁄4"-28 x 31⁄4") ININSSTTRAULCLTAITOIONNS UMSEAN&UCAALRE Installation Instructions 1 Use & Care Manual 1 Separately Packed Grease 2 Filters Exhaust adaptor 1 Nylon Grommet 1 (for metal cabinets) Glass Tray 1 You will find the installation hardware contained in which it was bought...
... Screws (1⁄4" x 2") Toggle Bolts (and wing nuts) (3⁄16" x 3") QUANTITY 2 2 Self-Aligning Machine 3 Screws (1⁄4"-28 x 31⁄4") ININSSTTRAULCLTAITOIONNS UMSEAN&UCAALRE Installation Instructions 1 Use & Care Manual 1 Separately Packed Grease 2 Filters Exhaust adaptor 1 Nylon Grommet 1 (for metal cabinets) Glass Tray 1 You will find the installation hardware contained in which it was bought...

Installation Instructions
Page 25
Ensure proper ground exists before use 8. ININSSTTARLULCATTIIOONNS 2. Install turntable ring and glass tray in cavity. 6. ININSSTTARLULCATTIIOONNS 4. Read the USE & CARE Manual. KEEP INSTALLATION INSTRUCTIONS FOR THE LOCAL INSPECTOR'S USE. Plug power cord into a seperate and dedicated 15- D RPEGROISDCTUARCRATDTION D D G D G EN-24 Remove all packing material from the ...
Ensure proper ground exists before use 8. ININSSTTARLULCATTIIOONNS 2. Install turntable ring and glass tray in cavity. 6. ININSSTTARLULCATTIIOONNS 4. Read the USE & CARE Manual. KEEP INSTALLATION INSTRUCTIONS FOR THE LOCAL INSPECTOR'S USE. Plug power cord into a seperate and dedicated 15- D RPEGROISDCTUARCRATDTION D D G D G EN-24 Remove all packing material from the ...


