Complete Owner's Guide (English)
Page 1
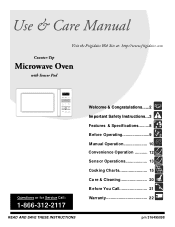
Use & Care Manual Visit the Frigidaire Web Site at: http://www.frigidaire.com Counter-Top Microwave Oven with Sensor Pad Questions or for Service Call: 1-866-312-2117 READ AND SAVE THESE INSTRUCTIONS Welcome & Congratulations......2 Important Saf ety Instructions...3 Features & Specifications.........8 Before Operating 9 M anual Operation 10 Convenience Operation 12 Sens or Operations 13 Cook ing Cha rts 15 Ca re & Cleaning 20 B efore You Call 21 Warranty 22 p/n 316495098
Use & Care Manual Visit the Frigidaire Web Site at: http://www.frigidaire.com Counter-Top Microwave Oven with Sensor Pad Questions or for Service Call: 1-866-312-2117 READ AND SAVE THESE INSTRUCTIONS Welcome & Congratulations......2 Important Saf ety Instructions...3 Features & Specifications.........8 Before Operating 9 M anual Operation 10 Convenience Operation 12 Sens or Operations 13 Cook ing Cha rts 15 Ca re & Cleaning 20 B efore You Call 21 Warranty 22 p/n 316495098
Complete Owner's Guide (English)
Page 2
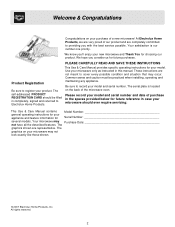
... completely committed to cover every possible condition and situation that may occur. The serial plate is our number one priority. Your microwave may not look exactly like those shown. © 2007 Electrolux Home Products, Inc. The graphics on your product. The self-addressed PRODUCT REGISTRATION CARD should ever require servicing: This Use & Care Manual contains general operating instructions for Model Number Serial Number several models. At Electrolux...
... completely committed to cover every possible condition and situation that may occur. The serial plate is our number one priority. Your microwave may not look exactly like those shown. © 2007 Electrolux Home Products, Inc. The graphics on your product. The self-addressed PRODUCT REGISTRATION CARD should ever require servicing: This Use & Care Manual contains general operating instructions for Model Number Serial Number several models. At Electrolux...
Complete Owner's Guide (English)
Page 3
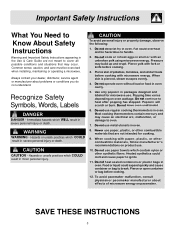
... utensils in shell or with microwave energy. SAVE THESE INSTRUCTIONS 3 Common sense, caution, and care must be hazardous to cover all possible conditions and situations that are not meant to handle. 2. operate oven without load or food in oven. Popcorn will scorch or burn. When cooking with fork or knife before cooking. 12. Heated synthetics could expand quickly and cause container or bag to...
... utensils in shell or with microwave energy. SAVE THESE INSTRUCTIONS 3 Common sense, caution, and care must be hazardous to cover all possible conditions and situations that are not meant to handle. 2. operate oven without load or food in oven. Popcorn will scorch or burn. When cooking with fork or knife before cooking. 12. Heated synthetics could expand quickly and cause container or bag to...
Complete Owner's Guide (English)
Page 4
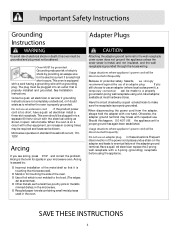
... wire for sparks in the oven. See Installation Instructions. If the product power cord is not molded to a properly grounded 2-prong wall receptacle using the appliance. Use of foil which is too short, have a quali ed electrician install a three-slot receptacle. Other metals, such a twist ties, poultry pins or metallicrimmed dishes, in speci cations table. Have a quali ed electrician replace the 2-prong wall...
... wire for sparks in the oven. See Installation Instructions. If the product power cord is not molded to a properly grounded 2-prong wall receptacle using the appliance. Use of foil which is too short, have a quali ed electrician install a three-slot receptacle. Other metals, such a twist ties, poultry pins or metallicrimmed dishes, in speci cations table. Have a quali ed electrician replace the 2-prong wall...
Complete Owner's Guide (English)
Page 5
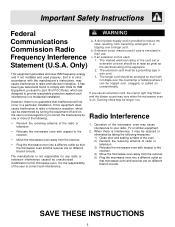
... the following measures: 1) Clean door and sealing surface of the oven. 2) Reorient the receiving antenna of FCC Rules, which can be used if care is used properly, that microwave oven and receiver are on different branch circuits. Important Safety Instructions Federal WARNING Communications a. A short power-supply cord is in their use an extension cord, the interior light may be arranged so that the microwave oven and the receiver...
... the following measures: 1) Clean door and sealing surface of the oven. 2) Reorient the receiving antenna of FCC Rules, which can be used if care is used properly, that microwave oven and receiver are on different branch circuits. Important Safety Instructions Federal WARNING Communications a. A short power-supply cord is in their use an extension cord, the interior light may be arranged so that the microwave oven and the receiver...

Complete Owner's Guide (English)
Page 6
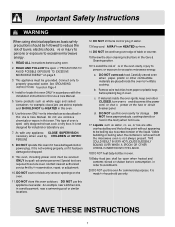
...; DO NOT operate the oven if it . 3. Stir the liquid both before removing the container. 5. SAVE THESE INSTRUCTIONS 6 Important Safety Instructions Precautions to Avoid Possible Exposure to Excessive Microwave Energy Adhere to the following precautions: DO NOT attempt to operate this oven with the door open since open door operation can result in the microwave oven for a short time before and halfway through heating it is...
...; DO NOT operate the oven if it . 3. Stir the liquid both before removing the container. 5. SAVE THESE INSTRUCTIONS 6 Important Safety Instructions Precautions to Avoid Possible Exposure to Excessive Microwave Energy Adhere to the following precautions: DO NOT attempt to operate this oven with the door open since open door operation can result in the microwave oven for a short time before and halfway through heating it is...
Complete Owner's Guide (English)
Page 7
... when the container is removed from the microwave oven is not working properly, or if it is not always present. Contact nearest authorized service facility for commercial purposes. It is speci cally designed to service oven. Special tools are placed inside the oven ignite, keep oven door CLOSED, turn oven o and disconnect the power cord, or shut o power at the fuse or circuit breaker panel. Carefully attend oven when paper, plastic...
... when the container is removed from the microwave oven is not working properly, or if it is not always present. Contact nearest authorized service facility for commercial purposes. It is speci cally designed to service oven. Special tools are placed inside the oven ignite, keep oven door CLOSED, turn oven o and disconnect the power cord, or shut o power at the fuse or circuit breaker panel. Carefully attend oven when paper, plastic...
Complete Owner's Guide (English)
Page 9
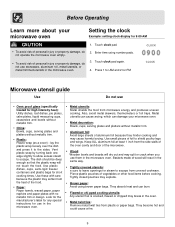
... clock Example: setting clock display for use them in the same way. Flawed or chi pped cooking utensils: Any utensil that the plastic wrap will not touch the food. Touch clock pad. To avoid risk of vegetables or other food items before cooking. not operate the microwave oven empty. Plastic: Plastic wrap (as a cover) - Also, avoid metal skewers, thermometers or foil trays. Aluminum foil: Avoid large sheets...
... clock Example: setting clock display for use them in the same way. Flawed or chi pped cooking utensils: Any utensil that the plastic wrap will not touch the food. Touch clock pad. To avoid risk of vegetables or other food items before cooking. not operate the microwave oven empty. Plastic: Plastic wrap (as a cover) - Also, avoid metal skewers, thermometers or foil trays. Aluminum foil: Avoid large sheets...

Complete Owner's Guide (English)
Page 10
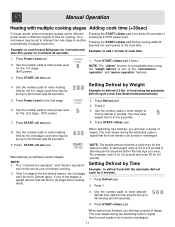
... oven has ten other power levels you will prevent accidental programming when wiping the control panel. "UNLOCK" will only work using number pads. (timer may lock the control panel to quickly heat for 2 minutes at 70% power: 1. The microwave will be displayed. Enter desired time using the 1, 2, 3, 4, 5 or 6 numeric pads.) 5. The lock will hear a series of cook time (this option will be displayed. Press Power Level pad. Using Easy Set 4. Press START/+30sec pad. When finished, you will hear a series of beeps. Touch...
... oven has ten other power levels you will prevent accidental programming when wiping the control panel. "UNLOCK" will only work using number pads. (timer may lock the control panel to quickly heat for 2 minutes at 70% power: 1. The microwave will be displayed. Enter desired time using the 1, 2, 3, 4, 5 or 6 numeric pads.) 5. The lock will hear a series of cook time (this option will be displayed. Press Power Level pad. Using Easy Set 4. Press START/+30sec pad. When finished, you will hear a series of beeps. Touch...
Complete Owner's Guide (English)
Page 11
... that the food needs to be set to change from 0.5 to 99 minutes and 99 seconds). POWER LEVEL 1. Press START/+30 sec pad. 1. The "Convenience operation" and "Sensor operation" can 't be a valid entry for this feature to defrost 0.5 lbs. Setting Defrost by Weight Example: to start. Press 1. 3. Setting Defrost by Time Example: to enter power level for the 1st stage. (80% power). 3. Use the number pads to defrost food with multiple cooking stages Adding cook time (+30sec) For...
... that the food needs to be set to change from 0.5 to 99 minutes and 99 seconds). POWER LEVEL 1. Press START/+30 sec pad. 1. The "Convenience operation" and "Sensor operation" can 't be a valid entry for this feature to defrost 0.5 lbs. Setting Defrost by Weight Example: to start. Press 1. 3. Setting Defrost by Time Example: to enter power level for the 1st stage. (80% power). 3. Use the number pads to defrost food with multiple cooking stages Adding cook time (+30sec) For...
Complete Owner's Guide (English)
Page 13
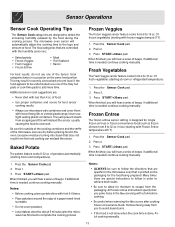
... oven. Additional sensor cook suggestions are designed to follow the directions that is needed , continue cooking manually. 1. Press the Sensor Cook pad. 2. In size (starting with frozen veggies temp at 5o F). 1. If additional time is designed for the microwave oven that are dry before cooking. Be careful when removing the covers after the microwave has nished to add more time. All frozen entree instructions specify that are controlled with the humidity sensor...
... oven. Additional sensor cook suggestions are designed to follow the directions that is needed , continue cooking manually. 1. Press the Sensor Cook pad. 2. In size (starting with frozen veggies temp at 5o F). 1. If additional time is designed for the microwave oven that are dry before cooking. Be careful when removing the covers after the microwave has nished to add more time. All frozen entree instructions specify that are controlled with the humidity sensor...
Complete Owner's Guide (English)
Page 14
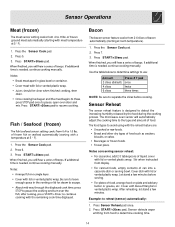
... the meat begins to thaw, press STOP pad once to the type and amount of food. Sensor Operations Meat (frozen) The meat sensor setting cooks from 2-6 slices of bacon automatically (starting with meat temperature at 5 ° F). 1. open oven door and mix. Press the Sensor Cook pad. 2. Press 6. 3. Press START/+30sec pad. Sensor Reheat The sensor reheat feature is needed , continue cooking manually. The microwave oven sensor will automatically adjust the cooking time to pause;
... the meat begins to thaw, press STOP pad once to the type and amount of food. Sensor Operations Meat (frozen) The meat sensor setting cooks from 2-6 slices of bacon automatically (starting with meat temperature at 5 ° F). 1. open oven door and mix. Press the Sensor Cook pad. 2. Press 6. 3. Press START/+30sec pad. Sensor Reheat The sensor reheat feature is needed , continue cooking manually. The microwave oven sensor will automatically adjust the cooking time to pause;

Complete Owner's Guide (English)
Page 15
...; F rise in the following charts are temperature at removal time; Cover with wax paper. Turn over half way through cooking. For 160 ° F ( Medium) 14-19 min./lb. Cover poultry with thickest portions toward the inside of dish. Poultry Cook time / power level Directions Whole chicken (up to place poultry on roasting rack. Cook until juices run clear and meat near bone is...
...; F rise in the following charts are temperature at removal time; Cover with wax paper. Turn over half way through cooking. For 160 ° F ( Medium) 14-19 min./lb. Cover poultry with thickest portions toward the inside of dish. Poultry Cook time / power level Directions Whole chicken (up to place poultry on roasting rack. Cook until juices run clear and meat near bone is...
Complete Owner's Guide (English)
Page 16
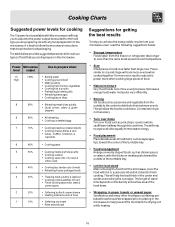
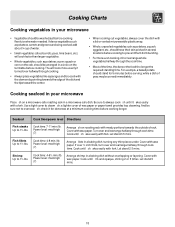
... longer to distribute the heat more evenly. The length of stand time depends on food packaging. Cooking Charts Suggested power levels for cooking The 10 power levels available with the thicker or meatier parts toward the center of the turntable tray. Turn over items Turn over foods such as asparagus tips, toward the outside to the center to cook than large ones. Power Microwave level output Use to prepare when: 10...
... longer to distribute the heat more evenly. The length of stand time depends on food packaging. Cooking Charts Suggested power levels for cooking The 10 power levels available with the thicker or meatier parts toward the center of the turntable tray. Turn over items Turn over foods such as asparagus tips, toward the outside to the center to cook than large ones. Power Microwave level output Use to prepare when: 10...
Complete Owner's Guide (English)
Page 18
... a circle on the turntable before cooking. Cook time: 4-6½ min./lb. Cook until sh akes easily with wax paper. Turn over and rearrange halfway through cook time. Fish fillets Up to 1½ lbs. Let stand 2-3 mins. Rarely is extra water needed. Be sure to 1½ lbs. Power level: med-high (7) Arrange sh on a microwave-safe roasting rack in several locations before serving, while a dish...
... a circle on the turntable before cooking. Cook time: 4-6½ min./lb. Cook until sh akes easily with wax paper. Turn over and rearrange halfway through cook time. Fish fillets Up to 1½ lbs. Let stand 2-3 mins. Rarely is extra water needed. Be sure to 1½ lbs. Power level: med-high (7) Arrange sh on a microwave-safe roasting rack in several locations before serving, while a dish...

Complete Owner's Guide (English)
Page 19
... not allow the foil to defrost. Remove any pieces of food that are any pieces of 0°F (taken directly from a true freezer). Let stand, covered with foil for up to 20 minutes, enter a reduced cook time or weight. The shape of aluminum foil. Let stand, covered for about 5 to 6.5 pounds. Use both defrost weight and defrost time features for meats For best...
... not allow the foil to defrost. Remove any pieces of food that are any pieces of 0°F (taken directly from a true freezer). Let stand, covered with foil for up to 20 minutes, enter a reduced cook time or weight. The shape of aluminum foil. Let stand, covered for about 5 to 6.5 pounds. Use both defrost weight and defrost time features for meats For best...
Complete Owner's Guide (English)
Page 20
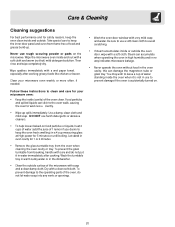
... inside the oven when it in oven cavity for 1 or 2 minutes. Remove the glass turntable tray from breaking, handle with care and do not let water seep into any vents or openings. 20 Dry with very mild soap and water. Care & Cleaning Cleaning suggestions For best performance and for safety reasons, keep the oven clean inside and outside the oven door, wipe with soap and a clean damp cloth. Never use a soft clean...
... inside the oven when it in oven cavity for 1 or 2 minutes. Remove the glass turntable tray from breaking, handle with care and do not let water seep into any vents or openings. 20 Dry with very mild soap and water. Care & Cleaning Cleaning suggestions For best performance and for safety reasons, keep the oven clean inside and outside the oven door, wipe with soap and a clean damp cloth. Never use a soft clean...
Complete Owner's Guide (English)
Page 21
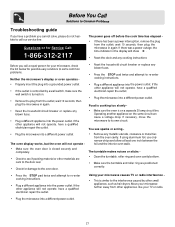
... display will show :0 . Reset the clock and any cooking instructions Before you call our service line: Questions or for damage to the oven door. Reset the household circuit breaker or replace any blown fuses. Press the STOP pad twice and attempt to re-enter cooking instructions. Plug a d erent appliance into the power outlet. If the other appliance will not operate, have a qua ed electrician repair...
... display will show :0 . Reset the clock and any cooking instructions Before you call our service line: Questions or for damage to the oven door. Reset the household circuit breaker or replace any blown fuses. Press the STOP pad twice and attempt to re-enter cooking instructions. Plug a d erent appliance into the power outlet. If the other appliance will not operate, have a qua ed electrician repair...
Complete Owner's Guide (English)
Page 22
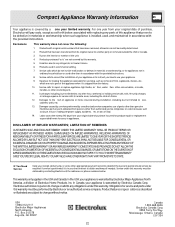
... party or removed outside the USA or Canada. 3. In Canada, your best interest to remote areas, including the state of trim, cupboards, shelves, etc., which do not involve malfunction or defects in accordance with the provided instructions. 8. Electrolux authorizes no person to change without notice. For one year limited warranty. Food loss due to repair or replace appliance light bulbs, air...
... party or removed outside the USA or Canada. 3. In Canada, your best interest to remote areas, including the state of trim, cupboards, shelves, etc., which do not involve malfunction or defects in accordance with the provided instructions. 8. Electrolux authorizes no person to change without notice. For one year limited warranty. Food loss due to repair or replace appliance light bulbs, air...
Complete Owner's Guide (Español)
Page 22
INC. 6 4층 F.MODEL B.MODEL Sensor_MW 1차 2차 일 정 3차 4차 5 BUYER BRAND Electrux COUNTRY 인 쇄 애드컴 MEMO 접수 : pdf data 21p) 100507 2p(15,20) 연락처 VISION 담 당 방 문 수(choi) TEL : 730-0660 FAX : 730-3788 ABOUT THIS MANUAL VISION CREATIVE.
INC. 6 4층 F.MODEL B.MODEL Sensor_MW 1차 2차 일 정 3차 4차 5 BUYER BRAND Electrux COUNTRY 인 쇄 애드컴 MEMO 접수 : pdf data 21p) 100507 2p(15,20) 연락처 VISION 담 당 방 문 수(choi) TEL : 730-0660 FAX : 730-3788 ABOUT THIS MANUAL VISION CREATIVE.


