
Complete Owner's Guide (English)
Page 1
Use & Care Manual Visit the Frigidaire Web Site at: http://www.frigidaire.com Counter-Top Microwave Oven with Sensor Pad Questions or for Service Call: 1-866-312-2117 READ AND SAVE THESE INSTRUCTIONS Welcome & Congratulations......2 Important Safety Instructions...3 Features & Specifications.........7 Before Operating 8 Manual Operation 9 Sensor Operations 12 Cooking Charts 14 Care & Cleaning 18 Before You Call 19 Warranty 20 p/n 316902464 EN
Use & Care Manual Visit the Frigidaire Web Site at: http://www.frigidaire.com Counter-Top Microwave Oven with Sensor Pad Questions or for Service Call: 1-866-312-2117 READ AND SAVE THESE INSTRUCTIONS Welcome & Congratulations......2 Important Safety Instructions...3 Features & Specifications.........7 Before Operating 8 Manual Operation 9 Sensor Operations 12 Cooking Charts 14 Care & Cleaning 18 Before You Call 19 Warranty 20 p/n 316902464 EN
Complete Owner's Guide (English)
Page 2
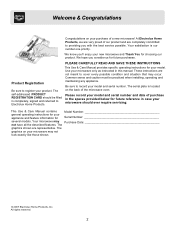
... CARD should ever require servicing: This Use & Care Manual contains general operating instructions for Model Number Serial Number several models. Common sense and caution must be filled in this manual. All rights reserved. 2 Your microwave may occur. Your satisfaction is located on the back of purchase in the spaces provided below for future reference in case your microwave should be practiced when installing, operating and maintaining any appliance...
... CARD should ever require servicing: This Use & Care Manual contains general operating instructions for Model Number Serial Number several models. Common sense and caution must be filled in this manual. All rights reserved. 2 Your microwave may occur. Your satisfaction is located on the back of purchase in the spaces provided below for future reference in case your microwave should be practiced when installing, operating and maintaining any appliance...
Complete Owner's Guide (English)
Page 3
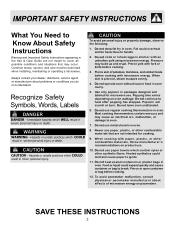
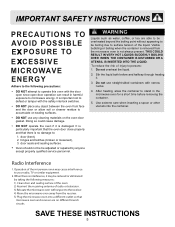
... electrical arc, malfunction, or damage to heat after popping has stopped. Pierce yolk with an unbroken yolk using microwave energy. Pierce skin of microwave energy on oven wattage. When skin is pierced, steam escapes evenly. 4. operate oven without load or food in oven. Popcorn will scorch or burn. Most cooking thermometers contain mercury and may build up and erupt. use regular cooking thermometers in oven. When cooking with microwave...
... electrical arc, malfunction, or damage to heat after popping has stopped. Pierce yolk with an unbroken yolk using microwave energy. Pierce skin of microwave energy on oven wattage. When skin is pierced, steam escapes evenly. 4. operate oven without load or food in oven. Popcorn will scorch or burn. Most cooking thermometers contain mercury and may build up and erupt. use regular cooking thermometers in oven. When cooking with microwave...
Complete Owner's Guide (English)
Page 4
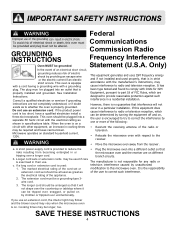
... use an extension cord, the interior light may flicker and the blower sound may cause interference to reduce the Ÿ Plug the microwave oven into a separate 60 hertz circuit with the manufacturer's instructions, may vary when the microwave oven is no guarantee that it will not occur in cooking times Ÿ Reorient the receiving antenna of electric shock by providing an escape wire or the electric...
... use an extension cord, the interior light may flicker and the blower sound may cause interference to reduce the Ÿ Plug the microwave oven into a separate 60 hertz circuit with the manufacturer's instructions, may vary when the microwave oven is no guarantee that it will not occur in cooking times Ÿ Reorient the receiving antenna of electric shock by providing an escape wire or the electric...
Complete Owner's Guide (English)
Page 5
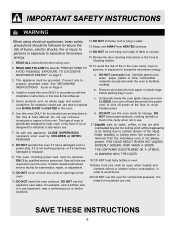
door (bent), 2. Do not use any cleaning materials on di erent branch circuits. Operation of the microwave oven may be adjusted or repaired by taking the following precautions: Ÿ DO NOT attempt to operate this oven with the door open since open door operation can result in harmful exposure to persons: 1. SAVE THESE INSTRUCTIONS 5 It is particularly important that the oven door close properly and that microwave oven and receiver are...
door (bent), 2. Do not use any cleaning materials on di erent branch circuits. Operation of the microwave oven may be adjusted or repaired by taking the following precautions: Ÿ DO NOT attempt to operate this oven with the door open since open door operation can result in harmful exposure to persons: 1. SAVE THESE INSTRUCTIONS 5 It is particularly important that the oven door close properly and that microwave oven and receiver are...
Complete Owner's Guide (English)
Page 6
... -for household use this Use & Care Manual. Review the door cleaning instructions in a wet basement, near a swimming pool or similar locations. Connect only to excessive microwave energy. DO this oven cavity for industrial or laboratory use . SAVE THESE INSTRUCTIONS 6 DO NOT use only. required to heat, cook, or dry food. Baby food jars shall be grounded. precautions should be HEATED in accordance with any vents or openings on the order to 2. Remove wire twist...
... -for household use this Use & Care Manual. Review the door cleaning instructions in a wet basement, near a swimming pool or similar locations. Connect only to excessive microwave energy. DO this oven cavity for industrial or laboratory use . SAVE THESE INSTRUCTIONS 6 DO NOT use only. required to heat, cook, or dry food. Baby food jars shall be grounded. precautions should be HEATED in accordance with any vents or openings on the order to 2. Remove wire twist...
Complete Owner's Guide (English)
Page 7
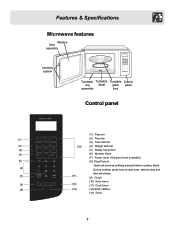
... settings pressed before cooking starts. (6) During cooking: press once to stop oven; Features & Specifications Microwave features Window Door assembly Interlock system Turntable Turntable Turntable Control ring Shaft glass panel assembly tray Control panel (1) Popcorn (1) (2) Favorite (3) Time defrost (2) (10) (4) Weight Defrost (3) (5) Ready set button (4) (6) Number Keys (7) Power level (10 power level available) (5) (8) Stop/Cancel: clears all entries. (7) (11) (9) Clock (10) Auto menu (8) (12) (11) Cook timer (9) (13) (12) Start/+30Sec. (13) Timer...
... settings pressed before cooking starts. (6) During cooking: press once to stop oven; Features & Specifications Microwave features Window Door assembly Interlock system Turntable Turntable Turntable Control ring Shaft glass panel assembly tray Control panel (1) Popcorn (1) (2) Favorite (3) Time defrost (2) (10) (4) Weight Defrost (3) (5) Ready set button (4) (6) Number Keys (7) Power level (10 power level available) (5) (8) Stop/Cancel: clears all entries. (7) (11) (9) Clock (10) Auto menu (8) (12) (11) Cook timer (9) (13) (12) Start/+30Sec. (13) Timer...

Complete Owner's Guide (English)
Page 8
... trimmed utensils in the microwave oven. 1. Tightly covered utensils: e sure to leave openings for steam to shield poultry legs and wings. Touch clock pad once for short cooking times. Plastic: Plastic wrap (as a cover) - Look for the manufacturer's label for any special instructions for use Oven proof glass (specifically treated for 9:00: CAUTION Ÿ To avoid risk of personal injury or property damage, do not operate...
... trimmed utensils in the microwave oven. 1. Tightly covered utensils: e sure to leave openings for steam to shield poultry legs and wings. Touch clock pad once for short cooking times. Plastic: Plastic wrap (as a cover) - Look for the manufacturer's label for any special instructions for use Oven proof glass (specifically treated for 9:00: CAUTION Ÿ To avoid risk of personal injury or property damage, do not operate...
Complete Owner's Guide (English)
Page 9
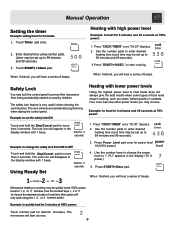
... microwave will hear a series of food need slower cooking, such as roasts, baked goods or custards. The safety lock feature is very useful when cleaning the control panel. Example: to set up to OFF Touch and hold the Stop/Cancel pad for 3 seconds 1. Your oven has nine other power levels you will appear in the display window with lower power levels Using the highest power level to 7. Example: to change the power level to heat foods does...
... microwave will hear a series of food need slower cooking, such as roasts, baked goods or custards. The safety lock feature is very useful when cleaning the control panel. Example: to set up to OFF Touch and hold the Stop/Cancel pad for 3 seconds 1. Your oven has nine other power levels you will appear in the display window with lower power levels Using the highest power level to 7. Example: to change the power level to heat foods does...
Complete Owner's Guide (English)
Page 10
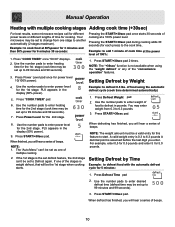
... Power Level pad once for the 2nd stage. Manual Operation Heating with the automatic defrost cycle for 5 minutes: 1. Use the number pads to enter power level for power level 10(100% power). of food using the "weight defrost" or any of beeps. 10 Press START/+30sec pad. 8. A valid weight entry is not available when using the automatic defrost cycle (cook time determined automatically) 1. Setting Defrost by Weight 4. Press "COOK TIMER" once."00:00" displays. 2. Use the number pads to Defrost again. The "Auto Menu...
... Power Level pad once for the 2nd stage. Manual Operation Heating with the automatic defrost cycle for 5 minutes: 1. Use the number pads to enter power level for power level 10(100% power). of food using the "weight defrost" or any of beeps. 10 Press START/+30sec pad. 8. A valid weight entry is not available when using the automatic defrost cycle (cook time determined automatically) 1. Setting Defrost by Weight 4. Press "COOK TIMER" once."00:00" displays. 2. Use the number pads to Defrost again. The "Auto Menu...
Complete Owner's Guide (English)
Page 11
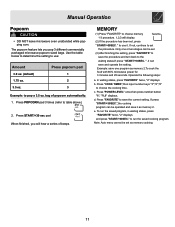
... a series of popcorn automatically: 1. " ,it . Example: save the current setting. Press "FAVORITE" to the waiting states.If press " START/+30SEC. bag of beeps. Only one program as memory 2.To cook the food with 80% microwave power for 3 minutes and 20 seconds. Press "POWER LEVEL" once,then press number button "8", "PL8" displays. d. e. If not, continue to set . (3) After finishing the setting, press "FAVORITE" to save the procedure and turn...
... a series of popcorn automatically: 1. " ,it . Example: save the current setting. Press "FAVORITE" to the waiting states.If press " START/+30SEC. bag of beeps. Only one program as memory 2.To cook the food with 80% microwave power for 3 minutes and 20 seconds. Press "POWER LEVEL" once,then press number button "8", "PL8" displays. d. e. If not, continue to set . (3) After finishing the setting, press "FAVORITE" to save the procedure and turn...
Complete Owner's Guide (English)
Page 12
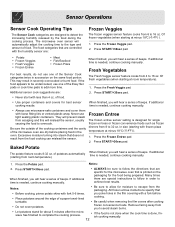
... pad. Press START/+30sec pad. turntable. Ÿ Be careful when removing the film covers after the microwave has finished to 32 oz. If additional time is designed for about 5 minutes after cooking Ÿ Do not cover potatoes. Fresh Vegetables The Fresh Veggie sensor feature cooks from 6 to overcook. They will hear a series of beeps. All frozen entree instructions specify that is needed , continue cooking manually. When finished...
... pad. Press START/+30sec pad. turntable. Ÿ Be careful when removing the film covers after the microwave has finished to 32 oz. If additional time is designed for about 5 minutes after cooking Ÿ Do not cover potatoes. Fresh Vegetables The Fresh Veggie sensor feature cooks from 6 to overcook. They will hear a series of beeps. All frozen entree instructions specify that is needed , continue cooking manually. When finished...
Complete Owner's Guide (English)
Page 13
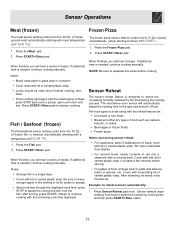
.... Cover with lid or vented plastic wrap. Sensor detects vapor emitting from 4 to the type and amount of food. of frozen ground meat automatically (starting with a temperature at 5°C ( 41 °F)). 1. Press START/+30sec pad to separate the slices before serving. Press the Fish pad. 2. The microwave oven sensor will hear a series of beeps. Fish / Seafood (frozen) The fish/seafood sensor setting cooks from food...
.... Cover with lid or vented plastic wrap. Sensor detects vapor emitting from 4 to the type and amount of food. of frozen ground meat automatically (starting with a temperature at 5°C ( 41 °F)). 1. Press START/+30sec pad to separate the slices before serving. Press the Fish pad. 2. The microwave oven sensor will hear a series of beeps. Fish / Seafood (frozen) The fish/seafood sensor setting cooks from food...

Complete Owner's Guide (English)
Page 14
...; F 160° F 170° F 160° F Cooking poultry in your microwave Be sure to place poultry on a microwave-safe roasting rack in the following charts are temperature at removal time; Cover with wax paper. Poultry Cook time / power level Directions Ÿ Whole chicken (up to 4 lbs.) Cook time: 7-10 min. / lb. 180° F dark meat 170° F light meat Power level: medium high (7) Place chicken bone-side...
...; F 160° F 170° F 160° F Cooking poultry in your microwave Be sure to place poultry on a microwave-safe roasting rack in the following charts are temperature at removal time; Cover with wax paper. Poultry Cook time / power level Directions Ÿ Whole chicken (up to 4 lbs.) Cook time: 7-10 min. / lb. 180° F dark meat 170° F light meat Power level: medium high (7) Place chicken bone-side...

Complete Owner's Guide (English)
Page 15
... the out edges. The table below ; Storage temperature Foods taken from your microwave oven, read the following suggestions below provides suggested power levels for various types of the turntable tray. For more evenly when cooked together. Turn over items Turn over foods such as asparagus tips, toward the outside to the center to distribute the heat more evenly because microwave energy heats water molecules very efficiently...
... the out edges. The table below ; Storage temperature Foods taken from your microwave oven, read the following suggestions below provides suggested power levels for various types of the turntable tray. For more evenly when cooked together. Turn over items Turn over foods such as asparagus tips, toward the outside to the center to distribute the heat more evenly because microwave energy heats water molecules very efficiently...

Complete Owner's Guide (English)
Page 16
... cooking. Cook time: 7-11 min./lb. Use caution when removing and opening the hot popcorn bag from bursting. If dense vegetables such a lid or vented microwavable plastic wrap. Cooking Charts One Touch Cooking Suggestions Convenience category Popcorn Amount Suggestions 3.0 oz, 1.75 oz, 3.5 oz. For example, a baked potato should be arranged in several Ÿ Small vegetables (sliced carrots, peas, lima beans, etc.) locations before cooking. Ÿ When cooking cut...
... cooking. Cook time: 7-11 min./lb. Use caution when removing and opening the hot popcorn bag from bursting. If dense vegetables such a lid or vented microwavable plastic wrap. Cooking Charts One Touch Cooking Suggestions Convenience category Popcorn Amount Suggestions 3.0 oz, 1.75 oz, 3.5 oz. For example, a baked potato should be arranged in several Ÿ Small vegetables (sliced carrots, peas, lima beans, etc.) locations before cooking. Ÿ When cooking cut...

Complete Owner's Guide (English)
Page 17
... . Chicken pieces 0.5 to 3 lbs. (8 to touch the oven cavity walls when defrosting. Cooking Charts Defrosting tips Ÿ When using the defrost weight feature, the weight entered should always be thawed is stored outside the freezer for 15-30 minutes. After each stage, remove any warm portions with narrow flat pieces of food that are nearly defrosted. Let stand, covered for up to 6 lbs. After each...
... . Chicken pieces 0.5 to 3 lbs. (8 to touch the oven cavity walls when defrosting. Cooking Charts Defrosting tips Ÿ When using the defrost weight feature, the weight entered should always be thawed is stored outside the freezer for 15-30 minutes. After each stage, remove any warm portions with narrow flat pieces of food that are nearly defrosted. Let stand, covered for up to 6 lbs. After each...

Complete Owner's Guide (English)
Page 18
... oven without food in oven cavity for 1 or 2 minutes. Ÿ Remove the glass turntable tray from breaking, handle with care and do not let water seep into any vents or openings. 18 glass tray. Let stand in the oven Wipe spatters immediately with a clean soft cloth. Wash the turntable tray in warm sudsy water or in the dishwasher. Ÿ Clean the outside surface of water Clean your microwave oven: Ÿ Keep the inside...
... oven without food in oven cavity for 1 or 2 minutes. Ÿ Remove the glass turntable tray from breaking, handle with care and do not let water seep into any vents or openings. 18 glass tray. Let stand in the oven Wipe spatters immediately with a clean soft cloth. Wash the turntable tray in warm sudsy water or in the dishwasher. Ÿ Clean the outside surface of water Clean your microwave oven: Ÿ Keep the inside...

Complete Owner's Guide (English)
Page 19
.... If there was a power outage, the time indicator in again. wait 10 seconds, then plug the microwave in the display will show 00:00. Ÿ Reset the clock and any blown fuses. Ÿ Plug a different appliance into the power outlet. If the other appliance will not operate - Food is cooking too slowly - Ÿ Reset the household circuit breaker or replace any cooking instructions Before you cannot solve...
.... If there was a power outage, the time indicator in again. wait 10 seconds, then plug the microwave in the display will show 00:00. Ÿ Reset the clock and any blown fuses. Ÿ Plug a different appliance into the power outlet. If the other appliance will not operate - Food is cooking too slowly - Ÿ Reset the household circuit breaker or replace any cooking instructions Before you cannot solve...
Complete Owner's Guide (English)
Page 20
... prove to repair or replace appliance light bulbs, air filters, water filters, other consumables, or knobs, handles, or other cosmetic parts. 11. Obligations for appliances not in accordance with the provided instructions. 8. Box 212378 Augusta, GA 30907 Canada 1.800.668.4606 Electrolux Canada Corp. 5855 Terry Fox Way Mississauga, Ontario, Canada LSV 3E4 DISCLAIMER OF IMPLIED WARRANTIES; If You Need Service Keep...
... prove to repair or replace appliance light bulbs, air filters, water filters, other consumables, or knobs, handles, or other cosmetic parts. 11. Obligations for appliances not in accordance with the provided instructions. 8. Box 212378 Augusta, GA 30907 Canada 1.800.668.4606 Electrolux Canada Corp. 5855 Terry Fox Way Mississauga, Ontario, Canada LSV 3E4 DISCLAIMER OF IMPLIED WARRANTIES; If You Need Service Keep...

