English Manual.
Page 6
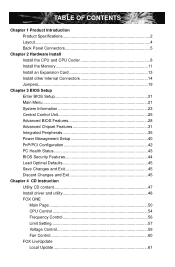
... Memory 11 Install an Expansion Card 13 Install other Internal Connectors 14 Jumpers 19 Chapter 3 BIOS Setup Enter BIOS Setup 21 Main Menu 21 System Information 23 Central Control Unit 25 Advanced BIOS Features 28 Advanced Chipset Features 31 Integrated Peripherals 35 Power Management Setup 40 PnP/PCI Configuration... 42 PC Health Status 43 BIOS Security Features 44 Load Optimal Defaults 45 Save Changes and Exit 45 Discard Changes and Exit 45 Chapter 4 CD Instruction...
... Memory 11 Install an Expansion Card 13 Install other Internal Connectors 14 Jumpers 19 Chapter 3 BIOS Setup Enter BIOS Setup 21 Main Menu 21 System Information 23 Central Control Unit 25 Advanced BIOS Features 28 Advanced Chipset Features 31 Integrated Peripherals 35 Power Management Setup 40 PnP/PCI Configuration... 42 PC Health Status 43 BIOS Security Features 44 Load Optimal Defaults 45 Save Changes and Exit 45 Discard Changes and Exit 45 Chapter 4 CD Instruction...
English Manual.
Page 7
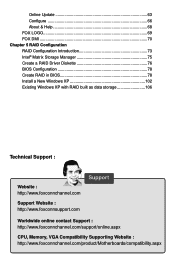
... LOGO 69 FOX DMI 70 Chapter 5 RAID Configuration RAID Configuration Introduction 73 Intel® Matrix Storage Manager 75 Create a RAID Driver Diskette 76 BIOS Configuration 78 Create RAID in BIOS 78 Install a New Windows XP 102 Existing Windows XP with RAID built as data storage 106 Technical Support : Website : http://www.foxconnchannel...
... LOGO 69 FOX DMI 70 Chapter 5 RAID Configuration RAID Configuration Introduction 73 Intel® Matrix Storage Manager 75 Create a RAID Driver Diskette 76 BIOS Configuration 78 Create RAID in BIOS 78 Install a New Windows XP 102 Existing Windows XP with RAID built as data storage 106 Technical Support : Website : http://www.foxconnchannel...
English Manual.
Page 15
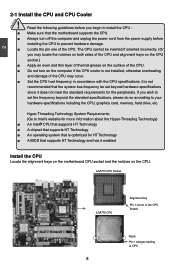
The CPU cannot be set the frequency beyond hardware specifications since it does not meet the standard requirements for HT Technology ■ A BIOS that supports HT Technology and has it enabled Install the CPU Locate the alignment keys on the motherboard CPU socket and the notches on the ...
The CPU cannot be set the frequency beyond hardware specifications since it does not meet the standard requirements for HT Technology ■ A BIOS that supports HT Technology and has it enabled Install the CPU Locate the alignment keys on the motherboard CPU socket and the notches on the ...

English Manual.
Page 18
... off the computer and unplug the power cord from the power outlet before you are : Single Channel DIMM1 DS/SS DIMM2 - It is installed, the BIOS will automatically check the memory in only one direction. Read the following : Channel 0 : DIMM1, DIMM2 Channel 1 : DIMM3, DIMM4 The combinations of the same capacity, brand...
... off the computer and unplug the power cord from the power outlet before you are : Single Channel DIMM1 DS/SS DIMM2 - It is installed, the BIOS will automatically check the memory in only one direction. Read the following : Channel 0 : DIMM1, DIMM2 Channel 1 : DIMM3, DIMM4 The combinations of the same capacity, brand...
English Manual.
Page 20
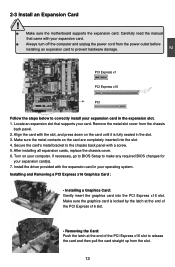
... the graphics card is fully seated in your expansion card(s). 7. PCI Express x1 PCI Express x16 PCI Follow the steps below to make any required BIOS changes for your operating system. Locate an expansion slot that came with the expansion card in the slot. 3. If necessary, go to... BIOS Setup to correctly install your computer. Secure the card's metal bracket to the chassis back panel with the slot, and press down on your expansion ...
... the graphics card is fully seated in your expansion card(s). 7. PCI Express x1 PCI Express x16 PCI Follow the steps below to make any required BIOS changes for your operating system. Locate an expansion slot that came with the expansion card in the slot. 3. If necessary, go to... BIOS Setup to correctly install your computer. Secure the card's metal bracket to the chassis back panel with the slot, and press down on your expansion ...

English Manual.
Page 24
...can be connected to the four USB ports on its motherboard. By connecting through USB cables with them, user can be controlled and monitored in G45M-S) The 1394a expansion cable can quickly expand another eight USB ports on the chassis. D+ GND NC 9 10 F_USB 1/2/3/4 Fan Connectors : ... the chassis is closed, the system will send a message out. 1394a Connector : F_1394 (Only available in "PC Health Status" section of the BIOS Setup. Audio Connector : CD_IN CD_IN is a Sony standard audio connector, it can detect the chassis intrusion through the function of this connector. The ...
...can be connected to the four USB ports on its motherboard. By connecting through USB cables with them, user can be controlled and monitored in G45M-S) The 1394a expansion cable can quickly expand another eight USB ports on the chassis. D+ GND NC 9 10 F_USB 1/2/3/4 Fan Connectors : ... the chassis is closed, the system will send a message out. 1394a Connector : F_1394 (Only available in "PC Health Status" section of the BIOS Setup. Audio Connector : CD_IN CD_IN is a Sony standard audio connector, it can detect the chassis intrusion through the function of this connector. The ...

English Manual.
Page 26
...The motherboard uses CMOS RAM to use the various functions of Jumpers 1. This section explains how to store the basic hardware information (such as BIOS data, date, time information, hardware password...etc.). Clear CMOS data is turned on. 19 19 2 2-5 Jumpers For some features needed,... users can change the jumper settings on this manual, pin 1 is simply labeled as "1". 2. For any jumper setting. Go to BIOS Setup to configure new system as described in this motherboard to clear CMOS data are : 1. Turn off the computer, unplug the power cord from...
...The motherboard uses CMOS RAM to use the various functions of Jumpers 1. This section explains how to store the basic hardware information (such as BIOS data, date, time information, hardware password...etc.). Clear CMOS data is turned on. 19 19 2 2-5 Jumpers For some features needed,... users can change the jumper settings on this manual, pin 1 is simply labeled as "1". 2. For any jumper setting. Go to BIOS Setup to configure new system as described in this motherboard to clear CMOS data are : 1. Turn off the computer, unplug the power cord from...
English Manual.
Page 27
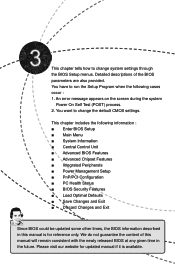
.... This chapter includes the following cases occur : 1. You want to change system settings through the BIOS Setup menus. We do not guarantee the content of the BIOS parameters are also provided. Please visit our website for updated manual if it is for reference only.... You have to run the Setup Program when the following information : ■ Enter BIOS Setup ■ Main Menu ■ System Information ■ Central Control Unit ■ Advanced BIOS Features ■ Advanced Chipset Features ■ Integrated Peripherals ■ Power Management Setup ■ PnP/...
.... This chapter includes the following cases occur : 1. You want to change system settings through the BIOS Setup menus. We do not guarantee the content of the BIOS parameters are also provided. Please visit our website for updated manual if it is for reference only.... You have to run the Setup Program when the following information : ■ Enter BIOS Setup ■ Main Menu ■ System Information ■ Central Control Unit ■ Advanced BIOS Features ■ Advanced Chipset Features ■ Integrated Peripherals ■ Power Management Setup ■ PnP/...

English Manual.
Page 28
.... ► System Information ► PnP/PCI Configuration ► Central Control Unit ► PC Health Status ► Advanced BIOS Features ► BIOS Security Features ► Advanced Chipset Features Load Optimal Defaults ► Integrated Peripherals Save Changes and Exit ► Power Management Setup...values for any damage which resulted from a list of setup functions together with two exit choices. Each item in the BIOS Setup, and we shall not be responsible for the chipset can be changed through this menu, and the system performance...
.... ► System Information ► PnP/PCI Configuration ► Central Control Unit ► PC Health Status ► Advanced BIOS Features ► BIOS Security Features ► Advanced Chipset Features Load Optimal Defaults ► Integrated Peripherals Save Changes and Exit ► Power Management Setup...values for any damage which resulted from a list of setup functions together with two exit choices. Each item in the BIOS Setup, and we shall not be responsible for the chipset can be changed through this menu, and the system performance...
English Manual.
Page 29
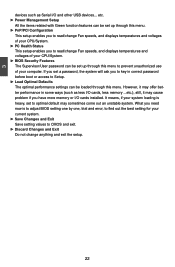
What you have more memory or I/O cards installed. It means, if your system loading is to adjust BIOS setting one by one, trial and error, to find out the best setting for your current system. ► Save Changes and Exit Save setting values ...to read /change Fan speeds, and displays temperatures and voltages of your CPU/System. ► BIOS Security Features The Supervisor/User password can be loaded through this menu. ► PnP/PCI Configuration This setup enables you to CMOS and exit. ►...
What you have more memory or I/O cards installed. It means, if your system loading is to adjust BIOS setting one by one, trial and error, to find out the best setting for your current system. ► Save Changes and Exit Save setting values ...to read /change Fan speeds, and displays temperatures and voltages of your CPU/System. ► BIOS Security Features The Supervisor/User password can be loaded through this menu. ► PnP/PCI Configuration This setup enables you to CMOS and exit. ►...
English Manual.
Page 30
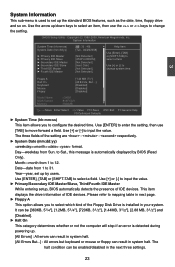
.... ► Fourth IDE Master [Not Detected] Floppy A Halt On Keyboard Mouse Floppy Model Name BIOS Version Memory [1.44 MB 31/2"] [All Errors, But ...] [Disabled] [Disabled] [Disabled] : G45M :815F1D21 :1024MB Move Enter:Select +/-/:Value F10:Save ESC:Exit F1:General Help F9:Optimized Defaults ...► System Time (hh:mm:ss) This item allows you to move forward a field. Use the arrow up by BIOS (Read Only). Day-weekday from Sun...
.... ► Fourth IDE Master [Not Detected] Floppy A Halt On Keyboard Mouse Floppy Model Name BIOS Version Memory [1.44 MB 31/2"] [All Errors, But ...] [Disabled] [Disabled] [Disabled] : G45M :815F1D21 :1024MB Move Enter:Select +/-/:Value F10:Save ESC:Exit F1:General Help F9:Optimized Defaults ...► System Time (hh:mm:ss) This item allows you to move forward a field. Use the arrow up by BIOS (Read Only). Day-weekday from Sun...

English Manual.
Page 31
... stop for a floppy error if you enabled this item. ► Model Name Model name of this information and discuss with the field service people if a BIOS upgrade is depending on how many memory modules were installed in your system before powering on. ► MAC Address This item shows the onboard LAN... MAC address. ► CPU Name It displays the current CPU name. 24 User can check this product. ► BIOS Version It displays the current BIOS version. The size is needed. ► Memory This item displays the current memory size.
... stop for a floppy error if you enabled this item. ► Model Name Model name of this information and discuss with the field service people if a BIOS upgrade is depending on how many memory modules were installed in your system before powering on. ► MAC Address This item shows the onboard LAN... MAC address. ► CPU Name It displays the current CPU name. 24 User can check this product. ► BIOS Version It displays the current BIOS version. The size is needed. ► Memory This item displays the current memory size.

English Manual.
Page 34
... is used to detect a CPU clock value which can be incremented from +50mV to +600mV. 27 When the maximal clock value is used to enter BIOS again, and select "O.C. The voltage can be run in a step of 50mV. The voltage can then press [F1] to continue, press [Del] ... Control This option is running your PC restarts ) in a step of 6.25mV. Voltage Options CMOS Setup Utility - Select [OK], and press [Enter], then BIOS will restart itself . Configuration" menu, enter an appropriate CPU clock value (smaller than the latest CPU clock value shown on the screen. When the overclock...
... is used to detect a CPU clock value which can be incremented from +50mV to +600mV. 27 When the maximal clock value is used to enter BIOS again, and select "O.C. The voltage can be run in a step of 50mV. The voltage can then press [F1] to continue, press [Del] ... Control This option is running your PC restarts ) in a step of 6.25mV. Voltage Options CMOS Setup Utility - Select [OK], and press [Enter], then BIOS will restart itself . Configuration" menu, enter an appropriate CPU clock value (smaller than the latest CPU clock value shown on the screen. When the overclock...

English Manual.
Page 35
...9658; CPU Configuration ► Boot Device Priority ► Hard Disk Drives ► Removable Drives Quick Boot Quiet Boot Floppy Drive Seek Bootup Num-Lock BIOS Write Protect [Press Enter] Help Item [Press Enter] [Press Enter] Configure CPU. [Press Enter] [Enabled] [Enabled] [Disabled] [On] [... option is used to specify the boot priority sequence from available removable drives. ► Quick Boot While Enabled, this option allows BIOS to skip certain tests while booting, this function, then POST will shorten the time needed to boot the system. ► Quiet...
...9658; CPU Configuration ► Boot Device Priority ► Hard Disk Drives ► Removable Drives Quick Boot Quiet Boot Floppy Drive Seek Bootup Num-Lock BIOS Write Protect [Press Enter] Help Item [Press Enter] [Press Enter] Configure CPU. [Press Enter] [Enabled] [Enabled] [Disabled] [On] [... option is used to specify the boot priority sequence from available removable drives. ► Quick Boot While Enabled, this option allows BIOS to skip certain tests while booting, this function, then POST will shorten the time needed to boot the system. ► Quiet...
English Manual.
Page 37
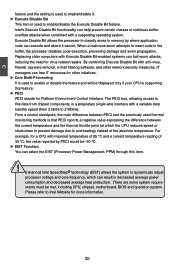
... attacks when combined with a supporting operating system. When a malicious worm attempts to insert code in memory by PECI would be met, including CPU, chipset, motherboard, BIOS and operation system. The PECI bus, allowing access to this item. ! Execute Disable Bit allows the processor to classify areas in the buffer, the processor...
... attacks when combined with a supporting operating system. When a malicious worm attempts to insert code in memory by PECI would be met, including CPU, chipset, motherboard, BIOS and operation system. The PECI bus, allowing access to this item. ! Execute Disable Bit allows the processor to classify areas in the buffer, the processor...
English Manual.
Page 39
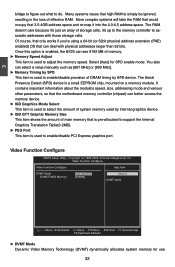
Once this option is enabled, the BIOS can see 8192 MB of DRAM timing by SPD device. The Serial Presence Detect (SPD) device is used to simply be ignored, resulting in the ...
Once this option is enabled, the BIOS can see 8192 MB of DRAM timing by SPD device. The Serial Presence Detect (SPD) device is used to simply be ignored, resulting in the ...

English Manual.
Page 40
When the memory is no longer be utilized by the operating system. This BIOS option allows you to adjust the amount of memory will provide the user with a guaranteed graphics memory at all non-critical systems when in the ...
When the memory is no longer be utilized by the operating system. This BIOS option allows you to adjust the amount of memory will provide the user with a guaranteed graphics memory at all non-critical systems when in the ...

English Manual.
Page 44
... TPM Work Group defines the implementation of cryptographic techniques including public-key cryptography, cryptographic algorithms and protocols. Members should have a working knowledge of security in BIOS Move Enter:Select +/-/:Value F10:Save ESC:Exit F1:General Help F9:Optimized Defaults ► TCG/TPM Support Trusted Computing Group (TCG) members develop and...
... TPM Work Group defines the implementation of cryptographic techniques including public-key cryptography, cryptographic algorithms and protocols. Members should have a working knowledge of security in BIOS Move Enter:Select +/-/:Value F10:Save ESC:Exit F1:General Help F9:Optimized Defaults ► TCG/TPM Support Trusted Computing Group (TCG) members develop and...
English Manual.
Page 45
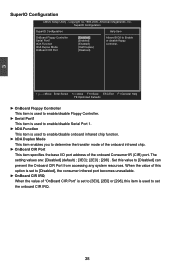
...], this value to Enable Serial Port1 [Enabled] or disable floppy IrDA Function [Enabled] controller. SuperIO Configuration SuperIO Configuration Help Item OnBoard Floppy Controller [Enabled] Allows BIOS to [Disabled] can prevent the Onboard CIR Port from accessing any system resources. 3 SuperIO Configuration CMOS Setup Utility - Copyright (C) 1985-2005, American Megatrends, Inc. The...
...], this value to Enable Serial Port1 [Enabled] or disable floppy IrDA Function [Enabled] controller. SuperIO Configuration SuperIO Configuration Help Item OnBoard Floppy Controller [Enabled] Allows BIOS to [Disabled] can prevent the Onboard CIR Port from accessing any system resources. 3 SuperIO Configuration CMOS Setup Utility - Copyright (C) 1985-2005, American Megatrends, Inc. The...

English Manual.
Page 46
...item is used to enable the support for USB devices on legacy OS. This is used to set the reset delay for EHCI BIOS handoff will appear : ► USB Storage Configuration After pressing , you can be available in the Enhanced Host Controller Interface (EHCI...Devices Enabled : Help Item 1 Keyboard, 1 Mouse Enables support for Legacy USB Support [Enabled] legacy USB USB 2.0 Controller Mode [High Speed] BIOS EHCI Hand-Off [Enabled] ► USB Storage Configuration [Press Enter] Move Enter:Select +/-/:Value F10:Save ESC:Exit F1:General Help F9:...
...item is used to enable the support for USB devices on legacy OS. This is used to set the reset delay for EHCI BIOS handoff will appear : ► USB Storage Configuration After pressing , you can be available in the Enhanced Host Controller Interface (EHCI...Devices Enabled : Help Item 1 Keyboard, 1 Mouse Enables support for Legacy USB Support [Enabled] legacy USB USB 2.0 Controller Mode [High Speed] BIOS EHCI Hand-Off [Enabled] ► USB Storage Configuration [Press Enter] Move Enter:Select +/-/:Value F10:Save ESC:Exit F1:General Help F9:...


