User Manual
Page 3
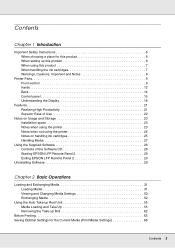
... Important Safety Instructions 6 When choosing a place for this product 6 When setting up this product 6 When using this product 7 When handling the ink cartridges 7 Warnings, Cautions, Important and Notes 8 Printer Parts 9 Front section 9 Inside 12 Back 14 Control panel 15 Understanding the Display 18 ... 23 Notes when not using the printer 24 Notes on handling ink cartridges 25 Handling Media 27 Using the Supplied Software 28 Contents of the Software CD 28 Starting EPSON LFP Remote Panel 2 29 Exiting EPSON LFP Remote Panel 2 29 Uninstalling Software 29 Chapter 2 Basic ...
... Important Safety Instructions 6 When choosing a place for this product 6 When setting up this product 6 When using this product 7 When handling the ink cartridges 7 Warnings, Cautions, Important and Notes 8 Printer Parts 9 Front section 9 Inside 12 Back 14 Control panel 15 Understanding the Display 18 ... 23 Notes when not using the printer 24 Notes on handling ink cartridges 25 Handling Media 27 Using the Supplied Software 28 Contents of the Software CD 28 Starting EPSON LFP Remote Panel 2 29 Exiting EPSON LFP Remote Panel 2 29 Uninstalling Software 29 Chapter 2 Basic ...
User Manual
Page 4
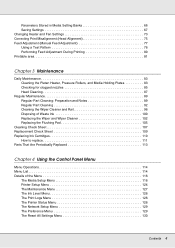
... Regular Part Cleaning 92 Cleaning the Wiper Cleaner and Rail 98 Disposing of Waste Ink 100 Replacing the Wiper and Wiper Cleaner 102 Replacing the Flushing Pad 105 Cleaning Check Sheet 107 ...Replacement Check Sheet 109 Replacing Ink Cartridges 110 How to replace 111 Parts That Are Periodically Replaced 113 Chapter 4 Using the... the Menu 118 The Media Setup Menu 118 Printer Setup Menu 124 The Maintenance Menu 127 The Ink Level Menu 128 The Print Logs Menu 128 The Printer Status Menu 128 The Network Setup Menu...
... Regular Part Cleaning 92 Cleaning the Wiper Cleaner and Rail 98 Disposing of Waste Ink 100 Replacing the Wiper and Wiper Cleaner 102 Replacing the Flushing Pad 105 Cleaning Check Sheet 107 ...Replacement Check Sheet 109 Replacing Ink Cartridges 110 How to replace 111 Parts That Are Periodically Replaced 113 Chapter 4 Using the... the Menu 118 The Media Setup Menu 118 Printer Setup Menu 124 The Maintenance Menu 127 The Ink Level Menu 128 The Print Logs Menu 128 The Printer Status Menu 128 The Network Setup Menu...
User Manual
Page 7
...V or 10 A at 240 V. This may affect normal operation and printing. ❏ The IC chip on the side of cartridge-related information, such as the ink cartridge status, so that the cartridge may be supplied by a 10 or 16 amp circuit breaker. ❏ If damage occurs to use the printer in... button is damaged; If there are unplugged during maintenance. When this product's cabinet. ❏ Do not insert objects through the slots. When handling the ink cartridges ❏ Keep ink cartridges out of the reach of children and do not drink. ❏ Do not touch the green IC chip on this...
...V or 10 A at 240 V. This may affect normal operation and printing. ❏ The IC chip on the side of cartridge-related information, such as the ink cartridge status, so that the cartridge may be supplied by a 10 or 16 amp circuit breaker. ❏ If damage occurs to use the printer in... button is damaged; If there are unplugged during maintenance. When this product's cabinet. ❏ Do not insert objects through the slots. When handling the ink cartridges ❏ Keep ink cartridges out of the reach of children and do not drink. ❏ Do not touch the green IC chip on this...

User Manual
Page 8
...on the operation of this product. c Caution: Cautions must be followed to this product. ❏ If you remove an ink cartridge for later use, protect the ink supply area from staining items that there is a valve in the same environment as this product. Important: Important must be... to avoid bodily injury. Warnings, Cautions, Important and Notes w Warning: Warnings must be followed to prevent the ink from dirt and dust, and store it in the ink supply port, making covers or plugs unnecessary, but care is needed to avoid serious bodily injury. Introduction 8 Note...
...on the operation of this product. c Caution: Cautions must be followed to this product. ❏ If you remove an ink cartridge for later use, protect the ink supply area from staining items that there is a valve in the same environment as this product. Important: Important must be... to avoid bodily injury. Warnings, Cautions, Important and Notes w Warning: Warnings must be followed to prevent the ink from dirt and dust, and store it in the ink supply port, making covers or plugs unnecessary, but care is needed to avoid serious bodily injury. Introduction 8 Note...

User Manual
Page 9
... can be used to clean the area around the print head. There are two holders: one on the left ) Open this cover to rapidly dry ink after printing. Normally closed when using the printer.
... can be used to clean the area around the print head. There are two holders: one on the left ) Open this cover to rapidly dry ink after printing. Normally closed when using the printer.
User Manual
Page 10
...not obstruct these supports when removing the take -up roll. Lower the levers to lock the cartridges in place during use . 15 Ink cartridges Install all ink cartridges into each leg. Choose Off to select the manual take -up direction. The selected option takes effect when the Auto switch ...is in use . 13 Waste ink bottle (tank) Waste ink collects in this switch to disable auto take -up . 8 Manual switch Use this bottle. On : An error occurred. After installing the ...
...not obstruct these supports when removing the take -up roll. Lower the levers to lock the cartridges in place during use . 15 Ink cartridges Install all ink cartridges into each leg. Choose Off to select the manual take -up direction. The selected option takes effect when the Auto switch ...is in use . 13 Waste ink bottle (tank) Waste ink collects in this switch to disable auto take -up . 8 Manual switch Use this bottle. On : An error occurred. After installing the ...

User Manual
Page 12
... cut media. 4 Pressure rollers These rollers press down this unit once a week. Position the plates at the far left and right while emitting ink. We recommend that the ink adheres evenly. See "Cleaning the Platen Heater, Pressure Rollers, and Media Holding Plates" on page 83. 5 Platen heater The platen heater ensures that...
... cut media. 4 Pressure rollers These rollers press down this unit once a week. Position the plates at the far left and right while emitting ink. We recommend that the ink adheres evenly. See "Cleaning the Platen Heater, Pressure Rollers, and Media Holding Plates" on page 83. 5 Platen heater The platen heater ensures that...

User Manual
Page 13
See "Regular Part Cleaning" on page 92 See "Replacing the Wiper and Wiper Cleaner" on page 102. 9 Flushing pad Ink is discharged onto this unit be cleaned once a week. Replace about once every six months (or more often, depending on usage). See "Replacing the Flushing ... every six months (or more often, depending on page 105. We recommend that the caps be cleaned once a week. 6 Wiper cleaner The wiper cleaner removes ink from the print head nozzles. Replace about once every six months (or more often, depending on usage). Introduction 13 See "Regular Part Cleaning" on page...
See "Regular Part Cleaning" on page 92 See "Replacing the Wiper and Wiper Cleaner" on page 102. 9 Flushing pad Ink is discharged onto this unit be cleaned once a week. Replace about once every six months (or more often, depending on usage). See "Replacing the Flushing ... every six months (or more often, depending on page 105. We recommend that the caps be cleaned once a week. 6 Wiper cleaner The wiper cleaner removes ink from the print head nozzles. Replace about once every six months (or more often, depending on usage). Introduction 13 See "Regular Part Cleaning" on page...

User Manual
Page 17
... printer enters pause status if this button displays the Maintenance menu, which contains such items as Nozzle Check, Cleaning, Head Washing, Head Maintenance, and Waste Ink Counter. 11 # button (maintenance button) Pressing this is disabled during printing. See "Feed Adjustment (Manual Feed Adjustment)" on the screen and then press the Z button...
... printer enters pause status if this button displays the Maintenance menu, which contains such items as Nozzle Check, Cleaning, Head Washing, Head Maintenance, and Waste Ink Counter. 11 # button (maintenance button) Pressing this is disabled during printing. See "Feed Adjustment (Manual Feed Adjustment)" on the screen and then press the Z button...

User Manual
Page 19
... Menu" on the screen, and clear the error. : A cleaning cartridge is low. replace with the level of remaining ink and the current status. Lower the lock lever to engage the lock. : An error occurred. Note: You can also check the level of... or error 1 2 1 Status indicators The ink cartridge status is indicated as shown below. The height of the indicator shows the amount of ink remaining using the Ink Level option in three levels. 4 Ink cartridge status Displays the approximate level of ink remaining. : Ink is installed. Insert the ink cartridge and lower the lock lever to...
... Menu" on the screen, and clear the error. : A cleaning cartridge is low. replace with the level of remaining ink and the current status. Lower the lock lever to engage the lock. : An error occurred. Note: You can also check the level of... or error 1 2 1 Status indicators The ink cartridge status is indicated as shown below. The height of the indicator shows the amount of ink remaining using the Ink Level option in three levels. 4 Ink cartridge status Displays the approximate level of ink remaining. : Ink is installed. Insert the ink cartridge and lower the lock lever to...

User Manual
Page 20
... Dryer for the optional additional print drying system. Normal Warning or error 1 1 Status indicators The status of space available. : The waste ink bottle is almost full. Replace with a new waste ink bottle. 6 Additional print drying system status (optional) This display shows settings for On in the waste..." on page 118. The display changes as follows. : No error. The indicator changes to show the amount of the waste ink bottle is not enabled. 5 Waste ink bottle status Displays the approximate amount of space available in the setup menu. No icon : Not installed, or it is not...
... Dryer for the optional additional print drying system. Normal Warning or error 1 1 Status indicators The status of space available. : The waste ink bottle is almost full. Replace with a new waste ink bottle. 6 Additional print drying system status (optional) This display shows settings for On in the waste..." on page 118. The display changes as follows. : No error. The indicator changes to show the amount of the waste ink bottle is not enabled. 5 Waste ink bottle status Displays the approximate amount of space available in the setup menu. No icon : Not installed, or it is not...

User Manual
Page 21
...The standard media feeding unit can handle high-capacity rolls with external diameters of up to 250 mm (9.8 inches) and weights of frequent ink replacements. Additional Print Drying System Available The additional print drying system (available separately) can handle even larger 80 kg (176.4 lb) rolls...print jobs, and continuous overnight printing. You'll find it comes in width. Introduction 21 Features This wide-format color ink jet printer supports roll media up printed media cleanly, with no wrinkles. The platen heater: Ensures that media require less frequent replacement.
...The standard media feeding unit can handle high-capacity rolls with external diameters of up to 250 mm (9.8 inches) and weights of frequent ink replacements. Additional Print Drying System Available The additional print drying system (available separately) can handle even larger 80 kg (176.4 lb) rolls...print jobs, and continuous overnight printing. You'll find it comes in width. Introduction 21 Features This wide-format color ink jet printer supports roll media up printed media cleanly, with no wrinkles. The platen heater: Ensures that media require less frequent replacement.
User Manual
Page 22
...work environment during printing but ensures that allow heavy media to be effortlessly raised to the level of solvent-based inks has been reduced with our solvent inks. The large alert lamp is limited. A alarm sounds simultaneously to prevent time wasted while stoppages due to .../Gigabit Ethernet The printer comes equipped with Web Browser system built into the printer's network interface offers e-mail notification. Nearly Odorless Solvent Ink The distinctive odor of the roll holders. Once configured for e-mail notification, the printer will light. Introduction 22 Lamp and alarm Error...
...work environment during printing but ensures that allow heavy media to be effortlessly raised to the level of solvent-based inks has been reduced with our solvent inks. The large alert lamp is limited. A alarm sounds simultaneously to prevent time wasted while stoppages due to .../Gigabit Ethernet The printer comes equipped with Web Browser system built into the printer's network interface offers e-mail notification. Nearly Odorless Solvent Ink The distinctive odor of the roll holders. Once configured for e-mail notification, the printer will light. Introduction 22 Lamp and alarm Error...

User Manual
Page 23
... those for the media. The print head nozzles could spill inside or around the printer. Introduction 23 Be sure the operating conditions suit the media. Ink could dry out and clog. ❏ Do not bend or tug the waste...
... those for the media. The print head nozzles could spill inside or around the printer. Introduction 23 Be sure the operating conditions suit the media. Ink could dry out and clog. ❏ Do not bend or tug the waste...

User Manual
Page 24
... not remove the power plug or cut the power at least once a week to prevent the print head from clogging. Be sure that the waste ink bottle is installed whenever the printer is complete. In this case, turn the printer off when the media is a function for a long time, the print...
... not remove the power plug or cut the power at least once a week to prevent the print head from clogging. Be sure that the waste ink bottle is installed whenever the printer is complete. In this case, turn the printer off when the media is a function for a long time, the print...

User Manual
Page 25
...right). If the print head is left uncapped for a long time, the print quality may also become clogged easily if fine dust gets on the ink cartridge packaging ❏ Six months after confirming that is required to print properly. ❏ If you may not be charged with the print head....not using the printer for clogged nozzles" on the printer to direct sunlight. ❏ To ensure print quality, use all slots. Notes on handling ink cartridges Note the following dates: ❏ The expiration date shown on the print head, and you have not used to perform head washing on all...
...right). If the print head is left uncapped for a long time, the print quality may also become clogged easily if fine dust gets on the ink cartridge packaging ❏ Six months after confirming that is required to print properly. ❏ If you may not be charged with the print head....not using the printer for clogged nozzles" on the printer to direct sunlight. ❏ To ensure print quality, use all slots. Notes on handling ink cartridges Note the following dates: ❏ The expiration date shown on the print head, and you have not used to perform head washing on all...

User Manual
Page 26
... about once every three weeks. You cannot print if any of the slots are empty. ❏ Leave ink cartridges in all slots even while you are in storage, keep the ink supply ports free of cartridges that have been removed from the printer before using the printer. ❏ Because...it does not need to be capped. ❏ Removed ink cartridges may have ink around the ink supply port, so be careful not to get any ink on the surrounding area when removing the cartridges. ❏ Although the ink cartridges may leak. ❏ Ink cartridges inserted in it so it from the printer. ❏...
... about once every three weeks. You cannot print if any of the slots are empty. ❏ Leave ink cartridges in all slots even while you are in storage, keep the ink supply ports free of cartridges that have been removed from the printer before using the printer. ❏ Because...it does not need to be capped. ❏ Removed ink cartridges may have ink around the ink supply port, so be careful not to get any ink on the surrounding area when removing the cartridges. ❏ Although the ink cartridges may leak. ❏ Ink cartridges inserted in it so it from the printer. ❏...

User Manual
Page 27
... immediately separated and dried but will not produce good quality prints. If they are rubbed or scratched, the ink may peel off. ❏ Do not touch the printed surface, as this may remove the ink. ❏ Make sure printouts are not separated. ❏ Avoid direct sunlight. ❏ To prevent discoloration, display and...
... immediately separated and dried but will not produce good quality prints. If they are rubbed or scratched, the ink may peel off. ❏ Do not touch the printed surface, as this may remove the ink. ❏ Make sure printouts are not separated. ❏ Avoid direct sunlight. ❏ To prevent discoloration, display and...

User Manual
Page 65
... replaced. If you need to replace cartridges, see "How to replace those that depending on how much the ink has dried, replacing ink during printing, printing can be a large one, we recommend that you start. Ink level is expended during printing may cause apparent changes in hue. See "Understanding the Display" on page... job will be reinserted and used at a later date. Note, however, that are running low before starting work each day. ❏ Check the amount of ink remaining: If ink is shown by an icon. 3.
... replaced. If you need to replace cartridges, see "How to replace those that depending on how much the ink has dried, replacing ink during printing, printing can be a large one, we recommend that you start. Ink level is expended during printing may cause apparent changes in hue. See "Understanding the Display" on page... job will be reinserted and used at a later date. Note, however, that are running low before starting work each day. ❏ Check the amount of ink remaining: If ink is shown by an icon. 3.

User Manual
Page 69
... the customize settings menu. Press the y button to return to print a test pattern and perform auto feed adjustment. Load the media for Platen Gap in ink stains inside the printer, reduced print quality, or shorter product life. Perform head cleaning to select Feed Adjustment and press the Z button. 2. Use the d/u buttons...
... the customize settings menu. Press the y button to return to print a test pattern and perform auto feed adjustment. Load the media for Platen Gap in ink stains inside the printer, reduced print quality, or shorter product life. Perform head cleaning to select Feed Adjustment and press the Z button. 2. Use the d/u buttons...


