
User Manual
Page 3
Contents SureColor P10000/P20000 User's Guide 9 Introduction to Your Printer...10 Printer Features ...10...Media Handling...19 Roll Paper Handling ...19 Loading Roll Paper ...19 Cutting Roll Paper ...25 Cutting Roll Paper Manually...25 Printing Trim Lines ...26 Removing Roll Paper...27 Cut Sheet Handling ...30 Loading Cut Sheets ...30 Loading ...Basket...35 Creating Paper Configurations ...36 Printing a Paper Configuration List 38 Selecting Custom Paper Configurations 38 Available Epson Papers ...39 Borderless Paper Type Compatibility 46 Using the Optional Auto Take-up Reel ...48 About the ...
Contents SureColor P10000/P20000 User's Guide 9 Introduction to Your Printer...10 Printer Features ...10...Media Handling...19 Roll Paper Handling ...19 Loading Roll Paper ...19 Cutting Roll Paper ...25 Cutting Roll Paper Manually...25 Printing Trim Lines ...26 Removing Roll Paper...27 Cut Sheet Handling ...30 Loading Cut Sheets ...30 Loading ...Basket...35 Creating Paper Configurations ...36 Printing a Paper Configuration List 38 Selecting Custom Paper Configurations 38 Available Epson Papers ...39 Borderless Paper Type Compatibility 46 Using the Optional Auto Take-up Reel ...48 About the ...
User Manual
Page 6
... ...161 Aligning the Print Head Automatically Using the Product Control Panel 162 Aligning the Print Head Automatically Using a Computer Utility 163 Aligning the Print Head Manually Using the Product Control Panel 164 Maintenance...166 Cleaning Your Product ...166 Cleaning Around the Print Head...169 Replacing the Cutter...181 Moving or Transporting...
... ...161 Aligning the Print Head Automatically Using the Product Control Panel 162 Aligning the Print Head Automatically Using a Computer Utility 163 Aligning the Print Head Manually Using the Product Control Panel 164 Maintenance...166 Cleaning Your Product ...166 Cleaning Around the Print Head...169 Replacing the Cutter...181 Moving or Transporting...
User Manual
Page 10
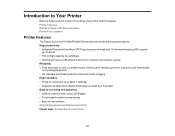
... media for easy access • Easy-to-use software Optional Equipment and Replacement Parts Parent topic: Introduction to learn more about your printer and this manual. Printer Features Notations Used in the Documentation Printer Part Locations Printer Features The Epson SureColor P10000/P20000 Series printers include these sections to Your Printer 10
... media for easy access • Easy-to-use software Optional Equipment and Replacement Parts Parent topic: Introduction to learn more about your printer and this manual. Printer Features Notations Used in the Documentation Printer Part Locations Printer Features The Epson SureColor P10000/P20000 Series printers include these sections to Your Printer 10

User Manual
Page 25
...you may not be able to keep your prints on the control panel. Windows Related tasks Selecting Roll Paper Settings - Cutting Roll Paper Manually Printing Trim Lines Parent topic: Roll Paper Handling Related references Roll Paper Options - The setting selected in the printer driver. Cutting Roll ...Paper The printer's a built-in cutter can automatically cut most paper types, or you manually cut them. Note: If you print on the control panel or in the printer driver overrides the control panel setting. Caution: You should...
...you may not be able to keep your prints on the control panel. Windows Related tasks Selecting Roll Paper Settings - Cutting Roll Paper Manually Printing Trim Lines Parent topic: Roll Paper Handling Related references Roll Paper Options - The setting selected in the printer driver. Cutting Roll ...Paper The printer's a built-in cutter can automatically cut most paper types, or you manually cut them. Note: If you print on the control panel or in the printer driver overrides the control panel setting. Caution: You should...

User Manual
Page 26
... exit the menu. 9. Press the cut the print by hand. Note: If you can print a trim line (page line) between print jobs as a guide for manual cutting. 1. Press the Menu button. 3. Press the Menu button. 3. Select Printer Setup and press the OK button. 4. Select Off. 7. Before you print, select the Setup...
... exit the menu. 9. Press the cut the print by hand. Note: If you can print a trim line (page line) between print jobs as a guide for manual cutting. 1. Press the Menu button. 3. Press the Menu button. 3. Select Printer Setup and press the OK button. 4. Select Off. 7. Before you print, select the Setup...

User Manual
Page 28
4. Note: If the roll lock lever is still on. 28 Lift the roll lock lever all the way up all the way, the lock is not raised up . If you are using the optional Auto Take-Up Reel, rewind the paper using the Manual switch. 5.
4. Note: If the roll lock lever is still on. 28 Lift the roll lock lever all the way up all the way, the lock is not raised up . If you are using the optional Auto Take-Up Reel, rewind the paper using the Manual switch. 5.

User Manual
Page 65
7. Then release the switch. 8. Note: The media will not take -up correctly if it loads evenly on the printer. Paper automatically feeds. 9. Make sure that there is some slack in the media and that it is looser on one side than the other. 65 Press the OK button on both sides. Press the Manual switch on the take up reel to the Forward position and hold it there until the media wraps around the core at least two times.
7. Then release the switch. 8. Note: The media will not take -up correctly if it loads evenly on the printer. Paper automatically feeds. 9. Make sure that there is some slack in the media and that it is looser on one side than the other. 65 Press the OK button on both sides. Press the Manual switch on the take up reel to the Forward position and hold it there until the media wraps around the core at least two times.

User Manual
Page 68
... reel is some slack in the media and that there is in the Off position and press the OK button on the printer. 7. Press the Manual switch on the take up reel to the Backward position and hold it is looser on both sides. Paper automatically feeds. 9. Make sure that it...
... reel is some slack in the media and that there is in the Off position and press the OK button on the printer. 7. Press the Manual switch on the take up reel to the Backward position and hold it is looser on both sides. Paper automatically feeds. 9. Make sure that it...

User Manual
Page 76
4. Unlock the paper stop and slide the paper holder to keep it from falling. 7. Tape the end of the roll to itself to prevent it from unwinding. 6. Remove the roll core from the take -up reel. 76 Cut the media manually and roll the printed end onto the take -up reel. 5. Note: Support the reel with one hand to the left.
4. Unlock the paper stop and slide the paper holder to keep it from falling. 7. Tape the end of the roll to itself to prevent it from unwinding. 6. Remove the roll core from the take -up reel. 76 Cut the media manually and roll the printed end onto the take -up reel. 5. Note: Support the reel with one hand to the left.

User Manual
Page 87
Front - Parent topic: Selecting Basic Print Settings - Roll Paper (Banner) Selects roll paper loaded in the sheet feeder. Sheet Selects sheets of paper loaded in the roll paper holder for a series of continuous images without any of the available roll paper options. Windows Roll Paper Options - Auto Cut options: • Off: Select this option to cut your prints manually. 87 Windows Select any margin space between them. Poster Board Selects poster board or other thick media loaded on the front poster board support.
Front - Parent topic: Selecting Basic Print Settings - Roll Paper (Banner) Selects roll paper loaded in the sheet feeder. Sheet Selects sheets of paper loaded in the roll paper holder for a series of continuous images without any of the available roll paper options. Windows Roll Paper Options - Auto Cut options: • Off: Select this option to cut your prints manually. 87 Windows Select any margin space between them. Poster Board Selects poster board or other thick media loaded on the front poster board support.

User Manual
Page 89
Windows 89 Print Page Line Prints lines between each image and trims each print individually, providing the cleanest edge for manual cutting. Auto Rotate Automatically positions the image or file to fit the roll paper. When Auto Rotate is selected, select the width of the paper as a guide for borderless printing. Parent topic: Selecting Basic Print Settings - • Double Cut: Increases the space between pages as the Roll Width setting.
Windows 89 Print Page Line Prints lines between each image and trims each print individually, providing the cleanest edge for manual cutting. Auto Rotate Automatically positions the image or file to fit the roll paper. When Auto Rotate is selected, select the width of the paper as a guide for borderless printing. Parent topic: Selecting Basic Print Settings - • Double Cut: Increases the space between pages as the Roll Width setting.

User Manual
Page 110
... program, as described in the Windows taskbar. 2. Parent topic: Printing with Windows Printing with OS X You can check for updates manually. Note: If you can print with your product software on Epson's support website. 110 Click OK to the product software. Do one of the following: • To change how often the...
... program, as described in the Windows taskbar. 2. Parent topic: Printing with Windows Printing with OS X You can check for updates manually. Note: If you can print with your product software on Epson's support website. 110 Click OK to the product software. Do one of the following: • To change how often the...

User Manual
Page 121
OS X Select any of your image. 121 Auto Cut options: • Off: Select this option to cut your prints manually. • Normal Cut: Creates a margin and the top and bottom of the available roll paper options. Roll Paper Options -
OS X Select any of your image. 121 Auto Cut options: • Off: Select this option to cut your prints manually. • Normal Cut: Creates a margin and the top and bottom of the available roll paper options. Roll Paper Options -

User Manual
Page 122
When Auto Rotate is selected, select the width of the paper as a guide for borderless printing. Parent topic: Selecting Roll Paper Settings - Borderless images may overlap slightly. • Double Cut: Increases the space between them. OS X 122 Auto Rotate Automatically positions the image or file to -end with no gap between each image and trims each print individually, providing the cleanest edge for manual cutting. Print Page Line Prints lines between pages as the Roll Width setting. • Single Cut: Prints images end-to fit the roll paper.
When Auto Rotate is selected, select the width of the paper as a guide for borderless printing. Parent topic: Selecting Roll Paper Settings - Borderless images may overlap slightly. • Double Cut: Increases the space between them. OS X 122 Auto Rotate Automatically positions the image or file to -end with no gap between each image and trims each print individually, providing the cleanest edge for manual cutting. Print Page Line Prints lines between pages as the Roll Width setting. • Single Cut: Prints images end-to fit the roll paper.

User Manual
Page 131
Lets you automatically or manually align the print head when print results are still clogged, select Heavy cleaning. Lets you adjust or replace the built-in the specified location on ... Check Head Cleaning Options Print Nozzle Check Pattern Printless Nozzle Check Pattern All Nozzles Various colors Normal Heavy Head Alignment Check and Clean Nozzle Auto Manual - Checks the nozzles and displays the results on the media. If head alignment with this setting does not correct the problem, select Uni-D. Replace Cutter...
Lets you automatically or manually align the print head when print results are still clogged, select Heavy cleaning. Lets you adjust or replace the built-in the specified location on ... Check Head Cleaning Options Print Nozzle Check Pattern Printless Nozzle Check Pattern All Nozzles Various colors Normal Heavy Head Alignment Check and Clean Nozzle Auto Manual - Checks the nozzles and displays the results on the media. If head alignment with this setting does not correct the problem, select Uni-D. Replace Cutter...

User Manual
Page 132
... Control Panel Cleaning the Print Head Using the Product Control Panel Aligning the Print Head Automatically Using the Product Control Panel Aligning the Print Head Manually Using the Product Control Panel Replacing the Cutter Paper Menu Settings The Paper menu lets you modify settings for the current paper, or create and...
... Control Panel Cleaning the Print Head Using the Product Control Panel Aligning the Print Head Automatically Using the Product Control Panel Aligning the Print Head Manually Using the Product Control Panel Replacing the Cutter Paper Menu Settings The Paper menu lets you modify settings for the current paper, or create and...

User Manual
Page 141
... to 600 seconds Restore Settings - Enables IPv6 communication. Prints a sheet listing the current printer settings. Displays the date that the Epson Color Calibration Utility was last run, if applicable. Printer Status settings Setting Firmware Version Option Status Print Status Sheet Calibration Date Options...1x Setting On Off HTTPS Redirect Setting On Off Description Determines whether IP addresses are obtained automatically through DHCP or manually. Automatically redirects network traffic sent over a USB connection. Displays the status of time before the printer times ...
... to 600 seconds Restore Settings - Enables IPv6 communication. Prints a sheet listing the current printer settings. Displays the date that the Epson Color Calibration Utility was last run, if applicable. Printer Status settings Setting Firmware Version Option Status Print Status Sheet Calibration Date Options...1x Setting On Off HTTPS Redirect Setting On Off Description Determines whether IP addresses are obtained automatically through DHCP or manually. Automatically redirects network traffic sent over a USB connection. Displays the status of time before the printer times ...

User Manual
Page 155
... instructions on the LCD screen. 6. Select Nozzle Check and press the OK button. 5. Do one of the following : • To print a nozzle check pattern and manually check it for issues, select Print Check Pattern and press the OK button. • To automatically check for any missing or deflected dots or segments...
... instructions on the LCD screen. 6. Select Nozzle Check and press the OK button. 5. Do one of the following : • To print a nozzle check pattern and manually check it for issues, select Print Check Pattern and press the OK button. • To automatically check for any missing or deflected dots or segments...

User Manual
Page 158
... for any clogged nozzles, select Check and Clean Nozzle and press the OK button. Press the OK button. Do one of the following : • To manually select the nozzles to examine the pattern for cleaning, select them and press the OK button. 7. Note: Use at least a 10× eye loupe to...
... for any clogged nozzles, select Check and Clean Nozzle and press the OK button. Press the OK button. Do one of the following : • To manually select the nozzles to examine the pattern for cleaning, select them and press the OK button. 7. Note: Use at least a 10× eye loupe to...

User Manual
Page 161
... head. If there are any gaps in the nozzle check pattern, clean the print head. • Manually align the print head on any transparent or colored paper or on these paper types: Plain paper, Epson Enhanced Matte Posterboard. Print head is clean Print head needs cleaning Parent topic: Print Head Cleaning Related... the loaded media. Aligning the Print Head Automatically Using the Product Control Panel Aligning the Print Head Automatically Using a Computer Utility Aligning the Print Head Manually Using the Product Control Panel Parent topic: Adjusting Print Quality 161
... head. If there are any gaps in the nozzle check pattern, clean the print head. • Manually align the print head on any transparent or colored paper or on these paper types: Plain paper, Epson Enhanced Matte Posterboard. Print head is clean Print head needs cleaning Parent topic: Print Head Cleaning Related... the loaded media. Aligning the Print Head Automatically Using the Product Control Panel Aligning the Print Head Automatically Using a Computer Utility Aligning the Print Head Manually Using the Product Control Panel Parent topic: Adjusting Print Quality 161


