Reference Guide
Page 4
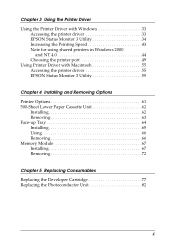
... the Printer Driver Using the Printer Driver with Windows 33 Accessing the printer driver 33 EPSON Status Monitor 3 Utility 34 Increasing the Printing Speed 43 Note for using shared printers in Windows 2000 and NT 4.0 44 Choosing the printer port 49 Using Printer Driver with Macintosh 55 Accessing the printer driver 55 EPSON Status Monitor 3 Utility 55 Chapter 4 Installing and Removing Options Printer Options 61...
... the Printer Driver Using the Printer Driver with Windows 33 Accessing the printer driver 33 EPSON Status Monitor 3 Utility 34 Increasing the Printing Speed 43 Note for using shared printers in Windows 2000 and NT 4.0 44 Choosing the printer port 49 Using Printer Driver with Macintosh 55 Accessing the printer driver 55 EPSON Status Monitor 3 Utility 55 Chapter 4 Installing and Removing Options Printer Options 61...

Reference Guide
Page 5
... 101 Print quality problems 102 Memory problems 107 Option problems 108 Printer driver and utility problems 109 Communication errors 110 Chapter 7 Cleaning and Transporting the Printer Cleaning the Printer 113 Cleaning the inside of the printer 113 Removing spilled toner 115 Cleaning the printer case 116 Transporting the Printer 117 Appendix A Technical Specifications Paper 119 Specifications 119...
... 101 Print quality problems 102 Memory problems 107 Option problems 108 Printer driver and utility problems 109 Communication errors 110 Chapter 7 Cleaning and Transporting the Printer Cleaning the Printer 113 Cleaning the inside of the printer 113 Removing spilled toner 115 Cleaning the printer case 116 Transporting the Printer 117 Appendix A Technical Specifications Paper 119 Specifications 119...

Reference Guide
Page 7
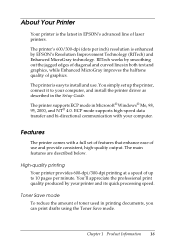
...laser printer precautions, and important safety instructions in the Setup Guide. ❏ Use your Setup Guide to load and print on how to operate the printer. Chapter 3, "Using the Printer Driver," gives you what special paper and media is available for your new printer.... the printer's parts and features, and options. Chapter 4, "Installing and Removing Options," gives step-by-step instructions for detailed information about using your printer. About This Guide This guide contains information about your printer. Getting Started Your EPSON EPL-5800L Advanced printer combines ...
...laser printer precautions, and important safety instructions in the Setup Guide. ❏ Use your Setup Guide to load and print on how to operate the printer. Chapter 3, "Using the Printer Driver," gives you what special paper and media is available for your new printer.... the printer's parts and features, and options. Chapter 4, "Installing and Removing Options," gives step-by-step instructions for detailed information about using your printer. About This Guide This guide contains information about your printer. Getting Started Your EPSON EPL-5800L Advanced printer combines ...
Reference Guide
Page 16
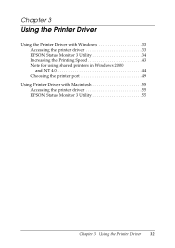
...reduce the amount of use . The main features are described below. The printer supports ECP mode in EPSON's advanced line of up the printer, connect it to your computer, and install the printer driver as described in printing documents, you can print drafts using the Toner ... High-quality printing Your printer provides 600-dpi/300-dpi printing at a speed of laser printers. Chapter 1 Product Information 16 About Your Printer Your printer is the latest in Microsoft® Windows® Me, 98, 95, 2000, and NT® 4.0. RITech works by EPSON's Resolution Improvement Technology (...
...reduce the amount of use . The main features are described below. The printer supports ECP mode in EPSON's advanced line of up the printer, connect it to your computer, and install the printer driver as described in printing documents, you can print drafts using the Toner ... High-quality printing Your printer provides 600-dpi/300-dpi printing at a speed of laser printers. Chapter 1 Product Information 16 About Your Printer Your printer is the latest in Microsoft® Windows® Me, 98, 95, 2000, and NT® 4.0. RITech works by EPSON's Resolution Improvement Technology (...

Reference Guide
Page 25
Note: ❏ Before printing, make sure that the Paper Size setting in your printer driver matches the paper you load. ❏ If you want to come out face-up, then raise the Face-up Tray and you want the sheets to print on paper heavier than 90g/m² (24 lb) or on special paper (such as envelopes, labels, transparencies, or thick paper), see "Printing on Special Media" on page 28. Chapter 2 Paper Handling 25 If you installed the optional Face-up Tray instead, and set the paper path selector down.
Note: ❏ Before printing, make sure that the Paper Size setting in your printer driver matches the paper you load. ❏ If you want to come out face-up, then raise the Face-up Tray and you want the sheets to print on paper heavier than 90g/m² (24 lb) or on special paper (such as envelopes, labels, transparencies, or thick paper), see "Printing on Special Media" on page 28. Chapter 2 Paper Handling 25 If you installed the optional Face-up Tray instead, and set the paper path selector down.

Reference Guide
Page 26
...manual feed slot. Insert a single sheet, with the printable side up and with the letterhead portion toward the printer. 3. Make sure to change the Paper Source setting to match the paper size you are using. Chapter 2 Paper Handling 26 ...The printer loads the paper from the manual feed slot: 1. Adjust the paper guides to MP Tray in place on the...will go into the manual feed slot above the tray cover. Make sure the cover is in the printer driver's Basic Settings menu. 4.
...manual feed slot. Insert a single sheet, with the printable side up and with the letterhead portion toward the printer. 3. Make sure to change the Paper Source setting to match the paper size you are using. Chapter 2 Paper Handling 26 ...The printer loads the paper from the manual feed slot: 1. Adjust the paper guides to MP Tray in place on the...will go into the manual feed slot above the tray cover. Make sure the cover is in the printer driver's Basic Settings menu. 4.

Reference Guide
Page 29
...envelope thickness (60 to check the print quality. If the printing is accessed through the printer driver's Optional Settings tab. Do not use window envelopes unless they are specially designed for laser printers. Chapter 2 Paper Handling 29 This dialog box is too light, adjust the print density ...as described in "Using the Printer Driver with Windows" on most window envelopes will melt when it comes into ...
...envelope thickness (60 to check the print quality. If the printing is accessed through the printer driver's Optional Settings tab. Do not use window envelopes unless they are specially designed for laser printers. Chapter 2 Paper Handling 29 This dialog box is too light, adjust the print density ...as described in "Using the Printer Driver with Windows" on most window envelopes will melt when it comes into ...

Reference Guide
Page 30
...adhesive by pressing a sheet of paper on the printer driver's Optional Settings menu. Transparencies You can load up to five transparencies into the MP tray. You can only use overhead projector transparencies and adhesive drafting film made for laser printers or plain-paper copiers. Chapter 2 Paper Handling...ten sheets of labels into the MP tray. To prevent the adhesive from coming into contact with printer parts, always use labels that completely cover the backing sheet, with laser printers or plain-paper copiers. However, you may need to Transparency in the Extended Settings on top...
...adhesive by pressing a sheet of paper on the printer driver's Optional Settings menu. Transparencies You can load up to five transparencies into the MP tray. You can only use overhead projector transparencies and adhesive drafting film made for laser printers or plain-paper copiers. Chapter 2 Paper Handling...ten sheets of labels into the MP tray. To prevent the adhesive from coming into contact with printer parts, always use labels that completely cover the backing sheet, with laser printers or plain-paper copiers. However, you may need to Transparency in the Extended Settings on top...

Reference Guide
Page 31
Thick paper You can load five to ten sheets of a weight between 90 and 163 g/m² (24 to 43 lb). When printing on thick paper, be sure to feed some types of thick paper one sheet at a time. Choose Thick Wide when printing on the printer driver's Optional Settings menu. Chapter 2 Paper Handling 31 Choose Thick Narrow for thick paper which is less than 188 mm wide. Use the thick paper of thick paper into the MP tray. However, you may need to change the Paper setting on the Extended Settings on thick paper which is 188 mm or wider.
Thick paper You can load five to ten sheets of a weight between 90 and 163 g/m² (24 to 43 lb). When printing on thick paper, be sure to feed some types of thick paper one sheet at a time. Choose Thick Wide when printing on the printer driver's Optional Settings menu. Chapter 2 Paper Handling 31 Choose Thick Narrow for thick paper which is less than 188 mm wide. Use the thick paper of thick paper into the MP tray. However, you may need to change the Paper setting on the Extended Settings on thick paper which is 188 mm or wider.
Reference Guide
Page 32
Chapter 3 Using the Printer Driver Using the Printer Driver with Windows 33 Accessing the printer driver 33 EPSON Status Monitor 3 Utility 34 Increasing the Printing Speed 43 Note for using shared printers in Windows 2000 and NT 4.0 44 Choosing the printer port 49 Using Printer Driver with Macintosh 55 Accessing the printer driver 55 EPSON Status Monitor 3 Utility 55 Chapter 3 Using the Printer Driver 32
Chapter 3 Using the Printer Driver Using the Printer Driver with Windows 33 Accessing the printer driver 33 EPSON Status Monitor 3 Utility 34 Increasing the Printing Speed 43 Note for using shared printers in Windows 2000 and NT 4.0 44 Choosing the printer port 49 Using Printer Driver with Macintosh 55 Accessing the printer driver 55 EPSON Status Monitor 3 Utility 55 Chapter 3 Using the Printer Driver 32

Reference Guide
Page 33
... is accessed from your Windows operating system, as explained below . To access the driver menus, see below . The printer driver allows you install the printer driver. Using the Printer Driver with detailed information and instructions on the File menu. Next, right-click the EPSON EPL-5800L Advanced icon and click Properties (in Windows Me/98/95/2000) or Printing...
... is accessed from your Windows operating system, as explained below . To access the driver menus, see below . The printer driver allows you install the printer driver. Using the Printer Driver with detailed information and instructions on the File menu. Next, right-click the EPSON EPL-5800L Advanced icon and click Properties (in Windows Me/98/95/2000) or Printing...
Reference Guide
Page 34
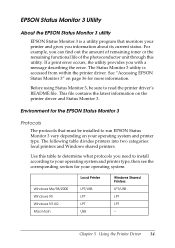
...Printer Driver 34 See "Accessing EPSON Status Monitor 3" on page 36 for the EPSON Status Monitor 3 Protocols The protocols that monitors your printer and gives you need to install according to read the printer driver's README file. This file contains the latest information on your operating system. The following table divides printers into two categories: local printers... this table to run EPSON Status Monitor 3 vary depending on the printer driver and Status Monitor 3. EPSON Status Monitor 3 Utility About the EPSON Status Monitor 3 utility EPSON Status Monitor 3 is accessed from...
...Printer Driver 34 See "Accessing EPSON Status Monitor 3" on page 36 for the EPSON Status Monitor 3 Protocols The protocols that monitors your printer and gives you need to install according to read the printer driver's README file. This file contains the latest information on your operating system. The following table divides printers into two categories: local printers... this table to run EPSON Status Monitor 3 vary depending on the printer driver and Status Monitor 3. EPSON Status Monitor 3 Utility About the EPSON Status Monitor 3 utility EPSON Status Monitor 3 is accessed from...

Reference Guide
Page 35
... the Utility tab of shared printers check box in the Monitoring Preferences dialog box. Local Printer Connect the printer directly to make a setting change involves selecting the Allow monitoring of the printer driver's Properties dialog box. (1) client machine (2) server machine (3) Windows shared printer Chapter 3 Using the Printer Driver 35 The change on the printer driver installed on the server machine...
... the Utility tab of shared printers check box in the Monitoring Preferences dialog box. Local Printer Connect the printer directly to make a setting change involves selecting the Allow monitoring of the printer driver's Properties dialog box. (1) client machine (2) server machine (3) Windows shared printer Chapter 3 Using the Printer Driver 35 The change on the printer driver installed on the server machine...

Reference Guide
Page 36
... steps to enable bi-directional support in the printer's Properties dialog box. Right-click the icon for Windows shared printers. Chapter 3 Using the Printer Driver 36 For Windows 2000 users, click the Ports tab. Accessing EPSON Status Monitor 3 EPSON Status Monitor 3 monitors the printer during printing and while the EPSON Status Monitor 3 dialog box is selected. Double-click...
... steps to enable bi-directional support in the printer's Properties dialog box. Right-click the icon for Windows shared printers. Chapter 3 Using the Printer Driver 36 For Windows 2000 users, click the Ports tab. Accessing EPSON Status Monitor 3 EPSON Status Monitor 3 monitors the printer during printing and while the EPSON Status Monitor 3 dialog box is selected. Double-click...
Reference Guide
Page 37
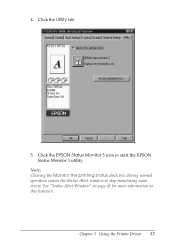
See "Status Alert Window" on page 41 for more information on this function. 4. Note: Clearing the Monitor the printing status check box during normal operation causes the Status Alert window to start the EPSON Status Monitor 3 utility. Click the Utility tab. 5. Click the EPSON Status Monitor 3 icon to stop monitoring some errors. Chapter 3 Using the Printer Driver 37
See "Status Alert Window" on page 41 for more information on this function. 4. Note: Clearing the Monitor the printing status check box during normal operation causes the Status Alert window to start the EPSON Status Monitor 3 utility. Click the Utility tab. 5. Click the EPSON Status Monitor 3 icon to stop monitoring some errors. Chapter 3 Using the Printer Driver 37

Reference Guide
Page 38
Clicking this button closes the dialog box. Chapter 3 Using the Printer Driver 38 If a problem occurs, the most probable solution is displayed. Printer image: Text box: OK button: The image at the upper left shows the printer status graphically. The text box next to the printer image displays the current status of the printer. Getting Printer Status Details You can monitor printer status and obtain information on consumable products using the EPSON Status Monitor 3 dialog box.
Clicking this button closes the dialog box. Chapter 3 Using the Printer Driver 38 If a problem occurs, the most probable solution is displayed. Printer image: Text box: OK button: The image at the upper left shows the printer status graphically. The text box next to the printer image displays the current status of the printer. Getting Printer Status Details You can monitor printer status and obtain information on consumable products using the EPSON Status Monitor 3 dialog box.

Reference Guide
Page 39
The toner icon flashes if toner is installed. Photoconductor Unit Indicates the remaining functional life of paper remaining in the paper source. Paper: Displays the paper size and the approximate amount of Life: the photoconductor unit. Chapter 3 Using the Printer Driver 39 Toner: Indicates the amount of remaining toner. Information for the optional 500-Sheet Lower Paper Cassette Unit is displayed only if this option is low (10 percent or less).
The toner icon flashes if toner is installed. Photoconductor Unit Indicates the remaining functional life of paper remaining in the paper source. Paper: Displays the paper size and the approximate amount of Life: the photoconductor unit. Chapter 3 Using the Printer Driver 39 Toner: Indicates the amount of remaining toner. Information for the optional 500-Sheet Lower Paper Cassette Unit is displayed only if this option is low (10 percent or less).

Reference Guide
Page 40
Default button: Restores default settings. Chapter 3 Using the Printer Driver 40 The following settings and buttons appear in the Utility tab of error that you wish to be notified about. The Monitoring Preferences dialog box appears. Setting Monitoring Preferences To make specific monitoring settings, click the Monitoring Preferences button in the dialog box: Select Notification: Use the check boxes to select the types of the printer driver's Properties dialog box.
Default button: Restores default settings. Chapter 3 Using the Printer Driver 40 The following settings and buttons appear in the Utility tab of error that you wish to be notified about. The Monitoring Preferences dialog box appears. Setting Monitoring Preferences To make specific monitoring settings, click the Monitoring Preferences button in the dialog box: Select Notification: Use the check boxes to select the types of the printer driver's Properties dialog box.
Reference Guide
Page 41
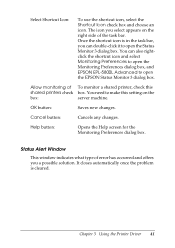
... the shortcut icon and select Monitoring Preferences to open the Monitoring Preferences dialog box, and EPSON EPL-5800L Advanced to make this shared printers check box. You can double-click it to open the EPSON Status Monitor 3 dialog box. OK button: Saves new changes. Allow monitoring of To ...to open the Status Monitor 3 dialog box. Cancel button: Cancels any changes. The icon you a possible solution. Chapter 3 Using the Printer Driver 41 Select Shortcut Icon: To use the shortcut icon, select the Shortcut Icon check box and choose an icon. Status Alert Window This window...
... the shortcut icon and select Monitoring Preferences to open the Monitoring Preferences dialog box, and EPSON EPL-5800L Advanced to make this shared printers check box. You can double-click it to open the EPSON Status Monitor 3 dialog box. OK button: Saves new changes. Allow monitoring of To ...to open the Status Monitor 3 dialog box. Cancel button: Cancels any changes. The icon you a possible solution. Chapter 3 Using the Printer Driver 41 Select Shortcut Icon: To use the shortcut icon, select the Shortcut Icon check box and choose an icon. Status Alert Window This window...
Reference Guide
Page 42
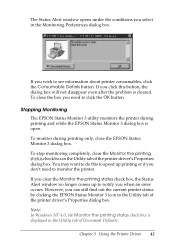
...you can still find out the current printer status by clicking the EPSON Status Monitor 3 icon in the Utility tab of Document Defaults. To stop monitoring completely, clear the Monitor the printing status check box in the Utility tab of the printer driver's Properties dialog box. You may want... to do this button, the dialog box will not disappear even after the problem is cleared. Stopping Monitoring The EPSON Status Monitor 3 utility monitors the printer during printing only, close the box you...
...you can still find out the current printer status by clicking the EPSON Status Monitor 3 icon in the Utility tab of Document Defaults. To stop monitoring completely, clear the Monitor the printing status check box in the Utility tab of the printer driver's Properties dialog box. You may want... to do this button, the dialog box will not disappear even after the problem is cleared. Stopping Monitoring The EPSON Status Monitor 3 utility monitors the printer during printing only, close the box you...
