
Reference Guide
Page 3
Contents Getting Started About This Guide 7 Warnings, Cautions, and Notes 8 Safety Precautions 9 Power On/Off Cautions 12 Chapter 1 Product Information Printer Parts 14 Panel lights 15 About Your Printer 16 Features 16 Options and consumable products 17 Chapter 2 Paper Handling Available Media 19 Paper that should not be used 20 Paper Sources 21 MP tray 21 500-Sheet Lower Paper Cassette Unit 21 Loading Paper 22 MP tray 22 Manually loading paper 26 500-Sheet Lower Paper Cassette Unit 27 Printing on Special Media 28 Envelopes 29 Labels 30 Transparencies 30 Thick paper 31 3
Contents Getting Started About This Guide 7 Warnings, Cautions, and Notes 8 Safety Precautions 9 Power On/Off Cautions 12 Chapter 1 Product Information Printer Parts 14 Panel lights 15 About Your Printer 16 Features 16 Options and consumable products 17 Chapter 2 Paper Handling Available Media 19 Paper that should not be used 20 Paper Sources 21 MP tray 21 500-Sheet Lower Paper Cassette Unit 21 Loading Paper 22 MP tray 22 Manually loading paper 26 500-Sheet Lower Paper Cassette Unit 27 Printing on Special Media 28 Envelopes 29 Labels 30 Transparencies 30 Thick paper 31 3

Reference Guide
Page 14
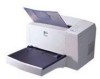
Printer Parts Printer cover Latch ready light (green) error light (red) Manual feed slot Power switch MP (Multi Purpose) tray Paper path selector Face-down tray Parallel interface connector AC inlet USB interface connector Chapter 1 Product Information 14
Printer Parts Printer cover Latch ready light (green) error light (red) Manual feed slot Power switch MP (Multi Purpose) tray Paper path selector Face-down tray Parallel interface connector AC inlet USB interface connector Chapter 1 Product Information 14

Reference Guide
Page 18
Chapter 2 Paper Handling Available Media 19 Paper that should not be used 20 Paper Sources 21 MP tray 21 500-Sheet Lower Paper Cassette Unit 21 Loading Paper 22 MP tray 22 Manually loading paper 26 500-Sheet Lower Paper Cassette Unit 27 Printing on Special Media 28 Envelopes 29 Labels 30 Transparencies 30 Thick paper 31 Chapter 2 Paper Handling 18
Chapter 2 Paper Handling Available Media 19 Paper that should not be used 20 Paper Sources 21 MP tray 21 500-Sheet Lower Paper Cassette Unit 21 Loading Paper 22 MP tray 22 Manually loading paper 26 500-Sheet Lower Paper Cassette Unit 27 Printing on Special Media 28 Envelopes 29 Labels 30 Transparencies 30 Thick paper 31 Chapter 2 Paper Handling 18

Reference Guide
Page 24
Place the cover back on the top to prevent paper from falling off the edge. Raise the face-down tray and lift up the paper support on the MP tray as the protection against the dust and for manual-feed printing, as shown below. 4. Chapter 2 Paper Handling 24 3.
Place the cover back on the top to prevent paper from falling off the edge. Raise the face-down tray and lift up the paper support on the MP tray as the protection against the dust and for manual-feed printing, as shown below. 4. Chapter 2 Paper Handling 24 3.

Reference Guide
Page 26
... to load a single sheet of paper from the manual feed slot: 1. Make sure to change the Paper Source setting to MP Tray in place on the MP tray. 2. The printer loads the paper from the computer. Make sure the cover is in the printer driver's Basic Settings menu. 4. Chapter 2 Paper ...Handling 26 Send the print data from the manual feed slot. Manually loading paper Follow these steps to match the paper size ...
... to load a single sheet of paper from the manual feed slot: 1. Make sure to change the Paper Source setting to MP Tray in place on the MP tray. 2. The printer loads the paper from the computer. Make sure the cover is in the printer driver's Basic Settings menu. 4. Chapter 2 Paper ...Handling 26 Send the print data from the manual feed slot. Manually loading paper Follow these steps to match the paper size ...

Reference Guide
Page 51
...5. Click OK to Settings, and then click Control Panel. 3. Make the ECP mode settings in the BIOS setting program that appears. 4. Select ECP Printer Port under Ports [COM & LPT], then click the Properties button. 6. Make the appropriate setting in the menu that comes with a parallel (IEEE... 1284-B compliant) connection, your computer manual.) 2. For details, see your computer must support ECP mode. Chapter 3 Using the Printer Driver 51 To use the ECP mode with your computer. (For details of the settings and the ...
...5. Click OK to Settings, and then click Control Panel. 3. Make the ECP mode settings in the BIOS setting program that appears. 4. Select ECP Printer Port under Ports [COM & LPT], then click the Properties button. 6. Make the appropriate setting in the menu that comes with a parallel (IEEE... 1284-B compliant) connection, your computer manual.) 2. For details, see your computer must support ECP mode. Chapter 3 Using the Printer Driver 51 To use the ECP mode with your computer. (For details of the settings and the ...

Reference Guide
Page 139
The following codes are inserted automatically and need not be input by the American Universal Product Code (UPC Symbol Specification Manual). ❏ Only regular UPC codes are supported. Supplementary codes are 60 pt, 75 pt (standard), 112.5 pt and 150 pt. Recommended sizes are not supported.... Character type Number of characters Font size Numbers (0 to 9) Up to 11 characters 60 pt to 150 pt (up to 96 pt in Windows NT). EPSON UPC-A ❏ UPC-A is the UPC-A standard barcode specified by hand: ❏ Left/right margin ❏ Left/right guard bar ❏ Center bar ❏ ...
The following codes are inserted automatically and need not be input by the American Universal Product Code (UPC Symbol Specification Manual). ❏ Only regular UPC codes are supported. Supplementary codes are 60 pt, 75 pt (standard), 112.5 pt and 150 pt. Recommended sizes are not supported.... Character type Number of characters Font size Numbers (0 to 9) Up to 11 characters 60 pt to 150 pt (up to 96 pt in Windows NT). EPSON UPC-A ❏ UPC-A is the UPC-A standard barcode specified by hand: ❏ Left/right margin ❏ Left/right guard bar ❏ Center bar ❏ ...

Reference Guide
Page 140
... to 150 pt (up to 96 pt in Windows NT). The following codes are 60 pt, 75 pt (standard), 112.5 pt and 150 pt. EPSON UPC-E ❏ UPC-E is the UPC-A zero-suppression (deletes extra zeros) barcode specified by hand: ❏ Left/right margin ❏ Left/right... guard bar ❏ Check digit ❏ OCR-B ❏ The numeral "0" Print Sample EPSON UPC-E Appendix B Working with Fonts 140 Recommended sizes are inserted automatically and need not be input by the American Universal Product Code (UPC Symbol Specification...
... to 150 pt (up to 96 pt in Windows NT). The following codes are 60 pt, 75 pt (standard), 112.5 pt and 150 pt. EPSON UPC-E ❏ UPC-E is the UPC-A zero-suppression (deletes extra zeros) barcode specified by hand: ❏ Left/right margin ❏ Left/right... guard bar ❏ Check digit ❏ OCR-B ❏ The numeral "0" Print Sample EPSON UPC-E Appendix B Working with Fonts 140 Recommended sizes are inserted automatically and need not be input by the American Universal Product Code (UPC Symbol Specification...

Reference Guide
Page 160
...removing, 63 C Cleaning inside printer, 113 printer case, 116 Consumable products developer cartridge, 126 photoconductor unit, 127 replacing, 76 Contacting EPSON, 149 Customer support, 149 D Developer cartridge replacing, 77 specifications, 126 E ECP mode, using, 51 Envelopes, 29 EPSON BarCode Fonts about, 129 formatting,..., 42 F Face-up Tray installing, 65 removing, 66 using, 66 Fonts, EPSON BarCode Fonts, 129 I Interface parallel interface, 124 USB connection, 52 L Labels, 30 Letterhead, loading, 26 M Manual feed, 26 Memory maximum, 17 standard, 17 Memory module installing, 67 removing, ...
...removing, 63 C Cleaning inside printer, 113 printer case, 116 Consumable products developer cartridge, 126 photoconductor unit, 127 replacing, 76 Contacting EPSON, 149 Customer support, 149 D Developer cartridge replacing, 77 specifications, 126 E ECP mode, using, 51 Envelopes, 29 EPSON BarCode Fonts about, 129 formatting,..., 42 F Face-up Tray installing, 65 removing, 66 using, 66 Fonts, EPSON BarCode Fonts, 129 I Interface parallel interface, 124 USB connection, 52 L Labels, 30 Letterhead, loading, 26 M Manual feed, 26 Memory maximum, 17 standard, 17 Memory module installing, 67 removing, ...

Reference Guide
Page 161
P Paper printable area, 120 size, 120 specifications, 119 type, 119 weight, 119 Paper handling manual feed, 26 MP tray, 22 printing on special media, 28 Paper jams cleaning, 90 preventing, 89 Paper source 500-Sheet Lower Paper Cassette Unit, 21 ...-Sheet Lower Paper Cassette Unit, 125 developer cartridge, 126 electrical, 123 environmental, 122 Face-up Tray, 126 paper, 119 parallel interface, 124 photoconductor unit, 127 printer, 121 safety approvals, 122 USB interface, 52 T Technical support, 149 Thick paper, 31 Toner removing spilled toner, 115 smudges, 104 Transporting the...
P Paper printable area, 120 size, 120 specifications, 119 type, 119 weight, 119 Paper handling manual feed, 26 MP tray, 22 printing on special media, 28 Paper jams cleaning, 90 preventing, 89 Paper source 500-Sheet Lower Paper Cassette Unit, 21 ...-Sheet Lower Paper Cassette Unit, 125 developer cartridge, 126 electrical, 123 environmental, 122 Face-up Tray, 126 paper, 119 parallel interface, 124 photoconductor unit, 127 printer, 121 safety approvals, 122 USB interface, 52 T Technical support, 149 Thick paper, 31 Toner removing spilled toner, 115 smudges, 104 Transporting the...

Service Manual
Page 2
...been made to change without the prior written permission of them. EPSON is a registered trademark of this manual may be trademarks or registered trademarks of their respective owners. Copyright © 1999 SEIKO EPSON CORPORATION. General Notice: Other product names used herein are subject ...to ensure the accuracy of the contents of SEIKO EPSON CORPORATION. EPSON disclaims any and all rights in any form or by any means, electronic, mechanical, photocopying, recording, or otherwise, without notice. Printed in this manual are for any errors be reproduced, stored in a...
...been made to change without the prior written permission of them. EPSON is a registered trademark of this manual may be trademarks or registered trademarks of their respective owners. Copyright © 1999 SEIKO EPSON CORPORATION. General Notice: Other product names used herein are subject ...to ensure the accuracy of the contents of SEIKO EPSON CORPORATION. EPSON disclaims any and all rights in any form or by any means, electronic, mechanical, photocopying, recording, or otherwise, without notice. Printed in this manual are for any errors be reproduced, stored in a...

Service Manual
Page 3
...PLATE. The precautionary measures itemized below should be observed when performing repair/maintenance procedures. DANGER 1. WHEN PERFORMING TESTING AS DICTATED WITHIN THIS MANUAL, DO NOT CONNECT THE UNIT TO A POWER SOURCE UNTIL INSTRUCTED TO DO SO. WHEN THE POWER SUPPLY CABLE MUST BE CONNECTED, ...ON THE UNIT BY PERSONS UNFAMILIAR WITH BASIC SAFETY MEASURES AS DICTATED FOR ALL ELECTRONICS TECHNICIANS IN THEIR LINE OF WORK. 3. IF THE EPSON PRODUCT HAS A PRIMARY AC RATING DIFFERENT FROM AVAILABLE POWER SOURCE, DO NOT CONNECT IT TO THE POWER SOURCE. 3. WARNING 1. PRECAUTIONS ...
...PLATE. The precautionary measures itemized below should be observed when performing repair/maintenance procedures. DANGER 1. WHEN PERFORMING TESTING AS DICTATED WITHIN THIS MANUAL, DO NOT CONNECT THE UNIT TO A POWER SOURCE UNTIL INSTRUCTED TO DO SO. WHEN THE POWER SUPPLY CABLE MUST BE CONNECTED, ...ON THE UNIT BY PERSONS UNFAMILIAR WITH BASIC SAFETY MEASURES AS DICTATED FOR ALL ELECTRONICS TECHNICIANS IN THEIR LINE OF WORK. 3. IF THE EPSON PRODUCT HAS A PRIMARY AC RATING DIFFERENT FROM AVAILABLE POWER SOURCE, DO NOT CONNECT IT TO THE POWER SOURCE. 3. WARNING 1. PRECAUTIONS ...

Service Manual
Page 4
PREFACE This manual describes basic functions, theory of electrical and mechanical operations, maintenance and repair procedures of EPL-5800. ADJUSTMENT m K CHAPTER 6. The instructions and procedures included herein are organized as follows: CHAPTER 1. OPERATING PRINCIPLES a K CHAPTER 3. DISASSEMBLY AND ASSEMBLY a JÄóJ J K CHAPTER 5. PRODUCT DESCRIPTIONS m K CHAPTER 2. ...
PREFACE This manual describes basic functions, theory of electrical and mechanical operations, maintenance and repair procedures of EPL-5800. ADJUSTMENT m K CHAPTER 6. The instructions and procedures included herein are organized as follows: CHAPTER 1. OPERATING PRINCIPLES a K CHAPTER 3. DISASSEMBLY AND ASSEMBLY a JÄóJ J K CHAPTER 5. PRODUCT DESCRIPTIONS m K CHAPTER 2. ...
