Product Specifications Sheet (English)
Page 1
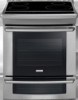
...Element - 2500 Watts Eight-Pass Broil Element - 4000 Watts Convection Element - 2500 Watts Cobalt Blue Interior Self-Clean Options with Door Lock Perfect Convect3® with Variable 2-Speed Fan Cooking Modes - Stainless Steel S Oven Cavity Dimensions - Perfect Pair™ Oven ...Racks Convection Roasting Rack 4.2 Cu. Wall Ovens Warmer Drawers Cooktops Built-In Ranges Freestanding Ranges Microwaves Induction Built-In Range EW30IS65J S Featuring Wave-Touch™ Controls & Induction Cooktop Exceptional Temperature Control Adjust heat with greater accuracy than gas or electric...
...Element - 2500 Watts Eight-Pass Broil Element - 4000 Watts Convection Element - 2500 Watts Cobalt Blue Interior Self-Clean Options with Door Lock Perfect Convect3® with Variable 2-Speed Fan Cooking Modes - Stainless Steel S Oven Cavity Dimensions - Perfect Pair™ Oven ...Racks Convection Roasting Rack 4.2 Cu. Wall Ovens Warmer Drawers Cooktops Built-In Ranges Freestanding Ranges Microwaves Induction Built-In Range EW30IS65J S Featuring Wave-Touch™ Controls & Induction Cooktop Exceptional Temperature Control Adjust heat with greater accuracy than gas or electric...
Complete Owner's Guide (English)
Page 3
...12-14 Getting Started 15 Setting Clock at Power Up 15 Control Panel Display Modes 15 Temperature Visual Display 15 Oven Light 16 Control Lock 16 Setting the Kitchen Timer 16 Setting Surface Controls 17 About the Ceramic Glass Cooktop 17 Use the Correct Cookware Type 17 Minimum ... Feature 45 Starting the Self-Clean Cycle 46 General Cleaning 47 Care and Cleaning of Stainless Steel 48 To Remove and Replace Oven Door 48 Special Door Care Instructions 48 Oven Light 49 Broiler Pan Cleaning Tips 49 Cooktop Cleaning and Maintenance 50 Cleaning Recommendations for Future Use 2 Model...
...12-14 Getting Started 15 Setting Clock at Power Up 15 Control Panel Display Modes 15 Temperature Visual Display 15 Oven Light 16 Control Lock 16 Setting the Kitchen Timer 16 Setting Surface Controls 17 About the Ceramic Glass Cooktop 17 Use the Correct Cookware Type 17 Minimum ... Feature 45 Starting the Self-Clean Cycle 46 General Cleaning 47 Care and Cleaning of Stainless Steel 48 To Remove and Replace Oven Door 48 Special Door Care Instructions 48 Oven Light 49 Broiler Pan Cleaning Tips 49 Cooktop Cleaning and Maintenance 50 Cleaning Recommendations for Future Use 2 Model...
Complete Owner's Guide (English)
Page 16
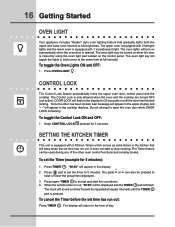
The oven light key will toggle the lights in both the upper and lower oven interiors to open the oven door while DOOR LOCK is equipped with 2 Kitchen Timers which serves as extra timers in the kitchen that will be repeated at full intensity. Press OVEN LIGHT . Do not ... a chime that gradually lights both ovens at the same time at regular intervals until the door has finished locking. The display will turn on when the door is pressed. The oven light may be used during any of day. DOOR LOCK will appear in the display for 3 seconds. The pads hi or lo can be...
The oven light key will toggle the lights in both the upper and lower oven interiors to open the oven door while DOOR LOCK is equipped with 2 Kitchen Timers which serves as extra timers in the kitchen that will be repeated at full intensity. Press OVEN LIGHT . Do not ... a chime that gradually lights both ovens at the same time at regular intervals until the door has finished locking. The display will turn on when the door is pressed. The oven light may be used during any of day. DOOR LOCK will appear in the display for 3 seconds. The pads hi or lo can be...

Complete Owner's Guide (English)
Page 46
... be burned if they may still be opened . Remove the oven racks and the racks supports. 2. Once the oven has cooled down for the oven door lock to close . To set the controls for "6:00"; 6 0 0 ). 5. Be sure the clock is set with damp cloth. As soon as the control is set , ...the motor driven oven door lock will stop or interrupt a self-cleaning cycle due to the side of the wall oven can damage the automatic door locking system. Press COOK OPTIONS to open . This can become very hot to escape. The display...
... be burned if they may still be opened . Remove the oven racks and the racks supports. 2. Once the oven has cooled down for the oven door lock to close . To set the controls for "6:00"; 6 0 0 ). 5. Be sure the clock is set with damp cloth. As soon as the control is set , ...the motor driven oven door lock will stop or interrupt a self-cleaning cycle due to the side of the wall oven can damage the automatic door locking system. Press COOK OPTIONS to open . This can become very hot to escape. The display...

Complete Owner's Guide (English)
Page 48
... to completely disengage the hinge levers. 4. Pull up the lock located on the lock to the fully opened position. 2. Removal of stainless parts. Read the following recommendations: 1. Do not close the oven door until all the oven racks are fully in normal position Lock engaged for maintaining the appearance of the Oven Door Lock in place. 2.
... to completely disengage the hinge levers. 4. Pull up the lock located on the lock to the fully opened position. 2. Removal of stainless parts. Read the following recommendations: 1. Do not close the oven door until all the oven racks are fully in normal position Lock engaged for maintaining the appearance of the Oven Door Lock in place. 2.


