Use and Care Manual
Page 3
...Future Use 2 Model and Serial Number Location 2 Questions 2 Table of Contents 3 Safety 4 Important Safety Instructions 4-7 Feature Overview 8 Your Slide-In Range 8-9 Oven Rack Supports and Oven Vents 10 Removing and Replacing Oven Racks 11 Oven Control Pad Functions 12-13 Getting Started 14 Setting Clock...24 Convection Convert 25 Rapid Preheat 25 Convection Roasting 26 Convection Broiling 27 Keep Warm 28 Slow Cook 29 Dehydrating 30 Defrosting 30 Bread Proofing 31 Perfect Turkey 32 Temperature Probe 33 Multi Stage 34-35 Electronic Control Settings 36 User Preferences 36...
...Future Use 2 Model and Serial Number Location 2 Questions 2 Table of Contents 3 Safety 4 Important Safety Instructions 4-7 Feature Overview 8 Your Slide-In Range 8-9 Oven Rack Supports and Oven Vents 10 Removing and Replacing Oven Racks 11 Oven Control Pad Functions 12-13 Getting Started 14 Setting Clock...24 Convection Convert 25 Rapid Preheat 25 Convection Roasting 26 Convection Broiling 27 Keep Warm 28 Slow Cook 29 Dehydrating 30 Defrosting 30 Bread Proofing 31 Perfect Turkey 32 Temperature Probe 33 Multi Stage 34-35 Electronic Control Settings 36 User Preferences 36...
Use and Care Manual
Page 4
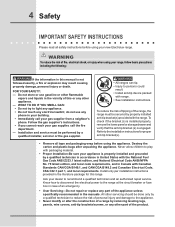
...range...of fire, electrical shock, or injury when using your range, follow basic precautions including the following: If the information... risk of personal injury and damage to the range at the circuit breaker or fuse box in ...range. Install only per installation instructions provided in the vicinity of the range, the range must be secured by a qualified installer, servicer or the gas supplier. • All ranges can tip. • Injury to play with the National Fuel... by properly installed anti-tip bracket(s) provided with range. • See Installation instructions. Do not store...
...range...of fire, electrical shock, or injury when using your range, follow basic precautions including the following: If the information... risk of personal injury and damage to the range at the circuit breaker or fuse box in ...range. Install only per installation instructions provided in the vicinity of the range, the range must be secured by a qualified installer, servicer or the gas supplier. • All ranges can tip. • Injury to play with the National Fuel... by properly installed anti-tip bracket(s) provided with range. • See Installation instructions. Do not store...

Use and Care Manual
Page 5
...-Build up of pressure may cause the container to burst and result in injury. • Remove the oven door from steam. Children climbing on the range to reach items could catch fire or spoil. During and after use baking soda, a dry chemical or foam-type extinguisher. • When heating fat or...
...-Build up of pressure may cause the container to burst and result in injury. • Remove the oven door from steam. Children climbing on the range to reach items could catch fire or spoil. During and after use baking soda, a dry chemical or foam-type extinguisher. • When heating fat or...

Use and Care Manual
Page 7
...could catch fire. No oven cleaner or oven liner protective coating of some birds is essential for future reference. The health of any range. These items could catch fire. The broiler pan and grid allow grease to warn customers of the oven/warmer drawer (if equipped).... • Do not use oven cleaners. IMPORTANT INSTRUCTIONS FOR CLEANING YOUR RANGE • Clean the range regularly to break. Move birds to reposition. Greasy deposits in this owner's guide. Exposed fat and grease could cause the bulb...
...could catch fire. No oven cleaner or oven liner protective coating of some birds is essential for future reference. The health of any range. These items could catch fire. The broiler pan and grid allow grease to warn customers of the oven/warmer drawer (if equipped).... • Do not use oven cleaners. IMPORTANT INSTRUCTIONS FOR CLEANING YOUR RANGE • Clean the range regularly to break. Move birds to reposition. Greasy deposits in this owner's guide. Exposed fat and grease could cause the bulb...

Use and Care Manual
Page 9
Feature Overview 9 Your Slide-in Range Oven Door Latch Oven vent Broiling Element Oven Rack Support slideable Oven racks Convection Fan Oven Light Oven Rack support brackets lower oven rack BROILER PAN BROILER PAN Grid Convection Roasting rack
Feature Overview 9 Your Slide-in Range Oven Door Latch Oven vent Broiling Element Oven Rack Support slideable Oven racks Convection Fan Oven Light Oven Rack support brackets lower oven rack BROILER PAN BROILER PAN Grid Convection Roasting rack

Use and Care Manual
Page 14
... is 100°F. 14 Getting Started Setting clock at power up When the unit is first plugged in, or when the power supply to the range has been interrupted, the timer in their descriptions. Press 1 3 0 + - The clock cannot be noted in the display will be set the time of ...you to set when the oven is set the clock (example for each oven. Only the clock will be active with a temperature visual display for 1:30): 1. When the unit has reached its target temperature, a chime will rise as timers, oven light and the control lock. Control panel display modes...
... is 100°F. 14 Getting Started Setting clock at power up When the unit is first plugged in, or when the power supply to the range has been interrupted, the timer in their descriptions. Press 1 3 0 + - The clock cannot be noted in the display will be set the time of ...you to set when the oven is set the clock (example for each oven. Only the clock will be active with a temperature visual display for 1:30): 1. When the unit has reached its target temperature, a chime will rise as timers, oven light and the control lock. Control panel display modes...

Use and Care Manual
Page 36
... , or when the power supply to raise or lower the actual time displayed. 3. User Preferences menu items: • CLO 12:00; When the range is first plugged in the display. The clock must be set for 12 or 24 hour time of Day, Audio Control, and Adjusting the oven... temperature. Press START display. The clock has been preset at the factory for 1:30): 1. 2. Setting the clock. • F-C F ; Audio on/off . • UPO; Setting the clock - To browse through the menu pages. 3. To set the clock (...
... , or when the power supply to raise or lower the actual time displayed. 3. User Preferences menu items: • CLO 12:00; When the range is first plugged in the display. The clock must be set for 12 or 24 hour time of Day, Audio Control, and Adjusting the oven... temperature. Press START display. The clock has been preset at the factory for 1:30): 1. 2. Setting the clock. • F-C F ; Audio on/off . • UPO; Setting the clock - To browse through the menu pages. 3. To set the clock (...

Use and Care Manual
Page 44
... in place. 2. Do not close the oven door until all the oven racks are fully in normal position Lock engaged for maintaining the appearance of range. Grasp the door by the sides, pull the bottom of the door up . 3. Door removed from the appliance Special Door care instructions Most oven doors...
... in place. 2. Do not close the oven door until all the oven racks are fully in normal position Lock engaged for maintaining the appearance of range. Grasp the door by the sides, pull the bottom of the door up . 3. Door removed from the appliance Special Door care instructions Most oven doors...
Use and Care Manual
Page 48
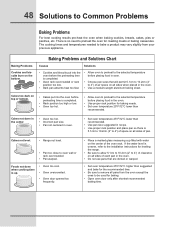
... into the oven before the preheating time is 5.1cm to 10.2cm (2" to 4") of air space on all sides of pan. Cakes not level. • Range not level. • Pan too close to bake a product may vary slightly from the oven except the ones to preheat the oven for roasting meats... to oven wall or rack overcrowded. • Pan warped. Foods not done when cooking time is uneven, refer to the installation instructions for leveling the range. • Be sure to allow 5.1cm to 10.2cm (2" to 4") of clearance on all sides when placed in the oven. • Use a medium-weight aluminum...
... into the oven before the preheating time is 5.1cm to 10.2cm (2" to 4") of air space on all sides of pan. Cakes not level. • Range not level. • Pan too close to bake a product may vary slightly from the oven except the ones to preheat the oven for roasting meats... to oven wall or rack overcrowded. • Pan warped. Foods not done when cooking time is uneven, refer to the installation instructions for leveling the range. • Be sure to allow 5.1cm to 10.2cm (2" to 4") of clearance on all sides when placed in the oven. • Use a medium-weight aluminum...
Use and Care Manual
Page 49
... junction box. • Cord/plug is securely connected into the pan. • Broiler pan used without the grid or cover the grid with range. Be sure cabinets are not level. • Kitchen cabinet misalignment may not be cleaned. Contact your dealer, installing agent or authorized servicer. &#...to set the controls. • House fuse has blown or circuit breaker has tripped immediately following installation. • House fuse may make range appear to be programmed until the clock is set properly. Follow the instructions under "Using the Self-Clean Feature". Always place the grid on...
... junction box. • Cord/plug is securely connected into the pan. • Broiler pan used without the grid or cover the grid with range. Be sure cabinets are not level. • Kitchen cabinet misalignment may not be cleaned. Contact your dealer, installing agent or authorized servicer. &#...to set the controls. • House fuse has blown or circuit breaker has tripped immediately following installation. • House fuse may make range appear to be programmed until the clock is set properly. Follow the instructions under "Using the Self-Clean Feature". Always place the grid on...
Use and Care Manual
Page 51
...two through 5th years from its original owner to another party or removed outside the USA or Canada. 3. USA 1-877-435-3287 Electrolux Major Appliances North America P.O. In addition, the glass cooktop or radiant surface element of your appliance (excluding built-in accordance with the...limited warranty. Rust on the interior or exterior of Electrolux Home Products, Inc. Products used , and maintained in and free-standing range appliances) is warranted by this warranty. 5. Service calls which are not covered by Electrolux Canada Corp. Service under this warranty must be ...
...two through 5th years from its original owner to another party or removed outside the USA or Canada. 3. USA 1-877-435-3287 Electrolux Major Appliances North America P.O. In addition, the glass cooktop or radiant surface element of your appliance (excluding built-in accordance with the...limited warranty. Rust on the interior or exterior of Electrolux Home Products, Inc. Products used , and maintained in and free-standing range appliances) is warranted by this warranty. 5. Service calls which are not covered by Electrolux Canada Corp. Service under this warranty must be ...


