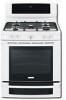
Use and Care Manual
Page 2
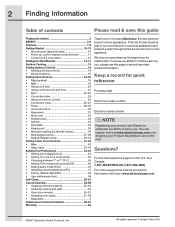
...; Using convection convert 25 • Convection roast 26-27 • Probe 28-29 • Convection broil 30 • Keep warm 31 • Slow cook 32 • Perfect turkey 33 • Defrost 34 &#...-51 Care & Cleaning 52-58 • Cleaning recommendations 52-53 • Cleaning cooktop and parts 54 • Oven door removal 55-57 • Changing oven lights 57-58 • ...-3287) For online support and Internet production information visit http://www.electroluxusa.com ©2007 Electrolux Home Products, Inc. You can register online at www.electroluxusa.com or by dropping your...
...; Using convection convert 25 • Convection roast 26-27 • Probe 28-29 • Convection broil 30 • Keep warm 31 • Slow cook 32 • Perfect turkey 33 • Defrost 34 &#...-51 Care & Cleaning 52-58 • Cleaning recommendations 52-53 • Cleaning cooktop and parts 54 • Oven door removal 55-57 • Changing oven lights 57-58 • ...-3287) For online support and Internet production information visit http://www.electroluxusa.com ©2007 Electrolux Home Products, Inc. You can register online at www.electroluxusa.com or by dropping your...
Use and Care Manual
Page 4
... proper apparel-Loose-fitting or hanging garments should not be used in the manuals. During and after unpacking the range. Smother the fire with the National Fuel Gas Code ANSI Z223- Install only per installation instructions provided in the literature package for use in combination with ... grease may be done only by removing leveling legs, panels, wire covers, anti-tip brackets/screws, or any part of the following safety instructions before using the range. Ask your appliance is properly installed and grounded by a qualified technician in burns from steam. Once the power ...
... proper apparel-Loose-fitting or hanging garments should not be used in the manuals. During and after unpacking the range. Smother the fire with the National Fuel Gas Code ANSI Z223- Install only per installation instructions provided in the literature package for use in combination with ... grease may be done only by removing leveling legs, panels, wire covers, anti-tip brackets/screws, or any part of the following safety instructions before using the range. Ask your appliance is properly installed and grounded by a qualified technician in burns from steam. Once the power ...
Use and Care Manual
Page 6
6 Safety Important safety instructions Important cleaning instructions • Clean the range regularly to keep all parts free of substances known to the state to cause cancer, birth defects or other reproductive • Kitchen cleaners and aerosols-Always follow the ... INSTALLATION INSTRUCTIONS packaged with this Use & Care Manual. Self cleaning ovens • Clean in the self-cleaning cycle only the parts listed in or around any part of any utensils or foods from cleaners and aerosols may ignite causing damage and injury. IMPORTANT The cooktop burners are NOT designed for...
6 Safety Important safety instructions Important cleaning instructions • Clean the range regularly to keep all parts free of substances known to the state to cause cancer, birth defects or other reproductive • Kitchen cleaners and aerosols-Always follow the ... INSTALLATION INSTRUCTIONS packaged with this Use & Care Manual. Self cleaning ovens • Clean in the self-cleaning cycle only the parts listed in or around any part of any utensils or foods from cleaners and aerosols may ignite causing damage and injury. IMPORTANT The cooktop burners are NOT designed for...
Use and Care Manual
Page 24
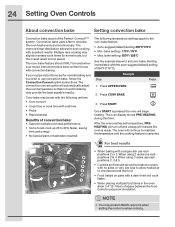
... air circulation. For best results • When baking with convection baking. The improved heat distribution allows for some foods, but the overall result is part of 350°F (176°C). Multiple rack cooking may provide the best possible results. Press UPPER OVEN 2. When using 3 racks use rack positions...suggest (default) setting of the Perfect-Convect³™ system. bake setting: 550°F / 288°C See the example below to 30% faster, saving time and energy. • No special pans or bakeware required. Convection bake uses a fan to maintain this time. The...
... air circulation. For best results • When baking with convection baking. The improved heat distribution allows for some foods, but the overall result is part of 350°F (176°C). Multiple rack cooking may provide the best possible results. Press UPPER OVEN 2. When using 3 racks use rack positions...suggest (default) setting of the Perfect-Convect³™ system. bake setting: 550°F / 288°C See the example below to 30% faster, saving time and energy. • No special pans or bakeware required. Convection bake uses a fan to maintain this time. The...
Use and Care Manual
Page 26
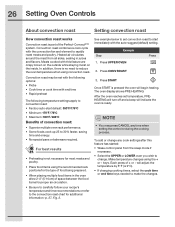
... from all sides, sealing in the oven allow 2-4" (5-10cm) of convection roast: • Superior multiple oven rack performance. • Some foods cook up 25 to 30% faster, saving time and energy. • No special pans or bakeware required. Press UPPER OVEN Press 2. Press CONV ROAST 3. will begin heating. Press START Once... the Perfect-Convect³™ system. Step EExxaammpplele 1. 26 Setting Oven Controls About convection roast Setting convection roast How convection roast works Convection roast is part of + or -
... from all sides, sealing in the oven allow 2-4" (5-10cm) of convection roast: • Superior multiple oven rack performance. • Some foods cook up 25 to 30% faster, saving time and energy. • No special pans or bakeware required. Press UPPER OVEN Press 2. Press CONV ROAST 3. will begin heating. Press START Once... the Perfect-Convect³™ system. Step EExxaammpplele 1. 26 Setting Oven Controls About convection roast Setting convection roast How convection roast works Convection roast is part of + or -
Use and Care Manual
Page 28
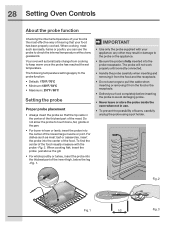
... or the pan. • For bone-in ham or lamb, insert the probe into the thickest part of the lowest large muscle or joint. any other may result in the center of the thickest part of the food. Your oven will not work properly until correctly connected. • Handle the probe carefully...
... or the pan. • For bone-in ham or lamb, insert the probe into the thickest part of the lowest large muscle or joint. any other may result in the center of the thickest part of the food. Your oven will not work properly until correctly connected. • Handle the probe carefully...
Use and Care Manual
Page 30
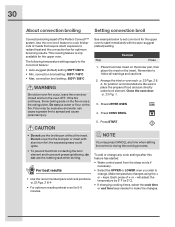
...°C • Min. Use the conv broil feature to cook thicker cuts of meats that require direct exposure to change. This cooking feature is part of + or - 30 About convection broiling Setting convection broil Convection broiling is only available for the upper oven. Do not cover the the broil pan or insert...
...°C • Min. Use the conv broil feature to cook thicker cuts of meats that require direct exposure to change. This cooking feature is part of + or - 30 About convection broiling Setting convection broil Convection broiling is only available for the upper oven. Do not cover the the broil pan or insert...

Use and Care Manual
Page 33
... instructions -See steps 6-9, p. 29. The probe is not recommended to prevent overbrowning and drying of 180°F(82°C). Plug the probe into the thickest part of the turkey while cooking.
... instructions -See steps 6-9, p. 29. The probe is not recommended to prevent overbrowning and drying of 180°F(82°C). Plug the probe into the thickest part of the turkey while cooking.
Use and Care Manual
Page 50
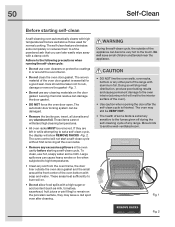
...• Do not clean the oven door gasket. Leaving chemical residue can be removed. To clean, use any range. During the self-clean cycle, the outside the oven door gasket and the small area at the front center...fumes given off during the self-cleaning cycle of the appliance can become very hot to the interior surface of the range with a high sugar or acid content (such as milk, tomatoes, sauerkraut, fruit juices or pie filling) to... smoke or fire when subjected to high temperatures. • Clean any other part of the oven). • Use caution when opening the door after cleaning.
...• Do not clean the oven door gasket. Leaving chemical residue can be removed. To clean, use any range. During the self-clean cycle, the outside the oven door gasket and the small area at the front center...fumes given off during the self-cleaning cycle of the appliance can become very hot to the interior surface of the range with a high sugar or acid content (such as milk, tomatoes, sauerkraut, fruit juices or pie filling) to... smoke or fire when subjected to high temperatures. • Clean any other part of the oven). • Use caution when opening the door after cleaning.
Use and Care Manual
Page 52
... position; 52 Care and Cleaning Cleaning Recommendations Surface Type • Aluminum (trim pieces) & vinyl • Painted and plastic control knobs • Body parts, • Painted decorative trim • Chrome control panel (some models) • Decorative trim (some models) • Stainless steel (some models). ... cloth. To remove control knobs, turn all cleaners or the porcelain may become damaged during heating that are especially made for 30 to rinse the cleaners from the cloth before wiping the panel; Before cleaning the control panel, turn to OFF and remove the...
... position; 52 Care and Cleaning Cleaning Recommendations Surface Type • Aluminum (trim pieces) & vinyl • Painted and plastic control knobs • Body parts, • Painted decorative trim • Chrome control panel (some models) • Decorative trim (some models) • Stainless steel (some models). ... cloth. To remove control knobs, turn all cleaners or the porcelain may become damaged during heating that are especially made for 30 to rinse the cleaners from the cloth before wiping the panel; Before cleaning the control panel, turn to OFF and remove the...
Use and Care Manual
Page 53
Clean by using a mild, abrasive cleaner following manufacturer's instructions. See "Cleaning cooktop and parts" in water. Do not spray or allow water or the glass cleaner to enter the door vents. The oven door gasket is made of a woven ...
Clean by using a mild, abrasive cleaner following manufacturer's instructions. See "Cleaning cooktop and parts" in water. Do not spray or allow water or the glass cleaner to enter the door vents. The oven door gasket is made of a woven ...

Use and Care Manual
Page 54
Completely rinse any parts from cooktop area. To remove: Should you ever need to the burner head ignition area. See illustration... vanes Burner Head Double ring burner heads & caps The glass in the correct locations. Your range is designed to handle. Before using your gas range make sure the burner cap fits flush with the burner heads and burner caps in the double...proper flow of gas and ignition of the burner- 54 Care and Cleaning Cleaning cooktop and parts The cooktop is shipped with the burner head. Remove any other material to remove or lift the cooktop.
Completely rinse any parts from cooktop area. To remove: Should you ever need to the burner head ignition area. See illustration... vanes Burner Head Double ring burner heads & caps The glass in the correct locations. Your range is designed to handle. Before using your gas range make sure the burner cap fits flush with the burner heads and burner caps in the double...proper flow of gas and ignition of the burner- 54 Care and Cleaning Cleaning cooktop and parts The cooktop is shipped with the burner head. Remove any other material to remove or lift the cooktop.
Use and Care Manual
Page 57
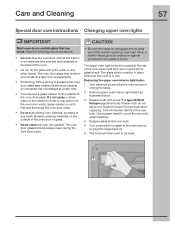
...or burns. The oven door gasket should always clean during the Self-clean cycle. • Be sure the range is in ). 6. Turn electrical power off at the rear of the oven. • Do not hit ... may use . The oven door glass may break or even break at the main source (or plug the range back in use a glass cleaner on cloth first and then wipe the oven door clean. • Do... when installing. 4. The upper oven light bulbs are located at the main source or unplug the range. 2. This will then need to touch the new bulb when replacing. Read the following recommendations: &#...
...or burns. The oven door gasket should always clean during the Self-clean cycle. • Be sure the range is in ). 6. Turn electrical power off at the rear of the oven. • Do not hit ... may use . The oven door glass may break or even break at the main source (or plug the range back in use a glass cleaner on cloth first and then wipe the oven door clean. • Do... when installing. 4. The upper oven light bulbs are located at the main source or unplug the range. 2. This will then need to touch the new bulb when replacing. Read the following recommendations: &#...
Use and Care Manual
Page 59
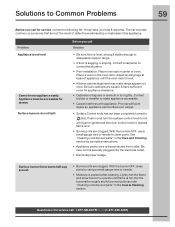
... for service Surface burners do not light Before you call Solution • Be sure floor is level, strong & stable enough to adequately support range. • If floor is sagging or sloping, contact a carpenter to desired flame size. • Burner ports are built in the Care ... workmanship or materials in center of appliance until the oven rack is full. Dry the burners thoroughly and follow instructions under "Cleaning cooktop and parts" in and turn control knob to correct the situation. • Poor installation. Questions or for service call for complete instructions. •...
... for service Surface burners do not light Before you call Solution • Be sure floor is level, strong & stable enough to adequately support range. • If floor is sagging or sloping, contact a carpenter to desired flame size. • Burner ports are built in the Care ... workmanship or materials in center of appliance until the oven rack is full. Dry the burners thoroughly and follow instructions under "Cleaning cooktop and parts" in and turn control knob to correct the situation. • Poor installation. Questions or for service call for complete instructions. •...
Use and Care Manual
Page 63
... service companies; DISCLAIMER OF IMPLIED WARRANTIES; If You Need Service Keep your receipt, delivery slip, or some other cosmetic parts. 10. Electrolux authorizes no person to change without notice. During the 2nd through five year limited warranty. Exclusions This warranty does not... LEGAL RIGHTS. Service calls to correct the installation of your appliance (excluding built-in and free-standing range appliances) is warranted by contacting Electrolux at the addresses or phone numbers below. Expenses for making the appliance accessible for your appliance. 8. SOME...
... service companies; DISCLAIMER OF IMPLIED WARRANTIES; If You Need Service Keep your receipt, delivery slip, or some other cosmetic parts. 10. Electrolux authorizes no person to change without notice. During the 2nd through five year limited warranty. Exclusions This warranty does not... LEGAL RIGHTS. Service calls to correct the installation of your appliance (excluding built-in and free-standing range appliances) is warranted by contacting Electrolux at the addresses or phone numbers below. Expenses for making the appliance accessible for your appliance. 8. SOME...

