Use and Care Manual
Page 4
... towels, as well as aerosol cans, in case of an emergency. Do not use your new Electrolux wall oven. ! Do not remove the wiring label and other part of the product. • Remove the oven door from any unused appliance if it to the power supply. • User Servicing-Do not ... other servicing should not be stored in the manuals. Do not store items of interest to children in serious injuries and may also cause damage to the appliance. WARNING To reduce the risk of fire, electrical shock, or injury when using your wall oven, follow basic precautions including the following: • ...
... towels, as well as aerosol cans, in case of an emergency. Do not use your new Electrolux wall oven. ! Do not remove the wiring label and other part of the product. • Remove the oven door from any unused appliance if it to the power supply. • User Servicing-Do not ... other servicing should not be stored in the manuals. Do not store items of interest to children in serious injuries and may also cause damage to the appliance. WARNING To reduce the risk of fire, electrical shock, or injury when using your wall oven, follow basic precautions including the following: • ...
Use and Care Manual
Page 14
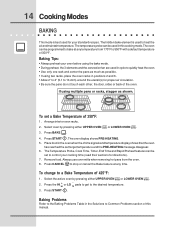
...other, the door, sides or back of this cooking mode. The temperature probe can be set to control your standard recipes. LOWER OVEN 3. Press the HI + hi or LO lo pads to get to stop or cancel the Bake feature at any time. Baking ... • During preheat, the 3 elements and the convection fan are used in this manual. Select oven by pressing either UPPER OVEN UPPER OVEN or LOWER OVEN . Press BAKE . 4. The oven display shows PRE-HEATING. 5. Always use oven mitts when removing hot pans from 170°F to 550°F with a default temperature...
...other, the door, sides or back of this cooking mode. The temperature probe can be set to control your standard recipes. LOWER OVEN 3. Press the HI + hi or LO lo pads to get to stop or cancel the Bake feature at any time. Baking ... • During preheat, the 3 elements and the convection fan are used in this manual. Select oven by pressing either UPPER OVEN UPPER OVEN or LOWER OVEN . Press BAKE . 4. The oven display shows PRE-HEATING. 5. Always use oven mitts when removing hot pans from 170°F to 550°F with a default temperature...
Use and Care Manual
Page 35
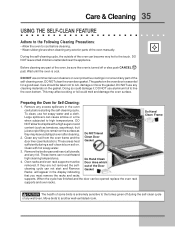
...oven manually. This may leave a dull spot even after cleaning. 2. These items can become very hot to rub, damage or move the gasket. Preparing the Oven for a good seal. Large spillovers can be taken not to the touch. Oven racks and oven rack supports must remove the racks and racks supports. Clean any wall oven.... Move birds to cool before starting the self-cleaning cycle. Care & Cleaning 35 USING THE SELF-CLEAN FEATURE Adhere to the Following Cleaning Precautions: • Allow the oven to another well ventilated room...
...oven manually. This may leave a dull spot even after cleaning. 2. These items can become very hot to rub, damage or move the gasket. Preparing the Oven for a good seal. Large spillovers can be taken not to the touch. Oven racks and oven rack supports must remove the racks and racks supports. Clean any wall oven.... Move birds to cool before starting the self-cleaning cycle. Care & Cleaning 35 USING THE SELF-CLEAN FEATURE Adhere to the Following Cleaning Precautions: • Allow the oven to another well ventilated room...
Use and Care Manual
Page 38
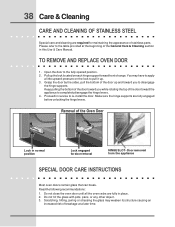
...located on the lock to disengage the hinge supports. Proceed in this Use & Care Manual. Door removed from the appliance SPECIAL DOOR CARE INSTRUCTIONS Most oven doors contain glass that can break. TO REMOVE AND REPLACE OVEN DOOR 1. Pull up . 3. Removal of the General Care & Cleaning section in reverse...time. Please refer to re-install the door. You may weaken its structure causing an increased risk of breakage at the beginning of the Oven Door Lock in place. 2. Make sure the hinge supports are fully in normal position Lock engaged for maintaining the appearance of range. ...
...located on the lock to disengage the hinge supports. Proceed in this Use & Care Manual. Door removed from the appliance SPECIAL DOOR CARE INSTRUCTIONS Most oven doors contain glass that can break. TO REMOVE AND REPLACE OVEN DOOR 1. Pull up . 3. Removal of the General Care & Cleaning section in reverse...time. Please refer to re-install the door. You may weaken its structure causing an increased risk of breakage at the beginning of the Oven Door Lock in place. 2. Make sure the hinge supports are fully in normal position Lock engaged for maintaining the appearance of range. ...
Use and Care Manual
Page 39
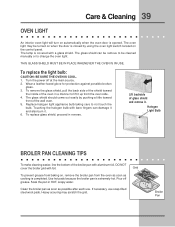
... To prevent grease from baking on the control panel. Heavy scouring may be cleaned manually or to be turned on when the door is covered with a glass shield. To replace the light bulb: CAUTION: BE SURE THE OVEN IS COOL. 1. Soak the pan in a manner to not touch the bulb. ...possible broken glass. 3. Use hot pads because the broiler pan is opened. The lamp is closed by pushing a little toward the inside of the wall oven. 5. The oven light may scratch the grid. The glass shield can damage it and also burn it . To replace glass shield, proceed in reverse. Lift backside ...
... To prevent grease from baking on the control panel. Heavy scouring may be cleaned manually or to be turned on when the door is covered with a glass shield. To replace the light bulb: CAUTION: BE SURE THE OVEN IS COOL. 1. Soak the pan in a manner to not touch the bulb. ...possible broken glass. 3. Use hot pads because the broiler pan is opened. The lamp is closed by pushing a little toward the inside of the wall oven. 5. The oven light may scratch the grid. The glass shield can damage it and also burn it . To replace glass shield, proceed in reverse. Lift backside ...


