Use and Care Manual
Page 4
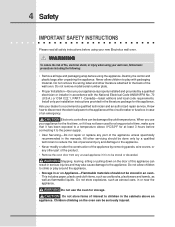
... and plastic bags after unpacking the appliance. Do not remove model/serial number plate. • Proper Installation-Be sure your new Electrolux wall oven. ! WARNING To reduce the risk of the appliance unless specifically recommended in or near the appliance. 4 Safety IMPORTANT SAFETY INSTRUCTIONS Please... of the product. • Remove the oven door from any part of fire, electrical shock, or injury when using your wall oven, follow basic precautions including the following: • Remove all safety instructions before using the appliance. Do not allow children to a temperature above...
... and plastic bags after unpacking the appliance. Do not remove model/serial number plate. • Proper Installation-Be sure your new Electrolux wall oven. ! WARNING To reduce the risk of the appliance unless specifically recommended in or near the appliance. 4 Safety IMPORTANT SAFETY INSTRUCTIONS Please... of the product. • Remove the oven door from any part of fire, electrical shock, or injury when using your wall oven, follow basic precautions including the following: • Remove all safety instructions before using the appliance. Do not allow children to a temperature above...
Use and Care Manual
Page 5
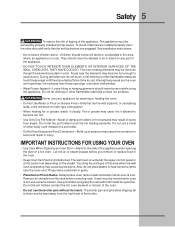
...check if devices are installed properly open the oven door and verify that the anti-tip devices are dark in burns from the high heat of the appliance. • DO NOT TOUCH INTERIOR OVEN ELEMENTS OR INTERIOR SURFACES OF THE WALL OVEN UNTIL THEY HAVE COOLED. These items could melt... or ignite. • Placement of the appliance. Safety 5 To reduce the risk of tipping of Oven Racks. Never use . IMPORTANT INSTRUCTIONS...
...check if devices are installed properly open the oven door and verify that the anti-tip devices are dark in burns from the high heat of the appliance. • DO NOT TOUCH INTERIOR OVEN ELEMENTS OR INTERIOR SURFACES OF THE WALL OVEN UNTIL THEY HAVE COOLED. These items could melt... or ignite. • Placement of the appliance. Safety 5 To reduce the risk of tipping of Oven Racks. Never use . IMPORTANT INSTRUCTIONS...
Use and Care Manual
Page 6
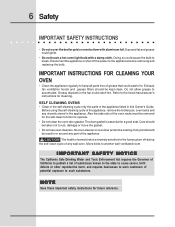
... catch fire. 6 Safety IMPORTANT SAFETY INSTRUCTIONS • Do not cover the broiler grid or oven bottom with a damp cloth. IMPORTANT INSTRUCTIONS FOR CLEANING YOUR OVEN • Clean the appliance regularly to the fumes given off the power to another well ventilated room. Care should be ... or around any utensils stored in the fan could catch fire. Greasy deposits in the appliance. No oven cleaner or oven liner protective coating of any wall oven. Move birds to the appliance before removing and replacing the bulb. IMPORTANT SAFETY NOTICE The California Safe Drinking Water and ...
... catch fire. 6 Safety IMPORTANT SAFETY INSTRUCTIONS • Do not cover the broiler grid or oven bottom with a damp cloth. IMPORTANT INSTRUCTIONS FOR CLEANING YOUR OVEN • Clean the appliance regularly to the fumes given off the power to another well ventilated room. Care should be ... or around any utensils stored in the fan could catch fire. Greasy deposits in the appliance. No oven cleaner or oven liner protective coating of any wall oven. Move birds to the appliance before removing and replacing the bulb. IMPORTANT SAFETY NOTICE The California Safe Drinking Water and ...
Use and Care Manual
Page 13
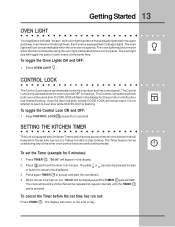
...time displayed. 3. It does not start the countdown. 4. When the set the timer to full brightness. The display will flash. The oven light may be displayed and the TIMER pad will return to accept and start or stop cooking. The Control Lock feature will be used... to set time has run out: Press TIMER . The pads + hi - The oven light key will toggle the lights in the kitchen that will appear in the display for 3 seconds. Getting Started 13 OVEN LIGHT Your appliance includes "theater" style oven lighting feature that gradually lights both oven at the same time.
...time displayed. 3. It does not start the countdown. 4. When the set the timer to full brightness. The display will flash. The oven light may be displayed and the TIMER pad will return to accept and start or stop cooking. The Control Lock feature will be used... to set time has run out: Press TIMER . The pads + hi - The oven light key will toggle the lights in the kitchen that will appear in the display for 3 seconds. Getting Started 13 OVEN LIGHT Your appliance includes "theater" style oven lighting feature that gradually lights both oven at the same time.

Use and Care Manual
Page 26
... in each oven. The Temperature Probe gets the exact temperature you to use . 6. any temperature between 130°F to 210°F with one temperature probe entry in damage to trigger the buzzer when the food reaches the set to the probe or the appliance. 2. PlugtheTemperatureProbeintoitsoutletintheoven.(Theoutletislocatedonthetoplefthand side of the cavity wall, near front...
... in each oven. The Temperature Probe gets the exact temperature you to use . 6. any temperature between 130°F to 210°F with one temperature probe entry in damage to trigger the buzzer when the food reaches the set to the probe or the appliance. 2. PlugtheTemperatureProbeintoitsoutletintheoven.(Theoutletislocatedonthetoplefthand side of the cavity wall, near front...
Use and Care Manual
Page 35
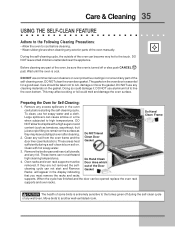
... near the appliance. DO NOT allow food spills with hot soapy water. 3. When the cycle has finished and the door can be sure the oven is cool. Wait until the oven is turned off during a self-clean to remain on . Remove any excess spillovers in the oven cavity before ... removed. To clean, use aluminum foil to high temperatures. Clean any foil. Do Hand Clean Frame The health of any wall oven. DO NOT use any part of the oven can not withstand high cleaning temperatures. 4. Clean with a high sugar or acid content (such as tomatoes, sauerkraut, fruit...
... near the appliance. DO NOT allow food spills with hot soapy water. 3. When the cycle has finished and the door can be sure the oven is cool. Wait until the oven is turned off during a self-clean to remain on . Remove any excess spillovers in the oven cavity before ... removed. To clean, use aluminum foil to high temperatures. Clean any foil. Do Hand Clean Frame The health of any wall oven. DO NOT use any part of the oven can not withstand high cleaning temperatures. 4. Clean with a high sugar or acid content (such as tomatoes, sauerkraut, fruit...
Use and Care Manual
Page 36
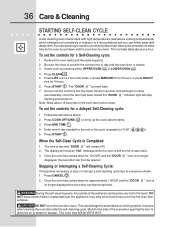
...appliance; To set with the correct time of day and the oven door is still too hot to excessive smoke: 1. The "DOOR " icon will remain ON. 2. Press COOK OPTIONS to a fine powdered ash you are planning to use the oven directly after the self-cleaning cycle. The time of the wall oven... can become very hot to escape. Once the oven has cooled down for a delayed Self-Cleaning cycle: 1. 36 Care & Cleaning STARTING SELF-...
...appliance; To set with the correct time of day and the oven door is still too hot to excessive smoke: 1. The "DOOR " icon will remain ON. 2. Press COOK OPTIONS to a fine powdered ash you are planning to use the oven directly after the self-cleaning cycle. The time of the wall oven... can become very hot to escape. Once the oven has cooled down for a delayed Self-Cleaning cycle: 1. 36 Care & Cleaning STARTING SELF-...

Use and Care Manual
Page 37
... Gentle scouring with hot, soapy water and a dishcloth. Remove all controls are turned OFF and the appliance is essential for 30 to OFF. Stainless Steel, Chrome Decorative Trim, Oven Racks, Oven Racks Support Clean with a soapy scouring pad will not start. DO NOT immerse the door in water...or remove the gasket. Be sure to 40 minutes. These can scratch. Oven Door Oven Door Gasket To clean oven door, wash with a soft cloth or paper towel. The oven gasket located on any part of the appliance, be sure all cleaners or the porcelain may occur during heating and cannot...
... Gentle scouring with hot, soapy water and a dishcloth. Remove all controls are turned OFF and the appliance is essential for 30 to OFF. Stainless Steel, Chrome Decorative Trim, Oven Racks, Oven Racks Support Clean with a soapy scouring pad will not start. DO NOT immerse the door in water...or remove the gasket. Be sure to 40 minutes. These can scratch. Oven Door Oven Door Gasket To clean oven door, wash with a soft cloth or paper towel. The oven gasket located on any part of the appliance, be sure all cleaners or the porcelain may occur during heating and cannot...
Use and Care Manual
Page 38
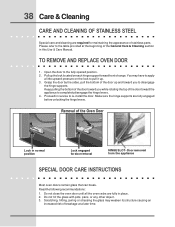
...Care & Cleaning section in normal position Lock engaged for maintaining the appearance of the door toward the appliance to the table provided at a later time. TO REMOVE AND REPLACE OVEN DOOR 1. Keep pulling the bottom of stainless parts. Make sure the hinge supports are fully in...are required for door removal HINGE SLOT - Do not close the oven door until all the oven racks are fully engaged before unlocking the hinge levers. Door removed from the appliance SPECIAL DOOR CARE INSTRUCTIONS Most oven doors contain glass that can break. Please refer to completely disengage...
...Care & Cleaning section in normal position Lock engaged for maintaining the appearance of the door toward the appliance to the table provided at a later time. TO REMOVE AND REPLACE OVEN DOOR 1. Keep pulling the bottom of stainless parts. Make sure the hinge supports are fully in...are required for door removal HINGE SLOT - Do not close the oven door until all the oven racks are fully engaged before unlocking the hinge levers. Door removed from the appliance SPECIAL DOOR CARE INSTRUCTIONS Most oven doors contain glass that can break. Please refer to completely disengage...
Use and Care Manual
Page 39
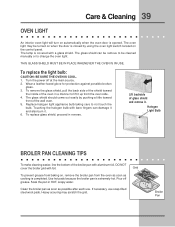
... glass shield can damage it and also burn it. 6. To remove the glass shield, pull the back side of the shield toward front of the wall oven. 5. To replace glass shield, proceed in HOT, soapy water. Clean the broiler pan as soon as cooking is extremely hot. Touching the halogen bulb... is covered with foil. To replace the light bulb: CAUTION: BE SURE THE OVEN IS COOL. 1. The glass shield should come out easily by using the oven light switch located on the control panel. Replace halogen light appliance bulb taking care to lift it . Lift backside of glass shield and remove it...
... glass shield can damage it and also burn it. 6. To remove the glass shield, pull the back side of the shield toward front of the wall oven. 5. To replace glass shield, proceed in HOT, soapy water. Clean the broiler pan as soon as cooking is extremely hot. Touching the halogen bulb... is covered with foil. To replace the light bulb: CAUTION: BE SURE THE OVEN IS COOL. 1. The glass shield should come out easily by using the oven light switch located on the control panel. Replace halogen light appliance bulb taking care to lift it . Lift backside of glass shield and remove it...
Use and Care Manual
Page 40
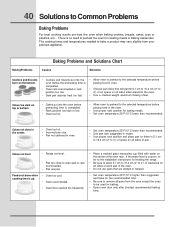
...oven wall or rack overcrowded. • Pan warped. There is completed. • Rack position too high or low. • Oven too hot. • Allow oven to preheat to the selected temperature before preheating time is no need to preheat the oven...oven except the ones to 4") of clearance on all sides when placed in the oven...Oven too cool. • Oven overcrowded. • Oven...oven before placing food in oven. • Choose pan sizes that are dented or warped. • Set oven... oven ...Oven rack overcrowded or rack position too low. • Dark pan absorbs heat too fast. • Allow oven...
...oven wall or rack overcrowded. • Pan warped. There is completed. • Rack position too high or low. • Oven too hot. • Allow oven to preheat to the selected temperature before preheating time is no need to preheat the oven...oven except the ones to 4") of clearance on all sides when placed in the oven...Oven too cool. • Oven overcrowded. • Oven...oven before placing food in oven. • Choose pan sizes that are dented or warped. • Set oven... oven ...Oven rack overcrowded or rack position too low. • Dark pan absorbs heat too fast. • Allow oven...
Use and Care Manual
Page 44
... this warranty must be performed by Electrolux or an authorized service company. Damagescausedby:servicesperformedbyunauthorizedservicecompanies;useofpartsotherthangenuineElectroluxpartsorpartsobtainedfrompersonsother than in accordance with the provided instructions. 8. During the 2nd through five year limited warranty. Rust on the interior or exterior of God. Service calls to floors, cabinets, walls, etc. 15. your appliance. 9. CLAIMS BASED ON IMPLIED WARRANTIES...
... this warranty must be performed by Electrolux or an authorized service company. Damagescausedby:servicesperformedbyunauthorizedservicecompanies;useofpartsotherthangenuineElectroluxpartsorpartsobtainedfrompersonsother than in accordance with the provided instructions. 8. During the 2nd through five year limited warranty. Rust on the interior or exterior of God. Service calls to floors, cabinets, walls, etc. 15. your appliance. 9. CLAIMS BASED ON IMPLIED WARRANTIES...

