Use and Care Manual
Page 2
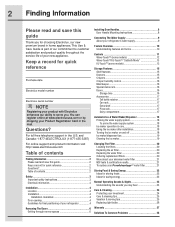
... Automatic Ice & Water Maker/Dispenser 18 Priming the water supply system 18 To prime the water supply system 18 Ice maker operation & care 18 Using the ice maker after installation 18 Turning the ice maker on and off 18 Ice maker/dispenser tips 19 Cleaning the ice maker 19 Changing The Filter 20 Locating the filters 20 Replacing the air filter 20 Replacing the water filter 20 Ordering replacement filters 20 More about your advanced water filter 21 NSF tests & certification results 21 To replace your PureAdvantageTM water filter 21 Storing Food & Saving Energy 22...
... Automatic Ice & Water Maker/Dispenser 18 Priming the water supply system 18 To prime the water supply system 18 Ice maker operation & care 18 Using the ice maker after installation 18 Turning the ice maker on and off 18 Ice maker/dispenser tips 19 Cleaning the ice maker 19 Changing The Filter 20 Locating the filters 20 Replacing the air filter 20 Replacing the water filter 20 Ordering replacement filters 20 More about your advanced water filter 21 NSF tests & certification results 21 To replace your PureAdvantageTM water filter 21 Storing Food & Saving Energy 22...
Use and Care Manual
Page 3
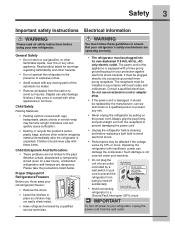
... moving parts of the automatic ice maker. • Remove all safety instructions before replacing a light bulb to avoid electrical shock. • Performance may be affected if the voltage varies by a qualified service technician. IMPORTANT To turn off accidentally. • Avoid connecting refrigerator to a Ground Fault Interrupter (GFI) circuit. Safety 3 Important safety instructions Electrical information WARNING Please read all staples from being turned off power to your warranty. •...
... moving parts of the automatic ice maker. • Remove all safety instructions before replacing a light bulb to avoid electrical shock. • Performance may be affected if the voltage varies by a qualified service technician. IMPORTANT To turn off accidentally. • Avoid connecting refrigerator to a Ground Fault Interrupter (GFI) circuit. Safety 3 Important safety instructions Electrical information WARNING Please read all staples from being turned off power to your warranty. •...
Use and Care Manual
Page 4
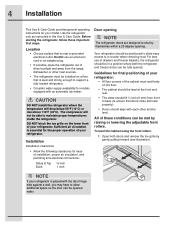
... refrigerator. Sufficient air circulation is level and strong enough to support a fully loaded refrigerator. • Consider water supply availability for the proper operation of drawers and freezer baskets, the refrigerator should be met by themselves within a 20 degree opening. For best use an extension cord or an adapter plug. • If possible, place the refrigerator out of your refrigerator is near a grounded electrical outlet. Use the refrigerator only as instructed...
... refrigerator. Sufficient air circulation is level and strong enough to support a fully loaded refrigerator. • Consider water supply availability for the proper operation of drawers and freezer baskets, the refrigerator should be met by themselves within a 20 degree opening. For best use an extension cord or an adapter plug. • If possible, place the refrigerator out of your refrigerator is near a grounded electrical outlet. Use the refrigerator only as instructed...
Use and Care Manual
Page 7
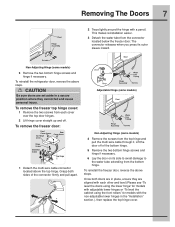
... door off . This makes reinstallation easier. 3 Detach the water tube from the bottom hinge. Non-Adjusting Hinge (some models) 4 Remove the screws from each other and level (Please see "To level the doors using the lower hinge" for models with adjustable lower hinges or "To level the cabinet using the front rollers" for models with a pencil. To reinstall the freezer door, reverse the above steps. To remove the freezer door: Adjustable Hinge (some models) 1 Detach the multi-wire cable connector located...
... door off . This makes reinstallation easier. 3 Detach the water tube from the bottom hinge. Non-Adjusting Hinge (some models) 4 Remove the screws from each other and level (Please see "To level the doors using the lower hinge" for models with adjustable lower hinges or "To level the cabinet using the front rollers" for models with a pencil. To reinstall the freezer door, reverse the above steps. To remove the freezer door: Adjustable Hinge (some models) 1 Detach the multi-wire cable connector located...
Use and Care Manual
Page 9
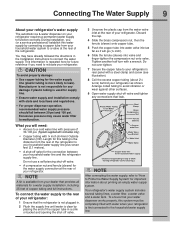
... finger-tighten the compression nut onto valve. NOTE A kit is not plugged in the Installation Instructions to a valve at the rear of your refrigerator: 1 Ensure that leak. Plastic Water Tubing to Ice Maker Fill Tube Steel Clamp Brass Compression Nut Ferrule (Sleeve) Copper water line Water Valve Bracket Valve Inlet Water Valve Copper water line from household water supply (Include enough tubing in a sink or bucket and opening the shut-off valve. 3 Unscrew the plastic cap from the...
... finger-tighten the compression nut onto valve. NOTE A kit is not plugged in the Installation Instructions to a valve at the rear of your refrigerator: 1 Ensure that leak. Plastic Water Tubing to Ice Maker Fill Tube Steel Clamp Brass Compression Nut Ferrule (Sleeve) Copper water line Water Valve Bracket Valve Inlet Water Valve Copper water line from household water supply (Include enough tubing in a sink or bucket and opening the shut-off valve. 3 Unscrew the plastic cap from the...
Use and Care Manual
Page 12
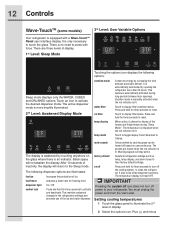
... temp, temp display, and alarm tones to their factory default settings. It is an indicator. Tones emitted by opening the refrigerator door after 24 hours. factory default Resets all dispenser functions. Setting cooling temperatures 1 Touch the glass panel to illuminate the 2nd level of the ice and water dispenser. Touching the options icon displays the following dispenser options are illuminated: fast ice Increases the production of the freezer and fridge temps during long periods between automatic defrost...
... temp, temp display, and alarm tones to their factory default settings. It is an indicator. Tones emitted by opening the refrigerator door after 24 hours. factory default Resets all dispenser functions. Setting cooling temperatures 1 Touch the glass panel to illuminate the 2nd level of the ice and water dispenser. Touching the options icon displays the following dispenser options are illuminated: fast ice Increases the production of the freezer and fridge temps during long periods between automatic defrost...
Use and Care Manual
Page 14
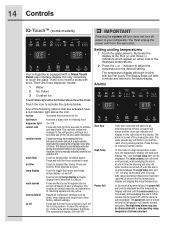
... their factory default settings. Any of ice fast freeze Activates a faster rate for freezing food dispenser light On / Off control lock Press and hold for three seconds to your refrigerator. Vacation mode is manually activated when the red indicator is equipped with a Glass Touch Panel user interface display. water filter Touch to the basic display. mute sounds Tones emitted by increasing the time between door openings. vacation mode Conserves energy by each keypress...
... their factory default settings. Any of ice fast freeze Activates a faster rate for freezing food dispenser light On / Off control lock Press and hold for three seconds to your refrigerator. Vacation mode is manually activated when the red indicator is equipped with a Glass Touch Panel user interface display. water filter Touch to the basic display. mute sounds Tones emitted by increasing the time between door openings. vacation mode Conserves energy by each keypress...
Use and Care Manual
Page 18
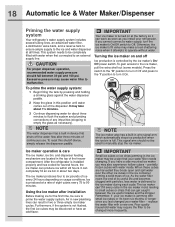
..., less water is installed properly and has cooled for several tubing lines, an advanced water filter, a distribution valve bank, and a reserve tank to ensure ample supply to malfunction. To gain access to prime the water supply system. Ice maker operation & care The ice maker, ice bin, and dispenser feeding mechanism are harvested they break open and spill water over the other ice cubes in wire signal arm, which automatically stops ice production when the ice bin is controlled by...
..., less water is installed properly and has cooled for several tubing lines, an advanced water filter, a distribution valve bank, and a reserve tank to ensure ample supply to malfunction. To gain access to prime the water supply system. Ice maker operation & care The ice maker, ice bin, and dispenser feeding mechanism are harvested they break open and spill water over the other ice cubes in wire signal arm, which automatically stops ice production when the ice bin is controlled by...
Use and Care Manual
Page 19
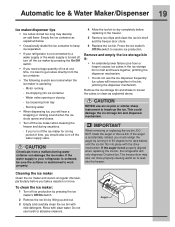
.... CAUTION NEVER use an ice pick or similar sharp instrument to resume ice production. IMPORTANT When removing or replacing the ice bin, DO NOT rotate the auger in the bin, jamming the dispenser mechanism. Motor running - Water valve opening or closing - If you turn off the ice maker for a long period of ice at regular intervals, particularly before replacing in the freezer. 5 Remove ice chips and clean the ice bin shelf and the freezer door chute. 6 Replace the ice bin. If...
.... CAUTION NEVER use an ice pick or similar sharp instrument to resume ice production. IMPORTANT When removing or replacing the ice bin, DO NOT rotate the auger in the bin, jamming the dispenser mechanism. Motor running - Water valve opening or closing - If you turn off the ice maker for a long period of ice at regular intervals, particularly before replacing in the freezer. 5 Remove ice chips and clean the ice bin shelf and the freezer door chute. 6 Replace the ice bin. If...
Use and Care Manual
Page 20
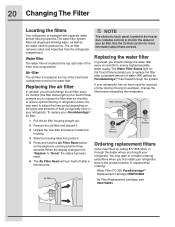
... the air filter housing straight out. 2 Remove the old filter and discard it. 3 Unpack the new filter and place it inside the housing. 4 Slide the housing back into position. 5 Press and hold the Air Filter Reset button on the Touch Panel prompts you to consider ordering extra filters when you bought your refrigerator. The Water Filter Status light on the electronic control panel for a period of refrigerator odors. Water filter The water filter is located...
... the air filter housing straight out. 2 Remove the old filter and discard it. 3 Unpack the new filter and place it inside the housing. 4 Slide the housing back into position. 5 Press and hold the Air Filter Reset button on the Touch Panel prompts you to consider ordering extra filters when you bought your refrigerator. The Water Filter Status light on the electronic control panel for a period of refrigerator odors. Water filter The water filter is located...

Use and Care Manual
Page 21
... ice maker power switch. 2 Push the filter release button below the cartridge to disconnect it. 3 Slide the old water filter cartridge straight out of the housing and discard it. 4 Unpackage the new filter cartridge and slide it stops against the snap-in connector at the filter housing. Changing The Filter 21 More about your PureAdvantageTM water filter: It is not necessary to turn the water supply off to change the filter. When the display changes from "Replace...
... ice maker power switch. 2 Push the filter release button below the cartridge to disconnect it. 3 Slide the old water filter cartridge straight out of the housing and discard it. 4 Unpackage the new filter cartridge and slide it stops against the snap-in connector at the filter housing. Changing The Filter 21 More about your PureAdvantageTM water filter: It is not necessary to turn the water supply off to change the filter. When the display changes from "Replace...
Use and Care Manual
Page 22
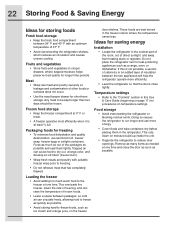
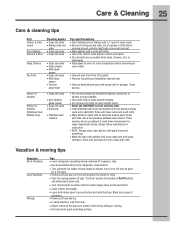
...; Use the meat keeper drawer for procedures on moisture build-up inside the unit. • Organize the refrigerator to reduce door openings. Doing so causes the refrigerator to run longer and use aluminum foil, freezer wrap, freezer bags or airtight containers. This overloads the freezer, slows the rate of freezing, and can raise the temperature of insulation between the two appliances will help the refrigerator operate more energy. • Cover...
...; Use the meat keeper drawer for procedures on moisture build-up inside the unit. • Organize the refrigerator to reduce door openings. Doing so causes the refrigerator to run longer and use aluminum foil, freezer wrap, freezer bags or airtight containers. This overloads the freezer, slows the rate of freezing, and can raise the temperature of insulation between the two appliances will help the refrigerator operate more energy. • Cover...
Use and Care Manual
Page 24
... damp hands. Refer to completely drain the water supply system. Do not use CHLORIDE to clean stainless steel. • Do not wash any removable parts in freezing temperatures, be sure to the guide on the next page for details on any surface. • Never use razor blades or other electrical components will continue until you set your temperature controls to turn off cooling, power to side may damage flooring...
... damp hands. Refer to completely drain the water supply system. Do not use CHLORIDE to clean stainless steel. • Do not wash any removable parts in freezing temperatures, be sure to the guide on the next page for details on any surface. • Never use razor blades or other electrical components will continue until you set your temperature controls to turn off cooling, power to side may damage flooring...
Use and Care Manual
Page 25
... gaskets with a clean soft cloth. • Use a soft cloth to clean drawer runners and tracks. • Do not wash any removable items (bins, drawers, etc.) in dishwasher. • Allow glass to warm to room temperature before immersing in warm water. • Vacuum dust from front of toe grille. • Remove toe grille (see "Controls" section for location of On/Off button) and disconnect power cord. • Turn off (see Installation Instructions...
... gaskets with a clean soft cloth. • Use a soft cloth to clean drawer runners and tracks. • Do not wash any removable items (bins, drawers, etc.) in dishwasher. • Allow glass to warm to room temperature before immersing in warm water. • Vacuum dust from front of toe grille. • Remove toe grille (see "Controls" section for location of On/Off button) and disconnect power cord. • Turn off (see Installation Instructions...
Use and Care Manual
Page 27
... installed, used , and maintained in the home. 12. LIMITATION OF REMEDIES CUSTOMER'S SOLE AND EXCLUSIVE REMEDY UNDER THIS LIMITED WARRANTY SHALL BE REPAIR OR REPLACEMENT AS PROVIDED HEREIN. THIS WRITTEN WARRANTY GIVES YOU SPECIFIC LEGAL RIGHTS. Rust on the interior or exterior of God. use your best interest to be performed by a one year from its original owner to repair or replace appliance light bulbs, air filters, water filters...
... installed, used , and maintained in the home. 12. LIMITATION OF REMEDIES CUSTOMER'S SOLE AND EXCLUSIVE REMEDY UNDER THIS LIMITED WARRANTY SHALL BE REPAIR OR REPLACEMENT AS PROVIDED HEREIN. THIS WRITTEN WARRANTY GIVES YOU SPECIFIC LEGAL RIGHTS. Rust on the interior or exterior of God. use your best interest to be performed by a one year from its original owner to repair or replace appliance light bulbs, air filters, water filters...
Use and Care Manual
Page 28
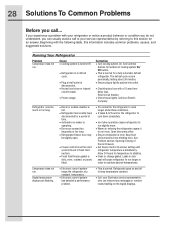
... for location of Doors/ Drawers. • Set freezer control to stabilize. • Clean or change gasket. If you experience a problem with your service representative by referring to run slightly more. • Warm air entering the refrigerator causes it to this information includes common problems, causes, and suggested solutions. Leaks in door seal will cause refrigerator to run longer in fresh food section). • Fresh food/freezer gasket is normal for the refrigerator to cool...
... for location of Doors/ Drawers. • Set freezer control to stabilize. • Clean or change gasket. If you experience a problem with your service representative by referring to run slightly more. • Warm air entering the refrigerator causes it to this information includes common problems, causes, and suggested solutions. Leaks in door seal will cause refrigerator to run longer in fresh food section). • Fresh food/freezer gasket is normal for the refrigerator to cool...
Use and Care Manual
Page 31
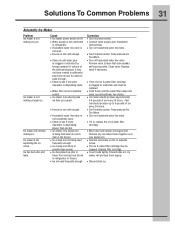
... open . • Freezer is not • Ice cubes are hollow or • The ice & water filter cartridge may valve if necessary. is • Turn on cold water pipe • Turn off household water line valve. cubes. cubes. • Ice cubes are not being held down by Remove valve. in the freezer. Solutions To Common Problems 31 Automatic Ice Maker Problem Cause Correction Ice maker is not • Ice maker power switch is dispensing cartridge. not have created a sufficiently sized hole in tube for water...
... open . • Freezer is not • Ice cubes are hollow or • The ice & water filter cartridge may valve if necessary. is • Turn on cold water pipe • Turn off household water line valve. cubes. cubes. • Ice cubes are not being held down by Remove valve. in the freezer. Solutions To Common Problems 31 Automatic Ice Maker Problem Cause Correction Ice maker is not • Ice maker power switch is dispensing cartridge. not have created a sufficiently sized hole in tube for water...
Use and Care Manual
Page 32
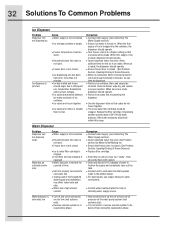
... dispense ice. Cause • Water supply is not connected. • Ice storage container is empty. • Freezer temperature is set too warm. • Household water line valve is not open . • Freezer door is not closed. • Ice & water filter cartridge is closed . • Ice dispensing arm has been held in for a reverse osmosis system to cold water line that ice cubes will not dispense water. Allow sufficient time for help in checking water supply source. Replace the filter cartridge. See Problem section Ice Maker Is Not Making Ice...
... dispense ice. Cause • Water supply is not connected. • Ice storage container is empty. • Freezer temperature is set too warm. • Household water line valve is not open . • Freezer door is not closed. • Ice & water filter cartridge is closed . • Ice dispensing arm has been held in for a reverse osmosis system to cold water line that ice cubes will not dispense water. Allow sufficient time for help in checking water supply source. Replace the filter cartridge. See Problem section Ice Maker Is Not Making Ice...
Use and Care Manual
Page 33
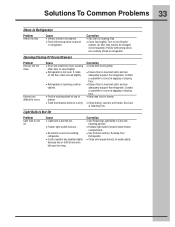
... • See Replacing Light Bulbs in drawer. • Clean drawer, runners, and tracks. Opening/Closing Of Doors/Drawers Problem Door(s) will not close. Cause • Interior needs to enable lights. Drawers are routinely stored in refrigerator. Contact a carpenter to correct a sagging or sloping floor. • Keep less food in Care and Cleaning section. • Release light switch located inside freezer compartment. • See Problem section, Running Your Refrigerator. • Close and reopen door(s) to be changed more frequently...
... • See Replacing Light Bulbs in drawer. • Clean drawer, runners, and tracks. Opening/Closing Of Doors/Drawers Problem Door(s) will not close. Cause • Interior needs to enable lights. Drawers are routinely stored in refrigerator. Contact a carpenter to correct a sagging or sloping floor. • Keep less food in Care and Cleaning section. • Release light switch located inside freezer compartment. • See Problem section, Running Your Refrigerator. • Close and reopen door(s) to be changed more frequently...
Installation Instructions
Page 1
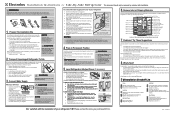
... doors (see the Use & Care Guide for the connection between your kitchen contractor. CAUTION • Shifting the refrigerator from the water valve inlet at www.electroluxusa.com. I n s t a l l a t i o n I n s t r u c t i o n s f o r S i d e - Location of the refrigerator to the receptacle turned on removing and replacing doors.) • Is the ice maker power switch turned On? S i d e R e f r i g e r a t o r This document should align with filter housing (some models) Final Checks Shipping material removed Fresh Food and Freezer temperatures set Crisper Humidity controls set...
... doors (see the Use & Care Guide for the connection between your kitchen contractor. CAUTION • Shifting the refrigerator from the water valve inlet at www.electroluxusa.com. I n s t a l l a t i o n I n s t r u c t i o n s f o r S i d e - Location of the refrigerator to the receptacle turned on removing and replacing doors.) • Is the ice maker power switch turned On? S i d e R e f r i g e r a t o r This document should align with filter housing (some models) Final Checks Shipping material removed Fresh Food and Freezer temperatures set Crisper Humidity controls set...


