
Complete Owners Guide English
Page 2
... page to an electrical power source. Purchase Date Electrolux Model Number Electrolux Serial Number Dealer Name Dealer Address Dealer Telephone If you . You can register online at the time your Product Registration Card in a safe place for any problems occur, refer to the "Troubleshooting" section of your Electrolux unit and your purchase as possible to install or operate the unit. We view your dealer...
... page to an electrical power source. Purchase Date Electrolux Model Number Electrolux Serial Number Dealer Name Dealer Address Dealer Telephone If you . You can register online at the time your Product Registration Card in a safe place for any problems occur, refer to the "Troubleshooting" section of your Electrolux unit and your purchase as possible to install or operate the unit. We view your dealer...

Complete Owners Guide English
Page 3
Questions? and Canada:1-877- 4ELECTROLUX (1-877-435-3287) For online support and Internet product information: www.electroluxappliances.com Table of Contents Finding Information 2 Safety 4 Feature Overview 7 Installation 8 Leveling 14 Operation 15 Door Reversal 18 Storage 20 Care & Maintenance 21 Troubleshooting 22 Warranty Information 23 Finding Information 3 Keep this manual and the sales receipt together in the U.S. For toll-free telephone support in a safe place for further reference.
Questions? and Canada:1-877- 4ELECTROLUX (1-877-435-3287) For online support and Internet product information: www.electroluxappliances.com Table of Contents Finding Information 2 Safety 4 Feature Overview 7 Installation 8 Leveling 14 Operation 15 Door Reversal 18 Storage 20 Care & Maintenance 21 Troubleshooting 22 Warranty Information 23 Finding Information 3 Keep this manual and the sales receipt together in the U.S. For toll-free telephone support in a safe place for further reference.

Complete Owners Guide English
Page 4
... electricity has been disconnected. • Altering, cutting of power cord, removal of power cord, removal of property and/ or life and will result in minor or moderate injury. It is the safety alert symbol. CAUTION Use only genuine Electrolux replacement parts. 4 Safety Important Safety Instructions Safety Precautions Do not attempt to install or operate your old appliance, take off the doors and leave shelves...
... electricity has been disconnected. • Altering, cutting of power cord, removal of power cord, removal of property and/ or life and will result in minor or moderate injury. It is the safety alert symbol. CAUTION Use only genuine Electrolux replacement parts. 4 Safety Important Safety Instructions Safety Precautions Do not attempt to install or operate your old appliance, take off the doors and leave shelves...

Complete Owners Guide English
Page 5
... Cooler/Beverage Center: • Remove doors. • Leave shelves in contact with reduced physical, sensory or mental capabilities, or lack of experience and knowledge, unless they are still dangerous - To be followed. Flammable refrigerant used. Follow handling instructions carefully. Children should never use of refrigerant tubing. Before you are not problems of the type recommended by trained service personnel. Cartons covered with your utility company...
... Cooler/Beverage Center: • Remove doors. • Leave shelves in contact with reduced physical, sensory or mental capabilities, or lack of experience and knowledge, unless they are still dangerous - To be followed. Flammable refrigerant used. Follow handling instructions carefully. Children should never use of refrigerant tubing. Before you are not problems of the type recommended by trained service personnel. Cartons covered with your utility company...

Complete Owners Guide English
Page 6
...the power cord. • Unplug the Wine Cooler/Beverage Center before cleaning and before replacing a light bulb to avoid electrical shock. • Performance may be installed in accordance with 3-prong grounded plug This appliance is not covered ...Amp, AC only electrical outlet. Power cord with local codes and ordinances. Grounding type wall receptacle Do not, under your unit: 1 Locate Power cord box inside unit. 2 Remove Power cord from being turned off accidentally. Avoid connecting refrigerator to be used in household and similar applications such as: • Staff kitchen...
...the power cord. • Unplug the Wine Cooler/Beverage Center before cleaning and before replacing a light bulb to avoid electrical shock. • Performance may be installed in accordance with 3-prong grounded plug This appliance is not covered ...Amp, AC only electrical outlet. Power cord with local codes and ordinances. Grounding type wall receptacle Do not, under your unit: 1 Locate Power cord box inside unit. 2 Remove Power cord from being turned off accidentally. Avoid connecting refrigerator to be used in household and similar applications such as: • Staff kitchen...

Complete Owners Guide English
Page 7
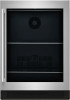
Feature Overview 7 Beverage Center Control Panel Upper Hinge Fan Door Handle Shelf Sensor Door Light Switch Lower Hinge Toe Grille Leg Wine Cooler Control Panel Upper Hinge Fan Door Handle Shelf Sensor Door Light Switch Lower Hinge Toe Grille Leg
Feature Overview 7 Beverage Center Control Panel Upper Hinge Fan Door Handle Shelf Sensor Door Light Switch Lower Hinge Toe Grille Leg Wine Cooler Control Panel Upper Hinge Fan Door Handle Shelf Sensor Door Light Switch Lower Hinge Toe Grille Leg

Complete Owners Guide English
Page 8
... installed, grounded wall outlet. So never damage the cooling pipe work during transportation. • Clean the interior surface with a cabinet or wall. Extreme cold ambient temperatures may also cause the unit not to perform properly. • Avoid locating the unit in sealed bottles. • Do not overload the cabinet. • Do not open the door unless necessary. • Do not cover shelves...
... installed, grounded wall outlet. So never damage the cooling pipe work during transportation. • Clean the interior surface with a cabinet or wall. Extreme cold ambient temperatures may also cause the unit not to perform properly. • Avoid locating the unit in sealed bottles. • Do not overload the cabinet. • Do not open the door unless necessary. • Do not cover shelves...

Complete Owners Guide English
Page 9
... tip when shelves are extended, causing damage or injury. Tools you or a child stand, sit, or lean on an open shelf. CONCRETE FLOOR Anti-tip bracket installation The bracket can choose which side is convenient for any reason, make sure that ...installed following these instructions. Installation 9 Installing the Anti-Tip Bracket CAUTION If your Wine Cooler/Beverage Center is not located under a counter top (free standing), you . WOOD FLOOR 3. If the Wine Cooler/ Beverage Center is used in this appliance is removed from its location for you must be installed at the left...
... tip when shelves are extended, causing damage or injury. Tools you or a child stand, sit, or lean on an open shelf. CONCRETE FLOOR Anti-tip bracket installation The bracket can choose which side is convenient for any reason, make sure that ...installed following these instructions. Installation 9 Installing the Anti-Tip Bracket CAUTION If your Wine Cooler/Beverage Center is not located under a counter top (free standing), you . WOOD FLOOR 3. If the Wine Cooler/ Beverage Center is used in this appliance is removed from its location for you must be installed at the left...

Complete Owners Guide English
Page 11
... flat washer (D). Fasten bracket to tip the unit. AD C B F WARNING After installing the bracket, try using a hammer or mallet. 5. After you have chosen the installation location, use either hole (3) to secure the bracket into the concrete, using light force to the floor by tightening nut securely. 6. Using a concrete bit, drill 8mm (3/8") pilot hole 45mm (1.7") deep. 3. If the unit...
... flat washer (D). Fasten bracket to tip the unit. AD C B F WARNING After installing the bracket, try using a hammer or mallet. 5. After you have chosen the installation location, use either hole (3) to secure the bracket into the concrete, using light force to the floor by tightening nut securely. 6. Using a concrete bit, drill 8mm (3/8") pilot hole 45mm (1.7") deep. 3. If the unit...

Complete Owners Guide English
Page 12
... models when installed against a wall or cabinet for top, sides or rear. NOTE A minimum of 2 7⁄8 inch handle clearance is recommended that the cabinet rough opening /removal of shelves. 24.02" 610mm 24.02" 610mm 34.45" 875mm 23.82" 605mm 23.52" 597.5mm 34.06" 865mm When under counter installation. 12 Installation Installing the Wine Cooler Your Electrolux...
... models when installed against a wall or cabinet for top, sides or rear. NOTE A minimum of 2 7⁄8 inch handle clearance is recommended that the cabinet rough opening /removal of shelves. 24.02" 610mm 24.02" 610mm 34.45" 875mm 23.82" 605mm 23.52" 597.5mm 34.06" 865mm When under counter installation. 12 Installation Installing the Wine Cooler Your Electrolux...

Complete Owners Guide English
Page 13
... hole plugs from the accessory bag. Place handle over the two mounting screws (A). 2. NOTE If the door is being reversed, please attach the anti-tip bracket onto the right hinge holes and then attach the other end of the anti-tip bracket onto the niche with screws (2 pcs) in size ST4 (12mm). Handle Installation Installation Instructions 1. Use Allen wrench to tighten 2 set...
... hole plugs from the accessory bag. Place handle over the two mounting screws (A). 2. NOTE If the door is being reversed, please attach the anti-tip bracket onto the right hinge holes and then attach the other end of the anti-tip bracket onto the niche with screws (2 pcs) in size ST4 (12mm). Handle Installation Installation Instructions 1. Use Allen wrench to tighten 2 set...

Complete Owners Guide English
Page 14
... turning the legs. Repeat this area open. Leveling legs, 2 at the front and rear corners of another person, lean the appliance back to avoid scratching the floor. The overall height of the unit when full. 14 Leveling Leveling the Unit Position the unit on a flat, level surface capable of supporting the entire weight of your Electrolux appliance may be set...
... turning the legs. Repeat this area open. Leveling legs, 2 at the front and rear corners of another person, lean the appliance back to avoid scratching the floor. The overall height of the unit when full. 14 Leveling Leveling the Unit Position the unit on a flat, level surface capable of supporting the entire weight of your Electrolux appliance may be set...

Complete Owners Guide English
Page 15
... the light settings, changing between 2 settings. Light always OFF when door is closed. 2A: Lights always ON no matter if door is open or closed. Child lock is turned back on, the display will display for 3 seconds to show the previous temperature settings. When the power is lit-up when activated. Temperature Set Press to toggle the lights ON/OFF. Child lock disables all button controls. The new setting will show the set temperature. Lights...
... the light settings, changing between 2 settings. Light always OFF when door is closed. 2A: Lights always ON no matter if door is open or closed. Child lock is turned back on, the display will display for 3 seconds to show the previous temperature settings. When the power is lit-up when activated. Temperature Set Press to toggle the lights ON/OFF. Child lock disables all button controls. The new setting will show the set temperature. Lights...

Complete Owners Guide English
Page 16
... changed from when the door is opened until the Cellaring mode is deactivated. C°/F° set temperature. Cellar Mode Set (Wine Cooler Only) Press once to toggle on or off any lights, digital readouts, solenoids, fans, valves, compressor, icons, tones, or alarms. There is a 30 second delay from 12ºC/54ºF. The alert icon turns On, but will remain until the Sabbath Mode is fixed...
... changed from when the door is opened until the Cellaring mode is deactivated. C°/F° set temperature. Cellar Mode Set (Wine Cooler Only) Press once to toggle on or off any lights, digital readouts, solenoids, fans, valves, compressor, icons, tones, or alarms. There is a 30 second delay from 12ºC/54ºF. The alert icon turns On, but will remain until the Sabbath Mode is fixed...

Complete Owners Guide English
Page 17
.... Door open icon turns On, the lights start to toggle the display between 'OF' and 'On'. Press the mute button once to blink and an alarm sounds. High / Low temperature alert When the set temp has been insufficient during a period of 6 hours, Low Temperature alert shows "Lº" and blinks the alert icon. To keep communicating that alarms will still be muted. Operation 17 CELLAR MODE Demo mode (Wine...
.... Door open icon turns On, the lights start to toggle the display between 'OF' and 'On'. Press the mute button once to blink and an alarm sounds. High / Low temperature alert When the set temp has been insufficient during a period of 6 hours, Low Temperature alert shows "Lº" and blinks the alert icon. To keep communicating that alarms will still be muted. Operation 17 CELLAR MODE Demo mode (Wine...

Complete Owners Guide English
Page 18
... are heavy. Remove door and place on top hinge pin. 2. 18 Door Reversal 54 3 + + + 1 76 2 5 + + + Reversing the Door 1. To remove the top hinge pin, open the door and pull down the gasket. Use a flat screwdriver to remove or replace the door assembly from the cabinet. 3. CAUTION Doors are recommended to pry the hook out then push up on a padded surface to remove the bottom hinge pin. Remove the lower hinge screws using a Phillips head...
... are heavy. Remove door and place on top hinge pin. 2. 18 Door Reversal 54 3 + + + 1 76 2 5 + + + Reversing the Door 1. To remove the top hinge pin, open the door and pull down the gasket. Use a flat screwdriver to remove or replace the door assembly from the cabinet. 3. CAUTION Doors are recommended to pry the hook out then push up on a padded surface to remove the bottom hinge pin. Remove the lower hinge screws using a Phillips head...

Complete Owners Guide English
Page 19
... door 180 degrees (handle on the left lower corner. 8. NOTE After the door reversal process, make sure the door switch actuator (12) is on the left top corner. 9. Align the door and top hinge. Place door on the inside bottom of the door. Install the hinge pin hook then install the hinge pin. 10. Install the hinge pin hook then install the hinge pin. 11. The actuator is installed on the left lower hinge. Install the right lower hinge...
... door 180 degrees (handle on the left lower corner. 8. NOTE After the door reversal process, make sure the door switch actuator (12) is on the left top corner. 9. Align the door and top hinge. Place door on the inside bottom of the door. Install the hinge pin hook then install the hinge pin. 10. Install the hinge pin hook then install the hinge pin. 11. The actuator is installed on the left lower hinge. Install the right lower hinge...

Complete Owners Guide English
Page 21
... to linger can penetrate into the surface of the stainless steel and become impossible to the unit. Interior Cleaning - Exterior Cleaning for long periods: • Clean thoroughly. • Leave the door ajar to allow air to circulate inside the cabinet in the direction of non-abrasive mild detergent and warm water. 4 Rinse with a solution of the grain. as areas with...
... to linger can penetrate into the surface of the stainless steel and become impossible to the unit. Interior Cleaning - Exterior Cleaning for long periods: • Clean thoroughly. • Leave the door ajar to allow air to circulate inside the cabinet in the direction of non-abrasive mild detergent and warm water. 4 Rinse with a solution of the grain. as areas with...

Complete Owners Guide English
Page 22
... "Start-Up and Temperature • Control" section). Remedy Adjust temperature colder. Contact a qualified Electrolux Service Technician. WARNING ELECTROCUTION HAZARD NEVER attempt to repair or perform maintenance on . • Airflow to front grille • blocked. Turn off manual light control. See "Installation" section. Adjust temperature warmer. Loosen hinges and re-align door. Door gasket is not restored • after power failure. See "Operation" section. Verify electrical supply. See "Installation" section. The model and serial number plate is...
... "Start-Up and Temperature • Control" section). Remedy Adjust temperature colder. Contact a qualified Electrolux Service Technician. WARNING ELECTROCUTION HAZARD NEVER attempt to repair or perform maintenance on . • Airflow to front grille • blocked. Turn off manual light control. See "Installation" section. Adjust temperature warmer. Loosen hinges and re-align door. Door gasket is not restored • after power failure. See "Operation" section. Verify electrical supply. See "Installation" section. The model and serial number plate is...

Complete Owners Guide English
Page 23
..., a division of purchase, Electrolux will repair or replace any refrigerator or freezer failures. 6. In the USA and Puerto Rico, your best interest to be defective in materials or workmanship when such appliance is installed, used other than in accordance with the provided instructions. 8. Products with the provided instructions. Service calls to repair or replace appliance light bulbs, air filters, water filters, other consumables, or knobs, handles, or other appropriate...
..., a division of purchase, Electrolux will repair or replace any refrigerator or freezer failures. 6. In the USA and Puerto Rico, your best interest to be defective in materials or workmanship when such appliance is installed, used other than in accordance with the provided instructions. 8. Products with the provided instructions. Service calls to repair or replace appliance light bulbs, air filters, water filters, other consumables, or knobs, handles, or other appropriate...


