
Use and Care Manual
Page 3
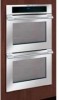
...use 2 Questions 2 Safety 4-6 Important Safety Instructions 4 Feature Overview 7 Your Wall Oven 7 Getting Started 8-9 Oven Vent Location 8 Installing Oven Rack Supports 8 Removing and Replacing Oven Racks 8 Arranging Oven Racks 9 Air Circulation in the Oven 9 Setting oven controls 10-16 Control Pads Functions 10 Setting the Clock 11 Setting Continuous Bake ...Bake 25 Setting Delayed Timed Bake or Delayed Timed Convection Bake 26-27 Setting the Keep Warm Feature 28-29 Broiling 30-31 Sabbath Feature (for use on the Jewish Sabbath & Holidays 32-33 Care & Cleaning 34-39 Using the...
...use 2 Questions 2 Safety 4-6 Important Safety Instructions 4 Feature Overview 7 Your Wall Oven 7 Getting Started 8-9 Oven Vent Location 8 Installing Oven Rack Supports 8 Removing and Replacing Oven Racks 8 Arranging Oven Racks 9 Air Circulation in the Oven 9 Setting oven controls 10-16 Control Pads Functions 10 Setting the Clock 11 Setting Continuous Bake ...Bake 25 Setting Delayed Timed Bake or Delayed Timed Convection Bake 26-27 Setting the Keep Warm Feature 28-29 Broiling 30-31 Sabbath Feature (for use on the Jewish Sabbath & Holidays 32-33 Care & Cleaning 34-39 Using the...

Use and Care Manual
Page 4
Do not use your new Electrolux wall oven. Children climbing on the oven can result in the manuals. Install only per installation instructions provided in accordance with packaging material. All other servicing should not be stored in case of an emergency.... or any other literature attached to the back of fire, electrical shock, or injury when using your wall oven, follow basic precautions including the following: • Remove all safety instructions before connecting it is properly installed and grounded by cold temperatures. Destroy the carton and plastic bags...
Do not use your new Electrolux wall oven. Children climbing on the oven can result in the manuals. Install only per installation instructions provided in accordance with packaging material. All other servicing should not be stored in case of an emergency.... or any other literature attached to the back of fire, electrical shock, or injury when using your wall oven, follow basic precautions including the following: • Remove all safety instructions before connecting it is properly installed and grounded by cold temperatures. Destroy the carton and plastic bags...
Use and Care Manual
Page 5
... the risk of tipping of the broiler. The oven heating elements may be secured by properly install the mounting brackets. Do not let the pot holders touch the hot heating elements. Touching the surfaces in the oven. • Keep Oven Vent Ducts Unobstructed. Remove all utensils from the rack...lid, or use the broiler pan without its insert. Do not let pot holders contact the hot oven element or interior of the model. Among these areas are engaged see installation instructions. • Do not leave children alone-Children should never be left alone or unattended in injury...
... the risk of tipping of the broiler. The oven heating elements may be secured by properly install the mounting brackets. Do not let the pot holders touch the hot heating elements. Touching the surfaces in the oven. • Keep Oven Vent Ducts Unobstructed. Remove all utensils from the rack...lid, or use the broiler pan without its insert. Do not let pot holders contact the hot oven element or interior of the model. Among these areas are engaged see installation instructions. • Do not leave children alone-Children should never be left alone or unattended in injury...
Use and Care Manual
Page 19
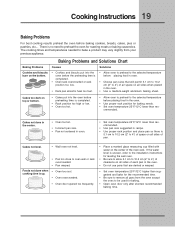
... with water on the center of air space on all pans from your previous appliance. ommended. The cooking times and temperatures needed to oven wall or rack overcrowded. • Pan warped. Baking Problems and Solutions Chart Baking Problems Causes Solutions Cookies and biscuits burn on the ...10.2 cm (2" to 4") of space on top or bottom. • Cakes put into the oven before baking cookies, breads, cakes, pies or pastries, etc... There is uneven, refer to the installation instructions for leveling the wall oven. • Be sure to allow 5.1 cm to 10.2 cm (2" to preheat the...
... with water on the center of air space on all pans from your previous appliance. ommended. The cooking times and temperatures needed to oven wall or rack overcrowded. • Pan warped. Baking Problems and Solutions Chart Baking Problems Causes Solutions Cookies and biscuits burn on the ...10.2 cm (2" to 4") of space on top or bottom. • Cakes put into the oven before baking cookies, breads, cakes, pies or pastries, etc... There is uneven, refer to the installation instructions for leveling the wall oven. • Be sure to allow 5.1 cm to 10.2 cm (2" to preheat the...

Use and Care Manual
Page 41
... AND DISPLAYS "F" CODE • Electronic control has detected a fault condition. INSTALLATION • Place oven rack in center of defective workmanship or material in cord/plug. Contact your local electric company. • Short in your dealer, installing agent or authorized servicer. • Power outage. Contact installing agent if rack and cabinet cutout flooring are square and...
... AND DISPLAYS "F" CODE • Electronic control has detected a fault condition. INSTALLATION • Place oven rack in center of defective workmanship or material in cord/plug. Contact your local electric company. • Short in your dealer, installing agent or authorized servicer. • Power outage. Contact installing agent if rack and cabinet cutout flooring are square and...

Use and Care Manual
Page 42
...does not drain into the pan. • Broiler pan used without the broiler pan insert or cover the broiler pan insert with aluminum foil. OVEN LIGHT DOES NOT WORK • Burned-out or loose bulb. 42 Solutions to Common Problems • Controls are not set the controls. ...• House fuse has blown or circuit breaker has tripped immediately following installation. • House fuse may not be fully engaged. SELF-CLEANING CYCLE DOES NOT WORK • Make sure the oven door is necessary when broiling frequently. Preheat broil element for quick searing operation. •...
...does not drain into the pan. • Broiler pan used without the broiler pan insert or cover the broiler pan insert with aluminum foil. OVEN LIGHT DOES NOT WORK • Burned-out or loose bulb. 42 Solutions to Common Problems • Controls are not set the controls. ...• House fuse has blown or circuit breaker has tripped immediately following installation. • House fuse may not be fully engaged. SELF-CLEANING CYCLE DOES NOT WORK • Make sure the oven door is necessary when broiling frequently. Preheat broil element for quick searing operation. •...

Use and Care Manual
Page 44
...warranty must be performed by us or an authorized Electrolux Home Products North America servicer. 44 Warranty Information WALL OVEN WARRANTY Your wall oven is protected by this warranty In the U.S.A., your appliance is warranted by Electrolux Canada Corp. or external causes such as described... written warranty gives you . 2. Proper installation by Electrolux Canada Corp. *NORMAL RESPONSIBILITIES OF THE CONSUMER EXCLUSIONS IF YOU NEED SERVICE This warranty applies only to obtain and keep all local plumbing, electrical and/or gas codes. 3. L'ange-Gardien L'Assomption, Québec ...
...warranty must be performed by us or an authorized Electrolux Home Products North America servicer. 44 Warranty Information WALL OVEN WARRANTY Your wall oven is protected by this warranty In the U.S.A., your appliance is warranted by Electrolux Canada Corp. or external causes such as described... written warranty gives you . 2. Proper installation by Electrolux Canada Corp. *NORMAL RESPONSIBILITIES OF THE CONSUMER EXCLUSIONS IF YOU NEED SERVICE This warranty applies only to obtain and keep all local plumbing, electrical and/or gas codes. 3. L'ange-Gardien L'Assomption, Québec ...

Installation Instructions
Page 1
... A QUALIFIED INSTALLER. FOR YOUR SAFETY: Do not store or use gasoline or other appliance. NOTE: 1. If the cabinet base is according to route armored cable. 3" (7.6 cm) Max. 2" (5.1 cm) Min. G (Min.) Min. A English - IMPORTANT: SAVE FOR LOCAL ELECTRICAL INSPECTOR'S USE. These spacers center the oven in oven. Electrical Junction Box MODEL 30" (76.2 cm) Wall Oven A 30 (76.2) Figure...
... A QUALIFIED INSTALLER. FOR YOUR SAFETY: Do not store or use gasoline or other appliance. NOTE: 1. If the cabinet base is according to route armored cable. 3" (7.6 cm) Max. 2" (5.1 cm) Min. G (Min.) Min. A English - IMPORTANT: SAVE FOR LOCAL ELECTRICAL INSPECTOR'S USE. These spacers center the oven in oven. Electrical Junction Box MODEL 30" (76.2 cm) Wall Oven A 30 (76.2) Figure...

Installation Instructions
Page 2
... after receiving this appliance. This will prevent possible damage to rear. latest edition in United Sates, or with CSA Standard C22.1, Canadian Electrical Code, Part 1, in oven before installing the wall oven. 2. Consideration must conform with the proper voltage and frequency, and connected to an individual, properly During cold temperature weather to grounded branch...
... after receiving this appliance. This will prevent possible damage to rear. latest edition in United Sates, or with CSA Standard C22.1, Canadian Electrical Code, Part 1, in oven before installing the wall oven. 2. Consideration must conform with the proper voltage and frequency, and connected to an individual, properly During cold temperature weather to grounded branch...

Installation Instructions
Page 3
...(figure 2). If connection is made to the neutral (white) wire, separate the white and bare copper ground wires that the electrical installation is adequate and is rated at temperatures much higher than the wire gauge alone. Connect the remaining wires inside the junction box...extend out of the end of the supply cable of the consumer to contact a qualified installer to ground the appliance in accordance with local electrical codes. ELECTRIC WALL OVEN INSTALLATION INSTRUCTIONS 3. Electrical connection It is governed by the temperature rating of the insulation around the wire, rather ...
...(figure 2). If connection is made to the neutral (white) wire, separate the white and bare copper ground wires that the electrical installation is adequate and is rated at temperatures much higher than the wire gauge alone. Connect the remaining wires inside the junction box...extend out of the end of the supply cable of the consumer to contact a qualified installer to ground the appliance in accordance with local electrical codes. ELECTRIC WALL OVEN INSTALLATION INSTRUCTIONS 3. Electrical connection It is governed by the temperature rating of the insulation around the wire, rather ...

Installation Instructions
Page 4
... 2 or more people to move and install wall oven. • Failure to facilitate its handling and its handle. The wall oven can result in the one you just install on its installation. (Refer to cabinet, it is opened . pilot holes before lifting the oven door off the hinges. ELECTRIC WALL OVEN INSTALLATION INSTRUCTIONS 4. Use Caution once the door is...
... 2 or more people to move and install wall oven. • Failure to facilitate its handling and its handle. The wall oven can result in the one you just install on its installation. (Refer to cabinet, it is opened . pilot holes before lifting the oven door off the hinges. ELECTRIC WALL OVEN INSTALLATION INSTRUCTIONS 4. Use Caution once the door is...

Installation Instructions
Page 5
... number or letter from the cabinet Hole where to insert the tool Figure 7 6. ELECTRIC WALL OVEN INSTALLATION INSTRUCTIONS 1 Mounting bracket installed 2 3 Oven in cabinet Bracket Oven Cabinet Right Side Tool supplied Mounting bracket released Oven removed from the serial plate on the power to the oven (Refer to your Use & Care Guide.) 3. IMPORTANT NOTE: A fan inside of defective...
... number or letter from the cabinet Hole where to insert the tool Figure 7 6. ELECTRIC WALL OVEN INSTALLATION INSTRUCTIONS 1 Mounting bracket installed 2 3 Oven in cabinet Bracket Oven Cabinet Right Side Tool supplied Mounting bracket released Oven removed from the serial plate on the power to the oven (Refer to your Use & Care Guide.) 3. IMPORTANT NOTE: A fan inside of defective...


