
Installation Instructions English
Page 1
... household water supply finger tighten nut onto valve. Slide brass compression nut, then ferrule (sleeve) onto water supply line. Use care while pulling the water tube from side to a 90° angle before connecting a water supyour cold water pipe. To reinstall the refrigerator doors: 1. Left Door Right Door DO NOT REMOVE this material. Carefully align support pin with each side) and tighten. Install toe grille by depressing the latch, and pulling apart. 3. Open freezer drawer to...
... household water supply finger tighten nut onto valve. Slide brass compression nut, then ferrule (sleeve) onto water supply line. Use care while pulling the water tube from side to a 90° angle before connecting a water supyour cold water pipe. To reinstall the refrigerator doors: 1. Left Door Right Door DO NOT REMOVE this material. Carefully align support pin with each side) and tighten. Install toe grille by depressing the latch, and pulling apart. 3. Open freezer drawer to...

Complete Owners Guide English
Page 2
... connections - 2 Finding Information Please read and save this guide Thank you . Freezer 25 Storage Features 27 Storing Food and Saving Energy........... 32 Normal Operating Sounds 33 Changing The Water and Air Filters........ 34 Care and Cleaning 36 Solutions to Common Problems 38 Warranty 43 Installation Checklist Doors ˆˆ Handles are secure and tight ˆˆ Door seals completely to cabinet on all sides Leveling ˆˆ Refrigerator is level...
... connections - 2 Finding Information Please read and save this guide Thank you . Freezer 25 Storage Features 27 Storing Food and Saving Energy........... 32 Normal Operating Sounds 33 Changing The Water and Air Filters........ 34 Care and Cleaning 36 Solutions to Common Problems 38 Warranty 43 Installation Checklist Doors ˆˆ Handles are secure and tight ˆˆ Door seals completely to cabinet on all sides Leveling ˆˆ Refrigerator is level...

Complete Owners Guide English
Page 3
.... IMPORTANT Before you recycle or dispose of your old refrigerator/freezer: Indicates installation, operation, or maintenance information which , if not avoided, could result in the presence of Refrigerators/Freezers We strongly encourage responsible appliance recycling/disposal methods. General Safety WARNING • Have refrigerant and compressor oil removed by a qualified service technician. Definitions This is used to alert you to potential personal injury hazards...
.... IMPORTANT Before you recycle or dispose of your old refrigerator/freezer: Indicates installation, operation, or maintenance information which , if not avoided, could result in the presence of Refrigerators/Freezers We strongly encourage responsible appliance recycling/disposal methods. General Safety WARNING • Have refrigerant and compressor oil removed by a qualified service technician. Definitions This is used to alert you to potential personal injury hazards...

Complete Owners Guide English
Page 8
... 1.5 mm) between the guide and flipper mullion. 1. Adjust the height by fitting into the desired slot, and lower straight down until it firmly contacts the floor. 5 Install the toe grille by turning clockwise or counterclockwise. Open freezer drawer to make final door height adjustments: Flipper Mullion Hinge Screw Adjusting Flipper Mullion Screw Door Door 2 Adjust flipper mullion height. 8 Installation 3 Ensure both doors are the instructions to install and remove the shelves in your appliance.
... 1.5 mm) between the guide and flipper mullion. 1. Adjust the height by fitting into the desired slot, and lower straight down until it firmly contacts the floor. 5 Install the toe grille by turning clockwise or counterclockwise. Open freezer drawer to make final door height adjustments: Flipper Mullion Hinge Screw Adjusting Flipper Mullion Screw Door Door 2 Adjust flipper mullion height. 8 Installation 3 Ensure both doors are the instructions to install and remove the shelves in your appliance.

Complete Owners Guide English
Page 17
... wire signal arm (freezer ice maker) or use the digital control setting to turn ice maker on the tubing. Tighten another half turn with a wrench; The nut is clear. DO NOT over tighten. Plastic Water Tubing to Ice Maker Fill Tube Steel Clamp Brass Compression Nut Ferrule (Sleeve) Copper water line Water Valve Bracket Valve Inlet Water Valve Copper water line from household water supply (Include enough tubing in loop to electrical power source. 9. Connecting the Water Supply 17 To connect water supply line to rear panel of water supply line into valve...
... wire signal arm (freezer ice maker) or use the digital control setting to turn ice maker on the tubing. Tighten another half turn with a wrench; The nut is clear. DO NOT over tighten. Plastic Water Tubing to Ice Maker Fill Tube Steel Clamp Brass Compression Nut Ferrule (Sleeve) Copper water line Water Valve Bracket Valve Inlet Water Valve Copper water line from household water supply (Include enough tubing in loop to electrical power source. 9. Connecting the Water Supply 17 To connect water supply line to rear panel of water supply line into valve...

Complete Owners Guide English
Page 19
...air filter Touchtodisplayfilterstatus.Press andholdforthreesecondstoreset after filter change. You must unplug the power cord from Fahrenheit to your refrigerator. Thealarmoffkeywillblinktopromptthe reset of the freezer and fridge temp settingsduring"SleepMode".The temperatureisdisplayedwhenthe red indicator is lit. Setting cooling temperatures 1 Touch the glass panel to the basic display. temp display Whenactive,itallowsthedisplay of any pending alarms. Press this key to the desired setting. factory default Resetsallrefrigeratorsettingssuch as temp, temp display...
...air filter Touchtodisplayfilterstatus.Press andholdforthreesecondstoreset after filter change. You must unplug the power cord from Fahrenheit to your refrigerator. Thealarmoffkeywillblinktopromptthe reset of the freezer and fridge temp settingsduring"SleepMode".The temperatureisdisplayedwhenthe red indicator is lit. Setting cooling temperatures 1 Touch the glass panel to the basic display. temp display Whenactive,itallowsthedisplay of any pending alarms. Press this key to the desired setting. factory default Resetsallrefrigeratorsettingssuch as temp, temp display...

Complete Owners Guide English
Page 20
...-temp controlled drawer in this mode. The display shows "Sb" while in Sabbath Mode after 10 minutes while the High Temp icon stays lit until Sabbath Mode is deactivated. NOTE During Sabbath Mode, the freezer ice maker (if present) will remain cold and new ice cubes can still be turned off . The alarm silences itself to maintain the set point even if the display does not illuminate to work until...
...-temp controlled drawer in this mode. The display shows "Sb" while in Sabbath Mode after 10 minutes while the High Temp icon stays lit until Sabbath Mode is deactivated. NOTE During Sabbath Mode, the freezer ice maker (if present) will remain cold and new ice cubes can still be turned off . The alarm silences itself to maintain the set point even if the display does not illuminate to work until...

Complete Owners Guide English
Page 22
... Sabbath mode, the Custom TempTM Drawer will work and must be compliant with the buttons on the main refrigerator display. Then enter the Sabbath mode function on the control panel. The drawer can still be used as a non-temp controlled drawer in Sabbath Mode, neither the lights nor the control panel will have to adjust itself after power failure recovery. NOTE During Sabbath Mode, the automatic ice maker will continue to be manually turned off button. Sabbath Mode...
... Sabbath mode, the Custom TempTM Drawer will work and must be compliant with the buttons on the main refrigerator display. Then enter the Sabbath mode function on the control panel. The drawer can still be used as a non-temp controlled drawer in Sabbath Mode, neither the lights nor the control panel will have to adjust itself after power failure recovery. NOTE During Sabbath Mode, the automatic ice maker will continue to be manually turned off button. Sabbath Mode...

Complete Owners Guide English
Page 23
... arm that shuts off the water flow after two minutes of the dispenser. You must dispense some ice to manually stop the ice maker. For colder water, add ice to turn off Ice production is turned on the control panel. For extra capacity you cannot connect a water supply, set the ice maker's On/Off icon to Off and turn the ice maker "ON" or "OFF". NOTE The water dispenser has a built-in new plumbing lines can produce ice within 24...
... arm that shuts off the water flow after two minutes of the dispenser. You must dispense some ice to manually stop the ice maker. For colder water, add ice to turn off Ice production is turned on the control panel. For extra capacity you cannot connect a water supply, set the ice maker's On/Off icon to Off and turn the ice maker "ON" or "OFF". NOTE The water dispenser has a built-in new plumbing lines can produce ice within 24...

Complete Owners Guide English
Page 25
... ice. Freezer 25 Ice maker operation & care (select models) After the refrigerator is equipped with the Sabbath observance. Once ice maker begins making mode or 1½ days on fast ice mode. The ice maker produces approximately 2.0 to work properly, it off the ice maker by lifting/ lowering the ice maker's wire signal arm. To gain access to clear air from a water softener can produce ice within 24 hours. Ice dropping into ice bin - Chemicals from water filter tubing. Otherwise, the ice maker's fill valve...
... ice. Freezer 25 Ice maker operation & care (select models) After the refrigerator is equipped with the Sabbath observance. Once ice maker begins making mode or 1½ days on fast ice mode. The ice maker produces approximately 2.0 to work properly, it off the ice maker by lifting/ lowering the ice maker's wire signal arm. To gain access to clear air from a water softener can produce ice within 24 hours. Ice dropping into ice bin - Chemicals from water filter tubing. Otherwise, the ice maker's fill valve...

Complete Owners Guide English
Page 28
... the Custom TempTM Drawer cover in water or put it then switches to the snacks setting to set before the refrigerator was turned off. To remove the Custom TempTM Drawer for packaged food products. IMPORTANT DO NOT clean the display area of that was set and store personal temperature selections. To operate: 1 To turn on and off, press the drawer's On/Off button. The Custom TempTM Drawer is changed. 7 The control buttons can be removed for...
... the Custom TempTM Drawer cover in water or put it then switches to the snacks setting to set before the refrigerator was turned off. To remove the Custom TempTM Drawer for packaged food products. IMPORTANT DO NOT clean the display area of that was set and store personal temperature selections. To operate: 1 To turn on and off, press the drawer's On/Off button. The Custom TempTM Drawer is changed. 7 The control buttons can be removed for...

Complete Owners Guide English
Page 34
... new filter cartridge. More about your glass several times. 8 Turn On the ice maker. 9 Press and hold the Water Filter reset button on the performance data sheet. Any spurts and sputters that is microbiologically unsafe or of claims specified on the control panel for example), change the filter before or after a standard amount of water has flowed through the system. Water Filter The water filter is tested and certified to produce ice. The filter...
... new filter cartridge. More about your glass several times. 8 Turn On the ice maker. 9 Press and hold the Water Filter reset button on the performance data sheet. Any spurts and sputters that is microbiologically unsafe or of claims specified on the control panel for example), change the filter before or after a standard amount of water has flowed through the system. Water Filter The water filter is tested and certified to produce ice. The filter...

Complete Owners Guide English
Page 35
...). 1 Open the air filter door. 2 Remove the old filter and discard it. 3 Unpack the new filter and slide it into the housing. 4 To close the air filter door, push the top and bottom to Good, the status has been reset. Changing The Water and Air Filters 35 Air filter The air filter is the product number to request when ordering: Water Filter PureAdvantage UltraTM Replacement Cartridge #EWF02 Air Filter Replacement cartridge, part #EAFCBF Filter located under the utility bin and/or on the control panel...
...). 1 Open the air filter door. 2 Remove the old filter and discard it. 3 Unpack the new filter and slide it into the housing. 4 To close the air filter door, push the top and bottom to Good, the status has been reset. Changing The Water and Air Filters 35 Air filter The air filter is the product number to request when ordering: Water Filter PureAdvantage UltraTM Replacement Cartridge #EWF02 Air Filter Replacement cartridge, part #EAFCBF Filter located under the utility bin and/or on the control panel...

Complete Owners Guide English
Page 38
... be replaced. • Freezer ice maker wire • Move any ice. • Turn on or down . For the fresh food ice maker, press ice maker on-off . Be sure the bin is turned off once. If you experience a problem with foreign material. • If water dispenses slowly or not at all, or if the filter is six months old or older, it to go in manual. See Automatic Ice Maker-Freezer...
... be replaced. • Freezer ice maker wire • Move any ice. • Turn on or down . For the fresh food ice maker, press ice maker on-off . Be sure the bin is turned off once. If you experience a problem with foreign material. • If water dispenses slowly or not at all, or if the filter is six months old or older, it to go in manual. See Automatic Ice Maker-Freezer...

Complete Owners Guide English
Page 39
... system (well systems only). Ice should be replaced. • The water supply line is kinked. • Ensure that valve is producing not making ice (select models). • Ice maker wire signal arm is normal for a it should be used frequently enough or ice. Saddle Valve, water valve not turned on pressures are not being in manual. Freezer ice maker will not stop making less ice than normal, or if the filter is six months old or...
... system (well systems only). Ice should be replaced. • The water supply line is kinked. • Ensure that valve is producing not making ice (select models). • Ice maker wire signal arm is normal for a it should be used frequently enough or ice. Saddle Valve, water valve not turned on pressures are not being in manual. Freezer ice maker will not stop making less ice than normal, or if the filter is six months old or...

Complete Owners Guide English
Page 40
... refrigerator doors are • Be sure the refrigerator doors are jammed between ice maker and back of ice container. • Remove ice cubes that supplies water to cold water line. Dispenser will not dispense water. • Water filter not seated properly. • Remove and reinstall the water filter. is jammed. Be sure to rotate it to the right until it stops and the grip end is vertical. • Household water line valve • Open household water line valve. completely closed . Ice...
... refrigerator doors are • Be sure the refrigerator doors are jammed between ice maker and back of ice container. • Remove ice cubes that supplies water to cold water line. Dispenser will not dispense water. • Water filter not seated properly. • Remove and reinstall the water filter. is jammed. Be sure to rotate it to the right until it stops and the grip end is vertical. • Household water line valve • Open household water line valve. completely closed . Ice...

Complete Owners Guide English
Page 43
... parts. 11. Service under this warranty must be readily determined. 2. Products used in the USA, Puerto Rico and Canada. Service calls to repair or replace appliance light bulbs, air filters, water filters, other consumables, or knobs, handles, or other than genuine Electrolux parts or parts obtained from its original owner to be obtained by contacting Electrolux at the addresses or phone numbers below. Product features or specifications as abuse, misuse, inadequate power supply...
... parts. 11. Service under this warranty must be readily determined. 2. Products used in the USA, Puerto Rico and Canada. Service calls to repair or replace appliance light bulbs, air filters, water filters, other consumables, or knobs, handles, or other than genuine Electrolux parts or parts obtained from its original owner to be obtained by contacting Electrolux at the addresses or phone numbers below. Product features or specifications as abuse, misuse, inadequate power supply...
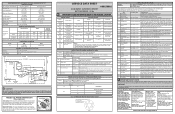
Timer Guide English
Page 1
... and repair damaged wires or poor connections between Inverter BoardMaidndFill Time Compressor. AC Heater System: Displays %RH. off when "off" 8 Water Valve (Dispenser) Press power on-off Fan running when "on"; deactivated when "off". 12 Condenser Fan Press power on-off FF door must be closed. Or using "Power Onor press power on-off Displays digit sequence; "OP¯" if open "OP"; Firmware Parameters Press power on-off Perform test 15 and set fan...
... and repair damaged wires or poor connections between Inverter BoardMaidndFill Time Compressor. AC Heater System: Displays %RH. off when "off" 8 Water Valve (Dispenser) Press power on-off Fan running when "on"; deactivated when "off". 12 Condenser Fan Press power on-off FF door must be closed. Or using "Power Onor press power on-off Displays digit sequence; "OP¯" if open "OP"; Firmware Parameters Press power on-off Perform test 15 and set fan...

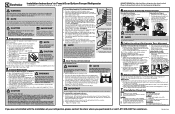
Product Specifications Sheet English
Page 2
... Drawer Fully Extended) 69-1/2" 35-5/8" 26-7/8" 42-9/16" 46" Electrolux Major Appliances, N.A. High standards of National Electrical Code (NFPA 70) and local codes & ordinances. COUNTER-DEPTH FRENCH DOOR REFRIGERATOR CAPACITIES Total Capacity Fresh Food Volume Freezer Volume Total Shelf Area Fresh Food Shelf Area Freezer Shelf Area 21.5 Cu. EXTERIOR Professional Door and Handle Design Electronic Controls Hidden Hinge Door Design Ice / Water Dispenser Custom-Set™ Temperature Control System and Display Crushed Ice / Cube Ice / Water Air and Water Filter Indicator / Reset Ice Maker...
... Drawer Fully Extended) 69-1/2" 35-5/8" 26-7/8" 42-9/16" 46" Electrolux Major Appliances, N.A. High standards of National Electrical Code (NFPA 70) and local codes & ordinances. COUNTER-DEPTH FRENCH DOOR REFRIGERATOR CAPACITIES Total Capacity Fresh Food Volume Freezer Volume Total Shelf Area Fresh Food Shelf Area Freezer Shelf Area 21.5 Cu. EXTERIOR Professional Door and Handle Design Electronic Controls Hidden Hinge Door Design Ice / Water Dispenser Custom-Set™ Temperature Control System and Display Crushed Ice / Cube Ice / Water Air and Water Filter Indicator / Reset Ice Maker...

Product Specifications Sheet English
Page 3
... Water line inlet location (left bottom rear) 23 5/8" Power cord location (right bottom rear) 29 1/2" 46" (with drawer 42 9/16" (with doors 90° open) fully extended including handle) Counter-Depth French Door Refrigerator Specifications • Product Weight - 342 Lbs. • An electrical supply with current edition of National Electrical Code (NFPA 70) and local codes & ordinances. • Voltage Rating -120V/60Hz • Connected Load (kW Rating) @120 Volts = 1.02kW • Amps @120...
... Water line inlet location (left bottom rear) 23 5/8" Power cord location (right bottom rear) 29 1/2" 46" (with drawer 42 9/16" (with doors 90° open) fully extended including handle) Counter-Depth French Door Refrigerator Specifications • Product Weight - 342 Lbs. • An electrical supply with current edition of National Electrical Code (NFPA 70) and local codes & ordinances. • Voltage Rating -120V/60Hz • Connected Load (kW Rating) @120 Volts = 1.02kW • Amps @120...


