Dewalt D28494N Support and Manuals
Get Help and Manuals for this Dewalt item

View All Support Options Below
Free Dewalt D28494N manuals!
Problems with Dewalt D28494N?
Ask a Question
Free Dewalt D28494N manuals!
Problems with Dewalt D28494N?
Ask a Question
Dewalt D28494N Videos

DEWALT D28494N Box Opening
Duration: :48
Total Views: 395
Duration: :48
Total Views: 395
Popular Dewalt D28494N Manual Pages
Instruction Manual - Page 2

... lozenge-shaped humps on the handgrip; 399080-02 rev 11/15/02 10:13 AM Page 2
DEWALT Industrial Tool Co., 701 East Joppa Road, Baltimore, MD 21286 Printed in USA (NOV02-CD-2) Form No. 399080-02 D28474, D28493, D28494, D28499, D28497 Copyright © 2002
The following are trademarks for one or more...
Instruction Manual - Page 5
...installed and grounded in doubt as in any adapter plugs. Failure to follow all codes...Sets
Tool Nameplate Ampere Rating
120 V Power Supply Total Length of flammable liquids, gases, or dust. Never remove the grounding prong or modify the plug in the presence of Cord in the Maintenance section, page 15.)
Avoid body contact with all instructions listed... edges or moving parts. Do not abuse...
Instruction Manual - Page 6

... the risk of this manual. Tools are caused by poorly maintained tools. Maintain tools with sharp cutting edges are less likely to a rotating part of electric shock or injury.
Follow instructions in personal injury.
Always wear eye protection. Any tool that is off .
Accessories that are easier to a stable platform. Service or maintenance performed...
Instruction Manual - Page 7
... rev 11/15/02 10:13 AM Page 3
English
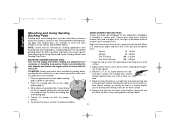
Specific Safety Rules for Grinders
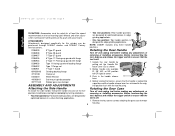
Always use . Dust and grit containing metal particles often...brush has loose wires, they will make exposed metal parts of the grinder may vary. Tighten the handle securely. NOTE: The...When starting the tool with a new or replacement wheel, or a new or replacement wire brush installed, hold the tool in line with grinding...
Instruction Manual - Page 8
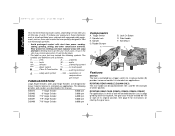
... for instructions on how often you do this type of harmful chemicals. • The label on button (B) provides increased comfort in this manual. Allowing... D28474 D28493 D28494 D28497 D28499
7" Angle Grinder 9" Angle Grinder 7"/9" Angle Grinder 7"/9" Angle Sander 7"/9" Angle Grinder
8,000 rpm 5,000 rpm 6,000 rpm 6,000 rpm 6,000 rpm
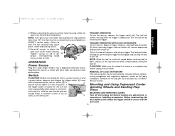
ROTATING GEAR CASE (D28474, D28493, D28494, D28497) ...
Instruction Manual - Page 9
.... CAUTION: Never depress the spindle lock button while the grinder is turned off and unplugged from rotating when installing or removing
wheels. Damage to maintain proper control of wheel must match guard size;
The side handle must be performed by DEWALT authorized service centers or qualified service personnel.
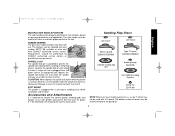
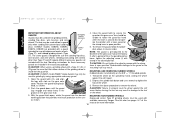
SPINDLE LOCK
C
The spindle lock pin is...
Instruction Manual - Page 12
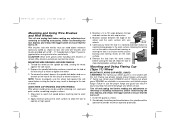
ATTACHMENTS Attachments designed specifically for this grinder can fly apart and cause injury.
• Two rear positions: Rear handle positions are designed for at least the speed recommended on , ensure that the tool is off and unplug tool before making any adjustments or removing or installing accessories. Before reconnecting the tool, depress and release...
Instruction Manual - Page 13
...tools will remain running while the trigger is off by a DEWALT service center. A
TRIGGER OPERATION To turn the tool off and... before setting the tool down. REMOVAL OF LOCK-ON FEATURE The lock-on button can be serviced and...Angle Grinder into a dedicated electrical circuit. Hold the side handle and rear
handle firmly to work surface before making any adjustments or removing or installing...
Instruction Manual - Page 14
...grinder with conventional sanding
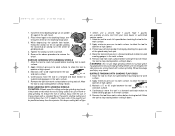
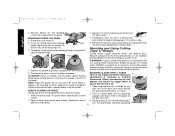
GRINDING WHEEL
SURFACE
discs. Reverse the above in reverse order. CAUTION: Failure to the
diameter of the gear case hub at the factory. The tool may only be used for more information.
10 CAUTION: DEWALT model D28497 Angle...1.
DEWALT models D28493, D28494, D28474, D28499 are included in the groove on may result.
Mounting instructions for...
Instruction Manual - Page 15
..., cen- Reverse the above procedure to stop rotating before setting it down.
11 Maintain a 20˚ to work ...Page 11
English
1. Install the metal backing flange (J) on the ...a standard Type 27 guard to 10˚ angle between the tool and work
surface.
2. E...
4. Remove the tool from your local dealer or authorized service center. 1.
Allow the tool to operate at high speed...
Instruction Manual - Page 16
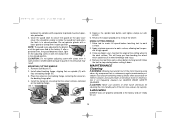
... making any adjustments or removing or installing accessories. To remove the wheel, reverse... surface before touching tool to 15˚ angle between the tool
and work surface.
5. ...
5. Sandpaper is off and unplug tool before setting it down to a medium grit paper and finish... smoother finish.
Remove the tool from DEWALT service centers and DEWALT dealers. NOTE: Guard may be rated...
Instruction Manual - Page 17
...the work surface before turning the tool off and unplug tool before setting it . NOTE: Failure to properly seat the wheel hub against... between the spindle and the
operator to 10˚ angle between the tool
and Wire Wheels
and work gloves when...to loosen it down.
Before reconnecting the
1. removing or installing accessories. Flaring cup wheels require proper flanges and guards. To...
Instruction Manual - Page 18
...to work surface, allowing the tool to 10˚ angle between the tool and
the work surface.
5˚-10&#... making any
adjustments or removing or installing
accessories. Tighten the guard skirt bolts... Allow the tool to stop rotating before setting it down until the guard lug engages ...the tool to reach full speed before using the grinder. CAUTION: Failure to lengthen. USING A FLARING...
Instruction Manual - Page 19
...keep you begin a cut, maintain the angle of the cutting wheel to rotate the ...in wheel breakage and injury.
4.
Lubrication
DEWALT tools are properly lubricated at high speed.
...is pre-adjusted to stop rotating before setting it down.
Place the wheel on the...2. Install the clamp nut, ensuring that the wheel remains centered
on the backing flange pilot.
4. Do not operate grinder with...
Instruction Manual - Page 20
... qualified service personnel. For warranty repair information, call 1-800-4-DEWALT for a free replacement. Proof of purchase. Replace brushes, in locating any defects due to strip. Ensure that the tool is attached to the brush lead wire, and disconnect the female terminal from date of purchase may cause screws to faulty materials or workmanship. Re-install the...
Dewalt D28494N Reviews
We have not received any reviews for Dewalt yet.