Setup Guide
Page 31
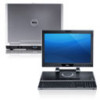
... sleep state. Connects to charge the device. NOTE: The USB PowerShare feature is powered on the computer to eSATA compatible storage devices (such as external hard drives or optical drives) or USB devices (such as a mouse, keyboard, printer, external drive, or MP3 player). Using Your XPS Laptop 8 eSATA/USB combo connector with USB PowerShare -
... sleep state. Connects to charge the device. NOTE: The USB PowerShare feature is powered on the computer to eSATA compatible storage devices (such as external hard drives or optical drives) or USB devices (such as a mouse, keyboard, printer, external drive, or MP3 player). Using Your XPS Laptop 8 eSATA/USB combo connector with USB PowerShare -
Setup Guide
Page 37
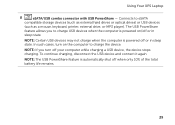
...status light - For more information on the multimedia keys, see "Status Lights and Indicators" on the XPS logo indicates the power states. The light on page 38. 2 Hard drive activity light - For more information on the battery status light, see "Multimedia Control Keys" on when... battery charge status. CAUTION: To avoid loss of data, never turn off the computer when the hard drive activity light is on page 44. 4 XPS logo light - A solid white light indicates hard drive activity. For more information on the logo light, see "Control Strip Features" on . 3 Control...
...status light - For more information on the multimedia keys, see "Status Lights and Indicators" on the XPS logo indicates the power states. The light on page 38. 2 Hard drive activity light - For more information on the battery status light, see "Multimedia Control Keys" on when... battery charge status. CAUTION: To avoid loss of data, never turn off the computer when the hard drive activity light is on page 44. 4 XPS logo light - A solid white light indicates hard drive activity. For more information on the logo light, see "Control Strip Features" on . 3 Control...

Setup Guide
Page 66
Using Your XPS Laptop Free Fall Sensor Free fall sensor protects your computer hard drive from possible damage, by detecting a free fall state is detected, the hard drive is no longer detected. 64 Your hard drive returns to normal operation, when the free fall state is placed in a safe state to protect against damage to the read/write head and possible data loss. When a free fall state caused by accidentally dropping the computer.
Using Your XPS Laptop Free Fall Sensor Free fall sensor protects your computer hard drive from possible damage, by detecting a free fall state is detected, the hard drive is no longer detected. 64 Your hard drive returns to normal operation, when the free fall state is placed in a safe state to protect against damage to the read/write head and possible data loss. When a free fall state caused by accidentally dropping the computer.
Setup Guide
Page 73
...-scanning program to 10 seconds until the computer turns off and then restart your computer. See the software documentation for at least 8 to check the hard drive or CDs. • Save and close any open files or programs and shut down any error message that the program is installed and configured properly... a key on your mouse, press the power button for information. -- CAUTION: You might lose data if you are unable to help in troubleshooting when contacting Dell. 71 Verify that the program is compatible with the program. --
...-scanning program to 10 seconds until the computer turns off and then restart your computer. See the software documentation for at least 8 to check the hard drive or CDs. • Save and close any open files or programs and shut down any error message that the program is installed and configured properly... a key on your mouse, press the power button for information. -- CAUTION: You might lose data if you are unable to help in troubleshooting when contacting Dell. 71 Verify that the program is compatible with the program. --

Setup Guide
Page 74
... performance improvement offers, system information, and links to access: PC Checkup - Using Support Tools Dell Support Center All the support you need - one convenient location. Manage your hard drive using a visual representation of the space consumed by each type of your computer each day.... To launch the application, click Start → All Programs→ Dell→ Dell Support Center→ Launch Dell Support Center. This utility displays all...
... performance improvement offers, system information, and links to access: PC Checkup - Using Support Tools Dell Support Center All the support you need - one convenient location. Manage your hard drive using a visual representation of the space consumed by each type of your computer each day.... To launch the application, click Start → All Programs→ Dell→ Dell Support Center→ Launch Dell Support Center. This utility displays all...
Setup Guide
Page 76
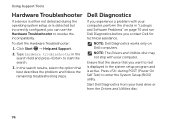
...NOTE: The Drivers and Utilities disc may not ship with your computer, perform the checks in "Lockups and Software Problems" on Dell computers. Start Dell Diagnostics from your computer. In the search results, select the option that you can use the Hardware Troubleshooter to resolve the incompatibility... configured, you want to test is displayed in the search field and press to start the Hardware Troubleshooter: 1. NOTE: Dell Diagnostics works only on page 70 and run Dell Diagnostics before you experience a problem with your hard drive or from the Drivers and Utilities disc. 74
...NOTE: The Drivers and Utilities disc may not ship with your computer, perform the checks in "Lockups and Software Problems" on Dell computers. Start Dell Diagnostics from your computer. In the search results, select the option that you can use the Hardware Troubleshooter to resolve the incompatibility... configured, you want to test is displayed in the search field and press to start the Hardware Troubleshooter: 1. NOTE: Dell Diagnostics works only on page 70 and run Dell Diagnostics before you experience a problem with your hard drive or from the Drivers and Utilities disc. 74
Setup Guide
Page 77
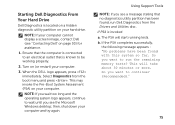
... continue to wait until you want to continue? (Recommended)." 75 Using Support Tools NOTE: If you want to run Dell Diagnostics from the boot menu and press . Ensure that the computer is connected to be working properly. 2. When the... with this system so far. b. Do you see "Contacting Dell" on your computer. NOTE: If your computer cannot display a screen image, contact Dell (see a message stating that is invoked: a. Turn on your hard drive. Starting Dell Diagnostics From Your Hard Drive Dell Diagnostics is located on a hidden diagnostic utility partition on (or...
... continue to wait until you want to continue? (Recommended)." 75 Using Support Tools NOTE: If you want to run Dell Diagnostics from the boot menu and press . Ensure that the computer is connected to be working properly. 2. When the... with this system so far. b. Do you see "Contacting Dell" on your computer. NOTE: If your computer cannot display a screen image, contact Dell (see a message stating that is invoked: a. Turn on your hard drive. Starting Dell Diagnostics From Your Hard Drive Dell Diagnostics is located on a hidden diagnostic utility partition on (or...
Setup Guide
Page 78
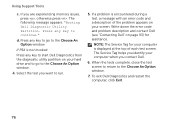
...Select the test you are experiencing memory issues, press , otherwise press . If a problem is displayed at the top of the problem appears on your hard drive and to go to the Choose An Option window. 4. When the tests complete, close the test screen to return to continue." If you want to... start Dell Diagnostics from the diagnostic utility partition on page 93) for your computer when you identify your computer is encountered during a test, a message with an...
...Select the test you are experiencing memory issues, press , otherwise press . If a problem is displayed at the top of the problem appears on your hard drive and to go to the Choose An Option window. 4. When the tests complete, close the test screen to return to continue." If you want to... start Dell Diagnostics from the diagnostic utility partition on page 93) for your computer when you identify your computer is encountered during a test, a message with an...

Setup Guide
Page 81
... using these options. If possible, backup your data files before using any of System Restore and DataSafe Local Backup when installing the Dell factory-installed software on a newly installed hard drive to restore your computer to the operating state it was in when you received your computer to restore your operating system permanently...
... using these options. If possible, backup your data files before using any of System Restore and DataSafe Local Backup when installing the Dell factory-installed software on a newly installed hard drive to restore your computer to the operating state it was in when you received your computer to restore your operating system permanently...
Setup Guide
Page 83
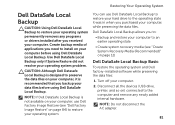
... your operating system. Disconnect all the devices (USB drive, printer, and so on your computer before using Dell DataSafe Local Backup. CAUTION: Although Dell Datasafe Local Backup is designed to preserve the data files on your computer, use Dell DataSafe Local Backup to restore your hard drive to the operating state it is not available on...
... your operating system. Disconnect all the devices (USB drive, printer, and so on your computer before using Dell DataSafe Local Backup. CAUTION: Although Dell Datasafe Local Backup is designed to preserve the data files on your computer, use Dell DataSafe Local Backup to restore your hard drive to the operating state it is not available on...
Setup Guide
Page 85
... system recovery media. Use the system recovery media in when you purchased the computer while preserving the data files on your computer. • Hard drive failure that you backup your computer. You can use the system recovery media, created using the system recovery media: 1. NOTE: If you... Insert the system recovery disc or USB key and restart the computer. 2. When the DELL logo appears, press immediately. then, shut down your computer using Dell DataSafe Local Backup, to return your hard drive to wait until you wait too long and the operating system logo appears, continue to ...
... system recovery media. Use the system recovery media in when you purchased the computer while preserving the data files on your computer. • Hard drive failure that you backup your computer. You can use the system recovery media, created using the system recovery media: 1. NOTE: If you... Insert the system recovery disc or USB key and restart the computer. 2. When the DELL logo appears, press immediately. then, shut down your computer using Dell DataSafe Local Backup, to return your hard drive to wait until you wait too long and the operating system logo appears, continue to ...
Setup Guide
Page 86
... system. Use Dell Factory Image Restore only as the last method to access the Advanced Boot Options window. NOTE: If you wait too long and the operating system logo appears, continue to wait until you purchased the computer. This option restores your hard drive to the operating...-including data files-are permanently deleted from the hard drive. Any programs or files added since you received your computer. then, shut down your operating system problem. If possible, back up the data before using this option. Use Dell Factory Image Restore only if System Restore did ...
... system. Use Dell Factory Image Restore only as the last method to access the Advanced Boot Options window. NOTE: If you wait too long and the operating system logo appears, continue to wait until you purchased the computer. This option restores your hard drive to the operating...-including data files-are permanently deleted from the hard drive. Any programs or files added since you received your computer. then, shut down your operating system problem. If possible, back up the data before using this option. Use Dell Factory Image Restore only if System Restore did ...

Setup Guide
Page 87
..., type administrator in the User name field, then click OK. 6. 3. The Dell Factory Image Restore welcome screen appears. The Confirm Data Deletion screen appears. Select the check box to confirm that you do not want to continue to reformat the hard drive and restore the system software to proceed with the Factory Image...
..., type administrator in the User name field, then click OK. 6. 3. The Dell Factory Image Restore welcome screen appears. The Confirm Data Deletion screen appears. Select the check box to confirm that you do not want to continue to reformat the hard drive and restore the system software to proceed with the Factory Image...

Setup Guide
Page 92
... confidential, proprietary and personal information, as well as removable media, such as follows: NOTE: Before you return the product to Dell, ensure that you back up any data on the hard drive(s) and on any other storage device in the original (or equivalent) packing materials. Remove any and all items being returned (AC...
... confidential, proprietary and personal information, as well as removable media, such as follows: NOTE: Before you return the product to Dell, ensure that you back up any data on the hard drive(s) and on any other storage device in the original (or equivalent) packing materials. Remove any and all items being returned (AC...

Setup Guide
Page 96
... Media" on page 83 run a diagnostic program for your computer "Dell Diagnostics" on page 74 reinstall system software "My Dell Downloads" on page 72 upgrade your computer with new or additional components like a new hard drive reinstall or replace a worn or defective part the Service Manual at ...support.dell.com/manuals NOTE: In some countries, opening and replacing parts of your computer "Dell Support Center" on page 73 for more information about...
... Media" on page 83 run a diagnostic program for your computer "Dell Diagnostics" on page 74 reinstall system software "My Dell Downloads" on page 72 upgrade your computer with new or additional components like a new hard drive reinstall or replace a worn or defective part the Service Manual at ...support.dell.com/manuals NOTE: In some countries, opening and replacing parts of your computer "Dell Support Center" on page 73 for more information about...

Setup Guide
Page 104
measured with the hard drive in head-parked position and a 2-ms half-sine pulse): Operating 110 G NonOperating 160 G Altitude (maximum): Operating -15.2 to 3048 m (-50 to 10,000 ft) ...): Operating 10% to 90% (noncondensing) Storage 5% to 35,000 ft) Airborne G2 or lower as defined contaminant level by ISA-S71.04-1985 measured with Dell Diagnostics running on the hard drive and a 2-ms half-sine pulse;
measured with the hard drive in head-parked position and a 2-ms half-sine pulse): Operating 110 G NonOperating 160 G Altitude (maximum): Operating -15.2 to 3048 m (-50 to 10,000 ft) ...): Operating 10% to 90% (noncondensing) Storage 5% to 35,000 ft) Airborne G2 or lower as defined contaminant level by ISA-S71.04-1985 measured with Dell Diagnostics running on the hard drive and a 2-ms half-sine pulse;

Setup Guide
Page 107
F finding more information 94 flick 50 FTP login, anonymous 88 H hard drive activity light 35 hardware problems diagnosing 74 Hardware Troubleshooter 74 help getting assistance and support 86 I Internet connection 23 ISP Internet Service Provider 23 M memory problems solving 69 mini-DisplayPort connector 33 Multimedia Control Keys 42 N network connection fixing 67 NVIDIA Optimus Technology 56 O Optical Drive Using 46 P power problems, solving 68 power strips, using 8 problems, solving 65 Index 105
F finding more information 94 flick 50 FTP login, anonymous 88 H hard drive activity light 35 hardware problems diagnosing 74 Hardware Troubleshooter 74 help getting assistance and support 86 I Internet connection 23 ISP Internet Service Provider 23 M memory problems solving 69 mini-DisplayPort connector 33 Multimedia Control Keys 42 N network connection fixing 67 NVIDIA Optimus Technology 56 O Optical Drive Using 46 P power problems, solving 68 power strips, using 8 problems, solving 65 Index 105


