
User's Guide
Page 2
... 11 Ordering ink cartridges...11 Replacing ink cartridges...11 Recycling Dell products...13 Using the printer control panel buttons and menus 14 Using the printer control panel...14 Changing temporary settings into new default settings 15 Changing the Power Saver timeout...16 Saving paper and energy... with Eco-Mode...17 Resetting to factory settings...17 Using the printer software 18 Minimum system requirements...18 Using...
... 11 Ordering ink cartridges...11 Replacing ink cartridges...11 Recycling Dell products...13 Using the printer control panel buttons and menus 14 Using the printer control panel...14 Changing temporary settings into new default settings 15 Changing the Power Saver timeout...16 Saving paper and energy... with Eco-Mode...17 Resetting to factory settings...17 Using the printer software 18 Minimum system requirements...18 Using...
User's Guide
Page 6
...please let us know. And if you find something we want to make sure it better. To start using your needs. By selecting certain printer settings or tasks, you 're satisfied. The Power Saver feature puts the printer in the Print Preview dialog or the printer display (depending on your printer..., and we could do it will be able to reduce your printer's environmental impact even further. About your printer Thank you for choosing this feature sets the printer to automatically print on both sides of the paper (duplex) for print, copy, and fax jobs. • Print more than one page...
...please let us know. And if you find something we want to make sure it better. To start using your needs. By selecting certain printer settings or tasks, you 're satisfied. The Power Saver feature puts the printer in the Print Preview dialog or the printer display (depending on your printer..., and we could do it will be able to reduce your printer's environmental impact even further. About your printer Thank you for choosing this feature sets the printer to automatically print on both sides of the paper (duplex) for print, copy, and fax jobs. • Print more than one page...
User's Guide
Page 7
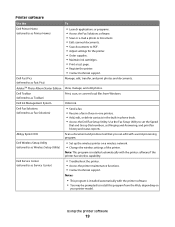
..., copying, scanning, and faxing tasks, depending on your printer model • Configuring printer settings • Viewing and printing documents and photos • Setting up and using printer software • Setting up and configuring the printer on a network, depending on your old printer instead of your... printer 7 Finding information about the printer Publications What are mostly text. • Use High Yield cartridges. For updates, check our Web site at support.dell.com. ...
..., copying, scanning, and faxing tasks, depending on your printer model • Configuring printer settings • Viewing and printing documents and photos • Setting up and using printer software • Setting up and configuring the printer on a network, depending on your old printer instead of your... printer 7 Finding information about the printer Publications What are mostly text. • Use High Yield cartridges. For updates, check our Web site at support.dell.com. ...

User's Guide
Page 15
... or submenu item that appears on the display. 11 Back button • Return to the previous screen. • Exit from one menu level to default settings after two minutes of inactivity or after the printer is turned off in progress. • Exit from a menu level of the Copy, Scan, Photo,... menu. • Exit from a menu level of the Setup menu to the top level of the previous mode. • Clear current settings or error messages, and return to default settings. 8 Display View: Note: The display is selected. Note: The Copy, Scan and Photo button lights are off when this button is ...
... or submenu item that appears on the display. 11 Back button • Return to the previous screen. • Exit from one menu level to default settings after two minutes of inactivity or after the printer is turned off in progress. • Exit from a menu level of the Copy, Scan, Photo,... menu. • Exit from a menu level of the Setup menu to the top level of the previous mode. • Clear current settings or error messages, and return to default settings. 8 Display View: Note: The display is selected. Note: The Copy, Scan and Photo button lights are off when this button is ...
User's Guide
Page 16
...the printer control panel, press . 2 Press the arrow buttons to scroll to Defaults, and then press . 3 Press the arrow buttons to scroll to Set Defaults, and then press . Photo menu The following Photo options will not time out after two minutes of inactivity or after you turn off . 1 From...the printer control panel, press . 2 Press the arrow buttons to scroll to Device Setup, and then press . 3 Press the arrow buttons to scroll to Clear Settings Timeout, and then press . 4 Press the arrow buttons to scroll to Never, and then press . 5 Press until you exit Setup, or press another mode ...
...the printer control panel, press . 2 Press the arrow buttons to scroll to Defaults, and then press . 3 Press the arrow buttons to scroll to Set Defaults, and then press . Photo menu The following Photo options will not time out after two minutes of inactivity or after you turn off . 1 From...the printer control panel, press . 2 Press the arrow buttons to scroll to Device Setup, and then press . 3 Press the arrow buttons to scroll to Clear Settings Timeout, and then press . 4 Press the arrow buttons to scroll to Never, and then press . 5 Press until you exit Setup, or press another mode ...

User's Guide
Page 17
... the printer control panel, press . 2 Press the arrow buttons to scroll to Defaults, and then press . 3 Press the arrow buttons to scroll to Set Defaults, and then press . 4 Press the arrow buttons to scroll to Use Factory, and then press . 5 When prompted to turn the printer on ... language) 1 Turn off the printer. 2 From the printer control panel, press and hold and , and then press and release to set the initial settings of your printer, make your selections using the printer control panel buttons. Initial Setup Complete appears on the display. Initial Setup Complete appears ...
... the printer control panel, press . 2 Press the arrow buttons to scroll to Defaults, and then press . 3 Press the arrow buttons to scroll to Set Defaults, and then press . 4 Press the arrow buttons to scroll to Use Factory, and then press . 5 When prompted to turn the printer on ... language) 1 Turn off the printer. 2 From the printer control panel, press and hold and , and then press and release to set the initial settings of your printer, make your selections using the printer control panel buttons. Initial Setup Complete appears on the display. Initial Setup Complete appears ...

User's Guide
Page 18
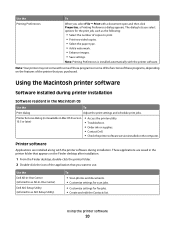
... X version 10.5.0 or later (Web only)* • Macintosh PowerPC OS X version 10.4.0 to 500MB of various software programs and what they can help you set up to version 10.4.3 (Web only)* • Linux Ubuntu 8.04 LTS and 8.10 (Web only)* • Linux openSUSE 11.0 and 11.1 (Web only...)* • Linux Fedora 10 (Web only)* * The printer driver for this operating system is available only at support.dell.com. Using the printer software Minimum system requirements The printer software requires up the printer using the installation software CD, all the necessary software was...
... X version 10.5.0 or later (Web only)* • Macintosh PowerPC OS X version 10.4.0 to 500MB of various software programs and what they can help you set up to version 10.4.3 (Web only)* • Linux Ubuntu 8.04 LTS and 8.10 (Web only)* • Linux openSUSE 11.0 and 11.1 (Web only...)* • Linux Fedora 10 (Web only)* * The printer driver for this operating system is available only at support.dell.com. Using the printer software Minimum system requirements The printer software requires up the printer using the installation software CD, all the necessary software was...
User's Guide
Page 19
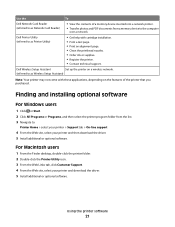
...on a wireless network. • Change the wireless settings of the printer. Dell Toolbar (referred to as Fast Pics) Manage, edit, transfer, and print photos and documents. Dell Service Center (referred to as Wireless Setup Utility) • Set up the wireless printer on your printer model. ...Notes: • This program is installed automatically with the printer software if the printer has wireless capability. Dell Ink Management System Order ink. Dell Wireless Setup Utility (referred to as...
...on a wireless network. • Change the wireless settings of the printer. Dell Toolbar (referred to as Fast Pics) Manage, edit, transfer, and print photos and documents. Dell Service Center (referred to as Wireless Setup Utility) • Set up the wireless printer on your printer model. ...Notes: • This program is installed automatically with the printer software if the printer has wireless capability. Dell Ink Management System Order ink. Dell Wireless Setup Utility (referred to as...
User's Guide
Page 20
...along with the printer software. Use the Dell All-In-One Center (referred to as All-In-One Center) Dell AIO Setup Utility (referred to as AIO Setup Utility) To • Scan photos and documents. • Customize settings for scan jobs. • Customize settings for the print job, such as ...in Mac OS X version 10.5 or later) • Access the printer utility. • Troubleshoot. • Order ink or supplies. • Contact Dell. • Check the printer software version installed on the features of copies to use. Printer Services dialog (not available in the Macintosh OS Use the...
...along with the printer software. Use the Dell All-In-One Center (referred to as All-In-One Center) Dell AIO Setup Utility (referred to as AIO Setup Utility) To • Scan photos and documents. • Customize settings for scan jobs. • Customize settings for the print job, such as ...in Mac OS X version 10.5 or later) • Access the printer utility. • Troubleshoot. • Order ink or supplies. • Contact Dell. • Check the printer software version installed on the features of copies to use. Printer Services dialog (not available in the Macintosh OS Use the...
User's Guide
Page 21
... Customer Support. 4 From the Web site, select your printer and then download the driver. 5 Install additional or optional software. Dell Wireless Setup Assistant Set up the printer on a wireless network. (referred to as Printer Utility) • Get help with these applications, depending on ... 4 From the Web site, select your printer and download the driver. 5 Install additional or optional software. Using the printer software 21 Dell Printer Utility (referred to as Wireless Setup Assistant) Note: Your printer may not come with cartridge installation. • Print a test page...
... Customer Support. 4 From the Web site, select your printer and then download the driver. 5 Install additional or optional software. Dell Wireless Setup Assistant Set up the printer on a wireless network. (referred to as Printer Utility) • Get help with these applications, depending on ... 4 From the Web site, select your printer and download the driver. 5 Install additional or optional software. Using the printer software 21 Dell Printer Utility (referred to as Wireless Setup Assistant) Note: Your printer may not come with cartridge installation. • Print a test page...
User's Guide
Page 22
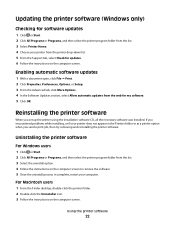
.... 3 Follow the instructions on the computer screen to remove the software. 5 Once the uninstall process in the Printers folder or as a printer option when you set up the printer using the installation software CD, all the necessary software was installed. Updating the printer software (Windows only) Checking for software updates 1 Click...
.... 3 Follow the instructions on the computer screen to remove the software. 5 Once the uninstall process in the Printers folder or as a printer option when you set up the printer using the installation software CD, all the necessary software was installed. Updating the printer software (Windows only) Checking for software updates 1 Click...

User's Guide
Page 24
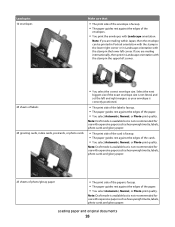
The paper should be flat against the paper support, and the edges should be flush against the edges of the stack on a level surface. 2 Center the paper on the paper support. 3 Adjust the paper guides so they rest against both paper guides. 4 From the printer control panel, select or confirm your paper settings. Loading paper and original documents 24 Note: Do not force paper into the printer. Straighten the edges of the paper. Loading paper and original documents Loading paper 1 Flex the sheets back and forth to loosen them. Do not fold or crease the paper.
The paper should be flat against the paper support, and the edges should be flush against the edges of the stack on a level surface. 2 Center the paper on the paper support. 3 Adjust the paper guides so they rest against both paper guides. 4 From the printer control panel, select or confirm your paper settings. Loading paper and original documents 24 Note: Do not force paper into the printer. Straighten the edges of the paper. Loading paper and original documents Loading paper 1 Flex the sheets back and forth to loosen them. Do not fold or crease the paper.
User's Guide
Page 26
... in Landscape orientation with the stamp in the lower left corner. Select the next biggest size if the exact envelope size is not listed, and set the left corner. 25 sheets of the paper. • You select Automatic, Normal, or Photo print quality. If you are mailing internationally, then print in...
... in Landscape orientation with the stamp in the lower left corner. Select the next biggest size if the exact envelope size is not listed, and set the left corner. 25 sheets of the paper. • You select Automatic, Normal, or Photo print quality. If you are mailing internationally, then print in...
User's Guide
Page 27
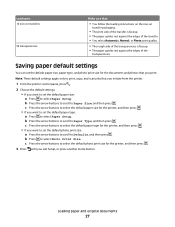
...then press . c Press the arrow buttons to select the default photo print size for the printer, and then press . • If you want to set the default photo print size: a Press the arrow buttons to scroll to Defaults, and then press . c Press the arrow buttons to select the default ... default paper size: a Press to select Paper Setup. Loading paper and original documents 27 Note: These default settings apply only to Paper Type, and then press . Saving paper default settings You can set the default paper size, paper type, and photo print size for the printer, and then press . • ...
...then press . c Press the arrow buttons to select the default photo print size for the printer, and then press . • If you want to set the default photo print size: a Press the arrow buttons to scroll to Defaults, and then press . c Press the arrow buttons to select the default ... default paper size: a Press to select Paper Setup. Loading paper and original documents 27 Note: These default settings apply only to Paper Type, and then press . Saving paper default settings You can set the default paper size, paper type, and photo print size for the printer, and then press . • ...

User's Guide
Page 29
...7 Click Print. Printing basic documents Printing a document For Windows users 1 With a document open , choose File > Page Setup. 2 From the Page Setup dialog, set the printer, paper size, and orientation. 3 Click OK. 4 From the menu bar, choose File > Print. 5 From the Printer pop-up menu, choose your... cartridges. • Remove each sheet as it is printed when printing photos or when working with specialty media. • Select the borderless setting when printing photos. Printing 29 Printing Tips for printing • Use the appropriate paper for your printer. 6 From the print options menu,...
...7 Click Print. Printing basic documents Printing a document For Windows users 1 With a document open , choose File > Page Setup. 2 From the Page Setup dialog, set the printer, paper size, and orientation. 3 Click OK. 4 From the menu bar, choose File > Print. 5 From the Printer pop-up menu, choose your... cartridges. • Remove each sheet as it is printed when printing photos or when working with specialty media. • Select the borderless setting when printing photos. Printing 29 Printing Tips for printing • Use the appropriate paper for your printer. 6 From the print options menu,...

User's Guide
Page 30
...By default, the first page is available only when you are printing multiple copies. • To prevent smudging when printing photos, remove each copy as a set the printer, paper size, and orientation. 3 Click OK. 4 From the menu bar, choose File > Print. 5 From the Printer pop-up menu, ...enter the number of pages (not collated). For Macintosh users 1 With a document open, choose File > Page Setup. 2 From the Page Setup dialog, set (collated) or to print, and then choose Collated. 7 Click Print. Collating printed copies When printing multiple copies of a document, you can choose to ...
...By default, the first page is available only when you are printing multiple copies. • To prevent smudging when printing photos, remove each copy as a set the printer, paper size, and orientation. 3 Click OK. 4 From the menu bar, choose File > Print. 5 From the Printer pop-up menu, ...enter the number of pages (not collated). For Macintosh users 1 With a document open, choose File > Page Setup. 2 From the Page Setup dialog, set (collated) or to print, and then choose Collated. 7 Click Print. Collating printed copies When printing multiple copies of a document, you can choose to ...

User's Guide
Page 31
Printing multiple pages on each page. 5 Adjust other settings as needed. 6 Click OK to close any printer software dialogs. 7 Click OK or Print. Note: If two-sided printing is enabled, then you must first ... the print order, you cannot print the last page first. For Macintosh users 1 With a document open , choose File > Page Setup. 2 From the Page Setup dialog, set the printer, paper size, and orientation. 3 Click OK. 4 From the menu bar, choose File > Print. 5 From the Printer pop-up menu, select a page order: •...
Printing multiple pages on each page. 5 Adjust other settings as needed. 6 Click OK to close any printer software dialogs. 7 Click OK or Print. Note: If two-sided printing is enabled, then you must first ... the print order, you cannot print the last page first. For Macintosh users 1 With a document open , choose File > Page Setup. 2 From the Page Setup dialog, set the printer, paper size, and orientation. 3 Click OK. 4 From the menu bar, choose File > Print. 5 From the Printer pop-up menu, select a page order: •...
User's Guide
Page 32
... for the printer to connect to the network computer or to the computer, see "Supported memory cards and file types" on each page. 8 Adjust other settings as needed. 9 Click Print. Enter the PIN using a USB connection a Press the arrow buttons to select the file name of the document that are supported...
... for the printer to connect to the network computer or to the computer, see "Supported memory cards and file types" on each page. 8 Adjust other settings as needed. 9 Click Print. Enter the PIN using a USB connection a Press the arrow buttons to select the file name of the document that are supported...

User's Guide
Page 33
If no size matches the envelope size, then set a custom size. 4 Select an orientation, and then click OK. 5 From the menu bar, choose File > Print. 6 From the Printer pop-up menu, choose your printer. 7 ... Setup tab > Paper Type list > select Plain Paper 4 Navigate to: Paper Size list > select your envelope size If no size matches the envelope size, then set a custom size. 5 Select an orientation. 6 Click OK to close any printer software dialogs. 7 Click OK or Print. Printing 33 For Macintosh users 1 With a document open...
If no size matches the envelope size, then set a custom size. 4 Select an orientation, and then click OK. 5 From the menu bar, choose File > Print. 6 From the Printer pop-up menu, choose your printer. 7 ... Setup tab > Paper Type list > select Plain Paper 4 Navigate to: Paper Size list > select your envelope size If no size matches the envelope size, then set a custom size. 5 Select an orientation. 6 Click OK to close any printer software dialogs. 7 Click OK or Print. Printing 33 For Macintosh users 1 With a document open...

User's Guide
Page 34
... list > select your paper type 4 Navigate to: Paper Size list > select your printer. 7 From the print options pop-up menu, choose Print Settings or Quality & Media. 8 From the Paper Type pop-up menu, choose Card Stock. 9 From the Print Quality menu, choose a print quality other...click File > Print. 2 Click Properties, Preferences, Options, or Setup. 3 Navigate to: Print Setup tab > Paper Size list > select Custom Size 4 Adjust the settings as needed to peel off during printing, resulting in a paper jam. Partial sheets (with areas exposed by missing labels) may cause labels to create a custom...
... list > select your paper type 4 Navigate to: Paper Size list > select your printer. 7 From the print options pop-up menu, choose Print Settings or Quality & Media. 8 From the Paper Type pop-up menu, choose Card Stock. 9 From the Print Quality menu, choose a print quality other...click File > Print. 2 Click Properties, Preferences, Options, or Setup. 3 Navigate to: Print Setup tab > Paper Size list > select Custom Size 4 Adjust the settings as needed to peel off during printing, resulting in a paper jam. Partial sheets (with areas exposed by missing labels) may cause labels to create a custom...


