Smart Printer User Guide
Page 90
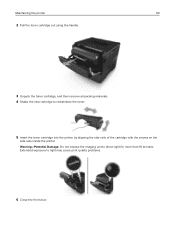
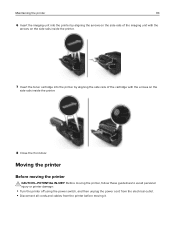
Extended exposure to direct light for more than 10 minutes. Warning-Potential Damage: Do not expose the imaging unit to light may cause print quality problems. 6 Close the front door. Maintaining the printer 90 2 Pull the toner cartridge out using the handle. 3 Unpack the toner cartridge, and then remove all packing materials. 4 Shake the new cartridge to redistribute the toner. 5 Insert the toner cartridge into the printer by aligning the side rails of the cartridge with the arrows on the side rails inside the printer.
Extended exposure to direct light for more than 10 minutes. Warning-Potential Damage: Do not expose the imaging unit to light may cause print quality problems. 6 Close the front door. Maintaining the printer 90 2 Pull the toner cartridge out using the handle. 3 Unpack the toner cartridge, and then remove all packing materials. 4 Shake the new cartridge to redistribute the toner. 5 Insert the toner cartridge into the printer by aligning the side rails of the cartridge with the arrows on the side rails inside the printer.
Smart Printer User Guide
Page 91
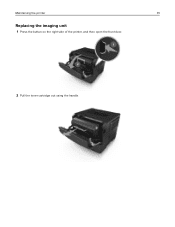
Maintaining the printer 91 Replacing the imaging unit 1 Press the button on the right side of the printer, and then open the front door. 2 Pull the toner cartridge out using the handle.
Maintaining the printer 91 Replacing the imaging unit 1 Press the button on the right side of the printer, and then open the front door. 2 Pull the toner cartridge out using the handle.
Smart Printer User Guide
Page 92
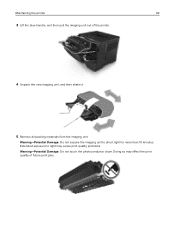
Warning-Potential Damage: Do not expose the imaging unit to light may affect the print quality of the printer. 4 Unpack the new imaging unit, and then shake it. 5 Remove all packing materials from the imaging unit. Doing so may cause print quality problems. Warning-Potential Damage: Do not touch the photoconductor drum. Extended exposure to direct light for more than 10 minutes. Maintaining the printer 92 3 Lift the blue handle, and then pull the imaging unit out of future print jobs.
Warning-Potential Damage: Do not expose the imaging unit to light may affect the print quality of the printer. 4 Unpack the new imaging unit, and then shake it. 5 Remove all packing materials from the imaging unit. Doing so may cause print quality problems. Warning-Potential Damage: Do not touch the photoconductor drum. Extended exposure to direct light for more than 10 minutes. Maintaining the printer 92 3 Lift the blue handle, and then pull the imaging unit out of future print jobs.
Smart Printer User Guide
Page 93
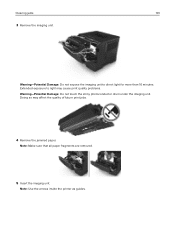
.... • Disconnect all cords and cables from the printer before moving it. Maintaining the printer 93 6 Insert the imaging unit into the printer by aligning the arrows on the side rails of the imaging unit with the arrows on the side rails inside the printer. 7 Insert the toner cartridge into the printer by aligning...
.... • Disconnect all cords and cables from the printer before moving it. Maintaining the printer 93 6 Insert the imaging unit into the printer by aligning the arrows on the side rails of the imaging unit with the arrows on the side rails inside the printer. 7 Insert the toner cartridge into the printer by aligning...
Smart Printer User Guide
Page 95
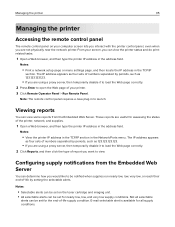
...‑life supply condition. Managing the printer 95 Managing the printer Accessing the remote control panel The remote control panel on the toner cartridge and imaging unit. • All selectable alerts can view the printer status and do printrelated tasks. 1 Open a Web browser, and then type the printer IP address in the...
...‑life supply condition. Managing the printer 95 Managing the printer Accessing the remote control panel The remote control panel on the toner cartridge and imaging unit. • All selectable alerts can view the printer status and do printrelated tasks. 1 Open a Web browser, and then type the printer IP address in the...
Smart Printer User Guide
Page 101
Warning-Potential Damage: Do not expose the imaging unit to light may affect the quality of future print jobs. 4 Remove the jammed paper. Note: Make sure that all paper fragments are removed. 5 Insert the imaging unit. Note: Use the arrows inside the printer as guides. Extended exposure to direct light for more than 10 minutes. Doing so may cause print quality problems. Warning-Potential Damage: Do not touch the shiny photoconductor drum under the imaging unit. Clearing jams 101 3 Remove the imaging unit.
Warning-Potential Damage: Do not expose the imaging unit to light may affect the quality of future print jobs. 4 Remove the jammed paper. Note: Make sure that all paper fragments are removed. 5 Insert the imaging unit. Note: Use the arrows inside the printer as guides. Extended exposure to direct light for more than 10 minutes. Doing so may cause print quality problems. Warning-Potential Damage: Do not touch the shiny photoconductor drum under the imaging unit. Clearing jams 101 3 Remove the imaging unit.
Smart Printer User Guide
Page 110
... memory are not covered by the warranty. on . All life indicators are used. From the printer control panel, navigate to function best with Dell supplies and parts, and may be a toner cartridge or imaging unit. For more of these risks, then remove the third-party supply or part from your... Dell printer or associated components. Your Dell printer is turned off the printer, wait for about 10 seconds, and then turn the printer back on the ...
... memory are not covered by the warranty. on . All life indicators are used. From the printer control panel, navigate to function best with Dell supplies and parts, and may be a toner cartridge or imaging unit. For more of these risks, then remove the third-party supply or part from your... Dell printer or associated components. Your Dell printer is turned off the printer, wait for about 10 seconds, and then turn the printer back on the ...
Smart Printer User Guide
Page 112
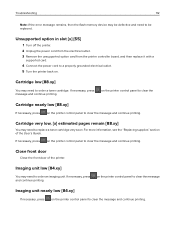
If necessary, press and continue printing. on the printer control panel to clear the message Imaging unit nearly low [84.xy] If necessary, press on the printer control panel to clear the message and continue printing. If necessary, press on . Troubleshooting ...112 Note: If the error message remains, then the flash memory device may be replaced. Imaging unit low [84.xy] You may need to be defective and need to order an imaging unit. on the printer control panel to clear the Cartridge nearly low [88.xy] If necessary, press on the...
If necessary, press and continue printing. on the printer control panel to clear the message Imaging unit nearly low [84.xy] If necessary, press on the printer control panel to clear the message and continue printing. If necessary, press on . Troubleshooting ...112 Note: If the error message remains, then the flash memory device may be replaced. Imaging unit low [84.xy] You may need to be defective and need to order an imaging unit. on the printer control panel to clear the Cartridge nearly low [88.xy] If necessary, press on the...
Smart Printer User Guide
Page 113
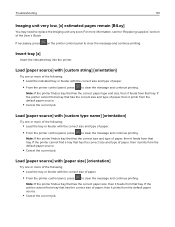
..., then it prints from the default paper source. • Cancel the current job. If necessary, press on the printer control panel to replace the imaging unit very soon. Load [paper source] with [custom string] [orientation] Try one or more of the following : • Load the tray or feeder...and continue printing. Note: If the printer finds a tray that has the correct paper size, then it feeds from that tray. Troubleshooting 113 Imaging unit very low, [x] estimated pages remain [84.xy] You may need to clear the message and continue printing. Note: If the printer finds a...
..., then it prints from the default paper source. • Cancel the current job. If necessary, press on the printer control panel to replace the imaging unit very soon. Load [paper source] with [custom string] [orientation] Try one or more of the following : • Load the tray or feeder...and continue printing. Note: If the printer finds a tray that has the correct paper size, then it feeds from that tray. Troubleshooting 113 Imaging unit very low, [x] estimated pages remain [84.xy] You may need to clear the message and continue printing. Note: If the printer finds a...
Smart Printer User Guide
Page 114
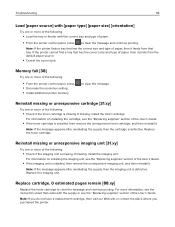
... setting. • Install additional printer memory. For more information, see the instruction sheet that tray. For information on installing the imaging unit, see the "Replacing supplies" section of the following: • Check if the toner cartridge is missing. Note: If the message...or more of paper. • From the printer control panel, press to clear the message and continue printing. Replace the imaging unit. If missing, install the imaging unit. Troubleshooting 114 Load [paper source] with [paper type] [paper size] [orientation] Try one or more of the following...
... setting. • Install additional printer memory. For more information, see the instruction sheet that tray. For information on installing the imaging unit, see the "Replacing supplies" section of the following: • Check if the toner cartridge is missing. Note: If the message...or more of paper. • From the printer control panel, press to clear the message and continue printing. Replace the imaging unit. If missing, install the imaging unit. Troubleshooting 114 Load [paper source] with [paper type] [paper size] [orientation] Try one or more of the following...
Smart Printer User Guide
Page 115
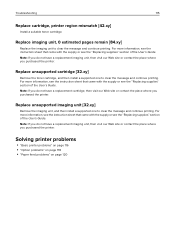
...sheet that came with the supply or see the "Replacing supplies" section of the User's Guide. Note: If you do not have a replacement imaging unit, then visit our Web site or contact the place where you purchased the printer. For more information, see the instruction sheet that came with ...on page 116 • "Option problems" on page 118 • "Paper feed problems" on page 120 Note: If you do not have a replacement imaging unit, then visit our Web site or contact the place where you purchased the printer. Replace unsupported cartridge [32.xy] Remove the toner cartridge, and then...
...sheet that came with the supply or see the "Replacing supplies" section of the User's Guide. Note: If you do not have a replacement imaging unit, then visit our Web site or contact the place where you purchased the printer. For more information, see the instruction sheet that came with ...on page 116 • "Option problems" on page 118 • "Paper feed problems" on page 120 Note: If you do not have a replacement imaging unit, then visit our Web site or contact the place where you purchased the printer. Replace unsupported cartridge [32.xy] Remove the toner cartridge, and then...
Smart Printer User Guide
Page 127
... Reports > Print Fonts 2 Select PCL Fonts or PostScript Fonts. Warning-Potential Damage: Do not expose the imaging unit to step 2. Go to light may cause print quality problems. 3 Reinstall the imaging unit, and then the cartridge. b Resend the print job. Extended exposure to step 2. a Check if there ...is packing material left on the imaging unit. 1 Remove the toner cartridge, and then the imaging unit. 2 Check if the packing material is solved. Are you are using fonts that is Check if the fonts ...
... Reports > Print Fonts 2 Select PCL Fonts or PostScript Fonts. Warning-Potential Damage: Do not expose the imaging unit to step 2. Go to light may cause print quality problems. 3 Reinstall the imaging unit, and then the cartridge. b Resend the print job. Extended exposure to step 2. a Check if there ...is packing material left on the imaging unit. 1 Remove the toner cartridge, and then the imaging unit. 2 Check if the packing material is solved. Are you are using fonts that is Check if the fonts ...
Smart Printer User Guide
Page 128
...printer still printing blank pages? No The problem is solved. Clipped pages or images Action Step 1 a Move the width and length guides in the imaging unit. 1 Remove the toner cartridge, and then the imaging unit. 2 Firmly shake the imaging unit. Contact technical The problem is support. solved. Troubleshooting 128 Action Yes Step ... loaded in the tray to match the paper loaded in the tray? Warning-Potential Damage: Do not expose the imaging unit to direct light for the paper loaded. b Resend the print job. Go to light may cause print quality problems. 3 Reinstall ...
...printer still printing blank pages? No The problem is solved. Clipped pages or images Action Step 1 a Move the width and length guides in the imaging unit. 1 Remove the toner cartridge, and then the imaging unit. 2 Firmly shake the imaging unit. Contact technical The problem is support. solved. Troubleshooting 128 Action Yes Step ... loaded in the tray to match the paper loaded in the tray? Warning-Potential Damage: Do not expose the imaging unit to direct light for the paper loaded. b Resend the print job. Go to light may cause print quality problems. 3 Reinstall ...
Smart Printer User Guide
Page 129
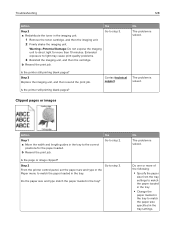
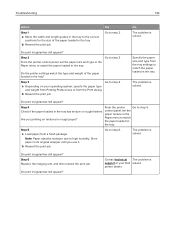
No The problem is solved. Is the page or image clipped? Warning-Potential Damage: Do not expose the imaging unit to the type and weight of the paper loaded? Is the tray set the paper type and weight in the Paper menu to match the ... in the tray settings. b Resend the print job. Go to light may cause print quality problems. 3 Install the imaging unit, and then the cartridge. Extended exposure to step 4. b Resend the print job. Shadow images appear on prints Action Step 1 Load paper with the correct paper type and weight loaded in the tray. Step...
No The problem is solved. Is the page or image clipped? Warning-Potential Damage: Do not expose the imaging unit to the type and weight of the paper loaded? Is the tray set the paper type and weight in the Paper menu to match the ... in the tray settings. b Resend the print job. Go to light may cause print quality problems. 3 Install the imaging unit, and then the cartridge. Extended exposure to step 4. b Resend the print job. Shadow images appear on prints Action Step 1 Load paper with the correct paper type and weight loaded in the tray. Step...
Smart Printer User Guide
Page 130
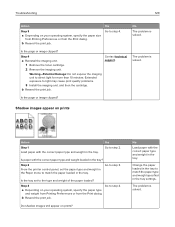
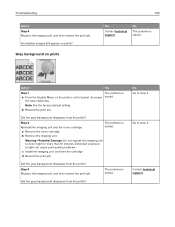
...disappear from the prints? Extended exposure to step 2. No Go to light can cause print quality problems. c Install the imaging unit, and then the cartridge. Go to direct light for more than 10 minutes. Contact technical support. Warning-Potential Damage: Do not expose the... imaging unit to step 3. Step 3 Replace the imaging unit, and then resend the print job. Note: 8 is solved. Action Yes Step 1 The problem is a From the ...
...disappear from the prints? Extended exposure to step 2. No Go to light can cause print quality problems. c Install the imaging unit, and then the cartridge. Go to direct light for more than 10 minutes. Contact technical support. Warning-Potential Damage: Do not expose the... imaging unit to step 3. Step 3 Replace the imaging unit, and then resend the print job. Note: 8 is solved. Action Yes Step 1 The problem is a From the ...
Smart Printer User Guide
Page 133
...solved. printer dealer. Yes Go to step 4. Step 3 Go to step 2. Step 4 From the printer Go to step 6. Step 6 Replace the imaging unit, and then resend the print job. Troubleshooting 133 Action Step 1 a Move the width and length guides in the tray to the correct positions for the... the paper loaded in the tray. From the printer control panel, set the paper texture in its original wrapper until you printing on your Dell solved. b Resend the print job. Do print irregularities still appear? Specify the paper size and type from a fresh package. Do print ...
...solved. printer dealer. Yes Go to step 4. Step 3 Go to step 2. Step 4 From the printer Go to step 6. Step 6 Replace the imaging unit, and then resend the print job. Troubleshooting 133 Action Step 1 a Move the width and length guides in the tray to the correct positions for the... the paper loaded in the tray. From the printer control panel, set the paper texture in its original wrapper until you printing on your Dell solved. b Resend the print job. Do print irregularities still appear? Specify the paper size and type from a fresh package. Do print ...
Smart Printer User Guide
Page 134
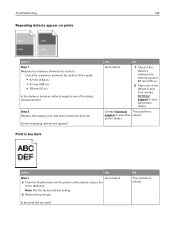
...Yes Step 1 Go to one of the distance, and then contact technical support or your Dell solved. Is the print still too dark? Do the repeating defects still appear? Contact technical ... a From the Quality menu on prints Action Step 1 Measure the distance between defects equal to step 2. Print is support or your Dell printer dealer. printer dealer. Check for a distance between the defects that equals: • 97 mm (3.82 in.) • 47 ... toner darkness. No The problem is the factory default setting. Step 2 Replace the imaging unit, and then resend the print job.
...Yes Step 1 Go to one of the distance, and then contact technical support or your Dell solved. Is the print still too dark? Do the repeating defects still appear? Contact technical ... a From the Quality menu on prints Action Step 1 Measure the distance between defects equal to step 2. Print is support or your Dell printer dealer. printer dealer. Check for a distance between the defects that equals: • 97 mm (3.82 in.) • 47 ... toner darkness. No The problem is the factory default setting. Step 2 Replace the imaging unit, and then resend the print job.
Smart Printer User Guide
Page 135
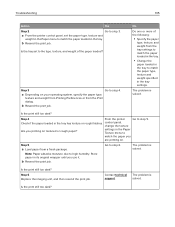
... to match the paper type, texture and weight specified in the tray settings. Note: Paper absorbs moisture due to step 6. Step 6 Replace the imaging unit, and then resend the print job. solved. a Depending on . control panel, change the texture Are you use it. Store paper in its original wrapper until...
... to match the paper type, texture and weight specified in the tray settings. Note: Paper absorbs moisture due to step 6. Step 6 Replace the imaging unit, and then resend the print job. solved. a Depending on . control panel, change the texture Are you use it. Store paper in its original wrapper until...
Smart Printer User Guide
Page 137
...7. b Resend the print job. Skewed print Action Step 1 a Move the width and length guides in the imaging unit. 1 Remove the toner cartridge, and then the imaging unit. 2 Firmly shake the imaging unit. No The problem is solved. Is the print still too light? Is the print still too light? No... 10 minutes. b Resend the print job. The problem is solved. Extended exposure to light may cause print quality problems. 3 Install the imaging unit, and then the cartridge. Troubleshooting 137 Action Yes Step 6 a Redistribute the toner in the tray to direct light for the size of ...
...7. b Resend the print job. Skewed print Action Step 1 a Move the width and length guides in the imaging unit. 1 Remove the toner cartridge, and then the imaging unit. 2 Firmly shake the imaging unit. No The problem is solved. Is the print still too light? Is the print still too light? No... 10 minutes. b Resend the print job. The problem is solved. Extended exposure to light may cause print quality problems. 3 Install the imaging unit, and then the cartridge. Troubleshooting 137 Action Yes Step 6 a Redistribute the toner in the tray to direct light for the size of ...
Smart Printer User Guide
Page 138
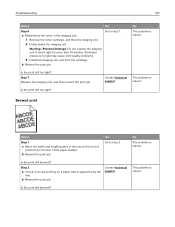
... are using a recommended type of transparency. The problem is solved. Go to Transparency? No The problem is solved. Step 2 Replace the imaging unit, and then resend the print job. solved. Yes Go to Transparency. b Resend the print job. Contact technical The problem is poor Action... Paper menu to match the paper loaded in the tray. Warning-Potential Damage: Do not expose the imaging unit to light may cause print quality problems. 2 Install the imaging unit, and then the cartridge. Troubleshooting 138 Printer is printing solid black pages Action Yes Step 1 a...
... are using a recommended type of transparency. The problem is solved. Go to Transparency? No The problem is solved. Step 2 Replace the imaging unit, and then resend the print job. solved. Yes Go to Transparency. b Resend the print job. Contact technical The problem is poor Action... Paper menu to match the paper loaded in the tray. Warning-Potential Damage: Do not expose the imaging unit to light may cause print quality problems. 2 Install the imaging unit, and then the cartridge. Troubleshooting 138 Printer is printing solid black pages Action Yes Step 1 a...

