
Mobile Precision Re-Image Guide
Page 10
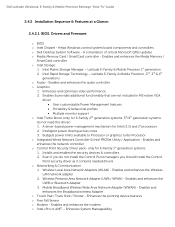
... critical Microsoft QFEs updates o Media Memory Card / SmartCard controller - Enhances and optimizes video performance 2. Wireless Personal Area Network Adapter (UWB / WPAN) - Mobile Broadband Wireless Wide Area Network Adapter (WWAN) - Latitude E-Family & Mobile Precision 2nd, 3rd & 4th generations o... sharing across cores 3. only for Intel i3, i5 and i7 processors 2. Enhances System Manageability Dell Latitude Ultrabook, E-Family & Mobile Precision Reimage "How-To" Guide 2.4.2 Installation Sequence & Features at a Glance: 2.4.2.1 BIOS, Drivers and Firmware: o BIOS o Intel ...
... critical Microsoft QFEs updates o Media Memory Card / SmartCard controller - Enhances and optimizes video performance 2. Wireless Personal Area Network Adapter (UWB / WPAN) - Mobile Broadband Wireless Wide Area Network Adapter (WWAN) - Latitude E-Family & Mobile Precision 2nd, 3rd & 4th generations o... sharing across cores 3. only for Intel i3, i5 and i7 processors 2. Enhances System Manageability Dell Latitude Ultrabook, E-Family & Mobile Precision Reimage "How-To" Guide 2.4.2 Installation Sequence & Features at a Glance: 2.4.2.1 BIOS, Drivers and Firmware: o BIOS o Intel ...
Mobile Precision Re-Image Guide
Page 14
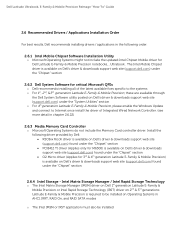
.... (see more detail in chapter 2.6.22) 2.6.3 Media Memory Card Controller o Microsoft Operating Systems do not include the Memory Card controller driver. Dell Latitude Ultrabook, E-Family & Mobile Precision Reimage "How-To" Guide 2.6 Recommended Drivers / Applications Installation Order For best results, Dell recommends installing drivers / applications in the following driver provided by Dell: R5C8xx Ricoh driver is available on...
.... (see more detail in chapter 2.6.22) 2.6.3 Media Memory Card Controller o Microsoft Operating Systems do not include the Memory Card controller driver. Dell Latitude Ultrabook, E-Family & Mobile Precision Reimage "How-To" Guide 2.6 Recommended Drivers / Applications Installation Order For best results, Dell recommends installing drivers / applications in the following driver provided by Dell: R5C8xx Ricoh driver is available on...

Owner's Manual
Page 4
...35 12 Secondary Hard Drive 37 Removing The Secondary Hard Drive 37 Installing The Secondary Hard Drive 38 13 Wireless Local Area Network (WLAN) Card 39 Removing Wireless Local Area Network (WLAN) Card 39 Installing The Wireless Local Area Network (WLAN) Card 40 14 Wireless Wide ...Area Network (WWAN) Card 41 Removing The Wireless Wide Area Network (WWAN) Card 41 Installing The Wireless Wide Area Network (WWAN) Card 42 15 Primary Memory 43 Removing The Primary Memory 43 Installing The Primary Memory 44
...35 12 Secondary Hard Drive 37 Removing The Secondary Hard Drive 37 Installing The Secondary Hard Drive 38 13 Wireless Local Area Network (WLAN) Card 39 Removing Wireless Local Area Network (WLAN) Card 39 Installing The Wireless Local Area Network (WLAN) Card 40 14 Wireless Wide ...Area Network (WWAN) Card 41 Removing The Wireless Wide Area Network (WWAN) Card 41 Installing The Wireless Wide Area Network (WWAN) Card 42 15 Primary Memory 43 Removing The Primary Memory 43 Installing The Primary Memory 44
Owner's Manual
Page 5
...Memory 45 Removing The Secondary Memory 45 Installing The Secondary Memory 46 17 CPU Fan...47 Removing The CPU Fan 47 Installing The CPU Fan...48 18 Coin-Cell Battery 49 Removing The Coin-Cell Battery 49 Installing The Coin-Cell Battery 50 19 Palm Rest 51 Removing The Palm Rest 51 Installing...20 CPU and Heatsink 57 Removing The CPU Heatsink 57 Installing The CPU Heatsink 58 21 Processor 59 Removing The Processor 59 Installing The Processor 60 22 Graphics Card Heatsink 61 Removing The Graphics Card Heatsink 61 Installing The Graphics Card Heatsink 64 23 Graphics Card 65 ...
...Memory 45 Removing The Secondary Memory 45 Installing The Secondary Memory 46 17 CPU Fan...47 Removing The CPU Fan 47 Installing The CPU Fan...48 18 Coin-Cell Battery 49 Removing The Coin-Cell Battery 49 Installing The Coin-Cell Battery 50 19 Palm Rest 51 Removing The Palm Rest 51 Installing...20 CPU and Heatsink 57 Removing The CPU Heatsink 57 Installing The CPU Heatsink 58 21 Processor 59 Removing The Processor 59 Installing The Processor 60 22 Graphics Card Heatsink 61 Removing The Graphics Card Heatsink 61 Installing The Graphics Card Heatsink 64 23 Graphics Card 65 ...

Owner's Manual
Page 13
Push the SD memory card into the compartment until it . 3. Follow the procedures in the Secure Digital (SD) memory card to release it is fully engaged with a click sound. 13 Press in Before Working On Your Computer 2. Slide the SD memory card out of the chassis. 2. Locate the Secure Digital (SD) memory card compartment on the left side of the computer. Installing The Secure Digital (SD) Card 1. Secure Digital (SD) Card 2 Removing The Secure Digital (SD) Card 1.
Push the SD memory card into the compartment until it . 3. Follow the procedures in the Secure Digital (SD) memory card to release it is fully engaged with a click sound. 13 Press in Before Working On Your Computer 2. Slide the SD memory card out of the chassis. 2. Locate the Secure Digital (SD) memory card compartment on the left side of the computer. Installing The Secure Digital (SD) Card 1. Secure Digital (SD) Card 2 Removing The Secure Digital (SD) Card 1.

Owner's Manual
Page 44
Locate the memory slot in After Working Inside Your Computer. 44 Install the battery. 6. Installing The Primary Memory 1. Follow the procedures in the computer. 2. Insert the memory into the memory socket. 3. Press down on the memory until the securing clips secure the memory in place. 4. Install the base cover. 5.
Locate the memory slot in After Working Inside Your Computer. 44 Install the battery. 6. Installing The Primary Memory 1. Follow the procedures in the computer. 2. Insert the memory into the memory socket. 3. Press down on the memory until the securing clips secure the memory in place. 4. Install the base cover. 5.
Owner's Manual
Page 46
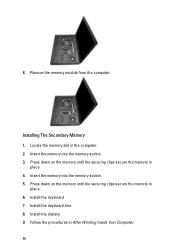
Press down on the memory until the securing clips secure the memory in place. 4. Locate the memory slot in After Working Inside Your Computer. 46 Press down on the memory until the securing clips secure the memory in place. 6. Install the keyboard trim. 8. Install the battery. 9. Remove the memory module from the computer. Insert the memory into the memory socket. 5. Follow the procedures in the computer. 2. Install the keyboard. 7. Installing The Secondary Memory 1. 8. Insert the memory into the memory socket. 3.
Press down on the memory until the securing clips secure the memory in place. 4. Locate the memory slot in After Working Inside Your Computer. 46 Press down on the memory until the securing clips secure the memory in place. 6. Install the keyboard trim. 8. Install the battery. 9. Remove the memory module from the computer. Insert the memory into the memory socket. 5. Follow the procedures in the computer. 2. Install the keyboard. 7. Installing The Secondary Memory 1. 8. Insert the memory into the memory socket. 3.

Owner's Manual
Page 56
... anchor hooks on the memory until the securing clips secure the memory in place. 8. Install the keyboard trim. 14. Tighten the screws securing the palm rest in place. 6. Install the secondary hard drive 10. Install the keyboard. 13. Install the battery. 16. Press down on the computer. 2. Install the base cover 15.... 7. Starting from the right edge of the palm rest, press downwards on the bottom of the palm rest to the palm rest. 5. Install the primary hard drive 11. Tighten the captive screws securing the palm rest in place. 9. Tighten the screws on the computer to engage ...
... anchor hooks on the memory until the securing clips secure the memory in place. 8. Install the keyboard trim. 14. Tighten the screws securing the palm rest in place. 6. Install the secondary hard drive 10. Install the keyboard. 13. Install the battery. 16. Press down on the computer. 2. Install the base cover 15.... 7. Starting from the right edge of the palm rest, press downwards on the bottom of the palm rest to the palm rest. 5. Install the primary hard drive 11. Tighten the captive screws securing the palm rest in place. 9. Tighten the screws on the computer to engage ...

Owner's Manual
Page 86
... system board in the computer. 2. Install the display assembly. 7. Install the processor. 11. Install the secondary memory. 15. Install the primary memory. 16. Install the keyboard trim. 23. Connect the wireless switch. 5. Connect the coin-cell battery on the rear of the computer. 6. Install the palm rest. 13. Install the CPU fan. 14. Install the secondary hard drive. 19. Align...
... system board in the computer. 2. Install the display assembly. 7. Install the processor. 11. Install the secondary memory. 15. Install the primary memory. 16. Install the keyboard trim. 23. Connect the wireless switch. 5. Connect the coin-cell battery on the rear of the computer. 6. Install the palm rest. 13. Install the CPU fan. 14. Install the secondary hard drive. 19. Align...

Owner's Manual
Page 117
...change a user-selectable option such as the user password. • read the current amount of memory or set the type of the General menu. 117 If you wait too long and the operating... program. Before you use System Setup, it to display, and then press . When the blue DELL logo is recommended that the keyboard has initialized. Entering System Setup 1. System Setup Menu Options The ...options for the System Setup program General The following table describe the menu options of hard drive installed. System Setup 37 System Setup Overview System Setup allows you to: • change the ...
...change a user-selectable option such as the user password. • read the current amount of memory or set the type of the General menu. 117 If you wait too long and the operating... program. Before you use System Setup, it to display, and then press . When the blue DELL logo is recommended that the keyboard has initialized. Entering System Setup 1. System Setup Menu Options The ...options for the System Setup program General The following table describe the menu options of hard drive installed. System Setup 37 System Setup Overview System Setup allows you to: • change the ...

Owner's Manual
Page 118
... to change the order in this section may or may not appear. Depending on your computer. • System Information • Memory Information • Processor Information • Device Information Battery Information Boot Sequence Displays the battery status and the type of AC adapter ...Allows you to change the date and time. Option System Information Description This section lists the primary hardware features of your computer and installed devices, the items listed in which the computer attempts to find an operating system. • Diskette Drive • Internal HDD &#...
... to change the order in this section may or may not appear. Depending on your computer. • System Information • Memory Information • Processor Information • Device Information Battery Information Boot Sequence Displays the battery status and the type of AC adapter ...Allows you to change the date and time. Option System Information Description This section lists the primary hardware features of your computer and installed devices, the items listed in which the computer attempts to find an operating system. • Diskette Drive • Internal HDD &#...

Owner's Manual
Page 133
Solid Blinking Solid The memory has encountered an error. Blinking Off Blinking The USB controller encountered a problem during initialization. This code persists if no processor is preventing the system from ... board component is preventing the system from completing POST. 133 Blinking Solid Blinking The LCD encountered a problem during initialization. Solid Blinking Blinking No SODIMMs are installed.
Solid Blinking Solid The memory has encountered an error. Blinking Off Blinking The USB controller encountered a problem during initialization. This code persists if no processor is preventing the system from ... board component is preventing the system from completing POST. 133 Blinking Solid Blinking The LCD encountered a problem during initialization. Solid Blinking Blinking No SODIMMs are installed.


