
Owner's Manual (Desktop)
Page 4
......34 System Board Layout...36 Installing The System Board...37 3 System Setup...39 Boot Sequence...39 Navigation Keys...39 System Setup Options...40 Updating the BIOS ...47 Jumper Settings...48 System and Setup Password...48 Assigning a System Password and Setup Password 48 Deleting or Changing an Existing System and/or Setup... Enhanced Pre-Boot System Assessment (ePSA) Diagnostics 51 5 Troubleshooting Your Computer 53 Power LED Diagnostics...53 Beep Code...54 Error Messages...54 6 Specifications...57 7 Contacting Dell ...65
......34 System Board Layout...36 Installing The System Board...37 3 System Setup...39 Boot Sequence...39 Navigation Keys...39 System Setup Options...40 Updating the BIOS ...47 Jumper Settings...48 System and Setup Password...48 Assigning a System Password and Setup Password 48 Deleting or Changing an Existing System and/or Setup... Enhanced Pre-Boot System Assessment (ePSA) Diagnostics 51 5 Troubleshooting Your Computer 53 Power LED Diagnostics...53 Beep Code...54 Error Messages...54 6 Specifications...57 7 Contacting Dell ...65

Owner's Manual (Desktop)
Page 39
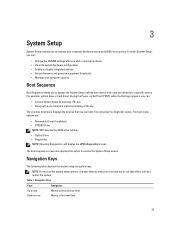
Navigation Keys Keys Navigation Up arrow Moves to access the System Setup screen. During the Power-on Self Test (POST), when the Dell logo appears, you can: • Access System Setup by pressing key • Bring up the one-time boot menu by pressing key... hardware configuration • Enable or disable integrated devices • Set performance and power management thresholds • Manage your computer hardware and specify BIOS‐level options. The boot-menu options are recorded but do not take effect until you to bypass the System Setup‐defined boot device...
Navigation Keys Keys Navigation Up arrow Moves to access the System Setup screen. During the Power-on Self Test (POST), when the Dell logo appears, you can: • Access System Setup by pressing key • Bring up the one-time boot menu by pressing key... hardware configuration • Enable or disable integrated devices • Set performance and power management thresholds • Manage your computer hardware and specify BIOS‐level options. The boot-menu options are recorded but do not take effect until you to bypass the System Setup‐defined boot device...
Owner's Manual (Desktop)
Page 40
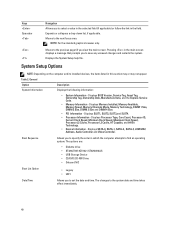
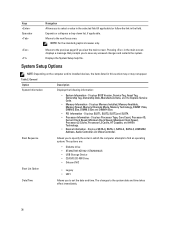
..., Current Clock Speed, Minimum Clock Speed, Maximum Clock Speed, Processor L2 Cache, Processor L3 Cache, HT Capable, and 64-Bit Technology. • Device Information - Displays BIOS Version, Service Tag, Asset Tag, Ownership Tag, Ownership Date, Manufacture Date, and the Express Service Code. • Memory Information - Boot Sequence Allows you to find...
..., Current Clock Speed, Minimum Clock Speed, Maximum Clock Speed, Processor L2 Cache, Processor L3 Cache, HT Capable, and 64-Bit Technology. • Device Information - Displays BIOS Version, Service Tag, Asset Tag, Ownership Tag, Ownership Date, Manufacture Date, and the Express Service Code. • Memory Information - Boot Sequence Allows you to find...

Owner's Manual (Desktop)
Page 42
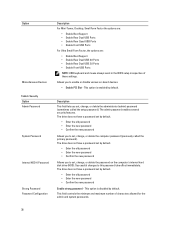
...; Enable Rear Dual USB 2.0 Ports • Enable Rear Dual USB 3.0 Ports • Enable Front USB Ports NOTE: USB keyboard and mouse always work in the BIOS setup irrespective of characters allowed for the admin and system passwords. 42 The drive does not have a password set by default.
...; Enable Rear Dual USB 2.0 Ports • Enable Rear Dual USB 3.0 Ports • Enable Front USB Ports NOTE: USB keyboard and mouse always work in the BIOS setup irrespective of characters allowed for the admin and system passwords. 42 The drive does not have a password set by default.
Owner's Manual (Desktop)
Page 43
...) configuration screens via the hotkey. • One-Time Enable - TPM Security - Changes to the Intel RAID (CTRL+I) or Intel Management Engine BIOS Extension (CTRL+P/F12). • Enable - Allows you to determine if you to determine whether changes to the system and hard disk passwords are ... • Admin Password Min • Admin Password Max • System Password Min • System Password Max Allows you activate or disable the BIOS module interface of the processor. • Enable CPU XD Support - Always prompt for passwords on restarts (warm boots). Also, the system will ...
...) configuration screens via the hotkey. • One-Time Enable - TPM Security - Changes to the Intel RAID (CTRL+I) or Intel Management Engine BIOS Extension (CTRL+P/F12). • Enable - Allows you to determine if you to determine whether changes to the system and hard disk passwords are ... • Admin Password Min • Admin Password Max • System Password Min • System Password Max Allows you activate or disable the BIOS module interface of the processor. • Enable CPU XD Support - Always prompt for passwords on restarts (warm boots). Also, the system will ...
Owner's Manual (Desktop)
Page 45
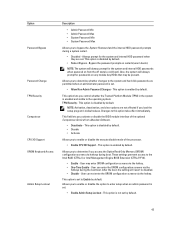
... LAN. • LAN Only - Option Fan Control Override USB Wake Support Wake on screen displays a message, that displays the keystroke sequence required to enter the BIOS Boot Option Menu. • Enable F12 Boot Option menu - Allows the system to be enabled in operating system environment. • Block Sleep (S3 state) - Specifies...
... LAN. • LAN Only - Option Fan Control Override USB Wake Support Wake on screen displays a message, that displays the keystroke sequence required to enter the BIOS Boot Option Menu. • Enable F12 Boot Option menu - Allows the system to be enabled in operating system environment. • Block Sleep (S3 state) - Specifies...

Owner's Manual (Desktop)
Page 47
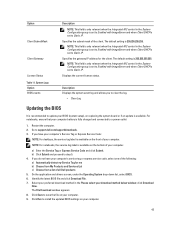
...on your computer. 9. Restart the computer. 2. If you have your computer. If you to clear the log. • Clear Log Updating the BIOS It is set to a power outlet 1. click Download Now. The default setting is 255.255.255.255. Click Save to Static IP. Click Run....255.255.255. Specifies the gateway IP address for me b) Choose from My Products and Services List c) Choose from a list of all Dell products 5. The File Download window appears. 8. Select your preferred download method in the System Configuration group is set to Enabled with ImageServer and ...
...on your computer. 9. Restart the computer. 2. If you have your computer. If you to clear the log. • Clear Log Updating the BIOS It is set to a power outlet 1. click Download Now. The default setting is 255.255.255.255. Click Save to Static IP. Click Run....255.255.255. Specifies the gateway IP address for me b) Choose from My Products and Services List c) Choose from a list of all Dell products 5. The File Download window appears. 8. Select your preferred download method in the System Configuration group is set to Enabled with ImageServer and ...
Owner's Manual (Desktop)
Page 48
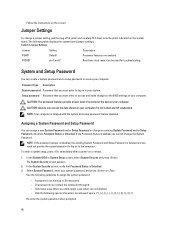
... Setting Default Description Password features are not allowed. - Setup password Password that you cannot change the System Password. In the System BIOS or System Setup screen, select System Security and press . Use the following special characters are allowed: space Re-enter the system ... letters are valid, upper case letters are enabled RTCRST pin 1 and 2 Real-time clock reset. Only the following guidelines to the BIOS settings of security for troubleshooting. CAUTION: The password features provide a basic level of your computer if is Unlocked. 3. CAUTION: Anyone ...
... Setting Default Description Password features are not allowed. - Setup password Password that you cannot change the System Password. In the System BIOS or System Setup screen, select System Security and press . Use the following special characters are allowed: space Re-enter the system ... letters are valid, upper case letters are enabled RTCRST pin 1 and 2 Real-time clock reset. Only the following guidelines to the BIOS settings of security for troubleshooting. CAUTION: The password features provide a basic level of your computer if is Unlocked. 3. CAUTION: Anyone ...
Owner's Manual (Desktop)
Page 49
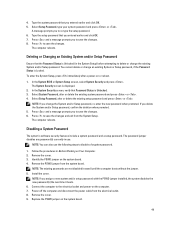
... System Setup) before attempting to the electrical outlet and power-on the system board. 49 Replace the PSWD jumper on the computer. 7. 4. In the System BIOS or System Setup screen, select System Security and press . In the System Security screen, verify that the Password Status is Locked. If you entered earlier...
... System Setup) before attempting to the electrical outlet and power-on the system board. 49 Replace the PSWD jumper on the computer. 7. 4. In the System BIOS or System Setup screen, select System Security and press . In the System Security screen, verify that the Password Status is Locked. If you entered earlier...
Owner's Manual (Desktop)
Page 51
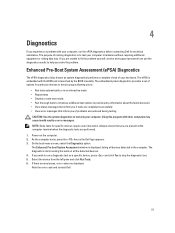
...the diagnostic tests are performed. 1. Power-on the computer. 2. If you wish to run the ePSA diagnostics before contacting Dell for technical assistance. Using this program with the BIOS and is displayed, listing all the detected devices. 4. 4 Diagnostics If you experience a problem with your computer, run...test on a specific device, press and click Yes to stop the diagnostic test. 5. Note the error code and contact Dell. 51 The Enhanced Pre-boot System Assessment window is launched by the BIOS internally. The purpose of options for specific devices require user interaction.
...the diagnostic tests are performed. 1. Power-on the computer. 2. If you wish to run the ePSA diagnostics before contacting Dell for technical assistance. Using this program with the BIOS and is displayed, listing all the detected devices. 4. 4 Diagnostics If you experience a problem with your computer, run...test on a specific device, press and click Yes to stop the diagnostic test. 5. Note the error code and contact Dell. 51 The Enhanced Pre-boot System Assessment window is launched by the BIOS internally. The purpose of options for specific devices require user interaction.

Owner's Manual (Desktop)
Page 53
... Amber LED State 2,1 2,2 2,3 2, 4 2,5 2,6 2,7 3,1 3,2 3,3 3,4 3,5 3,6 Description system board failure system board, PSU or PSU cabling failure system board, memory or CPU failure coin-cell battery failure corrupt BIOS CPU configuration failure or CPU failure memory modules are detected, but a memory failure possible peripheral card or system board failure possible USB failure no longer...
... Amber LED State 2,1 2,2 2,3 2, 4 2,5 2,6 2,7 3,1 3,2 3,3 3,4 3,5 3,6 Description system board failure system board, PSU or PSU cabling failure system board, memory or CPU failure coin-cell battery failure corrupt BIOS CPU configuration failure or CPU failure memory modules are detected, but a memory failure possible peripheral card or system board failure possible USB failure no longer...

Owner's Manual (Desktop)
Page 54
... the memory modules and, if necessary, replace them. Code Cause 1-3-2 Memory failure Error Messages Error Message Description Address mark not found The BIOS found a faulty disk sector or could not find a particular disk sector. Controller has failed The hard drive or the associated controller is ...and each set and AMT Management features are disabled until it is removed. If so, BIOS will jump out from looping and execute the normal shutdown process and power system. Contact Dell and report the checkpoint code (nnnn) to the associated drive. For the Windows operating ...
... the memory modules and, if necessary, replace them. Code Cause 1-3-2 Memory failure Error Messages Error Message Description Address mark not found The BIOS found a faulty disk sector or could not find a particular disk sector. Controller has failed The hard drive or the associated controller is ...and each set and AMT Management features are disabled until it is removed. If so, BIOS will jump out from looping and execute the normal shutdown process and power system. Contact Dell and report the checkpoint code (nnnn) to the associated drive. For the Windows operating ...
Owner's Manual (Desktop)
Page 58
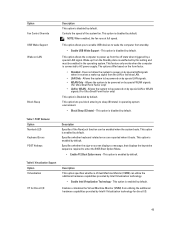
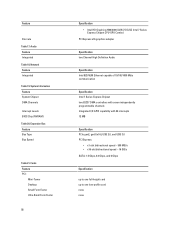
Audio Feature Integrated Table 18. System Information Feature System Chipset DMA Channels Interrupt Levels BIOS Chip (NVRAM) Table 20. Expansion Bus Feature Bus Type Bus Speed Table 21. Feature Discrete Table 17. Network Feature Integrated Table 19. Cards Feature PCI: ...
Audio Feature Integrated Table 18. System Information Feature System Chipset DMA Channels Interrupt Levels BIOS Chip (NVRAM) Table 20. Expansion Bus Feature Bus Type Bus Speed Table 21. Feature Discrete Table 17. Network Feature Integrated Table 19. Cards Feature PCI: ...
Owner's Manual (Mini-Tower)
Page 4
......30 System Board Components...33 Installing the System Board...33 3 System Setup...35 Boot Sequence...35 Navigation Keys...35 System Setup Options...36 Updating the BIOS ...43 Jumper Settings...44 System and Setup Password...44 Assigning a System Password and Setup Password 44 Deleting or Changing an Existing System and/or Setup... Enhanced Pre-Boot System Assessment (ePSA) Diagnostics 47 5 Troubleshooting Your Computer 49 Power LED Diagnostics...49 Beep Code...50 Error Messages...50 6 Specifications...53 7 Contacting Dell ...61
......30 System Board Components...33 Installing the System Board...33 3 System Setup...35 Boot Sequence...35 Navigation Keys...35 System Setup Options...36 Updating the BIOS ...43 Jumper Settings...44 System and Setup Password...44 Assigning a System Password and Setup Password 44 Deleting or Changing an Existing System and/or Setup... Enhanced Pre-Boot System Assessment (ePSA) Diagnostics 47 5 Troubleshooting Your Computer 49 Power LED Diagnostics...49 Beep Code...50 Error Messages...50 6 Specifications...53 7 Contacting Dell ...61
Owner's Manual (Mini-Tower)
Page 35
... • Enable or disable integrated devices • Set performance and power management thresholds • Manage your computer hardware and specify BIOS‐level options. The boot-menu options are recorded but do not take effect until you make are : • Removable Drive... Diagnostics NOTE: Choosing Diagnostics, will display the ePSA diagnostics screen. Table 1. During the Power-on Self Test (POST), when the Dell logo appears, you can boot from including the diagnostic option. Navigation Keys The following table displays the system setup navigation keys. NOTE...
... • Enable or disable integrated devices • Set performance and power management thresholds • Manage your computer hardware and specify BIOS‐level options. The boot-menu options are recorded but do not take effect until you make are : • Removable Drive... Diagnostics NOTE: Choosing Diagnostics, will display the ePSA diagnostics screen. Table 1. During the Power-on Self Test (POST), when the Dell logo appears, you can boot from including the diagnostic option. Navigation Keys The following table displays the system setup navigation keys. NOTE...
Owner's Manual (Mini-Tower)
Page 36
... applicable. Moves to select a value in the selected field (if applicable) or follow the link in this section may or may not appear Table 2. Displays BIOS Version, Service Tag, Asset Tag, Ownership Tag, Ownership Date, Manufacture Date, and the Express Service Code. • Memory Information - Boot Sequence Allows you view the...
... applicable. Moves to select a value in the selected field (if applicable) or follow the link in this section may or may not appear Table 2. Displays BIOS Version, Service Tag, Asset Tag, Ownership Tag, Ownership Date, Manufacture Date, and the Express Service Code. • Memory Information - Boot Sequence Allows you view the...
Owner's Manual (Mini-Tower)
Page 38
...; Enable Rear Dual USB 2.0 Ports • Enable Rear Dual USB 3.0 Ports • Enable Front USB Ports NOTE: USB keyboard and mouse always work in the BIOS setup irrespective of characters allowed for the admin and system passwords. 38 The drive does not have a password set by default. • Enter the old...
...; Enable Rear Dual USB 2.0 Ports • Enable Rear Dual USB 3.0 Ports • Enable Front USB Ports NOTE: USB keyboard and mouse always work in the BIOS setup irrespective of characters allowed for the admin and system passwords. 38 The drive does not have a password set by default. • Enter the old...

Owner's Manual (Mini-Tower)
Page 39
... boots). This option is disabled by default. NOTE: Activation, deactivation, and clear options are set. Changes to the Intel RAID (CTRL+I) or Intel Management Engine BIOS Extension (CTRL+P/F12). • Enable - This option is disabled by default. Allows you to determine if you to disabled. • Disable - These settings prenvent access... the boot, the setting will always prompt for the system and internal HDD password when they are not affected if you activate or disable the BIOS module interface of the processor. • Enable CPU XD Support -
... boots). This option is disabled by default. NOTE: Activation, deactivation, and clear options are set. Changes to the Intel RAID (CTRL+I) or Intel Management Engine BIOS Extension (CTRL+P/F12). • Enable - This option is disabled by default. Allows you to determine if you to disabled. • Disable - These settings prenvent access... the boot, the setting will always prompt for the system and internal HDD password when they are not affected if you activate or disable the BIOS module interface of the processor. • Enable CPU XD Support -

Owner's Manual (Mini-Tower)
Page 41
... Form Factor only) This option is enabled by special LAN signals. • WLAN Only - This option lets you to enable USB devices to enter the BIOS Boot Option Menu. • Enable F12 Boot Option menu - Table 8.
... Form Factor only) This option is enabled by special LAN signals. • WLAN Only - This option lets you to enable USB devices to enter the BIOS Boot Option Menu. • Enable F12 Boot Option menu - Table 8.
Owner's Manual (Mini-Tower)
Page 43
...For notebooks, the service tag label is available on the bottom of your BIOS (system setup), on replacing the system board or if an update is available on the front of all Dell products 5. Identify the latest BIOS file and click Download File. 7. Click Run to Static IP. On ...the application and drivers screen, under the Operating System drop-down list, select BIOS. 6. The default setting is set to Enabled with...
...For notebooks, the service tag label is available on the bottom of your BIOS (system setup), on replacing the system board or if an update is available on the front of all Dell products 5. Identify the latest BIOS file and click Download File. 7. Click Run to Static IP. On ...the application and drivers screen, under the Operating System drop-down list, select BIOS. 6. The default setting is set to Enabled with...


