
User Guide
Page 31
..., click ® Computer. c. Click Uninstall Dell Photo AIO Printer 966. 3. If the installation screen does not appear: a. In Windows XP, click Start® My Computer. Click Dell Printers. Follow the instructions on the screen. 4. Click ® Programs. b. Click Dell Photo AIO Printer 966. 2. Click Start® Programs or All Programs® Dell Printers® Dell Photo AIO Printer 966. Insert the Drivers and Utilities CD, and then...
..., click ® Computer. c. Click Uninstall Dell Photo AIO Printer 966. 3. If the installation screen does not appear: a. In Windows XP, click Start® My Computer. Click Dell Printers. Follow the instructions on the screen. 4. Click ® Programs. b. Click Dell Photo AIO Printer 966. 2. Click Start® Programs or All Programs® Dell Printers® Dell Photo AIO Printer 966. Insert the Drivers and Utilities CD, and then...
User Guide
Page 56
... Wireless Setup Utility NOTE: The Dell 966 Internal Wireless/Ethernet Adapter may be available in the printer. Here are supported: No security Installing the Dell 966 Internal Wireless/Ethernet Adapter Minimum Requirements for Setup The Dell™ 966 Internal Wireless/Ethernet Adapter The Dell Photo All-In-One Printer 966 An existing wireless network The Drivers and Utilities CD that came with...
... Wireless Setup Utility NOTE: The Dell 966 Internal Wireless/Ethernet Adapter may be available in the printer. Here are supported: No security Installing the Dell 966 Internal Wireless/Ethernet Adapter Minimum Requirements for Setup The Dell™ 966 Internal Wireless/Ethernet Adapter The Dell Photo All-In-One Printer 966 An existing wireless network The Drivers and Utilities CD that came with...
User Guide
Page 121
... the Drivers and Utilities CD to a network, the Scan Mode menu appears. 5. The scan opens on the computer you want to your scan. For Windows Vista: a. c. The Dell All-In-One Center opens. 3. From the Maintenance tab, click Network Support. NOTE: The computer must have the printer software...when scanning across a network. 1. You can view or change the PIN or the name of the computer to which you selected. Click Dell Photo AIO Printer 966. 2. From the Host Selection screen, choose the computer to which you need to send the document, and then press the Select button...
... the Drivers and Utilities CD to a network, the Scan Mode menu appears. 5. The scan opens on the computer you want to your scan. For Windows Vista: a. c. The Dell All-In-One Center opens. 3. From the Maintenance tab, click Network Support. NOTE: The computer must have the printer software...when scanning across a network. 1. You can view or change the PIN or the name of the computer to which you selected. Click Dell Photo AIO Printer 966. 2. From the Host Selection screen, choose the computer to which you need to send the document, and then press the Select button...
User Guide
Page 122
... text-editing program you have installed at the same time as your computer and printer, and make sure they are connected. 2. c. Click Dell Photo AIO Printer 966. 4. When you downloaded your printer drivers and software from the Dell website, OCR software was provided with your printer and should have OCR software installed on your settings, click Scan Now. Turn...
... text-editing program you have installed at the same time as your computer and printer, and make sure they are connected. 2. c. Click Dell Photo AIO Printer 966. 4. When you downloaded your printer drivers and software from the Dell website, OCR software was provided with your printer and should have OCR software installed on your settings, click Scan Now. Turn...
User Guide
Page 127
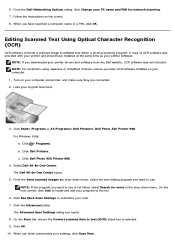
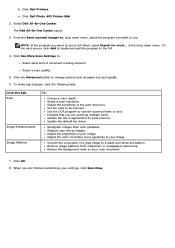
...to the list. 4. Adjust the sensitivity of applications to send scans to change options such as paper size and quality. 6. Click Dell Photo AIO Printer 966. 2. The Dell All-In-One Center opens. 3. To make any changes, click the following tabs: Click this tab: Scan Image Enhancements Image Patterns...the program you are finished customizing your settings, click Scan Now. Click OK. 8. Straighten images after scan (deskew). Click Dell Printers. Update the default fax driver. c. On the next screen, click Add to locate and add the program to use . Set the area to be scanned...
...to the list. 4. Adjust the sensitivity of applications to send scans to change options such as paper size and quality. 6. Click Dell Photo AIO Printer 966. 2. The Dell All-In-One Center opens. 3. To make any changes, click the following tabs: Click this tab: Scan Image Enhancements Image Patterns...the program you are finished customizing your settings, click Scan Now. Click OK. 8. Straighten images after scan (deskew). Click Dell Printers. Update the default fax driver. c. On the next screen, click Add to locate and add the program to use . Set the area to be scanned...


