User Guide
Page 1
...Finding Information Faxing About Your Printer Understanding the Software Understanding the Operator Installing the Dell 966 Internal Panel Menus Wireless/Ethernet Adapter Loading Paper and Originals Maintenance Printing Troubleshooting Printing From a Memory Card or USB Key Specifications Copying Appendix Scanning Licensing Notice Notes... SIG, Inc. Microsoft and Windows are trademarks of data and tells you have the Dell printer Service Tag available. Model 966 www.dell.com/supplies For the best service, make better use of Microsoft Corporation. UNITED STATES GOVERNMENT...
...Finding Information Faxing About Your Printer Understanding the Software Understanding the Operator Installing the Dell 966 Internal Panel Menus Wireless/Ethernet Adapter Loading Paper and Originals Maintenance Printing Troubleshooting Printing From a Memory Card or USB Key Specifications Copying Appendix Scanning Licensing Notice Notes... SIG, Inc. Microsoft and Windows are trademarks of data and tells you have the Dell printer Service Tag available. Model 966 www.dell.com/supplies For the best service, make better use of Microsoft Corporation. UNITED STATES GOVERNMENT...

User Guide
Page 10
...NOTE: One of the questions on the screen asks if there is on your original document. 3. With the file open, click File® Print. Click Dell Photo AIO Printer 966. 4. To send a single-page fax, click Fax Now. Click OK, and then follow the instructions on the screen. Repeat this process... until you to send the same fax to be sent. The Dell All-In-One Center opens. 5. Faxing Electronic Documents 1. Load your screen. Use ...
...NOTE: One of the questions on the screen asks if there is on your original document. 3. With the file open, click File® Print. Click Dell Photo AIO Printer 966. 4. To send a single-page fax, click Fax Now. Click OK, and then follow the instructions on the screen. Repeat this process... until you to send the same fax to be sent. The Dell All-In-One Center opens. 5. Faxing Electronic Documents 1. Load your screen. Use ...
User Guide
Page 13
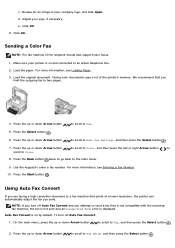
... Fax Convert: 1. Press the up or down Arrow button to scroll to an active telephone line. 2. For more information, see Loading Paper. 3. We recommend that prints at a lower resolution, the printer can automatically adjust the fax you limit the outgoing fax to Color. 8. Using Auto Fax Convert If you are faxing...
... Fax Convert: 1. Press the up or down Arrow button to scroll to an active telephone line. 2. For more information, see Loading Paper. 3. We recommend that prints at a lower resolution, the printer can automatically adjust the fax you limit the outgoing fax to Color. 8. Using Auto Fax Convert If you are faxing...
User Guide
Page 15
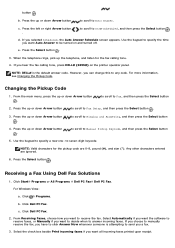
... calling tone. 4. For Windows Vista: a. c. NOTE: DELL# is attempting to receive the fax. Changing the Pickup Code 1. Click ® Programs. b. Select the check box beside Print incoming faxes if you want all incoming faxes printed upon receipt. Use the keypad to specify the time you want...want to send you selected Scheduled, the Auto Answer Schedule screen appears. From Receiving Faxes, choose how you hear the fax calling tone, press DELL# (3355#) on and turned off. button . to scroll to Manual Pickup Keycode, and then press the Select button 5. e. Any other ...
... calling tone. 4. For Windows Vista: a. c. NOTE: DELL# is attempting to receive the fax. Changing the Pickup Code 1. Click ® Programs. b. Select the check box beside Print incoming faxes if you want all incoming faxes printed upon receipt. Use the keypad to specify the time you want...want to send you selected Scheduled, the Auto Answer Schedule screen appears. From Receiving Faxes, choose how you hear the fax calling tone, press DELL# (3355#) on and turned off. button . to scroll to Manual Pickup Keycode, and then press the Select button 5. e. Any other ...
User Guide
Page 16
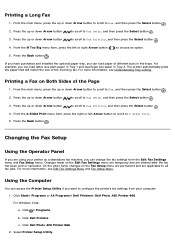
... 2. Changes made on Both Sides of the incoming fax. Click Start® Programs or All Programs® Dell Printers® Dell Photo AIO Printer 966. For example, you are applicable to Fax Printing, and then press the Select button . 4. The printer automatically picks the paper that will match the size...the Edit Fax Settings menu are temporary and are cleared after the fax has been sent or cancelled. Click Dell Photo AIO Printer 966. 2. Press the Back button . From the 2-Sided Print menu item, press the right or left or right Arrow button to Fax, and then press the Select button...
... 2. Changes made on Both Sides of the incoming fax. Click Start® Programs or All Programs® Dell Printers® Dell Photo AIO Printer 966. For example, you are applicable to Fax Printing, and then press the Select button . 4. The printer automatically picks the paper that will match the size...the Edit Fax Settings menu are temporary and are cleared after the fax has been sent or cancelled. Click Dell Photo AIO Printer 966. 2. Press the Back button . From the 2-Sided Print menu item, press the right or left or right Arrow button to Fax, and then press the Select button...

User Guide
Page 17
...Printing/Reports Choose to automatically resize oversize faxes so they print on two pages. Speed Dial Cover Page Add to scale and print...Group Dial List Adding an Entry to print a fax activity report. Specify when...to forward a fax, or print it and then forward it subscribes... Choose whether you want to print a footer (date, time, ... Specify a maximum send speed and a print quality for outgoing faxes. Choose Auto if... manual answer code. Specify when you want to print a fax confirmation. Choose a Caller ID pattern (1...you want to print on your country have a detection...
...Printing/Reports Choose to automatically resize oversize faxes so they print on two pages. Speed Dial Cover Page Add to scale and print...Group Dial List Adding an Entry to print a fax activity report. Specify when...to forward a fax, or print it and then forward it subscribes... Choose whether you want to print a footer (date, time, ... Specify a maximum send speed and a print quality for outgoing faxes. Choose Auto if... manual answer code. Specify when you want to print a fax confirmation. Choose a Caller ID pattern (1...you want to print on your country have a detection...
User Guide
Page 19
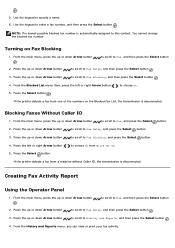
... scroll to Fax Setup, and then press the Select button . 3. to scroll to specify a name. 6. From the History and Reports menu, you can view or print your fax activity. Use the keypad to Fax, and then press the Select button 2. From the main menu, press the up or down Arrow button...
... scroll to Fax Setup, and then press the Select button . 3. to scroll to specify a name. 6. From the History and Reports menu, you can view or print your fax activity. Use the keypad to Fax, and then press the Select button 2. From the main menu, press the up or down Arrow button...
User Guide
Page 20
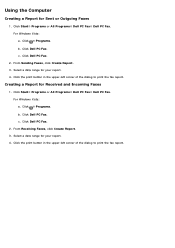
...Received and Incoming Faxes 1. Click Start® Programs or All Programs® Dell PC Fax® Dell PC Fax. Click the print button in the upper-left corner of the dialog to print the fax report. Click Dell PC Fax. 2. Click ® Programs. b. From Receiving Faxes, click ...Report. 3. From Sending Faxes, click Create Report. 3. Click the print button in the upper-left corner of the dialog to print the fax report. For Windows Vista: a. Click Start® Programs or All Programs® Dell PC Fax® Dell PC Fax. c. For Windows Vista: a. Click ® Programs....
...Received and Incoming Faxes 1. Click Start® Programs or All Programs® Dell PC Fax® Dell PC Fax. Click the print button in the upper-left corner of the dialog to print the fax report. Click Dell PC Fax. 2. Click ® Programs. b. From Receiving Faxes, click ...Report. 3. From Sending Faxes, click Create Report. 3. Click the print button in the upper-left corner of the dialog to print the fax report. For Windows Vista: a. Click Start® Programs or All Programs® Dell PC Fax® Dell PC Fax. c. For Windows Vista: a. Click ® Programs....

User Guide
Page 21
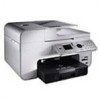
... connected to a computer, you can purchase separately to increase the amount of things. Unit you use to control copying, scanning, faxing, and printing. For more information, see Understanding the Operator Panel. NOTE: Pull the paper exit tray stop straight out to the ink cartridges. About Your Printer... Understanding the Printer Parts Understanding the Operator Panel You can use the Save Photos to Computer function or the Print Files mode. You do a variety of blank paper that holds the paper as it . NOTE: If you lift to gain access to...
... connected to a computer, you can purchase separately to increase the amount of things. Unit you use to control copying, scanning, faxing, and printing. For more information, see Understanding the Operator Panel. NOTE: Pull the paper exit tray stop straight out to the ink cartridges. About Your Printer... Understanding the Printer Parts Understanding the Operator Panel You can use the Save Photos to Computer function or the Print Files mode. You do a variety of blank paper that holds the paper as it . NOTE: If you lift to gain access to...
User Guide
Page 23
... selected modes. Select a menu item. in these countries. 15 USB connector Slot into which you have to remove to print on both sides of the paper. Enter a menu or a submenu. unit 18 Optional Dell 966 A networking device that you plug the USB cable (sold separately). The other end of copies. Turn your printer...
... selected modes. Select a menu item. in these countries. 15 USB connector Slot into which you have to remove to print on both sides of the paper. Enter a menu or a submenu. unit 18 Optional Dell 966 A networking device that you plug the USB cable (sold separately). The other end of copies. Turn your printer...
User Guide
Page 24
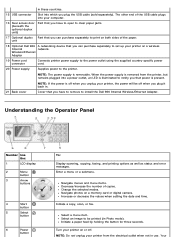
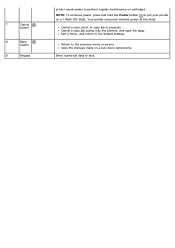
7 Cancel button 8 Back button 9 Keypad printer needs power to perform regular maintenance on a sub-menu temporarily. Cancel a copy job (using only the printer), and eject the page. Your printer consumes minimal power at this state. Cancel a scan, print, or copy job in progress. Enter numerical data or text. Exit a menu, and return to put your printer on a 1 Watt-Off State. Save the changes made on cartridges. NOTE: To conserve power, press and hold the Power button to the default settings. Return to the previous menu or screen.
7 Cancel button 8 Back button 9 Keypad printer needs power to perform regular maintenance on a sub-menu temporarily. Cancel a copy job (using only the printer), and eject the page. Your printer consumes minimal power at this state. Cancel a scan, print, or copy job in progress. Enter numerical data or text. Exit a menu, and return to put your printer on a 1 Watt-Off State. Save the changes made on cartridges. NOTE: To conserve power, press and hold the Power button to the default settings. Return to the previous menu or screen.

User Guide
Page 25
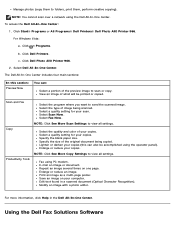
...™- Understanding the Software Using the Dell All-In-One Center Using the Dell Fax Solutions Software Using Printing Preferences Using Memory Card Manager Dell Ink Management System Removing and Reinstalling Software The printer software includes: Dell All-In-One Center- Using the Dell All-In-One Center The Dell All-In-One Center allows you want...
...™- Understanding the Software Using the Dell All-In-One Center Using the Dell Fax Solutions Software Using Printing Preferences Using Memory Card Manager Dell Ink Management System Removing and Reinstalling Software The printer software includes: Dell All-In-One Center- Using the Dell All-In-One Center The Dell All-In-One Center allows you want...
User Guide
Page 26
... creative copying). NOTE: Click See More Scan Settings to view all settings. Print an image as a multi-page poster. Click Start® Programs or All Programs® Dell Printers® Dell Photo AIO Printer 966. For Windows Vista: a. Click Dell Photo AIO Printer 966. 2. Select Scan Now. Enlarge or reduce an image. Edit text found in...
... creative copying). NOTE: Click See More Scan Settings to view all settings. Print an image as a multi-page poster. Click Start® Programs or All Programs® Dell Printers® Dell Photo AIO Printer 966. For Windows Vista: a. Click Dell Photo AIO Printer 966. 2. Select Scan Now. Enlarge or reduce an image. Edit text found in...
User Guide
Page 27
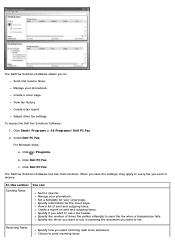
.... In this section: Sending Faxes You can: Send a new fax. View a list of times the printer attempts to be answered. Click Dell PC Fax. When you save the settings, they apply to every fax you want incoming calls to send the fax when a transmission fails. ... you want to fax. Click Start® Programs or All Programs® Dell PC Fax. 2. Select Dell PC Fax. Create a cover page. c. Create a report on sent and outgoing faxes. The Dell Fax Solutions Software allows you to print incoming faxes. For Windows Vista: a. Specify the number of sent and outgoing...
.... In this section: Sending Faxes You can: Send a new fax. View a list of times the printer attempts to be answered. Click Dell PC Fax. When you save the settings, they apply to every fax you want incoming calls to send the fax when a transmission fails. ... you want to fax. Click Start® Programs or All Programs® Dell PC Fax. 2. Select Dell PC Fax. Create a cover page. c. Create a report on sent and outgoing faxes. The Dell Fax Solutions Software allows you to print incoming faxes. For Windows Vista: a. Specify the number of sent and outgoing...

User Guide
Page 28
... Hardware and Sound. b. c. NOTE: Changes made to create. Select Automatic, Draft, Normal, or Photo depending on your printer settings in Printing Preferences depending on the type of rings before a call is open : 1. Set the number of project you click Sending Settings or Received ... Options, or Setup (depending on each tab, and change your desired output quality. Right-click the printer icon, and then select Printing Preferences. Click Printers. 2. In Windows XP, click Start® Settings® Control Panel® Printers and Other Hardware® Printers and...
... Hardware and Sound. b. c. NOTE: Changes made to create. Select Automatic, Draft, Normal, or Photo depending on your printer settings in Printing Preferences depending on the type of rings before a call is open : 1. Set the number of project you click Sending Settings or Received ... Options, or Setup (depending on each tab, and change your desired output quality. Right-click the printer icon, and then select Printing Preferences. Click Printers. 2. In Windows XP, click Start® Settings® Control Panel® Printers and Other Hardware® Printers and...

User Guide
Page 29
... have selected Use Color Cartridge for printing. Print in black and white to display, manage, edit, print, and save the ink in your status in, the Dell Customer Experience Improvement Program. Borderless - The Paper Size area lists the envelope sizes available for all Black Printing. Copies - Customize how the printer prints several copies of your memory...
... have selected Use Color Cartridge for printing. Print in black and white to display, manage, edit, print, and save the ink in your status in, the Dell Customer Experience Improvement Program. Borderless - The Paper Size area lists the envelope sizes available for all Black Printing. Copies - Customize how the printer prints several copies of your memory...
User Guide
Page 30
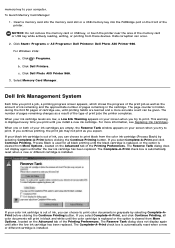
... Memory Card Manager: 1. Click Start® Programs or All Programs® Dell Printers® Dell Photo AIO Printer 966. The number of pages remaining changes as a result of the type of ink, you can choose to print color documents in black and white until you expect. If your black ink ...remove the memory card or USB key, or touch the printer near the area of the printer. Click Dell Photo AIO Printer 966. 3. The Reserve Tank dialog does not display again until printing habits are empty, the Reserve Tank window appears on your computer. Insert a memory card into the ...
... Memory Card Manager: 1. Click Start® Programs or All Programs® Dell Printers® Dell Photo AIO Printer 966. The number of pages remaining changes as a result of the type of ink, you can choose to print color documents in black and white until you expect. If your black ink ...remove the memory card or USB key, or touch the printer near the area of the printer. Click Dell Photo AIO Printer 966. 3. The Reserve Tank dialog does not display again until printing habits are empty, the Reserve Tank window appears on your computer. Insert a memory card into the ...
User Guide
Page 32
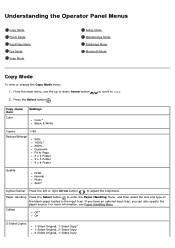
... Off* On 2-Sided Copies 1-Sided Original, 1-Sided Copy* 1-Sided Original, 2-Sided Copy 2-Sided Original, 1-Sided Copy Understanding the Operator Panel Menus Copy Mode Photo Mode Print Files Mode Fax Mode Scan Mode Setup Mode Maintenance Mode PictBridge Mode Bluetooth Mode Copy Mode To view or change the Copy Mode menu: 1. to...
... Off* On 2-Sided Copies 1-Sided Original, 1-Sided Copy* 1-Sided Original, 2-Sided Copy 2-Sided Original, 1-Sided Copy Understanding the Operator Panel Menus Copy Mode Photo Mode Print Files Mode Fax Mode Scan Mode Setup Mode Maintenance Mode PictBridge Mode Bluetooth Mode Copy Mode To view or change the Copy Mode menu: 1. to...

User Guide
Page 34
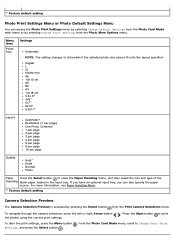
...your camera. NOTE: This item is displayed only if there is accessed by selecting Edit Photo from the Photo More Options menu. Change Print Press the Select button to enter Photo Preview mode. Menu item Settings Brightness Press the left or right Arrow button or Expand option ....access the Photo Edit Mode menu by pressing the Menu button Photo Preview mode. For more information, see Camera Selection Preview. Browse and Print Photos Print All Photos Press the Select button to enter the Photo Default Settings menu. to PC mode. Press the Select button , and then ...
...your camera. NOTE: This item is displayed only if there is accessed by selecting Edit Photo from the Photo More Options menu. Change Print Press the Select button to enter Photo Preview mode. Menu item Settings Brightness Press the left or right Arrow button or Expand option ....access the Photo Edit Mode menu by pressing the Menu button Photo Preview mode. For more information, see Camera Selection Preview. Browse and Print Photos Print All Photos Press the Select button to enter the Photo Default Settings menu. to PC mode. Press the Select button , and then ...
User Guide
Page 35
...page 4 per page 6 per page 8 per page 16 per page Quality Auto* Draft Normal Photo Paper Press the Select button to Change Photo Print Settings, and press the Select button . Press the Start button to Automatic if the selected photo size cannot fit onto the layout specified. * Factory... default setting Photo Print Settings Menu or Photo Default Settings Menu You can also specify the paper source. Menu item Photo Size Settings Automatic NOTE: The setting changes...
...page 4 per page 6 per page 8 per page 16 per page Quality Auto* Draft Normal Photo Paper Press the Select button to Change Photo Print Settings, and press the Select button . Press the Start button to Automatic if the selected photo size cannot fit onto the layout specified. * Factory... default setting Photo Print Settings Menu or Photo Default Settings Menu You can also specify the paper source. Menu item Photo Size Settings Automatic NOTE: The setting changes...


