
User Guide
Page 12
Double-click the CD-ROM drive icon, and then double-click setup.exe. c. d. Understanding the Software b. Follow the instructions on your screen to complete the installation. file:///T|/htdocs/systems/prn948/en/en/d0e8996.html[10/10/2012 11:05:21 AM] When the printer software installation screen appears, click Using a USB cable or Using a wireless network.
Double-click the CD-ROM drive icon, and then double-click setup.exe. c. d. Understanding the Software b. Follow the instructions on your screen to complete the installation. file:///T|/htdocs/systems/prn948/en/en/d0e8996.html[10/10/2012 11:05:21 AM] When the printer software installation screen appears, click Using a USB cable or Using a wireless network.

User Guide
Page 18
... in all regions. Minimum Requirements for Setup Wireless Network Settings Wireless Encryption Installing and Setting Up the Dell Wireless Adapter 1000 Configuring the Adapter Using the Wireless Setup Utility NOTE: The Dell™ Internal Wireless Adapter 1000 may be available in the printer. Wireless Networking Wireless Networking Minimum Requirements for Setup The Dell Internal Wireless Adapter 1000 The Dell All-In-One Printer An existing...
... in all regions. Minimum Requirements for Setup Wireless Network Settings Wireless Encryption Installing and Setting Up the Dell Wireless Adapter 1000 Configuring the Adapter Using the Wireless Setup Utility NOTE: The Dell™ Internal Wireless Adapter 1000 may be available in the printer. Wireless Networking Wireless Networking Minimum Requirements for Setup The Dell Internal Wireless Adapter 1000 The Dell All-In-One Printer An existing...

User Guide
Page 21
...:25 AM] Follow the instructions on your network documentation. Launch the Wireless Setup Utility. Configuring the Adapter Using the Wireless Setup Utility Configuration Overview Configuring the adapter using the Wireless Setup Utility involves connecting the printer in which the adapter has been installed ...license agreement, and then click Next. 7. In Windows Vista: 1. For more information, see Configuring the Adapter Using the Wireless Setup Utility. Connecting the Printer to Another Computer NOTE: To perform the following steps, the printer must already be needed to work...
...:25 AM] Follow the instructions on your network documentation. Launch the Wireless Setup Utility. Configuring the Adapter Using the Wireless Setup Utility Configuration Overview Configuring the adapter using the Wireless Setup Utility involves connecting the printer in which the adapter has been installed ...license agreement, and then click Next. 7. In Windows Vista: 1. For more information, see Configuring the Adapter Using the Wireless Setup Utility. Connecting the Printer to Another Computer NOTE: To perform the following steps, the printer must already be needed to work...
User Guide
Page 22
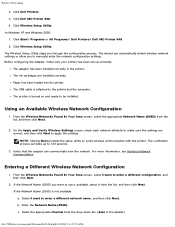
...the printer. The verification process can automatically detect wireless network settings or allow you to enter a different network name, and then click Next. Enter the Network Name (SSID). Click Dell AIO Printer 948. 4. The Wireless Setup Utility steps you want to manually enter the ...network configuration settings. b. Click Dell Printers. 3. From the Wireless Networks Found In Your Area screen, select I want to use ...
...the printer. The verification process can automatically detect wireless network settings or allow you to enter a different network name, and then click Next. Enter the Network Name (SSID). Click Dell AIO Printer 948. 4. The Wireless Setup Utility steps you want to manually enter the ...network configuration settings. b. Click Dell Printers. 3. From the Wireless Networks Found In Your Area screen, select I want to use ...
User Guide
Page 23
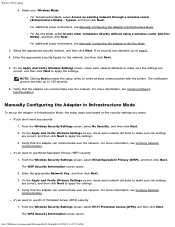
... adapter can take up the adapter in Ad-Hoc Mode. 3. From the Wireless Security Settings screen, select Wi-Fi Protected Access (WPA) and then click Next. NOTE: Clicking Next prompts the setup utility to step 5. 4. Manually Configuring the Adapter in Infrastructure Mode. If you... Network Key, and then click Next. 3. For additional setup instructions, see Manually Configuring the Adapter in Infrastructure Mode, the setup steps vary based on the security settings you want to apply the settings. 3. From the Wireless Security Settings screen, select No Security, and then click...
... adapter can take up the adapter in Ad-Hoc Mode. 3. From the Wireless Security Settings screen, select Wi-Fi Protected Access (WPA) and then click Next. NOTE: Clicking Next prompts the setup utility to step 5. 4. Manually Configuring the Adapter in Infrastructure Mode. If you... Network Key, and then click Next. 3. For additional setup instructions, see Manually Configuring the Adapter in Infrastructure Mode, the setup steps vary based on the security settings you want to apply the settings. 3. From the Wireless Security Settings screen, select No Security, and then click...

User Guide
Page 24
...Enter the appropriate WPA Network Key, and then click Next. 3. The Advanced WPA Options dialog box opens. 2. On the Apply and Verify Wireless Settings screen, check each network attribute to make sure the settings are correct, and then click Next to use Wired Equivalent Privacy (WEP) security... you don't want to connect to apply the settings. 6. Click Next. 5. Wireless Networking 2. If you have additional network keys, select the My network requires more limited in Ad-Hoc Mode, the setup steps vary based on the security settings you select. Select the Use WPA2 authentication ...
...Enter the appropriate WPA Network Key, and then click Next. 3. The Advanced WPA Options dialog box opens. 2. On the Apply and Verify Wireless Settings screen, check each network attribute to make sure the settings are correct, and then click Next to use Wired Equivalent Privacy (WEP) security... you don't want to connect to apply the settings. 6. Click Next. 5. Wireless Networking 2. If you have additional network keys, select the My network requires more limited in Ad-Hoc Mode, the setup steps vary based on the security settings you select. Select the Use WPA2 authentication ...

User Guide
Page 42
... key before the list is removed from the list. *Factory default settings/Current settings selected by user Setup Mode Main Menu Setup Mode Main Menu Paper Setup Device Setup Mode Submenu Paper Size Paper Type Language Country Date/Time Host Fax Settings Button Beep Power Save Clear Settings...USB Bluetooth adapter to save the setting. When the setting you want appears on the printer list of your computer using the Bluetooth wireless specification. Clear Device Remove the names of eight external Bluetooth-enabled devices. NOTE: The name appears on the display, press the ...
... key before the list is removed from the list. *Factory default settings/Current settings selected by user Setup Mode Main Menu Setup Mode Main Menu Paper Setup Device Setup Mode Submenu Paper Size Paper Type Language Country Date/Time Host Fax Settings Button Beep Power Save Clear Settings...USB Bluetooth adapter to save the setting. When the setting you want appears on the printer list of your computer using the Bluetooth wireless specification. Clear Device Remove the names of eight external Bluetooth-enabled devices. NOTE: The name appears on the display, press the ...

User Guide
Page 43
... menu: 1. Use the left and right Arrow buttons . Understanding the Operator Panel Menus Defaults Network Setup Photo Print Size Set Defaults Print Setup Page Wireless Setup TCP/IP Menu Network Time Network Name Wireless Signal Quality Reset Network Adapter to save your settings. From the main menu, use the left and right Arrow buttons Select...
... menu: 1. Use the left and right Arrow buttons . Understanding the Operator Panel Menus Defaults Network Setup Photo Print Size Set Defaults Print Setup Page Wireless Setup TCP/IP Menu Network Time Network Name Wireless Signal Quality Reset Network Adapter to save your settings. From the main menu, use the left and right Arrow buttons Select...

User Guide
Page 44
... your operator panel settings by selecting Device Setup from the Setup menu. Print Setup Page Wireless Setup TCP/IP Menu Network Time For more information, see Network Setup Options. *Factory default setting/Current setting selected by user file:///T|/htdocs/systems/prn948/en/en/d0e648.html[10/10/2012 11...Beep Power Save Clear Settings Timeout Defaults For more information, see Defaults Options. Photo Print Size Set Defaults For more information, see Device Setup Options. On* Off Power Save Specify how much time you want to elapse before the settings list is reset to hear a beep ...
... your operator panel settings by selecting Device Setup from the Setup menu. Print Setup Page Wireless Setup TCP/IP Menu Network Time For more information, see Network Setup Options. *Factory default setting/Current setting selected by user file:///T|/htdocs/systems/prn948/en/en/d0e648.html[10/10/2012 11...Beep Power Save Clear Settings Timeout Defaults For more information, see Defaults Options. Photo Print Size Set Defaults For more information, see Device Setup Options. On* Off Power Save Specify how much time you want to elapse before the settings list is reset to hear a beep ...

User Guide
Page 45
...:28 AM] Use Current Use Factory Network Setup Options You can configure your network setup options by selecting Defaults from the Setup menu. NOTE: You cannot change the value of your photo. Defaults Menu From this menu: Print Setup Page Wireless Setup You can: Print a list of your ...network. View your printer. View the current wireless signal strength. Network Setup Menu From this menu: Photo Print Size Set Defaults You can: Specify the size...
...:28 AM] Use Current Use Factory Network Setup Options You can configure your network setup options by selecting Defaults from the Setup menu. NOTE: You cannot change the value of your photo. Defaults Menu From this menu: Print Setup Page Wireless Setup You can: Print a list of your ...network. View your printer. View the current wireless signal strength. Network Setup Menu From this menu: Photo Print Size Set Defaults You can: Specify the size...

User Guide
Page 74
.... 2. Click ® Control Panel. Double-click the CD-ROM drive icon, and then double-click setup.exe. 4. Click ® Programs. 2. If the printer does not appear in the print queue. ...for multiple instances of printers, the printer software is installed. b. Right-click the Dell 948 icon. 3. file:///T|/htdocs/systems/prn948/en/en/d0e10686.html[10/10/2012 11:05... the printer software installation screen appears, click Using a USB cable or Using a wireless network. 5. Click Dell Printers. Troubleshooting 3. Follow the instructions on the printer. Determine if the printer software...
.... 2. Click ® Control Panel. Double-click the CD-ROM drive icon, and then double-click setup.exe. 4. Click ® Programs. 2. If the printer does not appear in the print queue. ...for multiple instances of printers, the printer software is installed. b. Right-click the Dell 948 icon. 3. file:///T|/htdocs/systems/prn948/en/en/d0e10686.html[10/10/2012 11:05... the printer software installation screen appears, click Using a USB cable or Using a wireless network. 5. Click Dell Printers. Troubleshooting 3. Follow the instructions on the printer. Determine if the printer software...


