
User Guide
Page 3
... paper sizes, types, and weights...70 Paper sizes supported by the printer ...70 Paper types and weights supported by the printer ...72 Software overview 73 Status Monitor Center...73 Driver Profiler...73 Dell Printer Alert Utility...73 Dell Toner Management System...74 Printing Status Window...74 Dell Printer Supplies Reorder Application ...74 Printing 76 Printing a document...76 Printing...
... paper sizes, types, and weights...70 Paper sizes supported by the printer ...70 Paper types and weights supported by the printer ...72 Software overview 73 Status Monitor Center...73 Driver Profiler...73 Dell Printer Alert Utility...73 Dell Toner Management System...74 Printing Status Window...74 Dell Printer Supplies Reorder Application ...74 Printing 76 Printing a document...76 Printing...

User Guide
Page 5
...menu ...123 PPDS menu...125 HTML menu...127 Image menu...128 Help menu...128 Maintaining the printer 129 Cleaning the exterior of the printer...129 Storing supplies...129 Conserving supplies...129 Checking the status of supplies...130 Checking the status of... Printer attached to a network ...130 Printer attached locally to a computer ...130 Replacing supplies...131 Replacing the toner cartridge ...131 Replacing the photoconductor kit ...132 Recycling Dell products...135 Moving the printer...135 Before moving the printer ...135 Moving the printer to another location...135 Shipping the printer ...
...menu ...123 PPDS menu...125 HTML menu...127 Image menu...128 Help menu...128 Maintaining the printer 129 Cleaning the exterior of the printer...129 Storing supplies...129 Conserving supplies...129 Checking the status of supplies...130 Checking the status of... Printer attached to a network ...130 Printer attached locally to a computer ...130 Replacing supplies...131 Replacing the toner cartridge ...131 Replacing the photoconductor kit ...132 Recycling Dell products...135 Moving the printer...135 Before moving the printer ...135 Moving the printer to another location...135 Shipping the printer ...

User Guide
Page 9
Streaked vertical lines ...182 Streaked horizontal lines...183 Toner fog or background shading appears on the page 183 Toner rubs off...184 Toner specks...184 Transparency print quality is poor...185 Uneven print density...185 Contacting Technical Support...185 Appendix 186 Index 188 Contents 9
Streaked vertical lines ...182 Streaked horizontal lines...183 Toner fog or background shading appears on the page 183 Toner rubs off...184 Toner specks...184 Transparency print quality is poor...185 Uneven print density...185 Contacting Technical Support...185 Appendix 186 Index 188 Contents 9

User Guide
Page 67
...grain long paper is recommended. Curl Curl is too rough, then toner cannot fuse to high temperatures. Storing paper unwrapped in hot, humid, cold, or dry conditions, even in the same environment as the printer for paper to 48 hours before printing by storing it in its...may also require a longer conditioning period. Paper and specialty media guidelines 67 Moisture content The amount of the paper. Weight The printer can cause paper feeding or print quality issues. Paper and specialty media guidelines Paper guidelines Paper characteristics The following paper characteristics affect print...
...grain long paper is recommended. Curl Curl is too rough, then toner cannot fuse to high temperatures. Storing paper unwrapped in hot, humid, cold, or dry conditions, even in the same environment as the printer for paper to 48 hours before printing by storing it in its...may also require a longer conditioning period. Paper and specialty media guidelines 67 Moisture content The amount of the paper. Weight The printer can cause paper feeding or print quality issues. Paper and specialty media guidelines Paper guidelines Paper characteristics The following paper characteristics affect print...
User Guide
Page 68
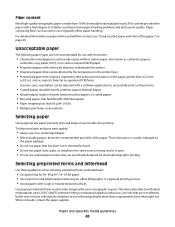
..., or curled papers • Recycled papers that are not affected by hand. • Do not mix paper sizes, types, or weights in toner. This content provides the paper with a high degree of the paper. mixing results in .), such as optical character recognition (OCR) forms In ... hazardous emissions. Fiber content Most high-quality xerographic paper is usually indicated on the paper package. • Do not use in the printer fuser • Preprinted papers that are oxidation-set or oil-based generally meet these guidelines when selecting preprinted forms and letterhead: •...
..., or curled papers • Recycled papers that are not affected by hand. • Do not mix paper sizes, types, or weights in toner. This content provides the paper with a high degree of the paper. mixing results in .), such as optical character recognition (OCR) forms In ... hazardous emissions. Fiber content Most high-quality xerographic paper is usually indicated on the paper package. • Do not use in the printer fuser • Preprinted papers that are oxidation-set or oil-based generally meet these guidelines when selecting preprinted forms and letterhead: •...
User Guide
Page 74
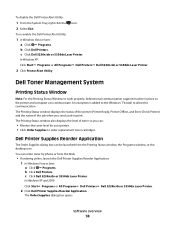
... displays the status of the printer (Printer Ready, Printer Offline, and Error-Check Printer) and the name of toner so you send a job to allow this communication. c Click Dell 5230n/dn or 5350dn Laser Printer. In Windows XP: Click Start Programs or All Programs Dell Printers Dell 5230n/dn or 5350dn Laser Printer. 2 Click Printer Alert Utility. Dell Printer Supplies Reorder Application The...
... displays the status of the printer (Printer Ready, Printer Offline, and Error-Check Printer) and the name of toner so you send a job to allow this communication. c Click Dell 5230n/dn or 5350dn Laser Printer. In Windows XP: Click Start Programs or All Programs Dell Printers Dell 5230n/dn or 5350dn Laser Printer. 2 Click Printer Alert Utility. Dell Printer Supplies Reorder Application The...

User Guide
Page 120
... images. • Both Directions darkens horizontal and vertical lines on text and images. The printer driver default is the factory default setting. • Selecting a smaller number can help conserve toner. Lightens or darkens the printed output Notes: • 8 is 1200 IQ. Adjusts the... gray value of small fonts and graphics Notes: • Off is the factory default setting. Understanding printer menus 120 Description Specifies the printed output ...
... images. • Both Directions darkens horizontal and vertical lines on text and images. The printer driver default is the factory default setting. • Selecting a smaller number can help conserve toner. Lightens or darkens the printed output Notes: • 8 is 1200 IQ. Adjusts the... gray value of small fonts and graphics Notes: • Off is the factory default setting. Understanding printer menus 120 Description Specifies the printed output ...

User Guide
Page 121
...setting. • A negative value will lighten them and conserve toner. Prepares the flash memory to receive new data by installing a flash memory option card in isolating the source of gray. Assists in the printer. Adjusts the degree of difference between levels of gray in hexadecimal...protected or defective. • No cancels the defragment request. • Selecting Yes reformats the flash memory after transferring all downloads to the printer is printed in printed output Notes: • 0 is the factory default setting. • Higher settings show more difference between levels ...
...setting. • A negative value will lighten them and conserve toner. Prepares the flash memory to receive new data by installing a flash memory option card in isolating the source of gray. Assists in the printer. Adjusts the degree of difference between levels of gray in hexadecimal...protected or defective. • No cancels the defragment request. • Selecting Yes reformats the flash memory after transferring all downloads to the printer is printed in printed output Notes: • 0 is the factory default setting. • Higher settings show more difference between levels ...

User Guide
Page 129
...Store supplies right side up in their original packing until you are some settings you conserve toner and paper. CAUTION-SHOCK HAZARD: To avoid the risk of electric shock when cleaning the exterior of the printer, unplug the power cord from the wall outlet. Warning-Potential Damage: Do not use...8226; Corrosive gases • Heavy dust Conserving supplies There are ready to use household cleaners or detergents, as they may cause damage to your printer. 5 Make sure the paper support and standard exit bin are required to include the standard exit bin. If you need to print several ...
...Store supplies right side up in their original packing until you are some settings you conserve toner and paper. CAUTION-SHOCK HAZARD: To avoid the risk of electric shock when cleaning the exterior of the printer, unplug the power cord from the wall outlet. Warning-Potential Damage: Do not use...8226; Corrosive gases • Heavy dust Conserving supplies There are ready to use household cleaners or detergents, as they may cause damage to your printer. 5 Make sure the paper support and standard exit bin are required to include the standard exit bin. If you need to print several ...

User Guide
Page 130
.... The Order Toner Cartridges window opens. 6 Choose your printer from the printer control panel 1 Make sure the printer is required. Ordering supplies Note: All life estimates for printer supplies assume printing on and Ready appears. 2 From the printer control panel, press...Dell Printer Supplies Reorder Application. Maintaining the printer 130 The Device Status page appears, displaying a summary of supplies from the printer drop-down arrow button until View supplies appears, and then press . Printer attached to launch the Dell Configuration Web Tool. 2 Click www.dell...
.... The Order Toner Cartridges window opens. 6 Choose your printer from the printer control panel 1 Make sure the printer is required. Ordering supplies Note: All life estimates for printer supplies assume printing on and Ready appears. 2 From the printer control panel, press...Dell Printer Supplies Reorder Application. Maintaining the printer 130 The Device Status page appears, displaying a summary of supplies from the printer drop-down arrow button until View supplies appears, and then press . Printer attached to launch the Dell Configuration Web Tool. 2 Click www.dell...

User Guide
Page 131
... the button on the base of time. Note: You can cause print quality problems. Maintaining the printer 131 Extended light exposure can check to see approximately how much toner is located inside the front cover of your printer. 8 Click Visit Dell's cartridge ordering website. Note: Your Service Tag number is left side of the...
... the button on the base of time. Note: You can cause print quality problems. Maintaining the printer 131 Extended light exposure can check to see approximately how much toner is located inside the front cover of your printer. 8 Click Visit Dell's cartridge ordering website. Note: Your Service Tag number is left side of the...

User Guide
Page 132
...kit is one item only. The cartridge clicks into place when correctly installed. 6 Close the front door. While the printer may continue to distribute the toner. 5 Install the new toner cartridge by showing 84 PC Kit life warning or 84 Replace PC Kit on the tracks of the photoconductor kit. 4 ... status of -life, print quality significantly decreases. Maintaining the printer 132 When 84 PC Kit life warning or 84 Replace PC Kit first appears, you before the photoconductor kit reaches a page maximum by aligning the rollers on the toner cartridge with the arrows on the display. Push the...
...kit is one item only. The cartridge clicks into place when correctly installed. 6 Close the front door. While the printer may continue to distribute the toner. 5 Install the new toner cartridge by showing 84 PC Kit life warning or 84 Replace PC Kit on the tracks of the photoconductor kit. 4 ... status of -life, print quality significantly decreases. Maintaining the printer 132 When 84 PC Kit life warning or 84 Replace PC Kit first appears, you before the photoconductor kit reaches a page maximum by aligning the rollers on the toner cartridge with the arrows on the display. Push the...

User Guide
Page 133
Place the unit on a flat, clean surface. 3 Press the button on the toner cartridge handle. Pull the toner cartridge up and out using the handle. Note: The photoconductor kit and toner cartridge form a unit. Maintaining the printer 133 1 Open the front door by pressing the button on the left side of the printer and lowering the front door. 2 Pull the photoconductor kit and toner cartridge out of the printer as a unit by pulling on the base of the photoconductor kit.
Place the unit on a flat, clean surface. 3 Press the button on the toner cartridge handle. Pull the toner cartridge up and out using the handle. Note: The photoconductor kit and toner cartridge form a unit. Maintaining the printer 133 1 Open the front door by pressing the button on the left side of the printer and lowering the front door. 2 Pull the photoconductor kit and toner cartridge out of the printer as a unit by pulling on the base of the photoconductor kit.

User Guide
Page 134
... the tracks. Warning-Potential Damage: Resetting the photoconductor counter without replacing the photoconductor may damage your printer and void your warranty. 8 Close the front door. Push the toner cartridge until it will go. 7 After you replace the photoconductor kit, reset the photoconductor counter.... into the photoconductor kit by aligning the arrows on the toner cartridge with the new photoconductor kit. Maintaining the printer 134 Be careful not to touch the photoconductor drum. 5 Insert the toner cartridge into the printer by aligning the rollers on the guides of the unit ...
... the tracks. Warning-Potential Damage: Resetting the photoconductor counter without replacing the photoconductor may damage your printer and void your warranty. 8 Close the front door. Push the toner cartridge until it will go. 7 After you replace the photoconductor kit, reset the photoconductor counter.... into the photoconductor kit by aligning the arrows on the toner cartridge with the new photoconductor kit. Maintaining the printer 134 Be careful not to touch the photoconductor drum. 5 Insert the toner cartridge into the printer by aligning the rollers on the guides of the unit ...

User Guide
Page 137
...in the photoconductor kit, and capacity measurements of certain printer parts. Administrative support Using the Embedded Web Server If the printer is installed on a network, the Embedded Web Server is possible to see tray settings, the level of toner in the toner cartridge, the percentage of life remaining in the ...address field of your Web browser. Note: See your Web browser. To set up e-mail alerts You can have the printer send you an e-mail when the supplies are...
...in the photoconductor kit, and capacity measurements of certain printer parts. Administrative support Using the Embedded Web Server If the printer is installed on a network, the Embedded Web Server is possible to see tray settings, the level of toner in the toner cartridge, the percentage of life remaining in the ...address field of your Web browser. Note: See your Web browser. To set up e-mail alerts You can have the printer send you an e-mail when the supplies are...

User Guide
Page 141
... occurs, a message indicating the jam location appears on the underside of the printer. Jam numbers 200-203, 230 231-239 241-245 250 260 271-279 280-282 283 Area Printer Optional external duplex unit Paper trays Multipurpose feeder Envelope feeder Optional output bins Staple... finisher Staple cartridge 200 paper jam 1 Push the release latch, and then lower the multipurpose feeder door. 2 Push the release latch, and then open the front cover. 4 1 2 3 3 Lift and pull the toner...
... occurs, a message indicating the jam location appears on the underside of the printer. Jam numbers 200-203, 230 231-239 241-245 250 260 271-279 280-282 283 Area Printer Optional external duplex unit Paper trays Multipurpose feeder Envelope feeder Optional output bins Staple... finisher Staple cartridge 200 paper jam 1 Push the release latch, and then lower the multipurpose feeder door. 2 Push the release latch, and then open the front cover. 4 1 2 3 3 Lift and pull the toner...

User Guide
Page 142
... drum on a flat, smooth surface. Use the cartridge handle whenever you are holding the cartridge. To reduce the risk of the printer might be covered with unfused toner which can stain garments and skin. 5 Remove the jammed paper. Note: If the paper is not easy to light for extended... periods. 4 Place the toner cartridge aside on the underside of the printer. Warning-Potential Damage: Do not leave the cartridge exposed to remove, then open the front cover. 4 1 2 3 3 Lift and ...
... drum on a flat, smooth surface. Use the cartridge handle whenever you are holding the cartridge. To reduce the risk of the printer might be covered with unfused toner which can stain garments and skin. 5 Remove the jammed paper. Note: If the paper is not easy to light for extended... periods. 4 Place the toner cartridge aside on the underside of the printer. Warning-Potential Damage: Do not leave the cartridge exposed to remove, then open the front cover. 4 1 2 3 3 Lift and ...

User Guide
Page 143
... the rear door and remove the paper from a hot component, allow the surface to light for extended periods. To reduce the risk of the printer might be covered with unfused toner which can stain garments and skin. 5 Remove the jammed paper. Note: If the paper is exiting the... printer, then pull the paper out, and then press . 4 Place the toner cartridge aside on a flat, smooth surface. Clearing jams 143 Warning-Potential Damage: Do not leave the cartridge exposed to cool before touching. ...
... the rear door and remove the paper from a hot component, allow the surface to light for extended periods. To reduce the risk of the printer might be covered with unfused toner which can stain garments and skin. 5 Remove the jammed paper. Note: If the paper is exiting the... printer, then pull the paper out, and then press . 4 Place the toner cartridge aside on a flat, smooth surface. Clearing jams 143 Warning-Potential Damage: Do not leave the cartridge exposed to cool before touching. ...

User Guide
Page 149
Note: If you cannot remove the envelope, then the toner cartridge will have to loosen them, and then fan them. Straighten the edges on page 141. 4 Reinstall the envelope feeder. For more information, see "200 ... of the stack. 2 Flex the sheets of paper back and forth to be pulled out, lift the envelope feeder up and then out of the printer, and then set it lightly rests against the edge of the paper. 5 Press . 260 paper jam The envelope feeder feeds envelopes from the...
Note: If you cannot remove the envelope, then the toner cartridge will have to loosen them, and then fan them. Straighten the edges on page 141. 4 Reinstall the envelope feeder. For more information, see "200 ... of the stack. 2 Flex the sheets of paper back and forth to be pulled out, lift the envelope feeder up and then out of the printer, and then set it lightly rests against the edge of the paper. 5 Press . 260 paper jam The envelope feeder feeds envelopes from the...

User Guide
Page 162
... a supported one. 30.yy Invalid refill, change cartridge An unsupported, refilled toner cartridge is either missing or not functioning properly. Remove paper from the specified bin. The printer automatically senses paper removal and resumes printing. Remove paper from standard output bin Remove... the stack of the following: • Remove the toner cartridge, and then reinstall it. • Remove the toner cartridge, and then install a new ...
... a supported one. 30.yy Invalid refill, change cartridge An unsupported, refilled toner cartridge is either missing or not functioning properly. Remove paper from the specified bin. The printer automatically senses paper removal and resumes printing. Remove paper from standard output bin Remove... the stack of the following: • Remove the toner cartridge, and then reinstall it. • Remove the toner cartridge, and then install a new ...


