

Service Manual
Page 107
... from the right and left hinge. A 3. The lower front cover removal is to step 3 is the same for all models. Note: The picture below shows the E260d, E260dn printer. Note: An alternative to remove the front access door, and remove the three screws from the right door mount. Lower front cover removal...
... from the right and left hinge. A 3. The lower front cover removal is to step 3 is the same for all models. Note: The picture below shows the E260d, E260dn printer. Note: An alternative to remove the front access door, and remove the three screws from the right door mount. Lower front cover removal...

Service Manual
Page 115
The manual feed clutch removal is the same for all models. Note: The picture below shows the E260d, E260dn printer. C 7. D Repair information 4-33 Remove the manual feed clutch (D). 6. Use a screwdriver to remove the e-clip (C) from the manual feed clutch.
The manual feed clutch removal is the same for all models. Note: The picture below shows the E260d, E260dn printer. C 7. D Repair information 4-33 Remove the manual feed clutch (D). 6. Use a screwdriver to remove the e-clip (C) from the manual feed clutch.

Service Manual
Page 116
See "Left side cover removal" on its right side. Remove the two screws (A). The manual feed solenoid removal is the same for all models. Manual feed solenoid removal 1. Note: The picture below shows the E260d, E260dn printer. A 4-34 Remove the duplex. Open the front access door, and place the printer on page 4-23. 2. See "Duplex removal" on page 4-11. 3. Remove the right side cover. Note: Be careful to not mar the finish of the printer. 4.
See "Left side cover removal" on its right side. Remove the two screws (A). The manual feed solenoid removal is the same for all models. Manual feed solenoid removal 1. Note: The picture below shows the E260d, E260dn printer. A 4-34 Remove the duplex. Open the front access door, and place the printer on page 4-23. 2. See "Duplex removal" on page 4-11. 3. Remove the right side cover. Note: Be careful to not mar the finish of the printer. 4.

Service Manual
Page 128
Close the front access door, and pull up on the MPF by the steel shaft until the MPF lifts from the lower front cover. 4-46 The multipurpose feeder removal is the same for all models. 6. Disconnect the MPF from its hinges. 5. Note: The picture below shows the E460dn, E460dw printer.
Close the front access door, and pull up on the MPF by the steel shaft until the MPF lifts from the lower front cover. 4-46 The multipurpose feeder removal is the same for all models. 6. Disconnect the MPF from its hinges. 5. Note: The picture below shows the E460dn, E460dw printer.

Service Manual
Page 132
The nameplate removal is the same for all models. Open the front access door. 2. A 3. Remove the nameplate. 4-50 Nameplate removal 1. Note: The picture below shows the E260d, E260dn printer. Remove the three screws (A).
The nameplate removal is the same for all models. Open the front access door. 2. A 3. Remove the nameplate. 4-50 Nameplate removal 1. Note: The picture below shows the E260d, E260dn printer. Remove the three screws (A).
Service Manual
Page 155
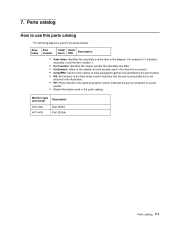
Machine type and model Description 4513-420 4513-430 Dell 2330d Dell 2330dn Parts catalog 7-1 7. For example 3-1 indicates assembly 3 and the item number 1. • Part number: identifies the unique number that the part is procurable but is not pictured in the illustration. • PP: (Parts Packet) in the parts description column indicates the part is...
Machine type and model Description 4513-420 4513-430 Dell 2330d Dell 2330dn Parts catalog 7-1 7. For example 3-1 indicates assembly 3 and the item number 1. • Part number: identifies the unique number that the part is procurable but is not pictured in the illustration. • PP: (Parts Packet) in the parts description column indicates the part is...