
Owners Manual
Page 8
... the Printer Software Software Overview 31 Installing Dell Software For Local Printing 32 Windows XP 32 Windows 2000 33 Windows 98 33 Windows Me 34 Assigning an IP Address 34 Installing Dell Software For Network Printing 35 Uninstalling Software 36 3 Loading Print Media Print Media Guidelines 37 Loading Paper 40 Using the Paper Tray 40 Using...
... the Printer Software Software Overview 31 Installing Dell Software For Local Printing 32 Windows XP 32 Windows 2000 33 Windows 98 33 Windows Me 34 Assigning an IP Address 34 Installing Dell Software For Network Printing 35 Uninstalling Software 36 3 Loading Print Media Print Media Guidelines 37 Loading Paper 40 Using the Paper Tray 40 Using...
Owners Manual
Page 9
... Multi-Function Printer Printing 51 Printing in Windows 51 Printing in Macintosh 51 Printing in Linux 51 Printing from the USB Memory Key 52 Copying 52 Knowing the Copy Menu 52 Setting the Basic Copy Options 52 Making Copies 54 Special Copy Features 54 Selecting a Paper Tray 55 Printing Copies... on Both Sides of Paper 55 Changing the Default Settings 56 Scanning 57 Knowing the Scan Menu 58 Scanning to an Application 58 Scanning Using...
... Multi-Function Printer Printing 51 Printing in Windows 51 Printing in Macintosh 51 Printing in Linux 51 Printing from the USB Memory Key 52 Copying 52 Knowing the Copy Menu 52 Setting the Basic Copy Options 52 Making Copies 54 Special Copy Features 54 Selecting a Paper Tray 55 Printing Copies... on Both Sides of Paper 55 Changing the Default Settings 56 Scanning 57 Knowing the Scan Menu 58 Scanning to an Application 58 Scanning Using...

Owners Manual
Page 37
... 355.6 mm) 7.25 x 10.5 in . NOTE: If you can select from the paper size menu and supported weights. indicates Support Print Media Size A4 A5 A6 JIS B5 ISO B5 Letter Legal Executive Oficio Folio (tray 1 and optional tray 2) 8.27 x 11.7 in . Y Y (216 x 330 mm) Duplex Printing Y...mm) 6.93 x 9.84 in . Y Y (176 x 250 mm) 8.5 x 11 in . Y Y (184.2 x 266.7 mm) 8.5 x 13.5 in . Print Media Sizes and Support Legend Dimensions Paper Tray Bypass Tray Y- Y Y (215.9 x 279.4 mm) 8.5 x 14 in . Y Y (216 x 343 mm) 8.5 x 13 in . Y Y (210 x 297 mm) 5.83 x 8.27 in . ...
... 355.6 mm) 7.25 x 10.5 in . NOTE: If you can select from the paper size menu and supported weights. indicates Support Print Media Size A4 A5 A6 JIS B5 ISO B5 Letter Legal Executive Oficio Folio (tray 1 and optional tray 2) 8.27 x 11.7 in . Y Y (216 x 330 mm) Duplex Printing Y...mm) 6.93 x 9.84 in . Y Y (176 x 250 mm) 8.5 x 11 in . Y Y (184.2 x 266.7 mm) 8.5 x 13.5 in . Print Media Sizes and Support Legend Dimensions Paper Tray Bypass Tray Y- Y Y (215.9 x 279.4 mm) 8.5 x 14 in . Y Y (216 x 343 mm) 8.5 x 13 in . Y Y (210 x 297 mm) 5.83 x 8.27 in . ...

Owners Manual
Page 38
... Loading Print Media Legend Y- indicates Support Print Media Size Envelope 7-3/4 (Monarch) Envelope COM-10 Envelope DL Envelope C5 Envelope C6 Custom Dimensions Paper Tray (tray 1 and optional tray 2) 3.875 x 7.5 in. - (98.4 x 190.5 mm) 4.12 x 9.5 in. - (105 x 241 mm) 4.33 x 8.66 in. - (110 x 220 mm) 6.38 x 9.01 in. - (162 x 229 mm) 4.49 x 6.38 in. - (...
... Loading Print Media Legend Y- indicates Support Print Media Size Envelope 7-3/4 (Monarch) Envelope COM-10 Envelope DL Envelope C5 Envelope C6 Custom Dimensions Paper Tray (tray 1 and optional tray 2) 3.875 x 7.5 in. - (98.4 x 190.5 mm) 4.12 x 9.5 in. - (105 x 241 mm) 4.33 x 8.66 in. - (110 x 220 mm) 6.38 x 9.01 in. - (162 x 229 mm) 4.49 x 6.38 in. - (...

Owners Manual
Page 40
To load paper: 1 Pull open the paper tray and remove it from the printer. 2 If you load paper that is longer than a standard (Letter or A4) size, such as Legal paper, press and unlatch the guide lock, and then slide the paper length guide out completely to extend the paper tray to 250 sheets of plain paper (75 g/m2, 20 lb...
To load paper: 1 Pull open the paper tray and remove it from the printer. 2 If you load paper that is longer than a standard (Letter or A4) size, such as Legal paper, press and unlatch the guide lock, and then slide the paper length guide out completely to extend the paper tray to 250 sheets of plain paper (75 g/m2, 20 lb...

Owners Manual
Page 41
Do not fold or crease the print media. NOTE: Overloading the paper tray may cause paper jams. Loading Print Media 41 3 Flex the sheets back and forth to be printed on, facing down. 5 Do not exceed the maximum stack height indicated by the paper limit marks on a level surface. 4 Insert the paper stack into the paper tray with the side to loosen them, and then fan them out. Align the edges on the both inside walls of the tray.
Do not fold or crease the print media. NOTE: Overloading the paper tray may cause paper jams. Loading Print Media 41 3 Flex the sheets back and forth to be printed on, facing down. 5 Do not exceed the maximum stack height indicated by the paper limit marks on a level surface. 4 Insert the paper stack into the paper tray with the side to loosen them, and then fan them out. Align the edges on the both inside walls of the tray.
Owners Manual
Page 43
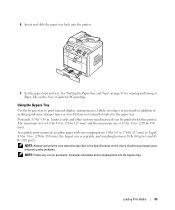
... and Type" on page 47 for copying and faxing or Paper Tab on postcards, envelopes and labels before loading them into the printer. 9 Set the paper type and size. The minimum size is 3.0 by 5.0 in. (76 by 127 mm) and the maximum size is 8.5 by 356 mm). ...PC-printing. Acceptable print materials are not currently loaded in . (216 by 14 in the paper tray. Loading Print Media 43 8 Insert and slide the paper tray back into the bypass tray. Using the Bypass Tray Use the bypass tray to print manual duplex, transparencies, labels, envelopes or postcards in addition to Legal, 8.5 ...
... and Type" on page 47 for copying and faxing or Paper Tab on postcards, envelopes and labels before loading them into the printer. 9 Set the paper type and size. The minimum size is 3.0 by 5.0 in. (76 by 127 mm) and the maximum size is 8.5 by 356 mm). ...PC-printing. Acceptable print materials are not currently loaded in . (216 by 14 in the paper tray. Loading Print Media 43 8 Insert and slide the paper tray back into the bypass tray. Using the Bypass Tray Use the bypass tray to print manual duplex, transparencies, labels, envelopes or postcards in addition to Legal, 8.5 ...

Owners Manual
Page 46
... up to: 250 sheets of plain paper in the paper tray 5 sheets of transparency in the • The transparency is designed for use with laser printers. tray 5 sheets of card stock in the bypass tray • The card stock is designed for use with laser printers. • The thickness should not ... 0.025 inches. 5 sheets of envelope in the bypass tray Make sure: The paper is designed for use with laser printers. • The stamp location is in the bypass The label is designed for use with laser printers. bypass tray • The rough side faces you print on transparencies....
... up to: 250 sheets of plain paper in the paper tray 5 sheets of transparency in the • The transparency is designed for use with laser printers. tray 5 sheets of card stock in the bypass tray • The card stock is designed for use with laser printers. • The thickness should not ... 0.025 inches. 5 sheets of envelope in the bypass tray Make sure: The paper is designed for use with laser printers. • The stamp location is in the bypass The label is designed for use with laser printers. bypass tray • The rough side faces you print on transparencies....

Owners Manual
Page 47
...paper the printer output trays can hold: Output Location front output tray (face down) rear output slot (face up to Fax and Copy modes. This setting will apply to : Make sure: 5 sheets of paper Setting the Paper Size and Type Setting the Paper Size After loading paper in the paper tray or the bypass tray... load up ) Capacity 150 sheets of plain paper 1 sheet of custom sized paper Your paper size should fit within these dimensions: in the bypass tray Width Length 3.0-8.5 in. (76-216 mm) 5.0-14.0 in. (127-356 mm) Your printer has two output locations; This setting will apply...
...paper the printer output trays can hold: Output Location front output tray (face down) rear output slot (face up to Fax and Copy modes. This setting will apply to : Make sure: 5 sheets of paper Setting the Paper Size and Type Setting the Paper Size After loading paper in the paper tray or the bypass tray... load up ) Capacity 150 sheets of plain paper 1 sheet of custom sized paper Your paper size should fit within these dimensions: in the bypass tray Width Length 3.0-8.5 in. (76-216 mm) 5.0-14.0 in. (127-356 mm) Your printer has two output locations; This setting will apply...

Owners Manual
Page 55
...Scroll ( or ) to select the paper tray you have to highlight Duplex and press Select ( ). Selecting a Paper Tray After loading the print media for copy output, you will not appear on the printout. Using Your Multi-Function Printer 55 ID Copying (available via scanner glass... only): Prints an image onto nine sheets of paper. This is larger than the printable area. NOTE: The copy job is scanned and printed one...
...Scroll ( or ) to select the paper tray you have to highlight Duplex and press Select ( ). Selecting a Paper Tray After loading the print media for copy output, you will not appear on the printout. Using Your Multi-Function Printer 55 ID Copying (available via scanner glass... only): Prints an image onto nine sheets of paper. This is larger than the printable area. NOTE: The copy job is scanned and printed one...
Owners Manual
Page 69
... more pages. The available options are On or Off. • Auto Reduction: When receiving a document as long as or longer than the paper loaded in the paper tray, the printer can reduce the size of the document to fit the size of redial attempts, 1-13. • MSG Confirm: You can set to Off..., the printer cannot reduce the document to fit onto one telephone line with an answering machine. picking up the handset of the extension phone ...
... more pages. The available options are On or Off. • Auto Reduction: When receiving a document as long as or longer than the paper loaded in the paper tray, the printer can reduce the size of the document to fit the size of redial attempts, 1-13. • MSG Confirm: You can set to Off..., the printer cannot reduce the document to fit onto one telephone line with an answering machine. picking up the handset of the extension phone ...
Owners Manual
Page 70
...are in Standby mode and that a delayed fax is set the printer to discard any excess at the actual size. • Discard Size: When receiving a document as long as or longer than the paper loaded in the paper tray, you can set . • Priority Fax: Send a ...high priority document ahead of reserved operations. • Cancel Job: Delete/cancel a scheduled fax job. • Ignore Toner: Set to print the incomming fax stored in memory when toner cartridge is nearly empty. A second broadcast operation is not permitted until the first one...
...are in Standby mode and that a delayed fax is set the printer to discard any excess at the actual size. • Discard Size: When receiving a document as long as or longer than the paper loaded in the paper tray, you can set . • Priority Fax: Send a ...high priority document ahead of reserved operations. • Cancel Job: Delete/cancel a scheduled fax job. • Ignore Toner: Set to print the incomming fax stored in memory when toner cartridge is nearly empty. A second broadcast operation is not permitted until the first one...

Owners Manual
Page 82
... cover and white sheet until toner particles are streaks or spots on your selection. The printer prints out a cleaning page. 3 Wipe the surface of the scanner glass and ADF glass until it is loaded in the paper tray. 2 Press Scroll ( or ) to highlight Menu and press Select ( ). 3 Press ...Scroll ( or ) to highlight Maintenance and press Select ( ). The first available menu item, Clean Drum, displays on the drum surface are affixed to the paper. 82 Maintenance Cleaning the Drum...
... cover and white sheet until toner particles are streaks or spots on your selection. The printer prints out a cleaning page. 3 Wipe the surface of the scanner glass and ADF glass until it is loaded in the paper tray. 2 Press Scroll ( or ) to highlight Menu and press Select ( ). 3 Press ...Scroll ( or ) to highlight Maintenance and press Select ( ). The first available menu item, Clean Drum, displays on the drum surface are affixed to the paper. 82 Maintenance Cleaning the Drum...

Owners Manual
Page 85
... display. Troubleshooting 85 The jammed paper automatically exits the printer. Follow the steps below to clear the jam. If the paper does not exit, go to Paper Jam 0 Open Front Door Paper Jam 1 Cartridge Area Pager Jam 2 Open Rear Door Paper Feed Jam (tray 1) Paper Feed Jam (optional tray 2) Bypass Tray Jam Fuser Area Jam Paper Exit Jam page 85, page...
... display. Troubleshooting 85 The jammed paper automatically exits the printer. Follow the steps below to clear the jam. If the paper does not exit, go to Paper Jam 0 Open Front Door Paper Jam 1 Cartridge Area Pager Jam 2 Open Rear Door Paper Feed Jam (tray 1) Paper Feed Jam (optional tray 2) Bypass Tray Jam Fuser Area Jam Paper Exit Jam page 85, page...

Owners Manual
Page 86
If you cannot see the paper in this area or the paper does not move when pulled, check the fuser area. Printing automatically resumes. Paper Feed Jam (optional tray 2) 1 Pull the optional tray 2 open. 2 Remove the jammed paper from the printer. 3 Remove the jammed paper by gently pulling it snaps into place. If you cannot see "Fuser Area Jam" on page 88. 4 Insert the paper tray into the printer until it straight out. For more information, see the paper or the paper does not move when pulled, go to the next step. 3 Pull the tray 1 half way out. 86 Troubleshooting
If you cannot see the paper in this area or the paper does not move when pulled, check the fuser area. Printing automatically resumes. Paper Feed Jam (optional tray 2) 1 Pull the optional tray 2 open. 2 Remove the jammed paper from the printer. 3 Remove the jammed paper by gently pulling it snaps into place. If you cannot see "Fuser Area Jam" on page 88. 4 Insert the paper tray into the printer until it straight out. For more information, see the paper or the paper does not move when pulled, go to the next step. 3 Pull the tray 1 half way out. 86 Troubleshooting

Owners Manual
Page 94
...outlined in "Clearing Jams in the Paper Paths" on page 85. • Follow the procedures in "Loading Paper" on the inside wall of the paper tray. • Do not remove the paper from the tray while your printer is printing. • Flex, fan and straighten the paper before loading. • Do ...not use creased, damp or curled paper. • Do not mix paper types in the paper tray. • ...
...outlined in "Clearing Jams in the Paper Paths" on page 85. • Follow the procedures in "Loading Paper" on the inside wall of the paper tray. • Do not remove the paper from the tray while your printer is printing. • Flex, fan and straighten the paper before loading. • Do ...not use creased, damp or curled paper. • Do not mix paper types in the paper tray. • ...

Owners Manual
Page 99
For information about loading paper in the optional tray 2. Installing Options 99 4 Place the printer over the optional tray 2, aligning the feet on the printer with the positioners in the optional tray 2. 5 Connect the cable into the connector on the back of the printer. 6 Load paper in this tray, see "Using the Paper Tray" on page 40. 7 Reconnect the power cord and printer cable, and turn the printer on.
For information about loading paper in the optional tray 2. Installing Options 99 4 Place the printer over the optional tray 2, aligning the feet on the printer with the positioners in the optional tray 2. 5 Connect the cable into the connector on the back of the printer. 6 Load paper in this tray, see "Using the Paper Tray" on page 40. 7 Reconnect the power cord and printer cable, and turn the printer on.

User's Guide
Page 5
...a dry cloth and wash your clothing in copying and faxing, or "Paper Tab" for PC-printing. Holding the toner cartridge by the handle, slide it into place. 4. To load paper: 1. Hot water sets toner into the paper tray. Use the handle on the cartridge to 250 sheets of the toner... cartridge. Close the front cover. CAUTION: Do not touch the green underside of plain paper (75 g/m2, 20lb) in the paper tray. Pull open the paper tray and remove it locks firmly into the printer until it from the printer. Loading Paper Load up to avoid touching this area. 3. See "Setting the...
...a dry cloth and wash your clothing in copying and faxing, or "Paper Tab" for PC-printing. Holding the toner cartridge by the handle, slide it into place. 4. To load paper: 1. Hot water sets toner into the paper tray. Use the handle on the cartridge to 250 sheets of the toner... cartridge. Close the front cover. CAUTION: Do not touch the green underside of plain paper (75 g/m2, 20lb) in the paper tray. Pull open the paper tray and remove it locks firmly into the printer until it from the printer. Loading Paper Load up to avoid touching this area. 3. See "Setting the...

User's Guide
Page 6
... guide so that is longer than a standard (Letter or A4) size, such as Legal paper, press and unlatch the guide lock, and then slide the paper length guide out completely to extend the paper tray to loosen them, and then fan them out. Do not fold or crease the print media. Do not exceed...
... guide so that is longer than a standard (Letter or A4) size, such as Legal paper, press and unlatch the guide lock, and then slide the paper length guide out completely to extend the paper tray to loosen them, and then fan them out. Do not fold or crease the print media. Do not exceed...

User's Guide
Page 7
... the stack. See "Setting the Paper Type" and "Setting the Paper Size". Insert and slide the paper tray back into an active wall jack. Plug one end of a telephone line cord into the telephone line socket (Line) and the other end into the printer. 9. NOTE: For additional information, refer to your printer is not blocked with the...
... the stack. See "Setting the Paper Type" and "Setting the Paper Size". Insert and slide the paper tray back into an active wall jack. Plug one end of a telephone line cord into the telephone line socket (Line) and the other end into the printer. 9. NOTE: For additional information, refer to your printer is not blocked with the...


