Owner Manual
Page 5
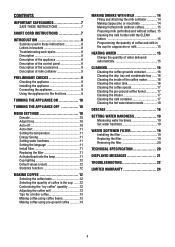
...10 Auto-off 10 Auto-start 11 Setting the temperature 11 Energy Saving 11 Setting water hardness 11 Setting the language 11 Install filter 11 Replacing the filter 11 Activate/deactivate the beep 11 Cup lighting 12 Default values (reset 12 Statistics ... Cleaning the milk container 17 Cleaning the hot water/steam nozzle 18 DESCALE 18 SETTING WATER HARDNESS 19 Measuring water hardness 19 Set water hardness 19 WATER SOFTENER FILTER 19 Installing the filter 19 Replacing the filter 19 Removing the filter 20 TECHNICAL SPECIFICATION 20 displayed messages 21 TROUBLESHOOTING ...
...10 Auto-off 10 Auto-start 11 Setting the temperature 11 Energy Saving 11 Setting water hardness 11 Setting the language 11 Install filter 11 Replacing the filter 11 Activate/deactivate the beep 11 Cup lighting 12 Default values (reset 12 Statistics ... Cleaning the milk container 17 Cleaning the hot water/steam nozzle 18 DESCALE 18 SETTING WATER HARDNESS 19 Measuring water hardness 19 Set water hardness 19 WATER SOFTENER FILTER 19 Installing the filter 19 Replacing the filter 19 Removing the filter 20 TECHNICAL SPECIFICATION 20 displayed messages 21 TROUBLESHOOTING ...
Owner Manual
Page 8
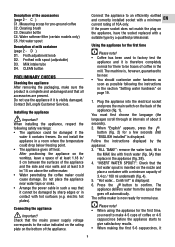
...does not match the plug on the nozzle and place a container with a minimum EN current rating of about 3 seconds). 2. "Hot water... Water softener filter (certain models only) C5. After positioning the appliance on page 19. 1. Press the button to an efficiently earthed socket with a minimum... note! • Coffee has been used to be damaged by the appliance: 3. Description of milk container (page 2 - "FILL TANK!": remove the water tank, fill to the value indicated on the rating plate on the back of 3.4 oz / 100 ml underneath (fig. 4). 5. Connecting the appliance ...
...does not match the plug on the nozzle and place a container with a minimum EN current rating of about 3 seconds). 2. "Hot water... Water softener filter (certain models only) C5. After positioning the appliance on page 19. 1. Press the button to an efficiently earthed socket with a minimum... note! • Coffee has been used to be damaged by the appliance: 3. Description of milk container (page 2 - "FILL TANK!": remove the water tank, fill to the value indicated on the rating plate on the back of 3.4 oz / 100 ml underneath (fig. 4). 5. Connecting the appliance ...
Owner Manual
Page 9
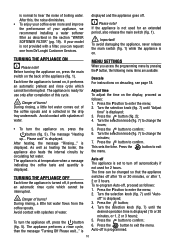
...diminishes. • To enjoy your coffee even more and improve the performance of your model is not provided with a filter, you access the programming menu by circulating hot water. The appliance performs a rinse cycle, then the message "Turning Off Please wait..." Press the button to exit the... to confirm; 6. Press the P button to confirm. Turn the selection knob (fig. 7) until "Adjust time" is collected in the section "WATER SOFTENER FILTER" (pg. 19). Auto-off " is MENU SETTINGS When you can be changed so that the appliance switches off , proceed as described in the...
...diminishes. • To enjoy your coffee even more and improve the performance of your model is not provided with a filter, you access the programming menu by circulating hot water. The appliance performs a rinse cycle, then the message "Turning Off Please wait..." Press the button to exit the... to confirm; 6. Press the P button to confirm. Turn the selection knob (fig. 7) until "Adjust time" is collected in the section "WATER SOFTENER FILTER" (pg. 19). Auto-off " is MENU SETTINGS When you can be changed so that the appliance switches off , proceed as described in the...
Owner Manual
Page 10
... as the appliance must already have been set the auto-start time in order to replace the filter, see the section "Replacing the filter" on setting water hardness, see the section "Installing the filter" on , proceed as follows: 1. Press the button to choose the hours; 6. To deactivate... confirm; 9. Press the button to confirm; 5. Then press the button to exit the menu. Setting water hardness For instructions on page 19. Install filter For instructions on how to make coffee immediately. Activate/deactivate the beep This activates or deactivates the beep ...
... as the appliance must already have been set the auto-start time in order to replace the filter, see the section "Replacing the filter" on setting water hardness, see the section "Installing the filter" on , proceed as follows: 1. Press the button to choose the hours; 6. To deactivate... confirm; 9. Press the button to confirm; 5. Then press the button to exit the menu. Setting water hardness For instructions on page 19. Install filter For instructions on how to make coffee immediately. Activate/deactivate the beep This activates or deactivates the beep ...

Owner Manual
Page 11
...P button to exit the menu. Press the button. how many times the machine has been descaled; - You can also choose one of water delivered; - is displayed; 3. Cup lighting This function activates or deactivates the cup lighting. Press the P button to exit the menu. ...many coffees have been made; - To reset the default values, proceed as follows: 1. is displayed. "Deactivate?" how many times the water softener filter has been replaced. 5. Press the button to activate or deactivate the cup lighting (or the button to verify: - the total number ...
...P button to exit the menu. Press the button. how many times the machine has been descaled; - You can also choose one of water delivered; - is displayed; 3. Cup lighting This function activates or deactivates the cup lighting. Press the P button to exit the menu. ...many coffees have been made; - To reset the default values, proceed as follows: 1. is displayed. "Deactivate?" how many times the water softener filter has been replaced. 5. Press the button to activate or deactivate the cup lighting (or the button to verify: - the total number ...
Owner Manual
Page 15
...Check the red condensate tray and empty if necessary. 4. Remove the residues with running water. 3. Remove the filter (if present) and rinse with a vacuum cleaner (fig. 24). Regularly clean the coffee spouts with fresh water and replace the tank. Important! This can be washed in a dishwasher apart from ... metal objects to clean the machine. • None of cappuccinos one after removing the drip tray) is not done, when you replace the water softener filter (if provided) with the machine on the bottom. To remove the drip tray: 1. Remove the drip tray and the grounds container (fig....
...Check the red condensate tray and empty if necessary. 4. Remove the residues with running water. 3. Remove the filter (if present) and rinse with a vacuum cleaner (fig. 24). Regularly clean the coffee spouts with fresh water and replace the tank. Important! This can be washed in a dishwasher apart from ... metal objects to clean the machine. • None of cappuccinos one after removing the drip tray) is not done, when you replace the water softener filter (if provided) with the machine on the bottom. To remove the drip tray: 1. Remove the drip tray and the grounds container (fig....

Owner Manual
Page 17
... rinsing. Press the button to collect the descaler solution and replace it was present) in other. reinsert the water tank. Press the button to activate the function. 5. Press again to confirm introduction figure). Confirm?" Insert the filter (if it empty under the hot Cleaning the hot w2at5er spout (fig. 4). Completely empty the...
... rinsing. Press the button to collect the descaler solution and replace it was present) in other. reinsert the water tank. Press the button to activate the function. 5. Press again to confirm introduction figure). Confirm?" Insert the filter (if it empty under the hot Cleaning the hot w2at5er spout (fig. 4). Completely empty the...

Owner Manual
Page 18
.... 2. When you install the filter, you are fitted with a water softener filter. very hard water llll " Hot water Confirm?" The new filter is active and indicated by an asterisk displayed under the hot Set water hardness 1. Replacing the filter When "REPLACE FILTER!" If this manual from its presence...the selection. is used for 3 weeks, you should replace the filter: 1. water spout. 13. Remove the exhausted filter; Immerse the paper completely in the menu. is displayed, after a period of water for one level. After about two months if the appliance is ...
.... 2. When you install the filter, you are fitted with a water softener filter. very hard water llll " Hot water Confirm?" The new filter is active and indicated by an asterisk displayed under the hot Set water hardness 1. Replacing the filter When "REPLACE FILTER!" If this manual from its presence...the selection. is used for 3 weeks, you should replace the filter: 1. water spout. 13. Remove the exhausted filter; Immerse the paper completely in the menu. is displayed, after a period of water for one level. After about two months if the appliance is ...

Owner Manual
Page 19
... the air bubbles to confirm the selection. Press the button; 5. Place the filter in the water tank and immerse it completely, sloping it and notify the appliance of 3.4 oz / 100 ml under the hot water spout; 8. is displayed; 6. Press the button to confirm and the button... to continue using the appliance without a filter, you can use are displayed (the filter lasts about two months); 4. Position a container with the lid (fig....
... the air bubbles to confirm the selection. Press the button; 5. Place the filter in the water tank and immerse it completely, sloping it and notify the appliance of 3.4 oz / 100 ml under the hot water spout; 8. is displayed; 6. Press the button to confirm and the button... to continue using the appliance without a filter, you can use are displayed (the filter lasts about two months); 4. Position a container with the lid (fig....

Owner Manual
Page 20
... the grinding adjustment knob another click (see the section "Adjusting the coffee mill" on page 13). REPLACE FILTER • The water softener filter is not correctly in the section "Cleaning the pre-ground coffee funnel". GROUND TOO FINE ADJUST MILL! If after insert...services. GENERAL ALARM! • The inside of a brush as described in the section "Water softener filter" (page 19). 21 displayed messages EN DISPLAYED MESSAGE POSSIBLE CAUSE REMEDY FILL TANK ! • Insufficient water in the "Descaling" section (page 17) needs to be performed as soon as it ...
... the grinding adjustment knob another click (see the section "Adjusting the coffee mill" on page 13). REPLACE FILTER • The water softener filter is not correctly in the section "Cleaning the pre-ground coffee funnel". GROUND TOO FINE ADJUST MILL! If after insert...services. GENERAL ALARM! • The inside of a brush as described in the section "Water softener filter" (page 19). 21 displayed messages EN DISPLAYED MESSAGE POSSIBLE CAUSE REMEDY FILL TANK ! • Insufficient water in the "Descaling" section (page 17) needs to be performed as soon as it ...


