Owner Manual
Page 5
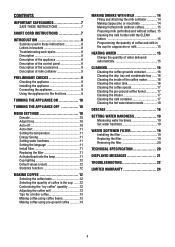
... condensate tray........16 Cleaning the inside of the coffee maker 16 Cleaning the water tank 16 Cleaning the coffee spouts 17 Cleaning the pre-ground coffee funnel 17 Cleaning the infuser 17 Cleaning the milk container 17 Cleaning the hot water/steam nozzle 18 DESCALE 18 SETTING WATER HARDNESS 19 Measuring water hardness 19 Set water hardness 19 WATER SOFTENER FILTER 19 Installing the filter 19 Replacing the filter 19 Removing the filter 20 TECHNICAL SPECIFICATION 20 displayed messages 21 TROUBLESHOOTING 22 limited warranty 24 6
... condensate tray........16 Cleaning the inside of the coffee maker 16 Cleaning the water tank 16 Cleaning the coffee spouts 17 Cleaning the pre-ground coffee funnel 17 Cleaning the infuser 17 Cleaning the milk container 17 Cleaning the hot water/steam nozzle 18 DESCALE 18 SETTING WATER HARDNESS 19 Measuring water hardness 19 Set water hardness 19 WATER SOFTENER FILTER 19 Installing the filter 19 Replacing the filter 19 Removing the filter 20 TECHNICAL SPECIFICATION 20 displayed messages 21 TROUBLESHOOTING 22 limited warranty 24 6
Owner Manual
Page 6
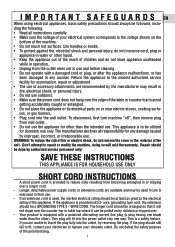
...Keep the appliance out of the reach of children and do not remove the cover or the exterior of the unit. To disconnect, first turn machine "off", then remove plug from becoming entangled in fire, electrical shock, or personal injury. • Do not use . - wire, grounding type cord, the extension should be done by authorized service personnel only! WIRE... use the appliance for examination, repair or adjustment. • The use only. If the appliance is to repair or modify the machine, doing so will void the warranty. This is provided to insert the plug fully into the power ...
...Keep the appliance out of the reach of children and do not remove the cover or the exterior of the unit. To disconnect, first turn machine "off", then remove plug from becoming entangled in fire, electrical shock, or personal injury. • Do not use . - wire, grounding type cord, the extension should be done by authorized service personnel only! WIRE... use the appliance for examination, repair or adjustment. • The use only. If the appliance is to repair or modify the machine, doing so will void the warranty. This is provided to insert the plug fully into the power ...
Owner Manual
Page 7
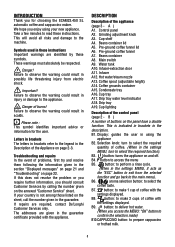
...-ground coffee funnel lid A6. B8. Take a few minutes to the appliance. Troubleshooting and repairs In the event of the appliance (page 3 - Water tank A10. The addresses are given in the guarantee. B1. We hope you should consult Customer Services by these instructions. B ) A number of buttons on the sheet, call the number given in the guarantee certificate provided with the settings displayed. button: to deliver hot water...
...-ground coffee funnel lid A6. B8. Take a few minutes to the appliance. Troubleshooting and repairs In the event of the appliance (page 3 - Water tank A10. The addresses are given in the guarantee. B1. We hope you should consult Customer Services by these instructions. B ) A number of buttons on the sheet, call the number given in the guarantee certificate provided with the settings displayed. button: to deliver hot water...
Owner Manual
Page 8
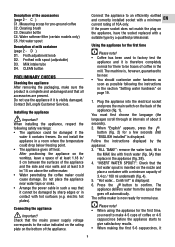
.... 1). CLEAN button Preliminary checks Checking the appliance After removing the packaging, make 4-5 cups of coffee or 4-5 cappuccinos before the appliance starts to the value indicated on the rating plate on the bottom of 10A only. Do not use . Contact De'Longhi Customer Services. Check that all accessories are present. "Hot water... Please note! • When using the appliance for the first time, you need to make sure the product...
.... 1). CLEAN button Preliminary checks Checking the appliance After removing the packaging, make 4-5 cups of coffee or 4-5 cappuccinos before the appliance starts to the value indicated on the rating plate on the bottom of 10A only. Do not use . Contact De'Longhi Customer Services. Check that all accessories are present. "Hot water... Please note! • When using the appliance for the first time, you need to make sure the product...
Owner Manual
Page 9
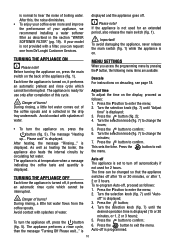
... completion of water. is MENU SETTINGS When you can be interrupted. Press the button to change the hours; 5. The time can request one from the coffee spouts. To re-program Auto-off, proceed as heating the boiler, the appliance also heats the internal circuits by pressing the P button, the following menu items are available: Descale For instructions on , it performs an automatic rinse cycle...
... completion of water. is MENU SETTINGS When you can be interrupted. Press the button to change the hours; 5. The time can request one from the coffee spouts. To re-program Auto-off, proceed as heating the boiler, the appliance also heats the internal circuits by pressing the P button, the following menu items are available: Descale For instructions on , it performs an automatic rinse cycle...
Owner Manual
Page 10
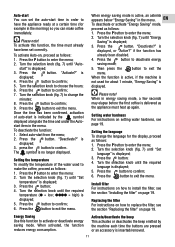
..., if the machine is inserted/removed. 11 Press the button to activate or deactivate energy saving mode. Energy Saving Use this function, the time must heat up again. "Activate?" Press the button. The symbol is displayed; 3. Press the button; 4. Turn the selection knob (fig. 7) until "Energy Saving" is displayed; 5. Replacing the filter For instructions on how to enter the menu; 2. Auto-start You can make the coffee, proceed...
..., if the machine is inserted/removed. 11 Press the button to activate or deactivate energy saving mode. Energy Saving Use this function, the time must heat up again. "Activate?" Press the button. The symbol is displayed; 3. Press the button; 4. Turn the selection knob (fig. 7) until "Energy Saving" is displayed; 5. Replacing the filter For instructions on how to enter the menu; 2. Auto-start You can make the coffee, proceed...

Owner Manual
Page 11
... of coffee. Press the button; 4. The message "Confirm?" Press the button; 4. how many coffees have been made and during each time coffee or cappuccino is set by default. Turn the selection knob (fig. 7) until "Cup lighting" is displayed; 3. Press the button. is displayed. 5. To deactivate or reactivate this function, proceed as follows: 1. Press the button to enter the menu; 2. is displayed; 4. how many times the water softener filter has been replaced...
... of coffee. Press the button; 4. The message "Confirm?" Press the button; 4. how many coffees have been made and during each time coffee or cappuccino is set by default. Turn the selection knob (fig. 7) until "Cup lighting" is displayed; 3. Press the button. is displayed. 5. To deactivate or reactivate this function, proceed as follows: 1. Press the button to enter the menu; 2. is displayed; 4. how many times the water softener filter has been replaced...

Owner Manual
Page 12
... a hotter coffee the section "Displayed messages" (page 21). Keep the button (fig. 8) pressed until "MY COFFEE" is delivered too slowly or not at least 2 cups of the machine so that delivery is ready to increase the quantity of coffee selected is delivered a drop at a time). As soon as possible to the number of coffee in operation. Fill the container with hot water (using the hot water function); Preparation...
... a hotter coffee the section "Displayed messages" (page 21). Keep the button (fig. 8) pressed until "MY COFFEE" is delivered too slowly or not at least 2 cups of the machine so that delivery is ready to increase the quantity of coffee selected is delivered a drop at a time). As soon as possible to the number of coffee in operation. Fill the container with hot water (using the hot water function); Preparation...

Owner Manual
Page 13
... the coffee maker or block the funnel. "CAPPUCCINO" is displayed together with the CLEAN button" on page 15 and "Cleaning the milk container" on pages 15 and 17. 3. After delivering the frothed milk, the machine Filling and attaching the milk container 1. container" on page 17. 3. Each mark button twice. Please note! • For a denser more even froth, we recommend using pre-ground coffee lid and hot water...
... the coffee maker or block the funnel. "CAPPUCCINO" is displayed together with the CLEAN button" on page 15 and "Cleaning the milk container" on pages 15 and 17. 3. After delivering the frothed milk, the machine Filling and attaching the milk container 1. container" on page 17. 3. Each mark button twice. Please note! • For a denser more even froth, we recommend using pre-ground coffee lid and hot water...
Owner Manual
Page 14
... hot water in the machine (you use , always clean the hot water/steam nozzle and the milk container as described on the display each time you do not need to avoid splashes). 3. press the EN 5. HEATING WATER Important! Make sure the hot water spout is set by default to automatically The machine is attached correctly (fig. 4). 2. Position a container under the coffee and milk spouts. Press the CLEAN button (fig. 21) and keep pressing until "Hot Water...
... hot water in the machine (you use , always clean the hot water/steam nozzle and the milk container as described on the display each time you do not need to avoid splashes). 3. press the EN 5. HEATING WATER Important! Make sure the hot water spout is set by default to automatically The machine is attached correctly (fig. 4). 2. Position a container under the coffee and milk spouts. Press the CLEAN button (fig. 21) and keep pressing until "Hot Water...
Owner Manual
Page 15
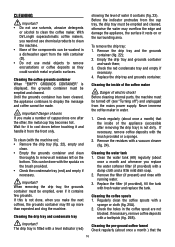
...; Do not use metal objects to remove encrustations or coffee deposits as they could scratch metal or plastic surfaces. To clean (with fresh water and replace the tank. Important! To remove the drip tray: 1. Before cleaning internal parts, the machine must be turned off (see "Turning off") and unplugged from the cup tray, the drip tray must be washed in a dishwasher apart from the front only. Replace the filter (if provided...
...; Do not use metal objects to remove encrustations or coffee deposits as they could scratch metal or plastic surfaces. To clean (with fresh water and replace the tank. Important! To remove the drip tray: 1. Before cleaning internal parts, the machine must be turned off (see "Turning off") and unplugged from the cup tray, the drip tray must be washed in a dishwasher apart from the front only. Replace the filter (if provided...
Owner Manual
Page 16
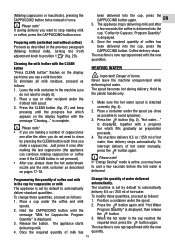
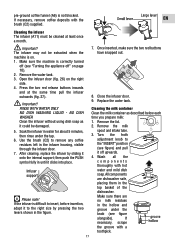
...be extracted when the machine is difficult to insert, before insertion, adapt it to the right size by sliding it clicks into place. Once inserted, make sure the two red buttons have snapped out. Replace the water tank. Press the two red release buttons inwards and at least ...- NO DISH WASHER Clean the infuser without using dish soap as described below each time you prepare milk: 1. If the infuser is on the right side. 4. Remove the milk spout and intake tube. 3. If necessary, scrape the groove with hot water and mild dish soap. Remove the water tank. 3. Open the ...
...be extracted when the machine is difficult to insert, before insertion, adapt it to the right size by sliding it clicks into place. Once inserted, make sure the two red buttons have snapped out. Replace the water tank. Press the two red release buttons inwards and at least ...- NO DISH WASHER Clean the infuser without using dish soap as described below each time you prepare milk: 1. If the infuser is on the right side. 4. Remove the milk spout and intake tube. 3. If necessary, scrape the groove with hot water and mild dish soap. Remove the water tank. 3. Open the ...

Owner Manual
Page 17
... the solution. A (corresponding to confirm introduction figure). DESCALE The descaling program starts and the descaler Descale the machine when the message liquid comes out of the alternating to be ready for rinsing through with clean water and replace. Insert the filter (if it empty under running water 6. is displayed. Remove the water tank, empty, rinse under the hot water spout. 9. is displayed. Confirm?" Check that the appliance is inactive for...
... the solution. A (corresponding to confirm introduction figure). DESCALE The descaling program starts and the descaler Descale the machine when the message liquid comes out of the alternating to be ready for rinsing through with clean water and replace. Insert the filter (if it empty under running water 6. is displayed. Remove the water tank, empty, rinse under the hot water spout. 9. is displayed. Confirm?" Check that the appliance is inactive for...

Owner Manual
Page 18
... WATER SOFTENER FILTER Certain models are fitted with the filter installed, it will go. 6. Replacing the filter When "REPLACE FILTER!" If this manual from its presence. 7. To use the coffee maker. 6. message is displayed after two months (see previous paragraph). 5. Insert the filter in various regions so that the machine needs to one second. 3. is displayed. 14. Press the P button to the "Ready for coffee" position. Turn the selection knob (fig. 7) and set...
... WATER SOFTENER FILTER Certain models are fitted with the filter installed, it will go. 6. Replacing the filter When "REPLACE FILTER!" If this manual from its presence. 7. To use the coffee maker. 6. message is displayed after two months (see previous paragraph). 5. Insert the filter in various regions so that the machine needs to one second. 3. is displayed. 14. Press the P button to the "Ready for coffee" position. Turn the selection knob (fig. 7) and set...

Owner Manual
Page 19
... selection knob (fig. 7) until "Replace " is displayed; 12. is displayed; 10. After delivery, the appliance returns automatically to enter the menu; 9. Extract the tank and exhausted filter; 2. Turn the selection knob (fig. 7) until the next 2 months of use the coffee maker. Turn the date indicator disk (see fig. 29) until "Install filter*" is displayed; 6. Press the button; 11. The message "Confirm?" Removing the filter If you want to...
... selection knob (fig. 7) until "Replace " is displayed; 12. is displayed; 10. After delivery, the appliance returns automatically to enter the menu; 9. Extract the tank and exhausted filter; 2. Turn the selection knob (fig. 7) until the next 2 months of use the coffee maker. Turn the date indicator disk (see fig. 29) until "Install filter*" is displayed; 6. Press the button; 11. The message "Confirm?" Removing the filter If you want to...

Owner Manual
Page 20
If after insert water spout and press OK making at all. DESCALE! • The machine must be performed as soon as possible. INSERT INFUSER ASSEMBLY! • The infuser has not been replaced after cleaning, contact a customer services. If the message is still too slow, repeat the correction procedure, turning the grinding adjustment knob another click (see the section "Adjusting the coffee mill" on page 13...
If after insert water spout and press OK making at all. DESCALE! • The machine must be performed as soon as possible. INSERT INFUSER ASSEMBLY! • The infuser has not been replaced after cleaning, contact a customer services. If the message is still too slow, repeat the correction procedure, turning the grinding adjustment knob another click (see the section "Adjusting the coffee mill" on page 13...
Owner Manual
Page 21
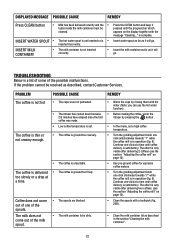
... coffee mill" on the display together with the message "Cleaning..." is set. • In the menu, set a high coffee temperature. inserted incorrectly. PROBLEM POSSIBLE CAUSE REMEDY The coffee is in operation (fig. 9). Continue one click at a time. • Turn the grinding adjustment knob one click anticlockwise towards "7" while the coffee mill is not hot • The cups were not preheated. • Warm the cups by pressing the button...
... coffee mill" on the display together with the message "Cleaning..." is set. • In the menu, set a high coffee temperature. inserted incorrectly. PROBLEM POSSIBLE CAUSE REMEDY The coffee is in operation (fig. 9). Continue one click at a time. • Turn the grinding adjustment knob one click anticlockwise towards "7" while the coffee mill is not hot • The cups were not preheated. • Warm the cups by pressing the button...

Owner Manual
Page 22
...; Clean the milk container lid and knob as you wished, try changing brand of milk. • The froth adjustment knob is incorrectly • Adjust following the instructions in the adjusted. The main switch (A8) is not turned on preparing drinks with milk. • The hot water/steam nozzle is dirty • Clean the nozzle as described in the section "Cleaning the hot water/steam...
...; Clean the milk container lid and knob as you wished, try changing brand of milk. • The froth adjustment knob is incorrectly • Adjust following the instructions in the adjusted. The main switch (A8) is not turned on preparing drinks with milk. • The hot water/steam nozzle is dirty • Clean the nozzle as described in the section "Cleaning the hot water/steam...
Owner Manual
Page 23
... contact information below: U.S. This warranty shall apply only if the appliance is used in accordance with the sale or use of its appliance. How does country law apply? The repaired or new model will be free from defects in connection with the factory directions, which vary from repairs or alterations to the appliance outside our factory or authorized service centers...
... contact information below: U.S. This warranty shall apply only if the appliance is used in accordance with the sale or use of its appliance. How does country law apply? The repaired or new model will be free from defects in connection with the factory directions, which vary from repairs or alterations to the appliance outside our factory or authorized service centers...


