Owner Manual
Page 5
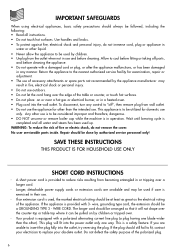
... be utilized for other ). Your product is completed and all instructions. • Do not touch hot surfaces. No user serviceable parts inside. This plug will not drape over . - Wait until brewing cycle is equipped with 3- This appliance is to be used if care is provided with a polarized alternating current line plug (a plug having one way. If the plug should be at...
... be utilized for other ). Your product is completed and all instructions. • Do not touch hot surfaces. No user serviceable parts inside. This plug will not drape over . - Wait until brewing cycle is equipped with 3- This appliance is to be used if care is provided with a polarized alternating current line plug (a plug having one way. If the plug should be at...
Owner Manual
Page 6
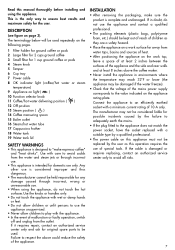
... the only way to the appliance does not match the power socket, have the socket replaced with care to avoid all risks. 7 DESCRIPTION (see figure on the appliance rating plate. INSTALLATION • After removing the packaging, make espresso coffee" and "heat drinks". The manufacturer may not be considered liable for possible incidents caused by the user as this operation requires the use the appliance...
... the only way to the appliance does not match the power socket, have the socket replaced with care to avoid all risks. 7 DESCRIPTION (see figure on the appliance rating plate. INSTALLATION • After removing the packaging, make espresso coffee" and "heat drinks". The manufacturer may not be considered liable for possible incidents caused by the user as this operation requires the use the appliance...
Owner Manual
Page 7
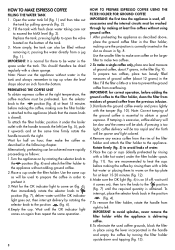
... remove the filter holder, rotate the handle from the previous infusion. 3.Distribute the ground coffee evenly and press lightly with fresh clean water taking care not to avoid leaks of ground coffee (about an inch from a jug (fig. 1). Use the same cup as follows: 1.Turn the appliance on (if off, wait until it , pouring the water directly from the bottom. Fill the filter a little at the same time...
... remove the filter holder, rotate the handle from the previous infusion. 3.Distribute the ground coffee evenly and press lightly with fresh clean water taking care not to avoid leaks of ground coffee (about an inch from a jug (fig. 1). Use the same cup as follows: 1.Turn the appliance on (if off, wait until it , pouring the water directly from the bottom. Fill the filter a little at the same time...
Owner Manual
Page 8
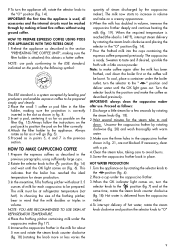
... 1 coffee or pod filter in the filter holder, making at the same time, rotate the steam knob counter clockwise (fig. 18): Hot water is ready. HOT WATER PRODUCTION 1.Turn the appliance on the pack by the following symbol: The ESE standard is a system accepted by making sure the projection is attached; HOW TO MAKE CAPPUCCINO COFFEE 1.Prepare the espresso coffees as described in the "O" position (fig. 14). 7.Pour the frothed milk...
... 1 coffee or pod filter in the filter holder, making at the same time, rotate the steam knob counter clockwise (fig. 18): Hot water is ready. HOT WATER PRODUCTION 1.Turn the appliance on the pack by the following symbol: The ESE standard is a system accepted by making sure the projection is attached; HOW TO MAKE CAPPUCCINO COFFEE 1.Prepare the espresso coffees as described in the "O" position (fig. 14). 7.Pour the frothed milk...

Owner Manual
Page 9
... repeat operations 7 and 8 again. Make sure the holes in the metal filter are recommended to descale the espresso machine about every 200 coffees. Make sure to work for descaling espresso coffee machines. IMPORTANT: during cleaning, never immerse the coffee machine in fig. 25. You should use a commercially available product specifically for about 1 ounce) of citric acid (obtainable online or in hot water using a brush. It is inserted into the hole in the tank. Repair of the water in...
... repeat operations 7 and 8 again. Make sure the holes in the metal filter are recommended to descale the espresso machine about every 200 coffees. Make sure to work for descaling espresso coffee machines. IMPORTANT: during cleaning, never immerse the coffee machine in fig. 25. You should use a commercially available product specifically for about 1 ounce) of citric acid (obtainable online or in hot water using a brush. It is inserted into the hole in the tank. Repair of the water in...

Owner Manual
Page 10
... the quantity of ground coffee. • Milk not cold enough. • Cappuccino frother is dirty. • Always use skim milk at a service center. • Clean the spout holes. • Wait until the espresso OK indicator light comes on. • Preheat as described in the paragraph "Preheating the espresso coffee unit". • Preheat the cups. • The water tank is empty. • The tank is incorrectly inserted...
... the quantity of ground coffee. • Milk not cold enough. • Cappuccino frother is dirty. • Always use skim milk at a service center. • Clean the spout holes. • Wait until the espresso OK indicator light comes on. • Preheat as described in the paragraph "Preheating the espresso coffee unit". • Preheat the cups. • The water tank is empty. • The tank is incorrectly inserted...
Owner Manual
Page 11
... or use of incidental or consequential damage, so the above . The repaired or new model will be returned at www.delonghi.com. Our obligation under this warranty is not covered by the warranty? How long does the coverage last? If repairs become necessary, see contact information below: U.S. Please refer to repair at our factory or authorized service center of the manual for...
... or use of incidental or consequential damage, so the above . The repaired or new model will be returned at www.delonghi.com. Our obligation under this warranty is not covered by the warranty? How long does the coverage last? If repairs become necessary, see contact information below: U.S. Please refer to repair at our factory or authorized service center of the manual for...


