Product Manual
Page 2
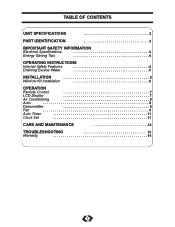
TABLE OF CONTENTS UNIT SPECIFICATIONS 2 PART IDENTIFICATION 3 IMPORTANT SAFETY INFORMATION Electrical Specifications 3 Energy Saving Tips 4 OPERATING INSTRUCTIONS Internal Safety Features 4 Draining Excess Water 5 INSTALLATION 5 Window Kit Installation 6 OPERATION Remote Control 7 LCD Display 7 Air Conditioning 8 Auto 8 Dehumidifier 9 Fan 9 Auto Timer 11 Clock Set 11 CARE AND MAINTENANCE 12 TROUBLESHOOTING 13 Warranty 14 1
TABLE OF CONTENTS UNIT SPECIFICATIONS 2 PART IDENTIFICATION 3 IMPORTANT SAFETY INFORMATION Electrical Specifications 3 Energy Saving Tips 4 OPERATING INSTRUCTIONS Internal Safety Features 4 Draining Excess Water 5 INSTALLATION 5 Window Kit Installation 6 OPERATION Remote Control 7 LCD Display 7 Air Conditioning 8 Auto 8 Dehumidifier 9 Fan 9 Auto Timer 11 Clock Set 11 CARE AND MAINTENANCE 12 TROUBLESHOOTING 13 Warranty 14 1
Product Manual
Page 4
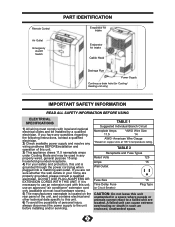
... unit. 3) This appliance draws 11.5 nameplate amps under Cooling Mode and may be installed by a qualified electrician. Remote Control Air Outlet Emergency On/Off Switch PART IDENTIFICATION Evaporator Air Intake Evaporator Air Intake Cable Hook Drainage Pipe Power Supply Continuous drain hole (for Cooling/ Heating unit only) IMPORTANT SAFETY INFORMATION READ...
... unit. 3) This appliance draws 11.5 nameplate amps under Cooling Mode and may be installed by a qualified electrician. Remote Control Air Outlet Emergency On/Off Switch PART IDENTIFICATION Evaporator Air Intake Evaporator Air Intake Cable Hook Drainage Pipe Power Supply Continuous drain hole (for Cooling/ Heating unit only) IMPORTANT SAFETY INFORMATION READ...
Product Manual
Page 12
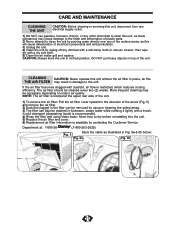
... Department at the upper rear side of the unit. 1) To remove the air filter: Pull the air filter cover upward in the direction of plastic parts. 2) Never attempt to the finish and deformation of the arrow (Fig. 5) and remove the air filter. 2) Dust/dirt clogged in vertical position. NOTE: The air...
... Department at the upper rear side of the unit. 1) To remove the air filter: Pull the air filter cover upward in the direction of plastic parts. 2) Never attempt to the finish and deformation of the arrow (Fig. 5) and remove the air filter. 2) Dust/dirt clogged in vertical position. NOTE: The air...


