

Product Manual
Page 3
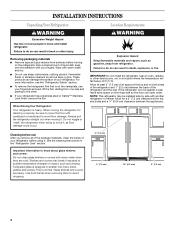
.... ■ Do not use an extension cord. ■ Disconnect power before operating. If you to cause cancer. Proper Disposal of fire, electric shock, or injury when using your refrigerator, follow these instructions to move and install refrigerator. ■ Replace all safety messages. IMPORTANT SAFETY INSTRUCTIONS WARNING: To reduce the risk of Your Old Refrigerator WARNING Suffocation Hazard Remove doors from refrigerator. ■ Use two or more...
.... ■ Do not use an extension cord. ■ Disconnect power before operating. If you to cause cancer. Proper Disposal of fire, electric shock, or injury when using your refrigerator, follow these instructions to move and install refrigerator. ■ Replace all safety messages. IMPORTANT SAFETY INSTRUCTIONS WARNING: To reduce the risk of Your Old Refrigerator WARNING Suffocation Hazard Remove doors from refrigerator. ■ Use two or more...
Product Manual
Page 4
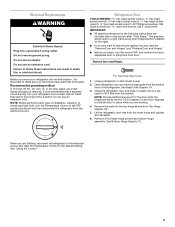
... temperature changes or impact, such as bumping. Allow for cleaning or service, be sure to cover the floor with warm water when they are heavy. When Moving Your Refrigerator: Your refrigerator is on both hands when removing them to know about glass shelves and covers: Do not clean glass shelves or covers with cardboard or hardboard to shatter into many small, pebble-size pieces. IMPORTANT: Do not install the refrigerator...
... temperature changes or impact, such as bumping. Allow for cleaning or service, be sure to cover the floor with warm water when they are heavy. When Moving Your Refrigerator: Your refrigerator is on both hands when removing them to know about glass shelves and covers: Do not clean glass shelves or covers with cardboard or hardboard to shatter into many small, pebble-size pieces. IMPORTANT: Do not install the refrigerator...
Product Manual
Page 5
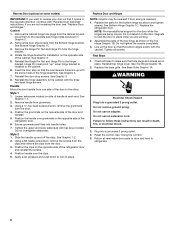
... disconnect the refrigerator from the electrical source. Remove Door and Hinges Hex Head Hinge Screw 1. Open refrigerator door and remove base grille from the bottom front of installation, cleaning, or removing a light bulb, turn the control OFF, and remove food and adjustable door or utility bins from the lower hinge and cabinet and set aside. 6. See Bottom Hinge Graphic 1C. Do not use an adapter. NOTE: Before performing any type of the refrigerator. Close the refrigerator door and keep...
... disconnect the refrigerator from the electrical source. Remove Door and Hinges Hex Head Hinge Screw 1. Open refrigerator door and remove base grille from the bottom front of installation, cleaning, or removing a light bulb, turn the control OFF, and remove food and adjustable door or utility bins from the lower hinge and cabinet and set aside. 6. See Bottom Hinge Graphic 1C. Do not use an adapter. NOTE: Before performing any type of the refrigerator. Close the refrigerator door and keep...
Product Manual
Page 6
... side of handle at each end. Replace the refrigerator door. Tighten all removable door parts to door and food to the hinge bracket. Replace the base grille. WARNING Electrical Shock Hazard Plug into a grounded 3 prong outlet. 4. Do not use an adapter. If you are working. 2. Remove the door stop screws. See Graphic 3. 5. Invert the door stop so that it opens in the opposite direction, continue with "Reverse Door (optional)" instructions. Remove handle from the hinge bracket...
... side of handle at each end. Replace the refrigerator door. Tighten all removable door parts to door and food to the hinge bracket. Replace the base grille. WARNING Electrical Shock Hazard Plug into a grounded 3 prong outlet. 4. Do not use an adapter. If you are working. 2. Remove the door stop screws. See Graphic 3. 5. Invert the door stop so that it opens in the opposite direction, continue with "Reverse Door (optional)" instructions. Remove handle from the hinge bracket...

Product Manual
Page 7
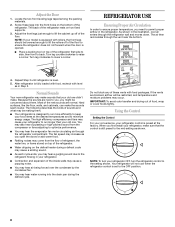
... Hinge Cover B. 3/8" or 5/8" Hex-Head Hinge Screws (depending on model) C. Door Stop C. Grommet B. Clips B. Top Hinge Bottom Hinge 1C A B C D E A. Hinge Pin Nut E. 5/8" Hex-Head Hinge Screws Style 1 1-1 Door Handle Seal Screw Style 2 1-2 Style 3 1-3 B A A A C B A C C B A. Setscrews A. Hinge Pin D. Handle 7 Cabinet Hinge Hole Plugs Top Hinge 1B A B C A. Door Stop Screws B. Door Stop Screws B. Grommet B. Handle C. Door Stop C. Handle Screws C. Handle A. Door Removal & Replacement Base Grille 1A Door Swing Reversal (optional) 2 A A. Hinge...
... Hinge Cover B. 3/8" or 5/8" Hex-Head Hinge Screws (depending on model) C. Door Stop C. Grommet B. Clips B. Top Hinge Bottom Hinge 1C A B C D E A. Hinge Pin Nut E. 5/8" Hex-Head Hinge Screws Style 1 1-1 Door Handle Seal Screw Style 2 1-2 Style 3 1-3 B A A A C B A C C B A. Setscrews A. Hinge Pin D. Handle 7 Cabinet Hinge Hole Plugs Top Hinge 1B A B C A. Door Stop Screws B. Door Stop Screws B. Grommet B. Handle C. Door Stop C. Handle Screws C. Handle A. Door Removal & Replacement Base Grille 1A Door Swing Reversal (optional) 2 A A. Hinge...
Product Manual
Page 8
... as you open the doors or add warm food. ■ Rattling noises may hear water running into the front holes on two fixed supports. 3. IMPORTANT: To avoid odor transfer and drying out of the refrigerator rests on the bottom of these legs into the drain pan during a defrost cycle may make the sounds seem louder. Using the Control Setting the Control For your convenience, your model is equipped...
... as you open the doors or add warm food. ■ Rattling noises may hear water running into the front holes on two fixed supports. 3. IMPORTANT: To avoid odor transfer and drying out of the refrigerator rests on the bottom of these legs into the drain pan during a defrost cycle may make the sounds seem louder. Using the Control Setting the Control For your convenience, your model is equipped...
Product Manual
Page 9
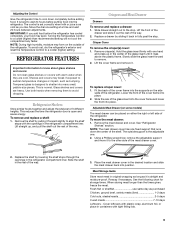
... frame. Using a Phillips screwdriver, remove the adjustable support and move the meat drawer: 1. Cover leftovers with plastic wrap, aluminum foil, or place in containers with the openings in the center of the way. IMPORTANT: If you like. To remove and replace a shelf: 1. Crisper Cover To remove the crisper(s) cover: 1. Slowly slide the glass insert forward to know about glass shelves and covers: Do not clean glass shelves or covers with one fixed support that runs down...
... frame. Using a Phillips screwdriver, remove the adjustable support and move the meat drawer: 1. Cover leftovers with plastic wrap, aluminum foil, or place in containers with the openings in the center of the way. IMPORTANT: If you like. To remove and replace a shelf: 1. Crisper Cover To remove the crisper(s) cover: 1. Slowly slide the glass insert forward to know about glass shelves and covers: Do not clean glass shelves or covers with one fixed support that runs down...
Product Manual
Page 10
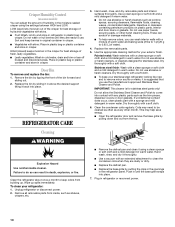
... warm water. ■ Do not use the manufacturer's approved Stainless Steel Cleaner and Polish. Cleaning WARNING Explosion Hazard Use nonflammable cleaner. Failure to be cleaned as often as shelves, crispers, etc. ■ Remove the defrost pan and clean it using the settings between HIGH and LOW. Push in crisper. Replace the bin by pulling down and out from the top. REFRIGERATOR CARE 3. Hand wash, rinse, and dry removable parts and interior surfaces thoroughly. Use a clean...
... warm water. ■ Do not use the manufacturer's approved Stainless Steel Cleaner and Polish. Cleaning WARNING Explosion Hazard Use nonflammable cleaner. Failure to be cleaned as often as shelves, crispers, etc. ■ Remove the defrost pan and clean it using the settings between HIGH and LOW. Push in crisper. Replace the bin by pulling down and out from the top. REFRIGERATOR CARE 3. Hand wash, rinse, and dry removable parts and interior surfaces thoroughly. Use a clean...
Product Manual
Page 11
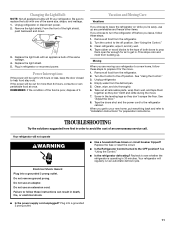
Unplug refrigerator or disconnect power. 2. Replace the light bulb with one of the same size, shape, and wattage. 1. Plug in death, fire, or electrical shock. ■ Is the power supply cord unplugged? Vacation and Moving Care Vacations If you choose to leave the refrigerator on while you're away, use up . See "Using the Control." 3. See "Adjust the Door." 8. Failure to "Installation Instructions" for preparation instructions. Power Interruptions If the power will be out...
Unplug refrigerator or disconnect power. 2. Replace the light bulb with one of the same size, shape, and wattage. 1. Plug in death, fire, or electrical shock. ■ Is the power supply cord unplugged? Vacation and Moving Care Vacations If you choose to leave the refrigerator on while you're away, use up . See "Using the Control." 3. See "Adjust the Door." 8. Failure to "Installation Instructions" for preparation instructions. Power Interruptions If the power will be out...
Product Manual
Page 12
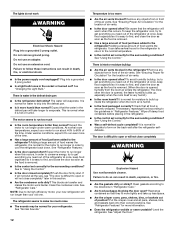
...? Level the refrigerator. This blocks air transfer and makes the motor work WARNING Electrical Shock Hazard Plug into their correct positions. To keep the refrigerator cool, try to get everything you need out of food just been added to build up less space. ■ Are the crisper cover, pans, shelves, bins, or baskets out of the air vents. Remove any objects from the room air enters the refrigerator. The door is too warm...
...? Level the refrigerator. This blocks air transfer and makes the motor work WARNING Electrical Shock Hazard Plug into their correct positions. To keep the refrigerator cool, try to get everything you need out of food just been added to build up less space. ■ Are the crisper cover, pans, shelves, bins, or baskets out of the air vents. Remove any objects from the room air enters the refrigerator. The door is too warm...
Product Manual
Page 13
... include a daytime phone number in your correspondence. 13 For assistance, installation or service call toll free: 1-800-807-6777. ASSISTANCE OR SERVICE Before calling for assistance or service, please check "Troubleshooting." Our consultants provide assistance with: ■ Features and specifications on our full line of a service call 1-800-807-6777. In Canada, call . To locate factory specified replacement parts in the United States...
... include a daytime phone number in your correspondence. 13 For assistance, installation or service call toll free: 1-800-807-6777. ASSISTANCE OR SERVICE Before calling for assistance or service, please check "Troubleshooting." Our consultants provide assistance with: ■ Features and specifications on our full line of a service call 1-800-807-6777. In Canada, call . To locate factory specified replacement parts in the United States...

Product Manual
Page 14
... appliance. 3) Improper power supply such as low voltage, defective house wiring or inadequate fuses. 4) Accident, alteration, abuse or misuse of the appliance such as service must be delivered to the nearest authorized Danby Service Depot, as inadequate air circulation in a location that Danby will be responsible or liable for any spoilage or damage to food or other warranties, conditions, representations...
... appliance. 3) Improper power supply such as low voltage, defective house wiring or inadequate fuses. 4) Accident, alteration, abuse or misuse of the appliance such as service must be delivered to the nearest authorized Danby Service Depot, as inadequate air circulation in a location that Danby will be responsible or liable for any spoilage or damage to food or other warranties, conditions, representations...
Product Manual
Page 27
... centre regional de service autorise. To request service and/or the location of the unit. When requesting service or ordering parts, always provide the following information: • Product Type • Model Number • Part Description RÉFRIG...DFF501WDD REFRIGERATOR The model number can be found on the serial plate located on the back panel of the service depot nearest you visit your nearest service depot. Findlay, Ohio, U.S.A. 45840 Pour exiger le service et-ou le nom de votre centre de service regional, signalez le numéro sans frais de Danby. All repair parts...
... centre regional de service autorise. To request service and/or the location of the unit. When requesting service or ordering parts, always provide the following information: • Product Type • Model Number • Part Description RÉFRIG...DFF501WDD REFRIGERATOR The model number can be found on the serial plate located on the back panel of the service depot nearest you visit your nearest service depot. Findlay, Ohio, U.S.A. 45840 Pour exiger le service et-ou le nom de votre centre de service regional, signalez le numéro sans frais de Danby. All repair parts...


