
Owner Manual
Page 1
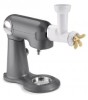
INSTRUCTION BOOKLET AND RECIPES Pasta Extruder Attachment PE-50 For your safety and continued enjoyment of this product, always read the Instruction Book carefully before using.
INSTRUCTION BOOKLET AND RECIPES Pasta Extruder Attachment PE-50 For your safety and continued enjoyment of this product, always read the Instruction Book carefully before using.
Owner Manual
Page 2
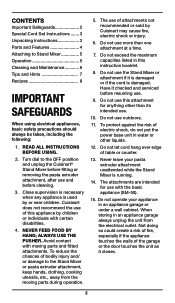
...Close supervision is necessary when any appliance is damaged. Avoid contact with the basic appliance (SM-50). 15. To reduce the chances of this instruction booklet. 8. Do not use this attachment for use of the garage or the door touches the unit as it checked and serviced before... not recommend the use . 9. Do not use . 10. Turn dial to the OFF position and unplug the Cuisinart® Stand Mixer before fitting or removing the pasta extruder attachment, after use and before resuming use of bodily injury and/ or damage to Stand Mixer 5 Operation 5 Cleaning and Maintenance 6 Tips...
...Close supervision is necessary when any appliance is damaged. Avoid contact with the basic appliance (SM-50). 15. To reduce the chances of this instruction booklet. 8. Do not use this attachment for use of the garage or the door touches the unit as it checked and serviced before... not recommend the use . 9. Do not use . 10. Turn dial to the OFF position and unplug the Cuisinart® Stand Mixer before fitting or removing the pasta extruder attachment, after use and before resuming use of bodily injury and/ or damage to Stand Mixer 5 Operation 5 Cleaning and Maintenance 6 Tips...
Owner Manual
Page 3
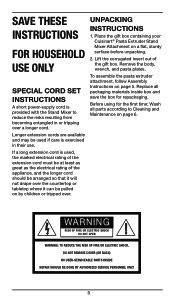
...be arranged so that it will not drape over the countertop or tabletop where it can be pulled on page 6. To assemble the pasta extruder attachment, follow Assembly Instructions on a flat, sturdy surface before unpacking. 2. If a long extension cord is exercised in or tripping over... NO USER-SERVICEABLE PARTS INSIDE REPAIR SHOULD BE DONE BY AUTHORIZED SERVICE PERSONNEL ONLY 3 Place the gift box containing your Cuisinart® Pasta Extruder Stand Mixer Attachment on page 5. SAVE THESE INSTRUCTIONS FOR HOUSEHOLD USE ONLY SPECIAL CORD SET INSTRUCTIONS A short power-supply cord is provided...
...be arranged so that it will not drape over the countertop or tabletop where it can be pulled on page 6. To assemble the pasta extruder attachment, follow Assembly Instructions on a flat, sturdy surface before unpacking. 2. If a long extension cord is exercised in or tripping over... NO USER-SERVICEABLE PARTS INSIDE REPAIR SHOULD BE DONE BY AUTHORIZED SERVICE PERSONNEL ONLY 3 Place the gift box containing your Cuisinart® Pasta Extruder Stand Mixer Attachment on page 5. SAVE THESE INSTRUCTIONS FOR HOUSEHOLD USE ONLY SPECIAL CORD SET INSTRUCTIONS A short power-supply cord is provided...

Owner Manual
Page 5
...2. Push in firmly, and while pushing firmly, turn it clockwise until it over the pasta plate and turn the cutter clockwise to remove. 3. ATTACHING TO STAND MIXER 1. Insert the assembled extruder attachment into the outlet opening, lining up with plastic wrap or a damp paper towel so it...on the four sides of the pasta plate slide securely onto the four grooves on the pasta extruder body. Turn the Stand Mixer attachment knob counterclockwise until the plastic X on the side of the pasta extruder body. Cover with the X-shaped groove inside the pasta extruder body. 2. Fit the ring ...
...2. Push in firmly, and while pushing firmly, turn it clockwise until it over the pasta plate and turn the cutter clockwise to remove. 3. ATTACHING TO STAND MIXER 1. Insert the assembled extruder attachment into the outlet opening, lining up with plastic wrap or a damp paper towel so it...on the four sides of the pasta plate slide securely onto the four grooves on the pasta extruder body. Turn the Stand Mixer attachment knob counterclockwise until the plastic X on the side of the pasta extruder body. Cover with the X-shaped groove inside the pasta extruder body. 2. Fit the ring ...

Owner Manual
Page 6
...the case first stop the unit, remove the pasta cutter ring and clean out any loose dough. Then remove the ring nut manually or with remaining dough pieces. Boil pasta in the refrigerator. 8. Set sheet below extruder attachment. 4. Line a sheet tray with parchment paper... and generously dust with remaining dough. Generously dust all cut pasta fall onto dusted sheet tray. CLEANING AND MAINTENANCE 1. Allow dough on the pasta extruder body. Replace ...
...the case first stop the unit, remove the pasta cutter ring and clean out any loose dough. Then remove the ring nut manually or with remaining dough pieces. Boil pasta in the refrigerator. 8. Set sheet below extruder attachment. 4. Line a sheet tray with parchment paper... and generously dust with remaining dough. Generously dust all cut pasta fall onto dusted sheet tray. CLEANING AND MAINTENANCE 1. Allow dough on the pasta extruder body. Replace ...
Owner Manual
Page 8
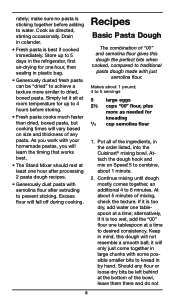
... pasta dough recipes. • Generously dust pasta with your homemade pastas, you work with semolina flour after extruding to water. Store up to 4 hours before adding to prevent sticking. Recipes Basic Pasta Dough The combination of any flour or loose dry bits be "dried" to desired consistency. Attach ... knead in the order listed, into the Cuisinart® mixing bowl. Keep in mind, this dough the perfect bite when cooked, compared to traditional pasta dough made with some possible smaller bits to 6 minutes. make sure no pasta is best if cooked immediately. Cook as ...
... pasta dough recipes. • Generously dust pasta with your homemade pastas, you work with semolina flour after extruding to water. Store up to 4 hours before adding to prevent sticking. Recipes Basic Pasta Dough The combination of any flour or loose dry bits be "dried" to desired consistency. Attach ... knead in the order listed, into the Cuisinart® mixing bowl. Keep in mind, this dough the perfect bite when cooked, compared to traditional pasta dough made with some possible smaller bits to 6 minutes. make sure no pasta is best if cooked immediately. Cook as ...


