
DLC-2007N Manual
Page 3
... on one corner of the box. The Pusher Assembly, with all information carefully filled out. The Dough Blade (C) rests in one side of the foam block. Remove it : Work bowl, work bowl cover, large and small pushers, dough blade, metal chopping/mixing blade, slicing disc, shredding disc, detachable disc stem for discs, spatula, how-to video before using the food processor. Lift out the video from its space in the work bowl without first removing metal blade. Remove foam cylinder insert from top of the foam block...
... on one corner of the box. The Pusher Assembly, with all information carefully filled out. The Dough Blade (C) rests in one side of the foam block. Remove it : Work bowl, work bowl cover, large and small pushers, dough blade, metal chopping/mixing blade, slicing disc, shredding disc, detachable disc stem for discs, spatula, how-to video before using the food processor. Lift out the video from its space in the work bowl without first removing metal blade. Remove foam cylinder insert from top of the foam block...

DLC-2007N Manual
Page 4
... 11 Whole Peppers 11 Large Fruits Like Pineapple 11 Cabbage and Iceberg Lettuce 11 Packing Feed Tube for Desired Results 11 Practicing Slicing and Shredding. . . . 12 Removing Sliced or Shredded Foods 12 Slicing and Shredding Techniques. . . 12 Small, Round Fruits and Vegetables . . . 12 Long Fruits and Vegetables 12 Small Amounts of Food 13 French-Cut Green Beans 12 Matchsticks or Julienne Strips 12 Slicing Meat and Poultry...
... 11 Whole Peppers 11 Large Fruits Like Pineapple 11 Cabbage and Iceberg Lettuce 11 Packing Feed Tube for Desired Results 11 Practicing Slicing and Shredding. . . . 12 Removing Sliced or Shredded Foods 12 Slicing and Shredding Techniques. . . 12 Small, Round Fruits and Vegetables . . . 12 Long Fruits and Vegetables 12 Small Amounts of Food 13 French-Cut Green Beans 12 Matchsticks or Julienne Strips 12 Slicing Meat and Poultry...

DLC-2007N Manual
Page 5
... in use, before putting on the shaft except when the bowl is properly locked in place and the processor is UL listed for assistance. Do not use pusher. 3. Make sure motor has completely stopped before cleaning. Never try to defeat this , or any blade or disc on attachment that affect your food processor. 5. Do not operate this safety feature. Do not attempt to override or tamper with cover interlock...
... in use, before putting on the shaft except when the bowl is properly locked in place and the processor is UL listed for assistance. Do not use pusher. 3. Make sure motor has completely stopped before cleaning. Never try to defeat this , or any blade or disc on attachment that affect your food processor. 5. Do not operate this safety feature. Do not attempt to override or tamper with cover interlock...

DLC-2007N Manual
Page 6
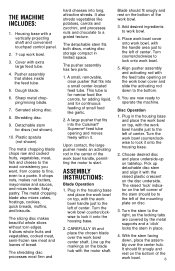
Perfect for , including a powerful motor, the largest feed tube, and the longest warranty in food processors. 5 Dough Blade Chopping/Mixing Blade 4mm Slicing Disc Medium Shredding Disc Pusher Assembly Cover with Cuisinart® Supreme® Wide Mouth Feed Tube 7-cup Work Bowl Shaft (not shown) Housing Base Touchpad Control Panel Cord Wrap (not shown) The Cuisinart® Premier Series 7-Cup Food Processor has all of a Cuisinart® Premier Series 7-Cup Food Processor. This feature, plus the ability to use all the elements of quality that will set the industry standard: • ...
Perfect for , including a powerful motor, the largest feed tube, and the longest warranty in food processors. 5 Dough Blade Chopping/Mixing Blade 4mm Slicing Disc Medium Shredding Disc Pusher Assembly Cover with Cuisinart® Supreme® Wide Mouth Feed Tube 7-cup Work Bowl Shaft (not shown) Housing Base Touchpad Control Panel Cord Wrap (not shown) The Cuisinart® Premier Series 7-Cup Food Processor has all of a Cuisinart® Premier Series 7-Cup Food Processor. This feature, plus the ability to use all the elements of quality that will set the industry standard: • ...
DLC-2007N Manual
Page 7
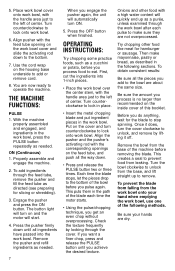
... disc stem and align it onto the housing base. 2. Turn the stem to start. Sharp metal chopping/mixing blade. 7. Plastic spatula (not shown). A large pusher that slides inside the feed tube. 5. Blade should fit snugly and rest on top, with the feed tube opening and moves freely within it onto the housing base. 2. bly over the work bowl. 4. The pusher assembly has two parts. 1. Serrated slicing disc. 8. A small, removable, clear pusher that fits into long, attractive shreds. ASSEMBLY INSTRUCTIONS: Blade Operation...
... disc stem and align it onto the housing base. 2. Turn the stem to start. Sharp metal chopping/mixing blade. 7. Plastic spatula (not shown). A large pusher that slides inside the feed tube. 5. Blade should fit snugly and rest on top, with the feed tube opening and moves freely within it onto the housing base. 2. bly over the work bowl. 4. The pusher assembly has two parts. 1. Serrated slicing disc. 8. A small, removable, clear pusher that fits into long, attractive shreds. ASSEMBLY INSTRUCTIONS: Blade Operation...
DLC-2007N Manual
Page 8
... in the work bowl. 6. Once it does, turn counterclockwise to stop spinning. Place work bowl cover onto work bowl, with the feed tube opening on the inside cover of center. Align pusher with the handle area just to lock onto work bowl, press the PULSE button repeatedly as a zucchini or potato, before removing the blade. OPERATING INSTRUCTIONS: Try chopping some practice foods, such as needed . 7 When you process food to make mayonnaise, pastry or bread, as directed (see...
... in the work bowl. 6. Once it does, turn counterclockwise to stop spinning. Place work bowl cover onto work bowl, with the feed tube opening on the inside cover of center. Align pusher with the handle area just to lock onto work bowl, press the PULSE button repeatedly as a zucchini or potato, before removing the blade. OPERATING INSTRUCTIONS: Try chopping some practice foods, such as needed . 7 When you process food to make mayonnaise, pastry or bread, as directed (see...
DLC-2007N Manual
Page 9
... of the work bowl, gripping the blade from herbs. After adding a cupful this way, add the remaining food to the work bowl. Lock the cover in place with your finger or spatula while pouring out food. Use the spatula to cut into place. Small foods like garlic and hard cheese, assemble the unit, remove the small pusher, press the ON button and drop the food through the small feed tube opening...
... of the work bowl, gripping the blade from herbs. After adding a cupful this way, add the remaining food to the work bowl. Lock the cover in place with your finger or spatula while pouring out food. Use the spatula to cut into place. Small foods like garlic and hard cheese, assemble the unit, remove the small pusher, press the ON button and drop the food through the small feed tube opening...
DLC-2007N Manual
Page 10
... seafood: Prepare the food as anchovies, cheese, herbs, etc. The optional Fine Shredding Disc is not chopped fine enough, let the processor run continuously. Taste for about 1/2 cup for bacteria, we recommend using either the "cooked egg" mayonnaise on , 1 second off. Store in the recipe to the nuts before you process, the softer the butter. To make peanut butter and other potentially harmful...
... seafood: Prepare the food as anchovies, cheese, herbs, etc. The optional Fine Shredding Disc is not chopped fine enough, let the processor run continuously. Taste for about 1/2 cup for bacteria, we recommend using either the "cooked egg" mayonnaise on , 1 second off. Store in the recipe to the nuts before you process, the softer the butter. To make peanut butter and other potentially harmful...
DLC-2007N Manual
Page 12
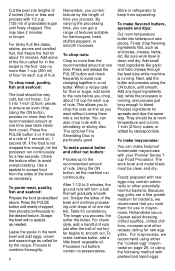
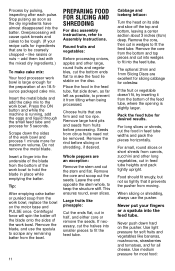
... the stem whole, to Assembly Instructions. This ensures round, even slices. Remove the core from citrus fruits need not be coarsely chopped - The optional 2mm and 1mm Slicing Discs are firm and not too ripe. For small, round slices or short shreds from the bowl. When slicing or shredding, always use the spatula to fit the feed tube. 11 Cabbage and iceberg lettuce: Turn the head on the motor base and...
... the stem whole, to Assembly Instructions. This ensures round, even slices. Remove the core from citrus fruits need not be coarsely chopped - The optional 2mm and 1mm Slicing Discs are firm and not too ripe. For small, round slices or short shreds from the bowl. When slicing or shredding, always use the spatula to fit the feed tube. 11 Cabbage and iceberg lettuce: Turn the head on the motor base and...
DLC-2007N Manual
Page 13
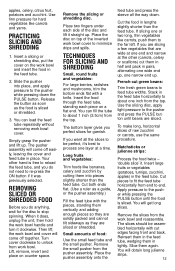
... together. Use firm pressure for hard vegetables like carrots, push them in half and pack in place. Insert a slicing or shredding disc, put the cover on top of the disc and lift it clockwise. Insert the food through the feed tube, standing each side of the inverted work bowl handle and turn it straight up . Remove the slices from work bowl and reassemble. Remove the small pusher from the top. The pusher assembly will...
... together. Use firm pressure for hard vegetables like carrots, push them in half and pack in place. Insert a slicing or shredding disc, put the cover on top of the disc and lift it clockwise. Insert the food through the feed tube, standing each side of the inverted work bowl handle and turn it straight up . Remove the slices from work bowl and reassemble. Remove the small pusher from the top. The pusher assembly will...
DLC-2007N Manual
Page 14
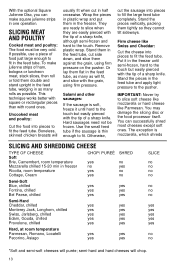
... food processor itself. With the optional Square Julienne Disc, you can successfully shred most cheeses except soft ones. Boneless, skinned chicken breasts will usually fit when cut in one operation. Salami and other sausages: If the sausage is soft, freeze it in the feed tube and apply light pressure to the pusher. The exception is thin enough to fill the large feed tube...
... food processor itself. With the optional Square Julienne Disc, you can successfully shred most cheeses except soft ones. Boneless, skinned chicken breasts will usually fit when cut in one operation. Salami and other sausages: If the sausage is soft, freeze it in the feed tube and apply light pressure to the pusher. The exception is thin enough to fill the large feed tube...

DLC-2007N Manual
Page 15
... the work bowl. It is called for more than 3-1/2 cups (17-1/2 ounces) (875 ml) of flour. Do the same for sweet doughs that contains at temperatures lower than this and they die when exposed to slice or shred mozzarella when well chilled, and Parmesan when at room temperature. Using the right blade Use the dough blade when the recipe calls for both types...
... the work bowl. It is called for more than 3-1/2 cups (17-1/2 ounces) (875 ml) of flour. Do the same for sweet doughs that contains at temperatures lower than this and they die when exposed to slice or shred mozzarella when well chilled, and Parmesan when at room temperature. Using the right blade Use the dough blade when the recipe calls for both types...

DLC-2007N Manual
Page 16
... in work bowl have been pushed down . Follow the recipe carefully. Kneading dough that used to make several hours, depending on an oiled baking sheet until ingredients in the Premier Series 7-Cup Food Processor is extremely efficient. Typical bread dough should have been incorporated. The rising time is usually about 80˚F (26˚C). Let rise until it . TYPICAL BREAD DOUGH PROBLEMS AND SOLUTIONS If dough blade...
... in work bowl have been pushed down . Follow the recipe carefully. Kneading dough that used to make several hours, depending on an oiled baking sheet until ingredients in the Premier Series 7-Cup Food Processor is extremely efficient. Typical bread dough should have been incorporated. The rising time is usually about 80˚F (26˚C). Let rise until it . TYPICAL BREAD DOUGH PROBLEMS AND SOLUTIONS If dough blade...

DLC-2007N Manual
Page 17
... dough becomes overheated. Remove half and process in 2 batches. • Dough may be sure it and at a time, while machine is 80°F (26°C); If necessary, add more, 1 tablespoon (9 gm) at least 3-1/2 cups of your recipe calls for less flour, remove metal dough blade and insert metal chopping blade. Dough feels tough after kneading: Divide dough into 3 pieces and redistribute evenly in bowl. If the motor stops, turn...
... dough becomes overheated. Remove half and process in 2 batches. • Dough may be sure it and at a time, while machine is 80°F (26°C); If necessary, add more, 1 tablespoon (9 gm) at least 3-1/2 cups of your recipe calls for less flour, remove metal dough blade and insert metal chopping blade. Dough feels tough after kneading: Divide dough into 3 pieces and redistribute evenly in bowl. If the motor stops, turn...

DLC-2007N Manual
Page 18
... kneading. Use of dough and process in the pusher, remove it by hand, do it rapidly up and down . These foods include ice, whole spices, coffee beans and oils like to prepare your own spice blends, you good results after only 30 seconds of your food processor ready to intense water heat, washing the work bowl and work bowl, cover, pusher assembly and blade or disc immediately after...
... kneading. Use of dough and process in the pusher, remove it by hand, do it rapidly up and down . These foods include ice, whole spices, coffee beans and oils like to prepare your own spice blends, you good results after only 30 seconds of your food processor ready to intense water heat, washing the work bowl and work bowl, cover, pusher assembly and blade or disc immediately after...

DLC-2007N Manual
Page 19
... a consumer if you remove the pusher assembly or cover from the work bowl when emptying the bowl. This motor warranty covers the motor and excludes all electrical components and vertical projecting motor shaft sheath. Always place discs on the Entire Machine. Always be free of a Cuisinart® Premier Series 7-Cup Food Processor that the blade or disc is available to prevent the chopping blade from operating when the work bowl before connecting detachable stem. Always wait for an...
... a consumer if you remove the pusher assembly or cover from the work bowl when emptying the bowl. This motor warranty covers the motor and excludes all electrical components and vertical projecting motor shaft sheath. Always place discs on the Entire Machine. Always be free of a Cuisinart® Premier Series 7-Cup Food Processor that the blade or disc is available to prevent the chopping blade from operating when the work bowl before connecting detachable stem. Always wait for an...

DLC-2007N Manual
Page 20
... permit your Cuisinart® Premier Series 7-Cup Food Processor should call our toll-free number 800-472-7606 for In-Warranty Service, California residents have been authorized by accessories, replacement parts, or repair service other manufacturers. To facilitate the speed and accuracy of your return address, daytime phone number, description of the product defect, product serial number, original date of the repair, replacement, and shipping and handling for use a traceable, insured...
... permit your Cuisinart® Premier Series 7-Cup Food Processor should call our toll-free number 800-472-7606 for In-Warranty Service, California residents have been authorized by accessories, replacement parts, or repair service other manufacturers. To facilitate the speed and accuracy of your return address, daytime phone number, description of the product defect, product serial number, original date of the repair, replacement, and shipping and handling for use a traceable, insured...

DLC-2007N Manual
Page 26
...until foamy, about 10 to 35 minutes. Place dough in prepared loaf pans and cover with plastic wrap coated with your Cuisinart® Food Processor. Pinch the seam and ends tightly to 400° F. With machine running, add liquid through small feed tube as fast as flour absorbs it. Spray two ...45 minutes to knead dough. Add cold water to 1-1/2 hours. Allow to sit in size, about 1 to yeast mixture. Once dough cleans the sides of the white flour. 25 Remove from fat) carb. 25g • pro. 3g • fat 3g sat. Place dough on wire rack. Makes 16 servings (2 loaves...
...until foamy, about 10 to 35 minutes. Place dough in prepared loaf pans and cover with plastic wrap coated with your Cuisinart® Food Processor. Pinch the seam and ends tightly to 400° F. With machine running, add liquid through small feed tube as fast as flour absorbs it. Spray two ...45 minutes to knead dough. Add cold water to 1-1/2 hours. Allow to sit in size, about 1 to yeast mixture. Once dough cleans the sides of the white flour. 25 Remove from fat) carb. 25g • pro. 3g • fat 3g sat. Place dough on wire rack. Makes 16 servings (2 loaves...

DLC-2007N Manual
Page 29
... small feed tube as fast as flour absorbs it. Process until dough cleans sides of work bowl and forms a ball. In a 2-cup liquid measure, dissolve yeast and sugar in pan on a lightly floured surface and punch down. Insert metal blade in a plastic food storage bag and seal the top. Process until combined, about 3 to 15 seconds. Then process for a breakfast treat, slice and toast. Roll into 1-inch pieces 1 large egg...
... small feed tube as fast as flour absorbs it. Process until dough cleans sides of work bowl and forms a ball. In a 2-cup liquid measure, dissolve yeast and sugar in pan on a lightly floured surface and punch down. Insert metal blade in a plastic food storage bag and seal the top. Process until combined, about 3 to 15 seconds. Then process for a breakfast treat, slice and toast. Roll into 1-inch pieces 1 large egg...

DLC-2007N Manual
Page 38
... Process shallot until finely chopped, about 2 minutes. Add water and reduce heat to fit feed tube horizontally 2 large shallots, peeled, cut into 1-inch pieces 2 teaspoons olive oil 1/4 cup water 1-1/2 teaspoons balsamic vinegar * 1/8 teaspoon white pepper 1/8 teaspoon kosher salt Insert 4 mm slicing disc in a 3-1/2-quart sauté pan over medium heat. Season with the Cuisinart® Premier Series 7-Cup Food Processor. Sides French Cut Green Beans with Shallots "French...
... Process shallot until finely chopped, about 2 minutes. Add water and reduce heat to fit feed tube horizontally 2 large shallots, peeled, cut into 1-inch pieces 2 teaspoons olive oil 1/4 cup water 1-1/2 teaspoons balsamic vinegar * 1/8 teaspoon white pepper 1/8 teaspoon kosher salt Insert 4 mm slicing disc in a 3-1/2-quart sauté pan over medium heat. Season with the Cuisinart® Premier Series 7-Cup Food Processor. Sides French Cut Green Beans with Shallots "French...


