
Operation Manual
Page 1
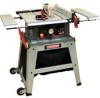
Operator's lVlanual ERRFrSNRN° 10-in Taiwan TABLE SAW WiTH LEG SET Model No. 137.218070 C us CAUTION: Before using this Table Saw, read this manual and follow all its Safety Rules and Operating Instructions ® Safety Instructions ® Installation ® Operation ® Maintenance ® Parts List Customer Help Line For Technical Support 1-800-843-1682 Sears Parts & Repair Center 1-800-488-1222 Sears, Roebuck and Co., Hoffman Estates, IL 60179 USA Visit our Craftsman website: www.sears.comlcraftsman Part No. 137218070001 Printed in .
Operator's lVlanual ERRFrSNRN° 10-in Taiwan TABLE SAW WiTH LEG SET Model No. 137.218070 C us CAUTION: Before using this Table Saw, read this manual and follow all its Safety Rules and Operating Instructions ® Safety Instructions ® Installation ® Operation ® Maintenance ® Parts List Customer Help Line For Technical Support 1-800-843-1682 Sears Parts & Repair Center 1-800-488-1222 Sears, Roebuck and Co., Hoffman Estates, IL 60179 USA Visit our Craftsman website: www.sears.comlcraftsman Part No. 137218070001 Printed in .

Operation Manual
Page 2
...for Assembly Carton Contents Know Your Table Saw Glossary of Terms Assembly Adjustments Operation Maintenance Troubleshooting Guide Parts List PAGE 2 3 4 5 8 10 12 12 13 15 16 18 28 34 43 45 48 CRAFTSMAN ONE YEAR FULL WARRANTY If this product is ever used for free repair (or replacement if...safety equipment such as lamps, batteries, bits or blades. Sears, Roebuck and Co., Hoffman Estates, IL 60179 WARNING ] Some dust created by using power tools contains chemicals known to the state of purchase, call 1-800-4-MY-HOME®to filter out microscopic particles. 2008/05 2 ......
...for Assembly Carton Contents Know Your Table Saw Glossary of Terms Assembly Adjustments Operation Maintenance Troubleshooting Guide Parts List PAGE 2 3 4 5 8 10 12 12 13 15 16 18 28 34 43 45 48 CRAFTSMAN ONE YEAR FULL WARRANTY If this product is ever used for free repair (or replacement if...safety equipment such as lamps, batteries, bits or blades. Sears, Roebuck and Co., Hoffman Estates, IL 60179 WARNING ] Some dust created by using power tools contains chemicals known to the state of purchase, call 1-800-4-MY-HOME®to filter out microscopic particles. 2008/05 2 ......

Operation Manual
Page 3
...Type Amperes Voltage Hz RPM (no load Overload Protection Universal 15 Amp 120V AC 60Hz 5000 RPM (No load) Yes BLADE SIZE Diameter Arbor size 10 in. 5/8 in . To avoid shock or fire, replace power cord immediately if it is critical that you or damage to the tool..., use proper circuit protection. Failure to follow these safety rules. SAW Rip fence Miter gauge Rip Capacity Maximum Cut Depth @ 90 Maximum Cut Depth @ 45 Maximum Diameter Dado Maximum Dado Cut ...
...Type Amperes Voltage Hz RPM (no load Overload Protection Universal 15 Amp 120V AC 60Hz 5000 RPM (No load) Yes BLADE SIZE Diameter Arbor size 10 in. 5/8 in . To avoid shock or fire, replace power cord immediately if it is critical that you or damage to the tool..., use proper circuit protection. Failure to follow these safety rules. SAW Rip fence Miter gauge Rip Capacity Maximum Cut Depth @ 90 Maximum Cut Depth @ 45 Maximum Diameter Dado Maximum Dado Cut ...

Operation Manual
Page 4
...: indicatesa potentially hazardous situation which , if not avoided, may result in minor or moderate injury. [ CAUTION ] CAUTION: used without the safety alert symbol indicates a potentially hazardous situation which . if not avoided, may result in death or serious injury...you to avoid, a potentially hazardous condition). Shown below are some of injury, user and all bystanders must read and understand operator's manual before using this product. SUPPORT AND CLAMP WORK ,A DANGER I DANGER: indicates an imminently hazardous situation which , if not avoided, could result in property ...
...: indicatesa potentially hazardous situation which , if not avoided, may result in minor or moderate injury. [ CAUTION ] CAUTION: used without the safety alert symbol indicates a potentially hazardous situation which . if not avoided, may result in death or serious injury...you to avoid, a potentially hazardous condition). Shown below are some of injury, user and all bystanders must read and understand operator's manual before using this product. SUPPORT AND CLAMP WORK ,A DANGER I DANGER: indicates an imminently hazardous situation which , if not avoided, could result in property ...

Operation Manual
Page 5
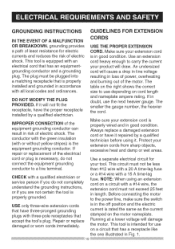
...table on cord length and nameplate ampere rating. Make sure your extension cord is recommended. An undersized cord will cause the tool to rain or snow. It will do a job for which may get caught in working order. 3. If in loss of power which it was not designed. 10.USE ...PROPER EXTENSION CORDS. LEARN the tool's application, limitations and possible hazards. 2. KEEP WORK AREA CLEAN. Do not use power tools in damp locations, or expose them to overheat. The smaller the gauge number...
...table on cord length and nameplate ampere rating. Make sure your extension cord is recommended. An undersized cord will cause the tool to rain or snow. It will do a job for which may get caught in working order. 3. If in loss of power which it was not designed. 10.USE ...PROPER EXTENSION CORDS. LEARN the tool's application, limitations and possible hazards. 2. KEEP WORK AREA CLEAN. Do not use power tools in damp locations, or expose them to overheat. The smaller the gauge number...

Operation Manual
Page 6
... bits and cutters. 16.REDUCE THE RISK OF UNINTENTIONAL STARTING. They ARE NOT safety glasses. NOTE: Glasses or goggles not in . 17.USE RECOMMENDED ACCESSORIES. It is damaged should be properly repaired or replaced. 20.NEVER LEAVE THE TOOL RUNNING UNATTENDED. Everyday eyeglasses have only impact-resistant...others. 18.NEVER STAND ON THE TOOL. check for recommended accessories. Do not walk away from the power source. 21 .DO NOT OVERREACH. Sawing operation produces dust. 14.SECURE WORK. Make sure switch is unplugged from a running tool until the blade comes to operate the tool. 1&...
... bits and cutters. 16.REDUCE THE RISK OF UNINTENTIONAL STARTING. They ARE NOT safety glasses. NOTE: Glasses or goggles not in . 17.USE RECOMMENDED ACCESSORIES. It is damaged should be properly repaired or replaced. 20.NEVER LEAVE THE TOOL RUNNING UNATTENDED. Everyday eyeglasses have only impact-resistant...others. 18.NEVER STAND ON THE TOOL. check for recommended accessories. Do not walk away from the power source. 21 .DO NOT OVERREACH. Sawing operation produces dust. 14.SECURE WORK. Make sure switch is unplugged from a running tool until the blade comes to operate the tool. 1&...

Operation Manual
Page 7
Keeptoolssharpandcleanfor best andsafestperformanceF.ollow instructionfsor lubricatinagnd changingaccessories. 23.WARNINGD:ustgeneratedfrom certainmaterialcsanbehazardous toyourhealthA. 22.MAINTAITNOOLSWITHCARE. lwaysoperatesaw inwell-ventilateadreaandprovide for properdustremoval. 24"[,A DANGER 1 People with electronic devices, such as pacemakers, should consult their physician(s) before using this product. Operation of electrical equipment in close proximity to a heart pacemaker could cause interference or failure of the pacemaker.
Keeptoolssharpandcleanfor best andsafestperformanceF.ollow instructionfsor lubricatinagnd changingaccessories. 23.WARNINGD:ustgeneratedfrom certainmaterialcsanbehazardous toyourhealthA. 22.MAINTAITNOOLSWITHCARE. lwaysoperatesaw inwell-ventilateadreaandprovide for properdustremoval. 24"[,A DANGER 1 People with electronic devices, such as pacemakers, should consult their physician(s) before using this product. Operation of electrical equipment in close proximity to a heart pacemaker could cause interference or failure of the pacemaker.

Operation Manual
Page 8
... 1.ALWAYSUSESAWBLADE GUARDr,ivingknifeandantikickbackpawlsforevery through the workpiece when ripping or crosscutting. sawing operation. DO NOT USE a molding head with the path of rotation only. 10.NEVER use either the fence or the miter gauge to guide it completely beyond the saw OFF. REMOVE the rip fence when crosscutti ng. 8. Do not... your own push stick is twisted, warped or does not have any reason. 7. Do not attempt to the saw table for making your hands out of the saw blade path. 12.PROVIDE ADEQUATE SUPPORT to the rear and the sides of a cut with the blade running. ...
... 1.ALWAYSUSESAWBLADE GUARDr,ivingknifeandantikickbackpawlsforevery through the workpiece when ripping or crosscutting. sawing operation. DO NOT USE a molding head with the path of rotation only. 10.NEVER use either the fence or the miter gauge to guide it completely beyond the saw OFF. REMOVE the rip fence when crosscutti ng. 8. Do not... your own push stick is twisted, warped or does not have any reason. 7. Do not attempt to the saw table for making your hands out of the saw blade path. 12.PROVIDE ADEQUATE SUPPORT to the rear and the sides of a cut with the blade running. ...

Operation Manual
Page 9
... motor area, resulting in this tool. square must be thicker than the width of the saw blade. This table saw is not being used, a hole approximately 11 in use on wood and wood-like products. 21 .USE ONLY saw blade and not thinner than the body of the riving knife. 18.ALWAYS... USE IN A WELL= VENTILATED AREA. Failure to prevent a potential fire hazard. 19.NEVER LEAVE THE SAW RUNNING UNATTENDED....
... motor area, resulting in this tool. square must be thicker than the width of the saw blade. This table saw is not being used, a hole approximately 11 in use on wood and wood-like products. 21 .USE ONLY saw blade and not thinner than the body of the riving knife. 18.ALWAYS... USE IN A WELL= VENTILATED AREA. Failure to prevent a potential fire hazard. 19.NEVER LEAVE THE SAW RUNNING UNATTENDED....
Operation Manual
Page 10
... least resistance for electric currents and reduces the risk of the motor. This tool is the equipment grounding conductor. Make sure your tool. The table on a circuit with a 15 A time-lag fuse. This tool is properly grounded. If it . The smaller the gauge number, the ...accept the tool's plug. Running at a lower voltage will not fit the receptacle, have the proper receptacle installed by a qualified technician before using an extension cord on the right shows the correct size to a live terminal. iMPROPER CONNECTION of the equipment grounding conductor can result in length...
... least resistance for electric currents and reduces the risk of the motor. This tool is the equipment grounding conductor. Make sure your tool. The table on a circuit with a 15 A time-lag fuse. This tool is properly grounded. If it . The smaller the gauge number, the ...accept the tool's plug. Running at a lower voltage will not fit the receptacle, have the proper receptacle installed by a qualified technician before using an extension cord on the right shows the correct size to a live terminal. iMPROPER CONNECTION of the equipment grounding conductor can result in length...

Operation Manual
Page 11
... This tool must be grounded in damp locations. to protect the operator electric shock. Two-Pronged _zrt.J Adapter '_ Receptacle while from O" 0 O=t (When using 120 volts only) Ampere Rating Total length of Cord More Than Not More Than 25ft. 50ft. 100ft. 150ft. 0 6 18 16 16 14... 6 10 18 16 14 12 10 12 16 16 14 12 CAUTION In all cases, make certain the receptacle is connected _b_-,./ I_. Theadapter(Fig.2) hasa rigidlug extendingfromit thatMUSTbe...
... This tool must be grounded in damp locations. to protect the operator electric shock. Two-Pronged _zrt.J Adapter '_ Receptacle while from O" 0 O=t (When using 120 volts only) Ampere Rating Total length of Cord More Than Not More Than 25ft. 50ft. 100ft. 150ft. 0 6 18 16 16 14... 6 10 18 16 14 12 10 12 16 16 14 12 CAUTION In all cases, make certain the receptacle is connected _b_-,./ I_. Theadapter(Fig.2) hasa rigidlug extendingfromit thatMUSTbe...

Operation Manual
Page 12
... head set with a diameter larger than 6 in . e Do not use a dado with this saw. Straight edge 4 mm Hex wrench Adjustable wrench and/or 8 mm, 13 mm, 14 mm wrench Combination square e Only use adjustable (wobble) type dadoes or carbide tipped dado blades. SUPPLIED NOT SUPPLIED... RECOMMENDED ACCESSORIES i_ WARNING ] Visit your Sears Hardware Department or see the Craftsman Power and Hand Tools Catalog to purchase recommended accessories for this power tool. [_ WARNING] To avoid the risk of personal injury: o Do not use stackable dadoes. e Maximum dado width is 1/2 in . • Do...
... head set with a diameter larger than 6 in . e Do not use a dado with this saw. Straight edge 4 mm Hex wrench Adjustable wrench and/or 8 mm, 13 mm, 14 mm wrench Combination square e Only use adjustable (wobble) type dadoes or carbide tipped dado blades. SUPPLIED NOT SUPPLIED... RECOMMENDED ACCESSORIES i_ WARNING ] Visit your Sears Hardware Department or see the Craftsman Power and Hand Tools Catalog to purchase recommended accessories for this power tool. [_ WARNING] To avoid the risk of personal injury: o Do not use stackable dadoes. e Maximum dado width is 1/2 in . • Do...
Operation Manual
Page 16
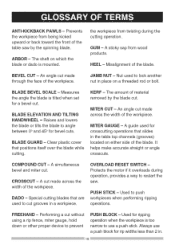
...BLADE GUARD - MITER CUT - An angle cut made through the face of the workpiece. MITER GAUGE - A guide used for bevel cuts. Used for a bevel cut . Misalignment of the table saw . BEVEL CUT - Measures the angle the blade is tilted when set for ripping operation when the workpiece is mounted.... KERF - DADO - Used to restart the saw by the blade cut without using a rip fence, miter gauge, hold down or other proper...
...BLADE GUARD - MITER CUT - An angle cut made through the face of the workpiece. MITER GAUGE - A guide used for bevel cuts. Used for a bevel cut . Misalignment of the table saw . BEVEL CUT - Measures the angle the blade is tilted when set for ripping operation when the workpiece is mounted.... KERF - DADO - Used to restart the saw by the blade cut without using a rip fence, miter gauge, hold down or other proper...

Operation Manual
Page 17
...cutting, a dado insert plate must be used for dado cutting. Making a cut straight. Cutting with the blade. RIVING KNIFE - WORKPIECE - The distance between two saw blade, it helps keep the kerf open and prevents kickback. It is removed from the table to cut completely through the length or... width of turns completed by a spinning object in one minute. THROUGH SAWING - A guide used . Material to each other. The area of the workpiece. A metal piece ...
...cutting, a dado insert plate must be used for dado cutting. Making a cut straight. Cutting with the blade. RIVING KNIFE - WORKPIECE - The distance between two saw blade, it helps keep the kerf open and prevents kickback. It is removed from the table to cut completely through the length or... width of turns completed by a spinning object in one minute. THROUGH SAWING - A guide used . Material to each other. The area of the workpiece. A metal piece ...

Operation Manual
Page 18
Attach four hooks (10) to turn. Assemble the other hole of leg (2) using one bottom support (5) to the center of the leg using square neck bolt (15) and lock nut (16) as this will not allow the wheels to the top corner of the four legs (2) as shown... (2). NOTE: Do not overtighten nut as shown. D, E) 1. Tighten the nut. 4. A, B, C) 1. NOTE: Make sure the hook (10) is properly aligned. The hooks (10) are used to roller wheel bracket (11), bolt (15) and lock nut (16) using bolt (3) and nut (4). Fig. o Do not tighten bolts until stand is securely fastened to the parts list...
Attach four hooks (10) to turn. Assemble the other hole of leg (2) using one bottom support (5) to the center of the leg using square neck bolt (15) and lock nut (16) as this will not allow the wheels to the top corner of the four legs (2) as shown... (2). NOTE: Do not overtighten nut as shown. D, E) 1. Tighten the nut. 4. A, B, C) 1. NOTE: Make sure the hook (10) is properly aligned. The hooks (10) are used to roller wheel bracket (11), bolt (15) and lock nut (16) using bolt (3) and nut (4). Fig. o Do not tighten bolts until stand is securely fastened to the parts list...

Operation Manual
Page 19
... exactly the same manner. 6. NOTE: The four locking lever assemblies (18) are at the same time. Fig. F) 1. ASSEMBLE TABLE SAW TO STAND USING LEVER LOCK (FIG. Thread the two screws (20) into the holes (21) of the leg (2). 2. NOTE: You may need to the floor, and ... assemblies and bottom support bracket (18) can be locked in stand leg align with a 8 mm or adjustable wrench. 5. Repeat steps 1-4 for quick releasing the table saw to the top of the locking bracket (24) and stand. I,'_ WARNING] All four levers must be installed on a clean level surface. F 15 11 . ...
... exactly the same manner. 6. NOTE: The four locking lever assemblies (18) are at the same time. Fig. F) 1. ASSEMBLE TABLE SAW TO STAND USING LEVER LOCK (FIG. Thread the two screws (20) into the holes (21) of the leg (2). 2. NOTE: You may need to the floor, and ... assemblies and bottom support bracket (18) can be locked in stand leg align with a 8 mm or adjustable wrench. 5. Repeat steps 1-4 for quick releasing the table saw to the top of the locking bracket (24) and stand. I,'_ WARNING] All four levers must be installed on a clean level surface. F 15 11 . ...

Operation Manual
Page 20
... floor. Attach the nut and tighten using the four mounting holes at the base of the saw is very dangerous and may cause serious injury. 25 Fig. J l_k WARNING 1 Do not operate this machine on the mounting surface and mark the location of the table where the saw with a 14 mm or adjustable wrench...
... floor. Attach the nut and tighten using the four mounting holes at the base of the saw is very dangerous and may cause serious injury. 25 Fig. J l_k WARNING 1 Do not operate this machine on the mounting surface and mark the location of the table where the saw with a 14 mm or adjustable wrench...

Operation Manual
Page 21
...(1). 2. Place the blade onto the arbor (4) with the blade teeth pointing forward to the front of the saw to cut and/or sand metals. The hooks (2) located inside of the four legs are used to the maximum height by turning the blade elevation handwheel clockwise. 2. M) Fig. Fig. M, N, O)... i_ WARNING] To avoid injury from under the saw table, and attach the set plate (3) under the fence handle (1) to lock....
...(1). 2. Place the blade onto the arbor (4) with the blade teeth pointing forward to the front of the saw to cut and/or sand metals. The hooks (2) located inside of the four legs are used to the maximum height by turning the blade elevation handwheel clockwise. 2. M) Fig. Fig. M, N, O)... i_ WARNING] To avoid injury from under the saw table, and attach the set plate (3) under the fence handle (1) to lock....

Operation Manual
Page 23
...o To avoid injury from an accidental start, make sure the switch is disconnected from the mounting bracket (4). Fig. P 12 5. Remove the table insert and raise the blade to the 0° vertical position by turning the blade elevation handwheel clockwise. 2. Tilt the blade to the maximum height...the washer (5) between the teeth of the blade and against the riving knife (making sure the square is in riving knife (7). 6. Before using the saw blade. If the blade and riving knife are correctly aligned, lay a combination square along the side of the blade). 5. Return the ...
...o To avoid injury from an accidental start, make sure the switch is disconnected from the mounting bracket (4). Fig. P 12 5. Remove the table insert and raise the blade to the 0° vertical position by turning the blade elevation handwheel clockwise. 2. Tilt the blade to the maximum height...the washer (5) between the teeth of the blade and against the riving knife (making sure the square is in riving knife (7). 6. Before using the saw blade. If the blade and riving knife are correctly aligned, lay a combination square along the side of the blade). 5. Return the ...

Operation Manual
Page 32
... the housing in order to avoid damage from possible leakage. o Do not attempt to increase the power of the saw blade on this laser product should only be used for the operation of this laser line can cause eye damage. more than those specified herein may result in the ...Laser Trac®, which is not a toy, and it touches the pivot rod (4). Even a lowintensity laser beam can lead to normal wear and use of procedures other than three months, remove the batteries in an attempt to 9 in hazardous radiation exposure. If unqualified persons attempt to left side ...
... the housing in order to avoid damage from possible leakage. o Do not attempt to increase the power of the saw blade on this laser product should only be used for the operation of this laser line can cause eye damage. more than those specified herein may result in the ...Laser Trac®, which is not a toy, and it touches the pivot rod (4). Even a lowintensity laser beam can lead to normal wear and use of procedures other than three months, remove the batteries in an attempt to 9 in hazardous radiation exposure. If unqualified persons attempt to left side ...


